
- Forum Listing
- Marketplace
- Advanced Search
- Videos & Photos
- Maintenance & How-to Videos
- SailNet is a forum community dedicated to Sailing enthusiasts. Come join the discussion about sailing, modifications, classifieds, troubleshooting, repairs, reviews, maintenance, and more!

Wood Stove Heating For Sailboats
- Add to quote
Within the first 5 minutes of this video, there are several ideas that might be helpful to heat a sailboat for cool or cold weather. The rest of the video tells how to install a wood stove, similar, possibly, to what the good Captain Slocum might have used. At the end of the video, Rebecca explains why the decision to go wood. It was a tough call as there was no perfect solution. The choice of heaters could be influenced by the area one is sailing in.

I wonder how well saltwater saturated wood burns? Where exactly would one store a half cord or so of wood on a modern sailboat? Of course, if she was a dock queen, then no problem, but in that case wouldn't electric heat be a bit easier and cheaper?

capta said: I wonder how well saltwater saturated wood burns? ... Click to expand...
Yep, Capta, it could mean an every other day beach stroll. Maybe we will load on a ton of coal for ballast. It is surprising though, how many sailboats have put this same stove on their sailboat and traveled the same region. No dock queen here. There are no docks where we are going which is part of the attraction. You should hear the great stories about the Falklands. Hundreds of islands and hardly any cruising sailboats. I ran into Skip Novak the other day at our local Haut Bay, grocery store, he runs charters in the Patagonia area. More amazing stories and certainly a charter boat I would not mind getting on while ours sits safely at anchor. We will see how it all works out for us.

I've looked long and hard at this exact stove. I'm almost convinced to give it a try. My problem is, I'm not sure I need a better heat source (I use an alcohol burner right now). My issues with a stove like this is the wood storage, dirt inside, and the soot. I know these are excellent stoves which burn very efficiently once up to temperature, but I also know that as the stove heats up, and cools down, it will produce smoke, soot and likely some ash. I'm concerned about the impact of this on the cabin and deck and perhaps sails. I see the video folks are also concerned about the smoke on deck issue. I'm not sure I like their solution. As far wood storage goes, it's going to be an issue, but I suspect this will be easier to manage. These stoves take so little fuel that you really don't need to have much on board. And I would stock up with a good supply of compressed natural fibre bricks (no glues). Something like this: https://canawick.com/bricks/
MikeOReilly said: My issues with a stove like this is the wood storage, dirt inside, and the soot. I know these are excellent stoves which burn very efficiently once up to temperature, but I also know that as the stove heats up, and cools down, it will produce smoke, soot and likely some ash. I'm concerned about the impact of this on the cabin and deck and perhaps sails." Mike, I have had the same concerns. But it is surprising how many other people use this same stove on their boat when sailing in very cold climates and no one has mentioned a problem of spilling ashes in the main saloon. Nor has anyone complained about soot on their Bimini or main, like I have imagined. I probably should have used the term "solid fuel stove" rather than just "wood" as these stoves are built solidly enough to also burn coal. We will get a fire going with wood then throw in some coal. We have gotten a lot of responses from people who have sailed the Tierra Del Fuego area with this stove and it worked well for them. The British marine author, Tom Cunliffe, says he has had a solid fuel stove on each of his yachts. On one Atlantic crossing, Tom says, a fire continually burned in the stove or the cold weather would have unbearable. He generally uses wood to start the fire then adds coal. Click to expand...

Sailed Maine and New England for years. Have had solid fuel, drip diesel, forced hot air and forced hot water. Conclusions If you sail any system that won’t tolerate boat movement is worthless. If you button up in sleet and cold rain any system that has combustion in living areas is dangerous. If your system doesn’t automatically turn off if combustion is interrupted or incomplete is dangerous. If your system doesn’t provide even heat throughout the vessel and is dependent upon radiant heat to heat living space it will be ineffective and uncomfortable. Any system that requires frequent attention while in use won’t work in practice. Therefore believe hydronic heat such as a wesbasto is the only viable choice for a liveaboard cruiser.

I really like wood heating on a boat. Had a buddy who lived aboard year round in Ontario that had a home made version of a Cubic mini on a Hans Christian 36. He used one of those heat activated fans to circulate the air. It was hot! Often had to open the hatches to cool the boat down even in the mid of winter. I have always wanted a solid fuel heater, but for the sailing I do on the great lakes April- December, my alcohol space heater is generally pretty adequate.

I would never want that on a boat. Diesel or kerosene is much better for fuel storage, soot, ash, and is much easier to extinguish. It is hard to control the temperature of a wood stove, hard to put out (dangerous) and they are sooty no matter what people say. And as pointed out above, they require constant attention. No thank you.
If I was convinced I really needed a permanent installed heater on our boat, I would probably go with one of these Cubic stoves. The downsides have already been mentioned. The main upsides to me are: cheap and easy access to fuel, simple installation, relatively inexpensive to buy, and a certain warmth that can only come from burning wood. I had a friend who used a home built wood stove on his boat sailing Lake Superior. It was wonderful. And I heated with wood for over a decade while living at our last land home: a cabin on the north shore of Lake Superior. So I understand the pros and cons of this choice. The issue for me is, I haven't needed more than my alcohol heater so far. And this is despite the fact that we mostly cruise in areas that most people would call "chilly": Lake Superior, and now Newfoundland. I guess I (we) just have a higher tolerance for cold.
What alcohol heater? Like origo?
Yes, but that's not really relevant to the thread. Although, if you want to discuss these heaters I'm happy to do so. Just not here.
Thanks. That's all I wanted to ask.
35 yrs of wood stove (main galley a diesel Dickinson) I welded up the box 1/4 plate steel. Door was gold plated glass front (scrounged). Similar size to the one in the video.The stove pipe was doubled , outer (shield)open at stove and deckhead No fan needed. Sometimes a quick run below to open frwd hatch and close the main hatch before the smoke started, after a tack, Here on the coast there's no shortage of beach wood. (fir bark burns like coal.) The salted wood needs a fire brick liner or the steel eats out. A SS plate diverter protects the top. Wood heat's the best comfort thing (almost) ever.IMHP. If anyone is making one, Ive got several glass doors (the hardest part to make) and lots of helpful hints like feet, fiddles, bilge fan .

Attachments

That's a nice stove Tom. Did you make it?
For a really simple stove-top heater, that is vented and does NOT put the exhaust in the cabin, read pages 48-51 of this month's Good Old Boat Magazine . I've been using this for 2 seasons on my F-24, and it will easily warm a small cabin from frost to shirt sleeves. It will work on any stove type. https://goodoldboat.com/MagazineDistribution/GOB131-SFRZE20d.pdf Good Old Boat is offering this month's issue free for all you shut-ins. That said, I installed a propane system on my cruising cat. Good heat is vital to enjoy winter sailing. I have a wood stove in my home, I enjoy using it some, but would find it far to annoying to depend on.
Tom Cunliffe likes the solid fuel heaters. He has a YouTube video with his opinion.
I did a lot of research on installing a solid fuel heater (Tiny Tot coal heater) on my Fantasia 35 about 7 or 8 years. As part of my research I had discussions with my insurance company and they told me then it would have zero impact on my insurance provided I follow the manufacturers installation instructions (they wanted pics). Odd, because a woodstove in my house costs about $400/year in additional insurance. But, currently have electric central heat in house, so no combustion or CO risk. I think a natural gas furnace also increases my insurance.
K & M puts heating stoves in many of their boats. Have also seen the stove used to heat a closed loop forced hot water heating system done in a fashion as to be able to tolerate as much as twenty degrees of tilt. However this is in diesel not wood. That’s the issue with heating a sail boat. Having a system that’s safe underway. It’s delightful to have heat. On occasion will sit on first step or stand on second step of companionway. Put slider up to my chest. Be under the hard dodger so even freezing rain isn’t an issue. Boat has multiple registers and several zones but it’s still wasteful to do this but oh so nice. A heating stove heats mostly by radiant heat. There’s some circulation even without a fan but the heat is uneven. Had a tayana with a drip diesel stove. Worked fine at anchor to heat the salon. But rest of the boat was cold. If you were on the boat for days it all did get hot. If you were just daysailing or doing weekends you could expect hours before the berths were warm. Also the ports wept as your exhalations raised the humidity in the boat. So before expending the bucks and losing the space involved think it through. How much cold weather sailing do you do? Is your boat insulated? Is it cored? Can you put in enough BTUs to allow ventilation and keep humidity reasonable. Will the weight screw up trim? How long can you run the heat before using up fuel? Heat wonderful but to do it right is fairly involved.
Kindling was always a chore (it rains a lot here), I now use those waxy fire place logs.....Cut most of the way thru with a table saw (no band saw) 3/4 " slices Break a slab off, break it half, light with butane torch. pile on the medium sized chunks of??
I don't know what psychological factor is at play, but I love sitting in front of a fire. I can almost watch it, with a good scotch in my hand, like it was TV on a cold winter night. I would love to have one on the boat, but it would have to have been pre-engineered. Most I've seen take up too much room. Sorry to say that's most evident on the OP's installation. I also could never imagine using one underway, or even at a rolly anchorage. Just too easy to trip into. This reminds me of a sportsmans/conservationist club outside NYC, near where I grew up. My father's name is on a plaque there for having won an event, when I was a kid. One of the clubs ritual games is a timed event to boil a pot of water, starting with only a log, an axe, a knife, matches and pot of water. No kindling and, if you use more than one match, you get a time penalty. I don't think this vid was taken there, but it shows how it's done. Some members had tweaks in technique. From a single log, with no kindling to a boiling pot of water in 5 mins. Club record was 2 or 3 mins, irrc.
- ?
- 173.8K members
Top Contributors this Month

- New Sailboats
- Sailboats 21-30ft
- Sailboats 31-35ft
- Sailboats 36-40ft
- Sailboats Over 40ft
- Sailboats Under 21feet
- used_sailboats
- Apps and Computer Programs
- Communications
- Fishfinders
- Handheld Electronics
- Plotters MFDS Rradar
- Wind, Speed & Depth Instruments
- Anchoring Mooring
- Running Rigging
- Sails Canvas
- Standing Rigging
- Diesel Engines
- Off Grid Energy
- Cleaning Waxing
- DIY Projects
- Repair, Tools & Materials
- Spare Parts
- Tools & Gadgets
- Cabin Comfort
- Ventilation
- Footwear Apparel
- Foul Weather Gear
- Mailport & PS Advisor
- Inside Practical Sailor Blog
- Activate My Web Access
- Reset Password
- Pay My Bill
- Customer Service

- Free Newsletter
- Give a Gift
How to Sell Your Boat

Cal 2-46: A Venerable Lapworth Design Brought Up to Date

Rhumb Lines: Show Highlights from Annapolis

Open Transom Pros and Cons

Leaping Into Lithium

The Importance of Sea State in Weather Planning

Do-it-yourself Electrical System Survey and Inspection

Install a Standalone Sounder Without Drilling

When Should We Retire Dyneema Stays and Running Rigging?

Rethinking MOB Prevention

Top-notch Wind Indicators

The Everlasting Multihull Trampoline

How Dangerous is Your Shore Power?

DIY survey of boat solar and wind turbine systems

What’s Involved in Setting Up a Lithium Battery System?

The Scraper-only Approach to Bottom Paint Removal

Can You Recoat Dyneema?

Gonytia Hot Knife Proves its Mettle

Where Winches Dare to Go

The Day Sailor’s First-Aid Kit

Choosing and Securing Seat Cushions

Cockpit Drains on Race Boats

Rhumb Lines: Livin’ the Wharf Rat Life

Re-sealing the Seams on Waterproof Fabrics

Safer Sailing: Add Leg Loops to Your Harness

Waxing and Polishing Your Boat

Reducing Engine Room Noise

Tricks and Tips to Forming Do-it-yourself Rigging Terminals

Marine Toilet Maintenance Tips

Learning to Live with Plastic Boat Bits
- Belowdecks & Amenities
Navigator Wood Stoves Provide Classic Heating and Cooking Onboard
Custom-made, cast-iron stoves are functional works of art..

Tucked into a wooded hillside in the San Juan Islands of Washington state, Navigator Stove Works is a young family operation attached to a long history of vintage stoves. Formally of Brooklyn, N.Y., and now based on Orcas Island, Navigator produces three compact wood-burning, cast-iron stove models for use on land and at sea. Originally designed for use aboard boats, the scaled-down stoves are also popular for cabins, RVs, and other small structures on terra firma.
Two of the Navigator stove patterns-the Sardine and the Little Cod-originally were made in the Lunenburg Foundry in Nova Scotia, Canada. The company, founded in 1891, manufactured a wide range of marine equipment for commercial vessels and yachts. Lunenburg ceased producing stoves in the early 1990s with the closure of its iron foundry operations. Navigator produces the Sardine and Little Cod using Lunenburgs foundry patterns.
The third model, the Halibut, is designed by Navigator and is based on old East Coast favorite, the Shipmate No. 212. Navigator also has a fourth stove in the works: a biodiesel prototype, the Herring. The Navigator stoves are custom made by order only, and the company is currently producing about 75 a year.

Safety First
As with any stove or heat source aboard, users must follow manufacturers installation instructions explicitly and heed their warnings to ensure safe operation. Installed in accordance with the manual, all Navigator stoves meet American Boat and Yacht Council liquid and solid fuel boat heating systems standards. These and other applicable U.S. and Canadian fire standards are also outlined in the manual, which all prospective buyers should study closely. For safety reasons, the stoves should not be used on a gasoline-powered boat.
The iron stoves are cast in the northeastern United States and then shipped in sections to Andrew Moore at Navigator Stoves on Orcas Islands. The stoves are sold as plain iron with a traditional stove polish, but a customer can opt to add one of six porcelain enamels -grey, black, mint, deep mariner blue, dark green, or classic barn red.
Moore prepares, polishes, and smooths the iron on each stove at his workshop, and then tweaks and assembles those ordered as polished iron. Stoves that are ordered with the porcelain coating are sent to the Midwest for coating, then flat-packed back to Moore for polishing, tweaking, and assembly. Lead times vary from one week to eight weeks, depending on availability.
All three stoves are designed to burn natural wood and charcoal. The two smallest models are best for heating 300 square feet or less. The largest model, the Halibut, is able to burn coal. The stoves are not intended for use with any other fuel sources. For use in warmer months, Navigator has designed alcohol drop-in burners. The drop-in burner literally drops into the stove top and burns denatured alcohol. The burner element is self-pressurizing and is located in the cast-bronze burner housing to minimize fuel spills. One 2-ounce filling will burn for 20 minutes. Running in simmer mode, the burn time is doubled. Tests show it takes 8 minutes to boil a liter of water. The alcohol can be refilled for longer cook times.

Navigator Stoves also sells many of the accessories associated with installing and maintaining a wood burning stove, including stove pipes, deck heads, and heat shielding. Heat shielding can be a critical issue, and Navigator offers custom-made shielding panels made from either 20-gauge stainless steel or 16-ounce copper.
The smallest and most popular model, the Sardine is a mere 12 by 12 by 11 inches, and weighs 35 pounds. The heat output is 7,500 to 18,000 BTUs.
Navigator Stoves suggests using this rule of thumb for determining required BTU: 15 x volume of space to heat = required BTUs. If extreme cold temperatures are expected, one might want to use a factor of 20. This compact Sardine is best suited for small boats or sleeping cabins aboard larger vessels. It is two-thirds the size of the Little Cod and costs $699 for plain iron and $1,199 for the porcelain enamel option.
First produced circa 1917, this solid-fuel stove was initially designed to keep fishermen warm and well fed as they jigged for cod. Simple and reliable, it is economical to run and maintain. It is intended for use in the galley, cabin, or pilothouse, or small spaces on land. By adding one or two of the alcohol drop-ins, it can essentially replace any alcohol stove onboard. The Little Cod measures approximately 13 by 18 by 14 inches and weighs 55 pounds. It produces 10,000 to 28,000 BTUs. It has a stainless-steel sea rail to keep cook pots in place, and has holes in the legs for securing stove to a platform. It is priced at $1,125 for iron and $1,675 with porcelain or $1,875 for red porcelain.
The Halibut has cast-bronze sea rails and corner posts. It has a glass firebox door, stainless-steel ash pan and oven rack, an oven thermometer, and a Halibut relief on the door. The Halibut doesn’t come up to temperatures as fast as the little stoves, but it does offer the oven for onboard cooking of bread, potatoes, and pies. It can also burn coal, whereas the smaller stoves are designed for wood and charcoal only. The platform size for the Halibut is 26 inches wide minimum, and 18 inches deep. The oven is 9 by 9 by 8 inches, and the stove weighs 175 pounds. The approximate heat output is 25,000 to 35,000 BTUs. The stove costs $2,850 with porcelain.

Herring Prototype
Navigator Stoves is also currently working on a diesel/ biodiesel prototype stove. It is intended to be 28 inches tall with a 12-by-12-inch footprint, and weigh 55 pounds. The Herring will have a glass-plate front and a herring relief on the front plate. It is designed with a “blue flame” natural draft burner from Europe and no fan or electricity is required. Tests by Navigator have shown a very clean, steady burn. The expected BTU rating is 16,000. Navigator is also working on a design for a water heating loop.
The Navigator stoves are functional art, a nostalgic throwback to simpler times. If convenience is your top priority, then don’t bother. Like any wood-burning stove, these come with soot, ash, and smoke, all of which can find its way onto the deck and cabintop. The cast iron construction is rugged, but it is also heavier than other heating options. Wood stoves take longer to heat up then a gas oven, and they require supervision and maintenance. But, notes Moore, that is the point, really.
A woodburning stove involves the sort of philosophical shift that a wooden boat requires: Convenience and ease of maintenance are not the aims. If you subscribe to the idea of a lifestyle of the present, in which you tend your fire, not just switch it on, then these well built, finely finished stoves fit the bill.
The stoves can be installed by an experienced and involved do-it-yourselfer in a couple of weekends, with the lions share of the time dedicated to thinking and planning, rather than installing.
- Practical Sailor Value Guide: Woodburning Stoves
- Download PDF Format
RELATED ARTICLES MORE FROM AUTHOR
Have a Tiny-Tot wood and coal burner on my Mason. Custom tools for tending. Makes it easy to keep clean. Fire it up early. Easier to maintain the daytime heat than to start from scratch. Reload later in the eve, good all night. Wake up to a warm boat.
LEAVE A REPLY Cancel reply
Log in to leave a comment
Latest Videos

Island Packet 370: What You Should Know | Boat Review

How To Make Starlink Better On Your Boat | Interview

Catalina 380: What You Should Know | Boat Review
- Privacy Policy
- Do Not Sell My Personal Information
- Online Account Activation
- Privacy Manager
You can be cozy and self-reliant with wood heat!
Sign up for occasional emails with wood stove tips and a heads up when we launch a sale.
We respect your email privacy
Thank you for subscribing!
You'll recieve ocassional emails with wood stove tips and a heads up when we launch a sale.
Build coziness, self-sufficiency and reliability into your boat
Want some guidance tell us more….
- Hidden Structure
- Do you have a stove picked out? Not yet Dwarf 3kW LITE Dwarf 3kW Standard Dwarf 4kW Dwarf 5kW Cookstove Combo Other
- What is the name of the stove?
- How big is your space? L x W x H (in feet)
- Hidden How cold does it get where you'll be spending the Winter? (in C or F?)
- How cold does it get where you'll be spending the Winter?
- Tell us more about your project, or ask us questions here.
- What's your name? * First Last
- What email address should we use to contact you? *
- Email This field is for validation purposes and should be left unchanged.
Here’s How
Fill out the guidance form below to start the process with one of our wood stove advisors.
Prefer to explore options by yourself? Use our wood stove selector tool
Your advisor will help you determine all the parts you need for your specific installation.
Or use our chimney selector tool
Your advisor will compile everything you need and send an invoice directly to your inbox.
Know what you need? Shop Now ! Still have questions? We want to help !
Use our manuals & guides , videos & FAQ’s . Don’t worry, we are still with you. Reach out at any time for personalized help from one of our tiny wood stove gurus.

The Dwarf 3kw LITE Small Wood Stove

The Dwarf 3kw Small Wood Stove

The Dwarf 4kw Small Wood Stove

The Dwarf 5kw Small Wood Stove
We care about your project and have been where you are.
All of our support guides were first customers! One of our experienced guides will be in touch with you to get you warm and cozy as quickly as possible!
Elizabeth put a Dwarf 5kw in her skoolie home 4 years ago, and it’s keeping her and her family warm while she’s building their home in Northern Vermont.
Codylived in his Tiny House for almost 8 years, and he upgraded his wood stove to the Dwarf 4kw for a longer burn time during central Oregon winters.
Lucas installed a Tiny Wood Stove in his Tiny House, which he calls home if he’s not traveling the country in his van.
Heather got her Dwarf 4kw stove when she decided to settle down in Vermont in the RV she has been living in for the past 5 years.
Looking for More Information?
You can access our extensive Knowledge Base of articles all about wood heat in small spaces.
Contact Us at any point along your journey and we are happy to help!
Simplistic, functional and stunning Tiny House with a Tiny Wood Stove setup
They know what the DYI community demands...quality, affordability, good looks, user friendly website packed with relevant information, and great customer service.
Cozy Tiny House in Central Oregon with Tiny Wood Stove Setup
Sitting by the fire on snowy days with a cup of coffee and a book is a dream come true.
Isabelle's small footprint Tiny House
I wanted to add a dry heat to a small space where the humidity is often high
Joel and Sara’s unique and cozy Tiny House
It's so cozy to light a fire in the morning, and the stove puts off an impressive amount of heat.
Megan's Tiny House in North Carolina
I love my stove! Its so incredibly cozy. I get so excited to use it when the weather starts to turn.
A Writing Cabin in the Woods - Timberhomes VT
It is a beautiful, efficient stove, and the 'work' of keeping the fire going with its small logs is a mindful, lovely, satisfying task.
Ben's Tiny House
We lived in a 3300 sq ft home during the winter we were paying up to $500 a month to heat our home now I can heat my home with sticks my dog leaves lying around!
Michaels Japanese inspired Tiny House
Setting up the stove with a friend was a piece of angel food cake
Jay's Off-Grid Tiny House Writers Retreat
The Dwarf Stove works like a charm and heats my tiny home quickly and efficiently.
Brett and Natasha's Cozy Tiny Homestead
We have a craving for beauty and adventure and freedom-and if you're not loaded, you have to find creative ways of pulling that off.
Master Wood Worker's Exquisite Custom Tiny House
We live in a very expensive part of the world, and this lifestyle has afforded us financial freedom-the ability to live debt free.
An exceptional house truck with character
We live in a rainforest, so moisture control is very important, and the dry heat of a wood stove helps to dry out everything inside when it's pouring rain for days and days.
Vince's stunning Airstream renovation
It's honestly one of my favorite things we've done to our Airstream
Traveling with kids in a vintage trailer
There are so many reasons we enjoy the stove, from keeping us warm in incredibly cold climates, to drying all our snow gear in a matter of half an hour to re-heating my coffee on cold mornings and cuddling to a fire at night.
Vintage Airstream life with four kids
We love the ability to move our home to new locations in ideal temperatures, and the closeness it has cultivated for our family is the greatest part
The one-of-a-kind adventure rig
I loved the practicality of the stove. It's small, robust and easy to use.
The Kerr Family - Airstream living
Anyone who came into our Airstream commented on how it felt like a home with the wood stove.
The Roam To Root Skoolie – Interior Design Art with a Tiny Wood Stove
Having a Tiny Wood Stove in our tiny space offered such a tangible feeling of home on the road.
The Butter Bus – A Family Skoolie that combines Design with Comfort and Functionality
Customer service was excellent, the product is excellent, we recommend Tiny Wood Stove to everyone!
Skoolie living in Montana
Quality product and real person customer service.
Adventure family of four living in a skoolie
It was the best decision we made in our bus
Francesca and Nicholas and three dogs - Skoolie life
We love the idea of being able to pick up our home and move wherever we want or need to go.
Brent and Lindsey's Shuttle Bus Escape
The ability to have a warm flickering fire makes our space feel like home no matter where we are parked.
Ben and Meag's Debt-Free Happy Bus
We wanted our next step to be something of our own, unattached to any one location or schedule ...
Treb's Family of 5 Home Sweet Skoolie
We do life outside.
Zach & Annie's Nomadic Adventure Bus, Stormy
Hey, I could do that!
Full-time Vanlife Family with a Dwarf 3kw Lite
When we bought our van we knew we wanted a wood stove for so many reasons.
Kev's Alaskan Overland Sauna Gear Trailer
Jay and abby's off-grid adventure van.
There is a sense of home that comes with having a wood stove in your living space.
Gary's Yurt in Colorado
The stove itself is very high quality as are all the flue pipe components. Customer service was really great too!
The tiny wood stoves are attractive, compact and functional.
Just added to your cart

CB-1008 CUB Cubic Mini Wood Stove
Adding product to your cart
- Easy to install and easy to operate!
- Eco-friendly
- Produces very little smoke due to its secondary combustion system!
- Much safer than a diesel or propane cook stove!
- Removes humidity from the cabin.
- The rail is easily removable.
- Measures only 11" (Wide) x 12" (High) x 10.5" (Depth) ( 27.94 cm x 30.48 cm x 26.67 cm ).
- If you remove the rail, you have a cooking area of 5" ( 12.7 cm ) from the flue to the edge of the plate and 11" ( 27.94 cm ) side to side.
- Well seasoned hardwood and pressed logs are the best fuels to burn.
- Ideally the wood should be cut to 5 3/4" ( 14.60 cm ) long. It could be cut slightly longer. However 5 3/4" ( 14.60 cm ) allows for good airflow around the sides and it does not damage the insulation on the inside.
- 6000 BTU - 14, 000 BTU
- 1.75 - 4.1 KWh
- Requires a horizontal clearance of 20" ( 50.8 cm ) in all directions without shielding and a vertical clearance of 30" ( 76.2 cm ).
- Clearances reduced to 3" ( 7.62 cm ) when using proper mounting and shielding.
- The stove needs a complete flue system comprising of 3"(7.62 cm) flue pipe, 5"(12.7 cm) insulated pipe and exit kit NOT INCLUDED
- 3/16" laser cut steel top plate.
- 1/8" laser cut steel body.
- 1/2" thick vermiculate firebrick insulation.
- 3/16" thick self cleaning robax glass.
- Brass plated coil handles.
Related Products
- Cub Collection
- Share Share on Facebook
- Tweet Tweet on Twitter
- Pin it Pin on Pinterest
- Technical Data
- Operating Manual
- Warning Sheet
- description
Customer Reviews
FAILURE TO READ AND FOLLOW WARNINGS MAY RESULT IN SEVERE INJURY, FIRE AND/OR POSSIBLY DEATH.
- Never use liquid fuel or any other material containing fuel to start the fire Only use well seasoned hardwoods or pressed logs without wax or glue as a binder. Appropriate pressed logs should have a wood stove symbol on the packaging. Never use liquid fuels, pellets, or green wood.
- Never operate your stove without carbon monoxide and smoke detectors
- Never open a window, hatch or door downwind of the stove
- Never use liquid fuel or any other material containing fuel to start the fire
- Do not operate your stove when the stove door is open
- Never leave your stove unattended when in use.
- Inspect and clean your flue pipe regularly. (weekly, until you determine your own cleaning schedule.)
- Keep fuel lamps, fuel containers, aerosol cans and any other combustibles at least 6 feet away from the stove
- Never use oil when cooking on the top of the stove
- Do not touch the surface of the stove when in use
- Never leave children and pets unattended when stove is in use
- Never use your stove in very rough seas
- Do not dry wet clothes directly on the stove
- Your appliance requires periodic maintenance and cleaning. Failure to maintain your appliance may lead to smoke spillage in your boat, cabin, or RV
- Never clean stove when your stove is hot
- Children and adults should be alerted to the hazards of high surface temperature and should stay away to avoid burns or clothing ignition
- Due to high temperatures, the appliance should be located out of traffic and away from furniture and draperies
- Even after the appliance is out, the stove and the glass will remain hot for an extended period of time
- Under no circumstances should this appliance be modified
- Do not operate the appliance with the glass door removed, cracked or broken
- Do not strike or slam shut the appliance glass door
- Always allow a small amount of air to enter cabin, open a window, hatch or vent up wind from the stove to replace air consumed by the stove
- Nontoxic smoke will be emitted during the first hour of operation as the paint is curing. Open windows or hatches as required to vent cabin. Or you can cure the paint outdoors by attaching a couple sections of stove pipe to the stove and lighting it outside. To eliminate the odor can take up to 20 – 30 hours of burn time.
- Never operate the stove without the baffles being installed correctly.

Inspection and Maintenance
1. Remove ashes from previous use
2. Inspect the flu pipe and clean if necessary
3. Inspect the window and verify that it is free from cracks and breaks
4. Inspect the door gasket and verify that it is properly secured and free of damage
5. Clean the window
6. Close the secondary air intake by pushing the control handle to its furthest rear position
7. Open the primary air intake to its maximum setting by sliding the control handle to its furthest right position
8. Place small timber, paper or cardboard and a log inside the stove and light the fire using a long neck lighter or matches
9. After a few minutes begin to open the secondary control
10. When the stove has reaches its optimum temperature, add larger pieces of wood and adjust the primary and secondary controls to the desired heat output
11. To extinguish the fire, simply close both the primary and secondary air intakes
Tips and tricks
1. To clean the window, use commercially available stove window cleaner or simply dip a damp cloth in the ashes and rub on window. A scraper can also be used but this will reduce the lifespan of the window.
2. To keep the window clean during use, pull the embers towards the front of the stove and place the new burning material towards the rear of the combustion chamber
3. To prevent excessive amber accumulation, allow embers to burn and reduce before adding more wood
4. When starting the fire with pressed logs, cut small 1 inch slices until optimum temperature is reached
5. Pressed logs expand as they burn. Avoid positioning them in a way that can put pressure on the window as they expand
6. The gasket surrounding the door will become very brittle over time. Avoid touching it when operating or cleaning your wood stove
7. In certain high wind conditions, a growling sound may be heard. This is normal and does not represent any danger. Adjust the primary air intake to reduce or eliminate the sound
Returns are only accepted within 30 days of receiving your order. Returned items must be unused, in its original packaging, and protective film must not be removed from the stainless steel products. If a used item is returned, a stove for example: A 160.00$ refurbishing fee must be deducted from the refund along with a 60.00$ restocking fee.
How many BTU’s does the Cub produce?
6000 to 14000BTU’s.
How big is the Cub?
Width: 11” Height: 12” Depth: 10.5”
How much square footage will the Cub heat?
100 -200 square feet.
How much does the Cub weigh?
27 LBS or 12.25 KG.
What size logs fit into the Cub?
5 ¾” long logs, and it can take up to three or four 2”x4” pieces.
What size is the glass?
6 1/4" x 4 3/4" x 3/16" thick.
What size is the flue collar?
Outside diameter: 3”
Inside diameter: 2 7/8”
Thickness: 1/16”
What are the stoves made of?
They are constructed from laser cut steel plate 1/8” to 3/16” thick! Vermiculate insulation, 3/16” thick self-cleaning Robax glass and quality hardware.
Are the stoves certified?
They are not. Please do your due diligence before placing an order. (Check your local law and regulations.
Is there a warranty on the stove?
Overall wear and tear are not covered. For example: scratches, rusting, baffles, insulation, glass etc.
ALL DAMAGE REQUIRES A PHOTO SENT TO [email protected] .
We offer a warranty on the glass for the first 90 days of use.
If the stove body gets structurally damaged (excludes glass, wear and tear, insulation, intake mesh etc) and you would like to repair it, we will do so free of charge. However shipping will not be covered.
We will gladly help you out.
Can you remove the rail on top of the stoves?
You can, simply align the tabs under the top plate with the holes in the top plate with pliers and it will slide out with ease.
What kind of wood is best to use?
The best wood to burn is well seasoned hard woods. This will help you achieve the best heat output along with the longest clean burn. You can also use pressed wood logs. We do not recommend pellets.
What are the two screws inside the firebox for?
They hold the baffles in place by putting pressure on the top plate. The baffles allow the secondary combustion system to work efficiently.
How does the secondary combustion system work?
Simply put, it pulls air from underneath the stove and introduced in the fire box at the top. The hot air mixes with the smoke and ignites the gases which are created by the burning wood. This produces heat with energy, which would otherwise have been lost up in the flue pipe providing better efficiency.
How much clearance is needed between the stove and combustibles?
Clearances required are 20” in all directions lateral to the stove unless installed with one of our wall mounts. If no shielding is present then you need to provide 20” clearance to combustibles. A 30” Clearances applies to the top of the stove to the surface above. Under the stove should also be shielded and an air gap should be provided.
How long does it take to cure the paint and how do I do it?
Once this process is done the stove will not need to be cured again. The curing of the paint will require you to burn the stove at high heat for several hours. It can take 1-3 hours for the paint to stop smoking. It can then take 20-30 hours for the smell to stop being produced.
This can be done outdoors to prevent the space from being filled with smoke. You can bring the stove outdoors and attach 2-3 sections of pipe. Run it hot and this will evacuate the moisture out the paint. If no pipe is used, the stove will not get hot enough to adequately evacuate the moisture.
Where do the stoves draw their air from?
The air must be replaced since the stove is constantly consuming oxygen. The stove will draw air from the room. In most cases you can open a window or a hatch and that should be enough to replace the air. For spaces that do not have a window, or if you do not want to have a window open, you can use our wall mount with fresh air intake. This will bring air from outside to the area where the stove draws its air from.
Can I use it to cook?
Definitely. We have made many meals on our stoves. The Grizzly has a mini roaster which makes easy to cook virtually anything you want! We would suggest not to cook with oil or grease because it could be fire hazard.
How do I light the stove?
1. Set your intakes: Open the primary air intake found on the front (open when pushed to the right). Keep the secondary air intake closed (found under the stove, closed when pushed
2. Take some paper and place some in the firebox, take some kindling and place it on top of the paper.
3. Light the paper and keep the door open for about five minutes.
4. Once it gets going you can introduce your wood, close the door and let it go for another 20 minutes.
5. After the 20 minutes has elapsed you can then begin to open the secondary air intake activating the secondary combustion system and dampen down the primary as desired.
For more details see here.
How do I extinguish the stove?
You will close both air intakes on the stove by pushing the primary intake all the way to the left, and the secondary combustion slider all the way to the back.
The fire will begin to die out right away, it will take some time for all embers to be fully extinguished. Do NOT leave a lit stove unattended.
How do I maintain a clear window?
The glass that the stove comes with is a self-cleaning glass made for wood stoves. Once the stove reaches temperature, the glass will begin to clear. To maintain a cleaner window, you can pull the coals forward, and then place the new wood towards the back. The quality of the wood will also have an impact and the cooler the stove is run, the darker the glass will be.
How do I clean a dirty window?
When the glass is cold you can mix a bit of ash with some water and rub it in circular motions.
How often do I need to replace the insulation?
The life span of the insulation will vary. It will last longer if the wood is not cut too large which will prevent chipping it. Also placing the wood as opposed to throwing the wood inside will also keep the insulation from deteriorating quickly. Replacement kits are available on our site for each stove.
24 LBS or 11 KG
How many BTU’s does the Grizzly produce?
8000 to 18000 BTU’s.
How big is the Cubic Grizzly?
Width: 13” Height: 15” Depth: 12”
How much square footage does the Grizzly heat?
200 -400 square feet.
PLEASE NOTE : The square footage mentioned are for spaces with low ceilings. Example; if you have a space that is 180 square feet with high ceilings it’s best to go with the Grizzly to compensate for the extra space needed to be heated.
How heavy is the Grizzly?
39 LBS or 17.7 KG
What size logs fit into the Grizzly?
6 ¾” long logs and it can take up to four or five 2”x4” pieces
Open the primary air intake found on the front (open when pushed to the right). Keep the secondary air intake closed (found under the stove, closed when pushed forward).
Take some paper and place some in the firebox, take some kindling and place it on top of the paper. Light the paper and keep the door open for about five minutes.
Once it gets going you can introduce your hard wood, close the door and let it go for another 20 minutes. After the 20 minutes has elapsed you can then begin to open the secondary air intake activating the secondary combustion system. You can also dampen down the primary as desired.
How to shut the stove off?
Push the primary intake all the way to the left, and the secondary combustion slider all the way to the back.
You will need to close both air intakes on the stove and the fire will begin to die out right away, it will take some time for all embers to be fully extinguished.
How to keep a clean glass?
The stove glass is a self-cleaning glass made for wood stoves. Once the stove reaches temperature, the glass begin to clear. To maintain a cleaner window, you can pull the coals forward, and then place the new wood towards the back.
How much flue pipe do I need?
The top of the flue pipe must surpass your roof line by one foot to ensure proper draft and safety.
We recommend a minimum of 40” of straight pipe.
What is the diameter of the flue pipe?
Our stoves take a 3" double wall flue pipe.
How do I connect the flue pipes together?
You will begin by taking the pipe having the flow arrow facing up. Take the second section of pipe and have the inner wall that is crimped and have the edge hit the inside edge of the pipe below.
Do this at an angle with the seams aligned.
As you push down and twist, bring the pipe up to vertical. You can then push down as far as it will go.
Place a block of wood on the floor and a block on top of the flue, and tap with a hammer until the pipe above comes onto the bump on the pipe bellow.
Do this for all sections until your flue pipe is complete then the entire length can be installed onto the stove.
Fix the pipes together with a screw at each seam

How do I clean the pipe?
You can see how to clean the pipe here
Can I exit out of a wall?
We do not suggest to do so. This is for several reasons:
You will have two elbows creating turbulence slowing the draft.
The slower draft will create more creosote buildup.
You will have more of your flue pipe outside which will cool the pipe quicker and this will also
Reduce the draft, and create more creosote.
For these reasons we do not have elbows for our pipe, nor do we know any that will work with our pipe.
A straight run up and out the roof is the best practice for a properly functioning stove.
How do I exit the pipe?
You can see all the items required to exit the pipe here
Instruction on how to do so is found here
Does the wall mount come with the mounting bracket and all necessary hardware?
Yes it does, it comes with everything needed; the mounting bracket, screws, bushing, and washers.
When do I need to use the wall mount with fresh air intake?
Normally the air is replaced by opening a window slightly.
The wall mount with fresh air intake will bring air from outside to the area where the stove draws its air from and this would be used in spaces that do not have a window to open or in spaces where you did want to open a window. It will bring the replacement through a 2” flex hose you would connect to the manifold found under the wall mount.
How much does it cost for shipping?
The shipping cost varies depending on what you order and how far it needs to travel to reach your location. To get a shipping quote we suggest you add the products you would like to purchase, input your information and it will give you an exact price with taxes and shipping included.
How long does it take to receive my Cubic once purchased?
Once the order is placed it will take 1-3 business days to ship.
After the order leaves our facility, it will take 4-7 business days to arrive for Canadian orders.
U.S and international orders will take 1-3 business days to arrive once shipped. Once it ships, it is up to the shipping company to ship it on time.
Do I need to pay tax?
For Canadian orders, tax is collected at the time of purchase.
For U.S clients there is no tax.
For international clients, tax will be paid upon arrival of the item - if applicable.
How is it shipped?
In Canada it will be Canada post who does the delivery.
For U.S and international orders, it will be DHL who will do the delivery.
What if the items arrive damaged?
If the items arrive damaged. Please take a photo and send it to us at [email protected] . We will assess the best course of action.
What if I need to return or exchange an item?
For returns, please refer to our return policy.
If you need to exchange an item that you have already received in exchange for another (ex. wall mount to floor mount), please send us an e-mail.
General Information
How draft is produced & how to reduce it.
Draft is generated in the flue pipe. When you first light a fire in the stove, the heat warms up the flue and air climbs upward, creating a convection effect. This upward pull of air is what creates the draw of air into the fire box allowing the stove to function. The flue pipe being the “engine” of the stove is why a double wall flue pipe is required.
The double wall constructions maintains flue gas temperatures which greatly improves the draft and pipe cleanliness. There are many factors when it comes to draft creation such as; the temperature of the flue, the length of the flue system, weather conditions, and the space where the stove is installed among other factors.
Draft is reduced dramatically when any bends are introduced.
This is why we do not recommend to introduce any elbows in the flue system.
Draft can also be reduced if you do not run the flue pipe past the highest point of the roof, due to a lack of moving air over the cap. This is crucial for optimal stove performance and safety.
Types Of Flue Pipe
There are three main types of flue pipes: Single Wall, Double Wall and Insulated. We suggest to only use our 3" double wall flue pipe in conjunction with our insulated pipe to prevent the cooling of the gasses and for optimal draft.
Our stoves require a 3” double wall flue pipe.
A single wall flue pipe should never be used on our stoves.
A double wall flue pipe will maintain the temperature of the flue gases as hot as possible, to allow for proper draft and to have the least amount of creosote buildup.
The pipe should be insulated as it goes through the ceiling roof and all the way to the cap. This can be achieved with our insulated pipes.
What Is Creosote? + Cleaning Process
Creosote is created by the process of burning wood.
The buildup of creosote inside the flue pipe and the cap will happen over time. Whenever flue gases come in
contact with a cold surface, (either the pipe or the cap), the creosote will condensate and stick to that surface.
This is why you must check the flue pipe regularly to determine the rate at which this process happens so you can create a cleaning schedule in accordance with your setup.
It is recommended to clean every week or so, until a schedule has been created.
The rate of this process is dependent on many factors; quality of wood, the type of flue pipe you use, temperature of the stove and flue pipe, as well as how you set the settings on the stove.
As mentioned above, keeping the flue gases hot will keep the build up to a minimum and using a double wall flue pipe while insulating the section of flue pipe on the exterior of the space - will help keep the flue cleaner for a longer period.
See cleaning instructions here
Exiting through a wall
Our stove and flue pipe are quite small. Any elbow you introduce creates turbulence, restricting the draft which reduces the performance of the stove. When you exit out a wall you would introduce two elbows. One to go out, and one to go up. Also since you exit at a lower point in the space.
You have more flue pipe outside than if you exited out the roof. This would require you to insulate a much larger portion of your flue pipe. This is a more expensive set up, it requires more work, and you will end up with a lesser performing stove. For these reasons it is not suggest to exit through a wall.
How to maintain a clear window
This is dependent on a few factors that are important to keep in mind if your goal is to maintain a cleanliness of the stove.
Firstly, the amount of heat in the fire box. Secondly, if you are burning dirty or humid wood and also the amount of wood you put into the stove.
These are all contributing factors to consider. If you add too much wood at once you will drop the temperature of the stove and the glass will darken.
Once it comes back up to temperature the glass will begin to clean it self. When reloading the firebox, pull the coals to the front (without blocking the air intake) and place the wood toward the back and this will allow the window to stay clearer for longer.
Also when you introduce a new piece of wood, it can take 5-10 minutes for the moisture/humidity, and oils to be released. During this time you will see a darkening of the glass due to the humidity being released and will clean it self once the wood has its moisture removed.
Our stoves are insulated, this reflects the heat back into the stove improving the functionality of the secondary combustion system. It also holds heat and radiates it over a longer period of time.
Secondary combustion
The secondary combustion works by pulling oxygen from the secondary air intake, mixing it with the gases produced by the burning wood and gets reignited. This allows the stove to use energy that would otherwise be lost.
This system works when the stove is up to temperature. You can control the secondary combustion by opening and closing the slider found on the underside of the stove. Pulling the lever forward towards you to open, push towards the stove to close.
Quotes and shipping
For a price or shipping quote, simply select the items you wish to purchase, input your information and it will give you an exact price with no obligation to buy!
Lighting the fire/extinguishing the fire
When starting a fire in a Cubic Mini Wood Stove it is made easy by placing 2 or 3 balls of crumpled up paper and a few small pieces of wood on top. Light the paper and the little pieces of wood will catch fire. Once that happens let it go for a few minutes to allow the pipe to heat and start creating draft.
You can then go ahead and introduce a piece of wood. It is suggested to leave the door open until the piece catches fire, then you can close the door. Once your fire is lit it is suggested to fully open the primary air vent to allow the flue pipe to heat up as much as possible.After 20 minutes or so you may reduce the primary air intake and open the secondary air intake to activate the secondary combustion system which will burn hotter and cleaner.
When you wish to put out the fire, simply close all air vents. You will see the flame die down immediately and in a little while the embers will die as well.
Complete and total combustion of fuels
With normal use of the stove, the ashes out is normally only needed every few days. To prevent the buildup of ash too quickly you must wait until the wood is almost completely consumed before adding more wood.
If you add wood prematurely ashes will build up quicker than they are supposed to.
Types of Fuel
With a Cubic Mini Wood Stove there are a few fuel types you may use; soft wood, hard wood, pressed logs, and coal. You can use soft wood to get the fire going. Once it is lit you can use hard wood. Pressed logs are a great choice as they are easy to cut to size, and they also burn very hot and clean.
You must read the package to see if it can be used in an air tight stove and that it is not made with glue. Coal is another choice and is similar to using wood.
Reason for Draft Issues
In most cases a lack of draft is caused by not maintaining flue gas temperatures, having an elbow or worst, to have two - or to have a large portion of non-insulated flue pipe outside.
If those are not the cause of the draft problem then it is most likely air coming and going from the wrong area. If you have a window open downwind and not upwind the air will come in down the pipe and want to exit through the window instead of coming in through the window and out the pipe.
This can be resolved by opening a different window or orienting either your boat or RV in the proper direction if possible. Another reason could be due to an obstacle near by the cap. If this is the cause, you would have to run the flue pipe up and above the obstacle allowing for free moving air to pass over the cap.
If your pipe is not maintaining its flue gas temperature, that can also cause problems. However, as mentioned above you can insulate it to combat that cooling effect.

- Choosing a selection results in a full page refresh.
- Press the space key then arrow keys to make a selection.

How to Heat a Sailboat: 6 Practical Options

For most sailors, boating season ends when the weather begins to get cold. It’s just too unbearable being out on the water with such a strong chill in the air. Or is it? If you could heat up your boat, you could extend the sailing season even longer, which would be delightful. How do you warm a sailboat?
We recommend the following 6 options for heating your sailboat:
- Fully insulate you sailboat
- Use a forced-air furnace
- Try a reverse cycle air conditioner
- Get some electric heaters
- Rely on hydronic heat
- Warm up with a heating stove
If you have yet to hear about some of these heating options, keep reading. In this article, we’ll discuss each heating method in-depth, including some practical tips you can use for safe, efficient heating aboard your sailboat!
Stay Warm on Your Sailboat with These 6 Methods
Southernly sailing.
This first option for keeping toasty aboard your sailboat doesn’t require any heating units. Instead, when you feel those wintry winds chill you to the bone, set course for the south. In the United States, southern states tend to stay pretty warm all year long, even when most of the rest of the country is suffering from bitterly cold winters.
You can reliably sail to Florida, California, or anywhere in the southern part of the country and feel instantly warmer. Try it for yourself!
If you don’t have the luxury to spend your winter in warmer locations then here are a few ways to stay warm during cold weather.
Fully insulate your sailboat
Insulating your boat will not only allow you to retain the heat in the cabin but it will also minimize the humidity levels and condensation in the cupboards. By insulating your boat you will have no condensation issue in your cupboards and cabinets besides the heat retention will greatly improve.
Having low humidity and condensation levels will make it a lot easier to heat up your boat. In addition to that carpeting your boat is also going to provide good insulation during the winter months. I would recommend laying out a carpet and a carpet underlay underneath the carpet to insulate your floor properly. This technique alone, will make a huge difference in the temperature of your cabin.
When selecting your underlay, make sure you select the one which has the highest insulating properties, generally the underlay that is designed for concrete or cement slabs provides the highest insulating properties and a good option to go for. Check out this useful video on how to insulate your boat:
Forced-Air Furnace
A forced-air furnace is another great option to consider. This heating system uses propane, oil, fuel, or gas as a main heat source. Return ducts allow the forced-air furnace to absorb outdoor air, warm it up, and then send it back to you so you can fight the cold.
All the excess exhaust should go off-deck if your furnace is ducted correctly. Using a forced-air furnace to its fullest extent will require the installation of ductwork in your sailboat. This can be costly, but if you plan on sailing in cooler weather in the years ahead, then it’s a worthwhile investment.
The main drawback with this system is finding a proper place (close enough to the cabin) to install the furnace. Forced air furnaces are by large installed in the stern locker, located 10-15 feet away from your cabin. Blowing the heat through the ducts this far will cause heat loss. To prevent the loss, you need to insulate your pipes using armaflex insulation material. Here are some advantages and disadvantages of forced air furnaces.
- Instant Heat Available Through all cabin rooms
- The Heating system is easily regulated
- Solid solution for heat your boat
- Even heat distributions via the vents
- Dries air inside the cabin quickly
- Can easily heat your lockers and the engine lockers
- It is complex to install the wires and ducts and fuel supply
- Ducting and isolating the ducts is hard job
- These furnaces consumes a lot of electricity
- Carbon build up inside the ducts can cause clogging the ducks in the long run.
Reverse Cycle Air Conditioner
Who says you have to retire your air conditioner when the summer ends? You can keep using it into the fall if yours has reverse cycling.
A reverse cycle air conditioner can both cool and heat an area, so it’s a great unit to have onboard your sailboat. The refrigeration cycle that normally provides cool air remains intact with a reverse cycle air conditioner, but, when you want warm air instead, that cycle goes backward.
Here’s how it works. The indoor evaporator coil takes on the role of a condenser coil to make heat. Outside of the unit, your second condenser unit also changes its act, becoming an evaporator now. This allows the second condenser to send cold air out and away from your sailboat rather than keep it in as it usually does.
Your reverse cycle air conditioner can also work as a dehumidifier and an air purifier, so it’s really like four things in one. Of course, for all that convenience, you will pay significantly more for a reverse cycle air conditioner than most of the other heating options we’ll discuss on this list.
Still, we’d say it’s seriously worth considering buying a reverse cycle air conditioner. You can have reliable cooling on those especially hot days, then sufficient warmth when you’re shivering, and all in one handy unit. Since you’ll want to save space and limit weight capacity on your sailboat, a reverse cycle air conditioner seems like an almost perfect solution.
Electric Heaters
A few electric heaters on your sailboat can also be a viable option for warding off the cold. Each heating unit within the heater takes electrical energy and transfers it into heat energy that you can feel. That heating unit is known as an electrical resistor.
The electrical resistor includes nichrome wiring to convert electricity into usable heat. Ceramic insulators will also boost the heat output, making electric heaters quite effective.
You have all sorts of options for electric heaters, many of which are suitable for sailboats. Let’s discuss these options in more detail now.
- Heat pumps: A compressor within the heat pump uses electricity to kickstart the refrigeration cycle. During that refrigeration cycle, outdoor air passes through the heat pump, with the heat energy separated from the air. That heat then travels through your sailboat, warming it up. Heat pumps also have an evaporator that uses liquid. This liquid will begin boiling so it can be used as a source of heat, although the fluid does not boil at high pressure.
- Storage heating: Storage heaters are common in the United Kingdom, but they’re used elsewhere in the world too. Clay bricks within the storage heater get warm and then send out the warm air when you need it most.
- Fan heaters: A forced convection heater or fan heater includes an electric fan within, hence the name. This fan moves air faster to provide quick warmth. However, you must keep fan heaters away from other items, as they could ignite what’s nearby if it’s flammable.
- Convection heaters: Thermal conductors within a convection heater will warm up the air when it cycles in. The buoyancy of hot air allows it to rise so cool air can enter the convection heater in greater quantities, being warmed up immediately. Some convection heaters use thermal fluid or oil. They’re less risky than fan heaters, as convection heaters are not as prone to ignition.
- Infrared radiant heaters: An infrared radiant heater has elements within that reach high temperatures, releasing infrared radiation. This radiation goes through the heater, connecting with an absorbing surface and becoming heat. The heat is designed to hit items and people rather than the whole space itself, providing optimal warmth.
Hydronic Heat
We’re still not done discussing heating options for your sailboat yet. Hydronic heat is a type of heating system that’s especially known for its energy efficiency. The internal system has a tube that goes beneath the floor. Usually, this floor is that of a home, but your sailboat’s cabin areas are also applicable. The hydronic heating system then produces radiant heat from the floor up.
Within your hydronic heat system is hot liquid, typically water. The liquid moves through the heat system’s hoses via piping. All along, the very hot temperature of the liquid is maintained so its levels are near boiling. You can even use your sailboat thermostat to adjust the water temperature in your hydronic heating system through the plumbing manifold.
Depending on how you set your temperature, you can turn on certain zones of your sailboat so those are the only ones that are heated. You can also set different temperatures from one zone to another. If one part of your sailboat stays pretty comfortable, then maybe you set the heat lower than the driver’s seat near the windshield, as this area might get pretty cold.
The heating unit’s pumps will send in freshwater as needed to be boiled and transferred. As the water eventually cools down, it goes through the boiler again and is reused. That’s a big part of why hydronic heating systems are so efficient.
Heating Stove
Since you spend so much time on your sailboat, you might as well opt for a heating stove. Also known as a wood-burning stove or diesel drip stoves, not only can these stoves act as a source of warmth, but they can cook food as well.
A heating stove may rely on diesel fuel or sawdust bricks or other sources of biomass fuel from wood. The stove itself is made of steel, cast iron, or another form of sturdy, durable metal. Within the stove is a firebox with fire bricks around it. Air controls make the heating stove safe to use, as does a ventilating stove pipe that you’d angle offboard, as the combustible gases combine here, which would be dangerous to be around.
When you light the heating stove, the gases move to the chimney. For the combustion gases to exit the fire chamber through the chimney, your flue gas temperature must surpass the outdoor air temperature. That’s not too hard in the fall! Here are some pros and cons of heating stove:
- It has Simple design
- Requires minimum installation
- Provides Cosy home feeling
- It dries the boat well
- Has a Cooktop
- It can be used as a source for radiator
- water pipes
- Learning curve
- Produces soot
- Chimney installation can be challenging
- Takes longer to get the cabin warm
When choosing heating stove for your boat make sure you have a quality carbon-monoxide detector installed and make sure you change the batteries every 6-9 months.
Can You Use Engine Heat to Warm Your Sailboat?
Some sailors also recommend gathering by the engine to take in the heat that’s generated around here. Since your boat engine has coolant fluid that’s warmed up as the engine runs, this warm fluid could send heat towards the cabin.
This doesn’t make for the most viable heating solution unless you have a heat exchanger, coolant lines, and a fan. The coolant lines should go from your engine to your heat exchanger, which takes the air and warms it up. The fan then sends the cool air towards the cabin. Hoses can push out the warm air to you.
If you like to take your sailboat out somewhere, turn it off, and just sit on the quiet water, engine heat for warmth won’t work. You’re only getting heat when the boat runs. Also, you’re using a lot of fuel for this heating method and potentially putting undue strain on the engine.
So yes, while you can use your engine as a source of heat, it’s not an option we’d highly recommend.
Conclusion
Has the weather taken a turn for the colder? Don’t retire your sailboat quite yet! With heating stoves, hydronic heat, electric heaters, a forced-air furnace, reverse cycle air conditioning, or even engine heat in rare instances, you can sail well into the colder months while staying nice and warm.
I am the owner of sailoradvice. I live in Birmingham, UK and love to sail with my wife and three boys throughout the year.
Recent Posts
How To Sail From The Great Lakes To The Ocean
It’s a feat in and of itself to sail to the Great Lakes. Now you want to take it one step further and reach the ocean, notably, the Atlantic Ocean. How do you chart a sailing course to get to the...
Can You Sail from the Great Lakes to the Gulf of Mexico by Boat? 
You have years of boating experience and consider yourself quite an accomplished sailor. Lately, you’ve been interested in challenging yourself and traveling greater distances than ever before. If...
Out here on the 'Wet' Coast, specifically in the Lower Mainland of British Columbia, keeping the cabin of your boat warm and toasty makes for a better boating experience. A wood stove is a great solution, but marine wood stoves are costly. The smallest ones available are still too large for the sixteen-foot sailing barge I intend to build (my own design) shown below.
So as a warm up to building the boat itself, I decided to make the wood stove first. A pretty extensive search online yielded few results or examples of anyone making their own small solid fuel heater for a boat, so I decided that I would document the construction of mine for the sake of interest.
However, this is not a building plan or instructions to construct this stove. I assume no liability whatsoever for anyone copying this design, or even being remotely inspired to do something similar.
Having said that, here's how I went about making this stove: The main body of the stove is a piece of mild steel box section, 3/8 inch thickness and six inches by six inches by seven inches long. I was able to find it at a local machine shop in their scrap bin. The ends were already square and just need a little dressing with a file.
I chained drilled (more on that later) a round hole to accept a muffler fitting and finished the hole well enough to basically tap the fitting in tightly from the inside, and secured it with nail after drilling a hole to accept it. I made three feet with carriage bolts and black iron plumbing fittings. The stove will be bolted down so I figured three feet were enough, and with the single foot at the front, it will be easier to sweep and clean under the stove.
Next I made the back of the stove with a six inch by six inch piece of ¼ inch mild steel plate, and drilled and tapped to accept 10-32 machine screws to bolt it on. Before doing so, I smeared on copious amounts of stove cement to seal it.
I dressed everything up with a file after assembly.
The front was made much the same way, but I used countersunk 6-32 screws, and prior to installation I cut out the opening for the door.
The above photo shows how I cut the holes by chain drilling. The secret is to drill each hole slightly overlapping the last. If you drill too closely however, the drill point slides off into the previous hole. When this happened I flipped the piece over and came in from the other side. I used the lowest speed on the drill press and kept the belt loose enough that I could stop the chuck with my hand. This allowed me to drill without clamping thereby speeding up the process. If the bit grabbed, the drill would stall rather than spinning the piece like a whirling scimitar. There is no guarantee the belt on any drill press will slip when you want it to. So if you are going to do what I did at least wear heavy gloves and in any and every case, safety glasses. Like my Dad used to say, "do what I say, not what I do" so folks I'm making no recommendation here. My advice is, always clamp your work and keep your hands clear.
Once the piece was cut out, I put it in the vice and filed the edges to my scribed lines with a bastard.
Here you can see the draft control I made. The knob on the left is made of a piece of brass drilled and tapped to accept a 6-32 screw which is installed in a countersunk hole from the back of the piece so it can slide across the front easily. The right knob is drilled and tapped for a 10-32 screw that protrudes from the inside of the stove though a tapped hole. To adjust the draft I loosen the right knob and move the control to the desired position, and then tighten.
The most time consuming of the whole project was making the door. I wanted a window so I could see the cheery flame and avoid suicidal thoughts when it is raining. I was able to source a piece of stove glass quite cheaply from the local glass supplier - enough to make a few spares. The glass is very expensive otherwise - about $90 a square foot, but they had a scrap piece they couldn't use and let me have it for $10.
I made a frame from mild steel the same thickness as the glass, and sandwiched it between an inside frame, and the door itself (see test result at the end of the article). The door is larger than the stove opening by ½ inch all around. The glass frame, and rear frame are the same size as the stove opening. The openings in the door and the rear frame are slightly smaller (about 1/8 inch all around) than the glass itself. The rear frame is drilled and tapped to accept 6-32 screws, and the door and glass frame were drilled larger so the screw threads cleared. Before assembly I smeared it all up with stove cement.
If you are wondering what those three things are on the door they are clamps called clecoes. They are really handy for this sort of work.
Nothing dresses up a stove like this more than some brass trim. I found this brass fork at the local Salvation Army thrift store for two bucks. I sawed the end off and mounted like a grill over the window - kind of a Poseidon's trident. I figured it would make it a little more nautical.
The hinge is a plain old door hinge, cut and shaped. I shimmed it so that it would make the door fit nicely with the gasket thickness taken into account.
I used an anchor nut locked even tighter with a castle nut as a latch. A decorative brass handle made from another thrift store find is on the other end of the bolt. The gasket is glued on with a special wood stove gasket glue that is clear and looks like model cement. I painted the stove with flat black Tremclad high temperature paint.
The stove would not operate correctly the first time because I ran it without a chimney. Also, the heat from that first trial cracked the glass. When I dis-assembled the door I realized that the tight frame around the glass, along with it all being cemented together caused stresses resulting in the fracture.
I cut a new glass, but installed it without the middle frame, instead using gasket material around the glass. I did not use cement either. Before firing the stove I used a propane torch to heat the whole thing up and see if it would crack again and it did not.
I put on a piece of muffler pipe as a chimney and built a fire with some dry wood. Once the fire was going I threw in a dozen charcoal briquettes and closed the door. I left the draft control full open. The stove threw heat for a good six hours before I went to bed. I don't know how long it burned after that, but I'm very happy with the result. We should be very comfortable in our little boat.
Alan Jones swarfmakeratshawdotca

Once the overall scheme was signed off by all, it was time to start with the surgery. Any sailor knows the trauma of adding a new hole to the boat, even above waterline… and this one was a doozy: a very large opening in .2″ steel topped with Treadmaster, backed with a very dense .75″ marine ply, and blocked for the extricated pole amidst an expanse of foam insulation filling a grid of steel ribs. After much head-scratching and calling out reference marks ‘twixt deck and pilothouse, we punched a pilot hole, then broke out the jigsaw. Here, Andrew’s assistant Jeff from Indian Summer II is carefully slurping up any remaining steel bits to prevent future rust spots…

The guys headed back to the shop to conjure a few parts, including a trim ring that compensates for the 5° camber of the deck and supports the beautiful cast bronze deck iron . This was all bedded in place using screws for clamping pressure, prompting the first of many comments that it looks like it was meant to be that way. (2012 update: I later had serious leak problems because the Treadmaster was not cut back far enough to allow a fillet of sealant… and various sealing problems developed including failure of the primer-Dolphinite interface and a crack in the trim ring from too much screw tension on the curved deck surface. I finally pulled the ring, which popped off with no effort, gave it a proper coat of wood sealer followed by Brightside polyurethane, then bedded it with 4200 after cleaning the old residue) :
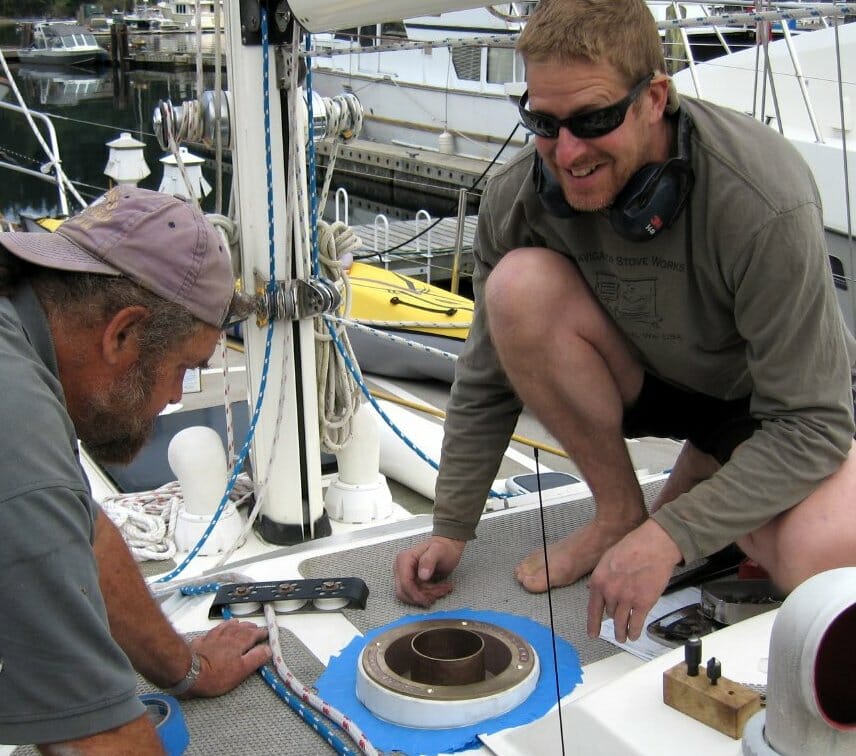
This made for a nicely finished exterior appearance, but from below we could still see the wood “underlayment” – meaning that it would be exposed to radiant heat as well. The hole had been lined with copper sheeting as a first step:
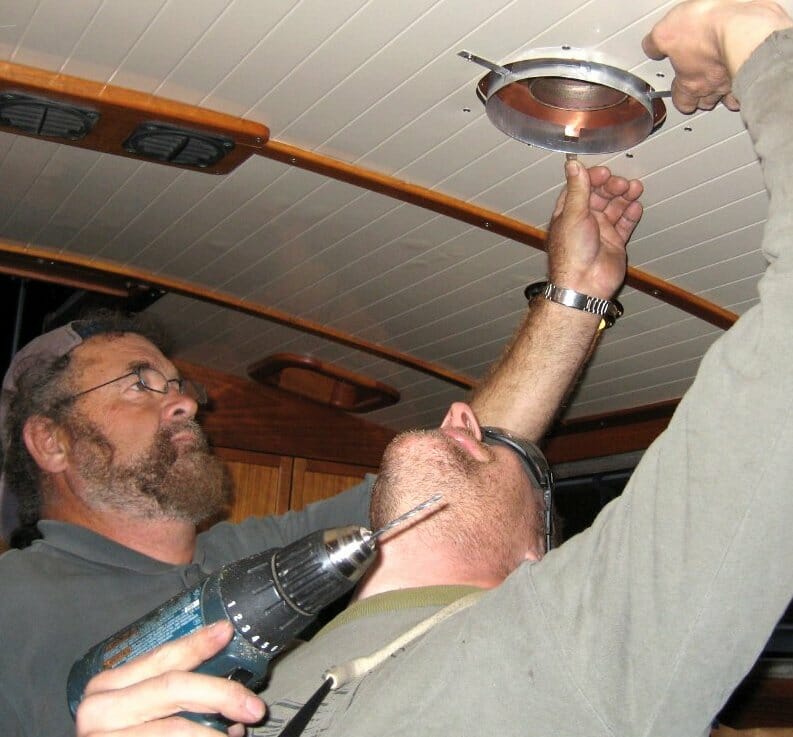
In a flash of inspiration, Andrew conjured a pair of aluminum components that would further reflect heat while allowing cooling airflow. It also prompted one of many amusing photographic moments, given all the awkward angles necessary when working on a boat…
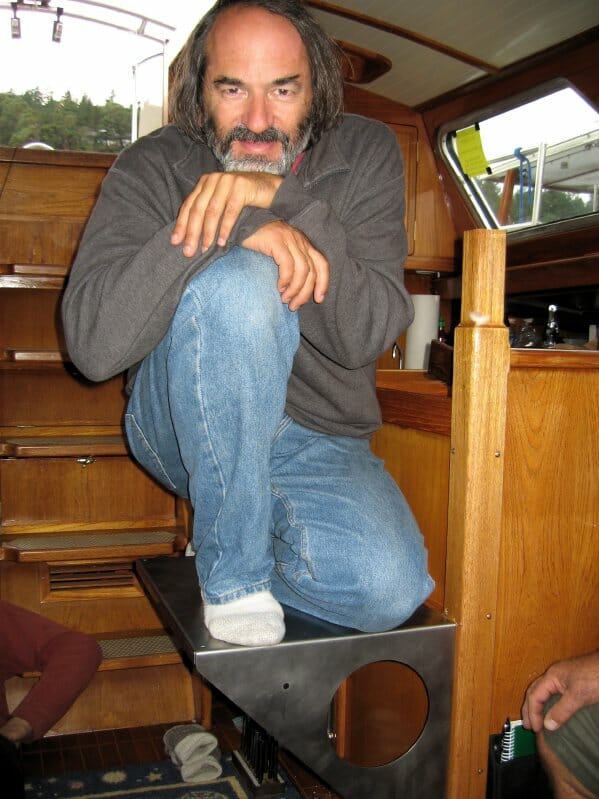
With the hole prepped, it was time to get the stove mounted. They used the cannibalized wood from the original pole to frame out the plywood wall at the end of the galley counter, allowing a clever hack in which a routed channel created clearance for a row of 1/4-20 T-nuts. The whole assembly is thus removable without dragging out the refrigerator that’s on the other side of that wall… a process that is complicated further by having to remove the foot pumps under the galley sink to provide enough fridge-movement clearance to get an arm into the cavity. Boats are for contortionists, something I am most emphatically not .
When the shelf was installed, Andrew immediately insisted that I park on it to convince myself that it is sufficiently robust…
With that test passed, he added a stainless heatshield to protect the wood… and then the stove was centered and bolted to the shelf, its tripod legs insuring that no amount of heat-induced casting warpage would cause rocking. A few leveling washers induced general positioning consensus, then it was down to the final steps.
Pipefitting is something of an art, it turns out, and I was surprised at how fiddly this part was… but patience and collective insistence on perfection eventually yielded a smooth and well-considered run. Here we are eyeballin’ and tweakin’…
Now you can see the final configuration of the deck-iron interface, with the heat shield spaced away from the headliner giving a strong sense of the etymology of stove-pipe hat :
Topside, we have a couple of operational choices. The smoke head can be plugged directly into the deck iron for a low-profile look like this:
Or, as is the case at the moment in the oppressive wind and rain of an incoming cold front, we can insert a 2-foot pipe section to improve draft and disperse the startup smoke above the level of the dodger:
And it’s done! With the pipe all fitted and already showing a patina from the test-firing, here are three views of the finished Little Cod installation on Nomadness . From the passage to the aft cabin:

Lying on the sole looking up (with the draft damper visible in the angled section):

And from the center of the pilothouse, showing the loading door on the end:
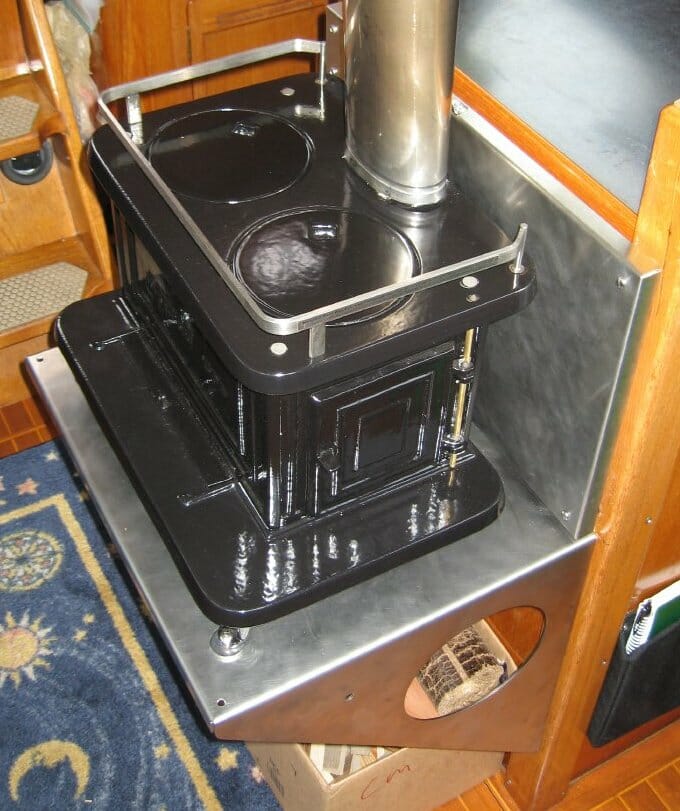
And, you see those little holes on the front corners of the top shelf surface? One of the major issues here is safety — not just keeping skin off the dangerously hot stove pipe, but keeping fast-moving knees off the sharp shelf corners, one hand attached to a handhold at all times whilst bounding along in a seaway, and careening bodies off the stove itself. Removing the original pole, which was necessary to allow pipe to pass through the deck in the only available location, complicated the problem; it’s a large enough cabin that one could get thrown off-balance easily without something solid to hold on to at every stage of a traverse from one point to another.
I have added a few more strategically-placed handholds around the boat, but the central fixture is a sort of “caging” of the stove made with 7/8″ stainless rail and Sea Dog stainless fittings .
The other huge issue, actually the biggest trade-off of this whole project, was the impact on engine and generator access. Massive sole panels have always lifted to the 90° position and locked in place with springs, but now they only make it to 60° and have to be held up manually… obviously inadequate, although the most-frequently serviced bits are still easy to reach (Racors, tank-selection valves, oil filters and dipsticks, the sticky shutoff rail on the injector pump that needs an occasional tickle, coolant caps, and so on). The raw-water impeller on the main engine, already a major pain to change, is now more so, and I shudder to think of having to change out the starter with this reduced clearance.
We’ll immediately fashion a couple of latches to support the access panels from the stove shelf, but if serious surgery is necessary, it will be necessary to unscrew the hinges and lift the units completely out (removing the stove as well if major gymnastics are going to be involved). Fortunately, it’s all serviceable by design.
Other than that detail, I am thoroughly delighted with this new life-support component in the technomadic escape pod. An efficient heat source is now readily harvestable, and even a small fire renders the cabin cozy without the Webasto roar or the shore-power requirements of an electric heater. And to anyone who Googled their way to this page whilst contemplating a stove for their boat… I can warmly recommend Andrew and his products. He exudes an old-fashioned sense of quality craftsmanship rarely seen these days, and this little stove of time-tested design is clearly going to outlast the captain of the ship.
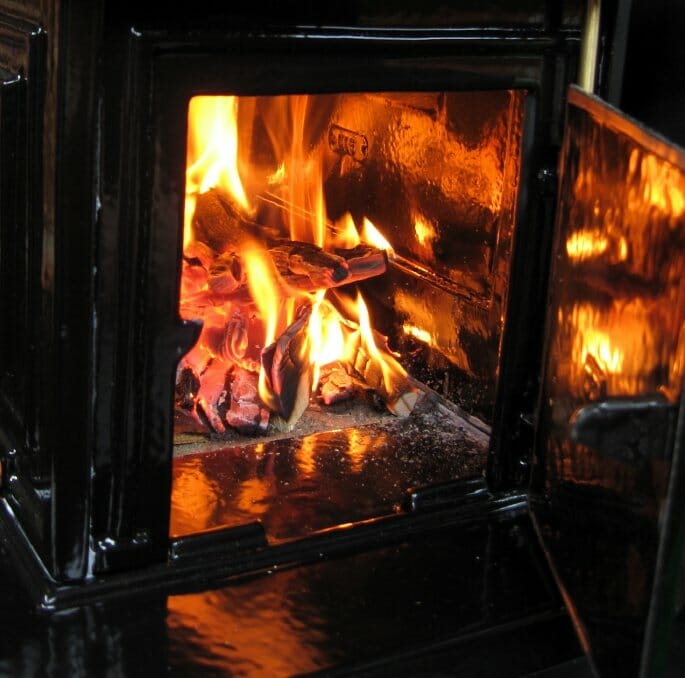
Updates…
First, in the accessories department, a woodstove thermometer is essential. I use the Rutland one, which I got on Amazon, and it works well (though the Inferno is now getting better reviews):
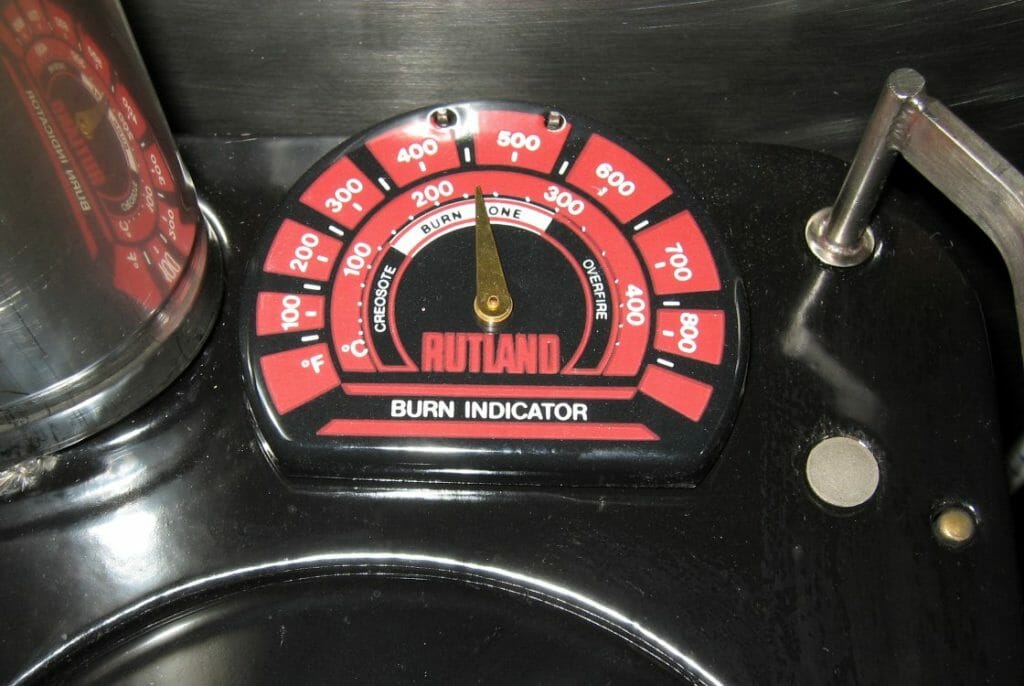
Second, I finally got around to building the safety cage around the stove, and it has been a surprisingly pleasant addition to the boat… actually better than the post that had to be removed for the installation. I used standard 7/8″ stainless rail and fittings (I bought mine from Defender).
Third, it’s pretty easy to light with the normal methods (paper and little scraps of kindling), but if you want an effective shortcut, try these little fire-starters. Actually, I usually make my own with sawdust and melted wax, poured into egg cartons… but that’s a messy job and kind of a nuisance. The commercial ones work great, store forever, and save a lot of fiddling. The ones at that link should be broken into quarters, good for 144 fires.
The heavy stainless shelf took threads nicely, and where the angled braces meet the thinner heat shield they are bolted deeply into the supporting structure. I haven’t tested it with airborne body weight yet (and hope never to!) but it easily handles the dynamic loads of rough conditions and grabbing it hard to prevent a fall. The height was optimized for leaning, and the top rail will get decorative hitching some rainy night.
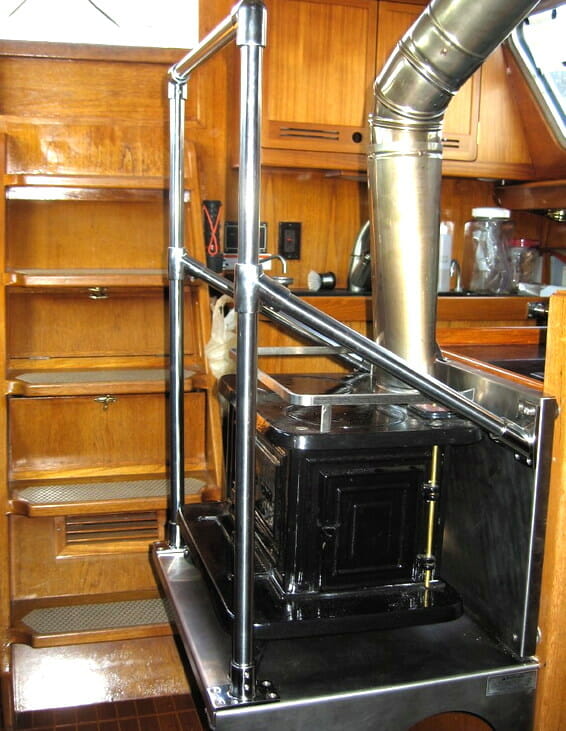
The latest additions (2012) are a Caframo Ecofan and a window! The fan is not as hearty an air-mover as a dedicated DC one, but who wants to cable and listen to another motor? This uses a thermoelectric element to generate power from the difference between the hot base and the relatively cool fins, and does a nice job of gently moving air across the stove and distributing it around a small boat cabin. I had considered mounting mine to one of the disks (with high-temp adhesive, given the enamel), but thought better of it… that’s precious horizontal surface most of the time and the fan lives in a foam nest off-season or underway.
As to the glass window… Andrew now offers a glass-front option when you buy one of these, but quoted me $400 for a retrofit. As much as I wanted one, that was a bit too rich on my current budget for a purely aesthetic item. This launched me on a lengthy quest, culminating at last in a source for custom pyroceramic shapes (not glass) that can take about 1300° F continuous and 10% overtemp for a short time… a healthy margin of error for a wood stove that will probably never see more than 750° F for more than a few YIKES moments as you frantically reduce the draft. It also survives thermal shock very well; here’s mine along with the Caframo fan:
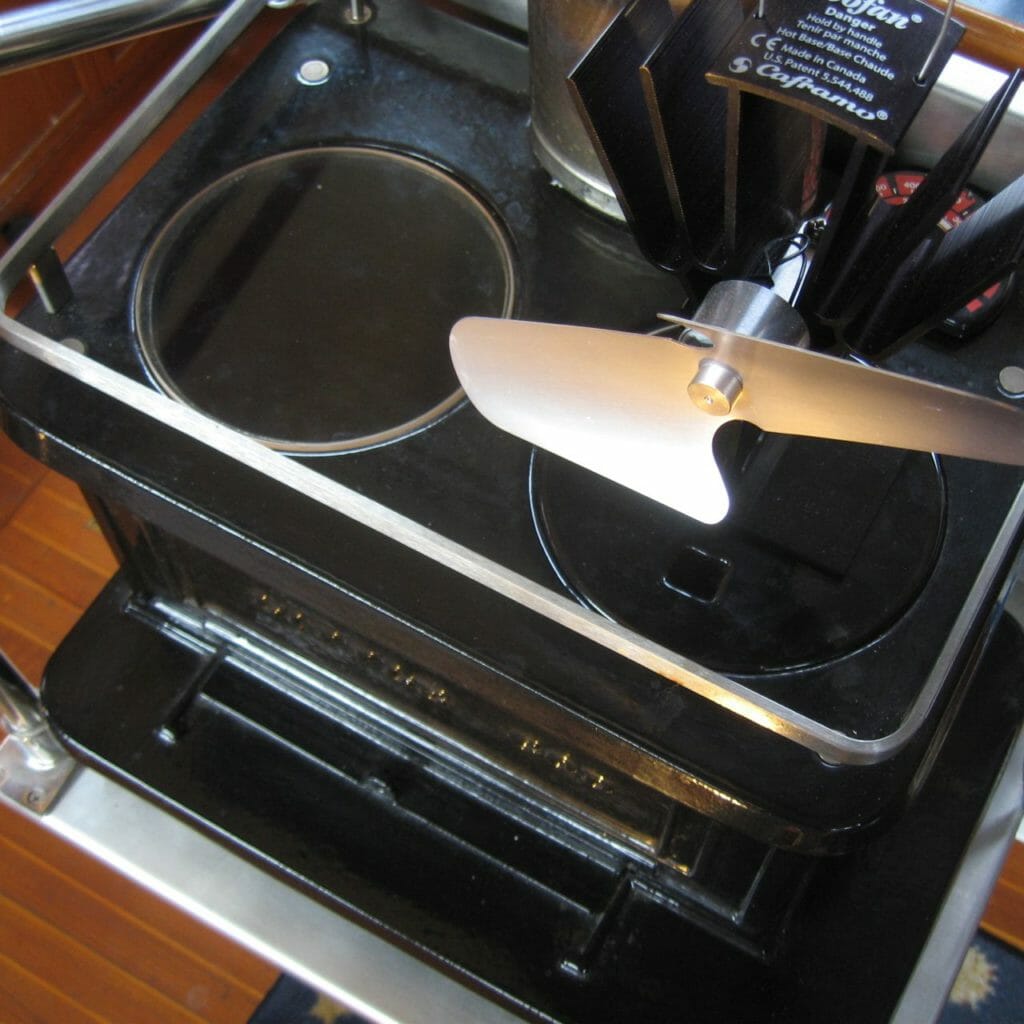
It casts a beautiful warm light around the cabin, reflecting nicely off the overhead, and it’s great to see the fire without having to open the door! I still think it would be better to get the glass front option at the time you buy a new stove, but if you already have a Sardine , Little Cod , or Halibut … you can buy a piece of 3/16″ Neoceram, 6″ diameter, with pencil-grind edges from One Day Glass . (I was reselling them for a while, but don’t really need to be in the loop… gotta choose my battles!) It will pick up soot from the flames, but is easy to clean; just use a wad of wet newspaper and some of the ash from the firebox.
Follow-up (2013) note on fuel
When I had a domestic woodstove, I avoided burning driftwood because of the salt content… mixed with sticky creosote, it leaves a hygroscopic layer that absorbs moisture year-round and can quickly destroy cast iron or non-stainless stovepipe. Since this stove is enameled inside and out, I have not worried too much about that, though it is still not ideal.
Researching this recently for a discussion thread on Facebook, I turned up an interesting article (no longer online) from a chimney sweeping expert that advises against using one of my favorite fuels… mill ends. Clean, dry, neat-stacking, and often free, these cut-off chunks of dimensional lumber are really tempting, though I have noticed that they usually burn insanely hot. Now I know why (and they have other dangers as well, including salt and some nasty chemical).
Also, this classic book is worth having in your library: The Woodburner’s Encyclopedia (1976), usually pretty cheap on Amazon.
2017 Footnote
I sold the lovely Nomadness in 2016, and happily, the Little Cod did not fit the new owner’s cruising plans. I’m now installing it in a project shed near my new mobile digitizing lab, having swallowed the anchor.
Cheers, and stay warm! -Steve
29 Comments

damn, you cold water, monohull guys really DO like all the comforts of home :-)LOLOL!
OMG. I have become a monohull guy, haven’t I? Never saw that coming.
You may want to have someone who does fuel polishing to come and do a cleaning on your tanks. They treat your remaining fuel with biocide and cleaners and then pipe the fuel through filters to remove the gunk in the tank as well as the algae.
Then a treatment with biocide after that will keep the growth at bay.
Stumblingthunder
Sumblingthunder – yes, I am looking into that. Actually, I can polish onboard (two Racors and a system of valves with a transfer pump lets me move fuel among tanks, or even pickup in one and return to another while the engine is running), and I have been using biocide with the new stuff (the clean aft tank, which I just refilled yesterday). But that’s not as good as a proper tank cleaning… the question is whether or not such an extreme and expensive operation is necessary. I don’t want to wait to find out until the boat is getting thrashed in foul conditions, shaking it loose and clogging the filters…
Thanks for the comment!
Well its been a little over a month, hows the stove working out? Im looking into one for next year, and my biggest concern is that it can hold a fire overnight. Fatsco makes a tiny tot coal stove that I read an article on Good Old Boat that says it can be banked and they still have hot coals in the morning… whats your experience?
thanks deryk
Hi Deryk…
I haven’t yet tried a full overnight load… now doing the winter-moorage dance, making weekly trips to work on projects. The fires have been wonderful and the boat cozy… and it’s a great little incinerator. I’ll post when I have done some proper survival-heating!
Cheers, Steve
Just a thought that occurred regarding access below the stove. Would it work to cut that panel in half, then use a piano hinge on top to put it back together? That would allow you to fold it over itself, then open and should minimize your clearance issues. It should also be strong and fairly inobtrusive. I have brought brass hinge at Home Depot before at a reasonable price. Hope it works better than having to remove the hinges. Best of luck.
Lauren Neher
A few months have passed now, and there have been enough firings for me to have a better sense of performance. The other night it was subfreezing in the harbor, and I kept the stove going at about 450 degrees surface temp all evening. At bedtime, I stoked it full and minimized both intake and stack flow… 8 hours later when I stumbled to the galley for coffee, it was still too hot to rest my hand on (though I did not try to fire it up without kindling, as it was getting sunny).
In short, it works beautifully!
Hello, Just curious what kind of stove pipe you used? I am only finding 4 inch pipe that is for HVAC, and not for wood burning units. Thanks, Jon
Jon – I used the pipe provided by the Marinestove folks; here is the accessories page that details the pipe, shielding, bends, smoke heads, and related parts.
Cheers, and stay warm! Steve
Glad to see that your install is evolving to suit your needs. Its that element of customization that our spirited customers bring to their particular application which gives me an added boost in the shop every day. Did I mention Idaho Energy Logs to you for super long burn times? A Codger (someone who uses a Little Cod) down at Fisheries Supply in Seattle has reported incredible burn times. I need to try them. When we get into these long burn times it becomes all the more important that everyone heed the smoke/co2 alarm install recommendation. As you have witnessed boats can be tricky with air/chimney flow dynamics. Dorade vents and the like can throw a monkey wrench into the mix. Hence important to have an audible alarm alerting you to a drastic negative change in your flow dynamics. Topic shift. What do you do for hot water ? Any novel designs lurking for integrating the stove into the mix. Folks ask us from time to time and it would be a great option to be able to offer them.
Look forward to your Springtime assessment of life aboard with COD.
Cheers, Andrew / NSW
HI Andrew – great to hear from you! We just had our first burn of the season the other night, and it was quite pleasant to feel that pervasive warmth (so much nicer than the other heat sources aboard).
We picked up some very dense manufactured logs; don't know if they are Idaho. I will try them and let you know my impressions.
Thanks for the reminder on the smoke/CO2 sensors – that is in the plan for the shipnet, but I will get the hardware aboard now. Know of a combined model that is low power?
Hot water: I got rid of the demand water heater that came with the boat, installed with such a short stack that it didn't draft properly and spewed humidity/CO into the cabin. Aboard now is an Isotherm, which uses either AC (700W, well within Inverter range) or engine coolant loop. I don't have much experience with it yet, but would enjoy playing with a preheater coupled to the Cod.
Your stove always elicits admiring comments from visitors, even when just sitting there cold. I'm happy to have it aboard.
Cheers! Steve
Great job Steve! Great stove!.I am an Italian liveaboard, for 4 years in Venice (freezing cold and humid in winter) and always heating my days and night with an old wood burning stove. It makes the difference aboard. All my best and sincere compliments for your useful blog I am definitely linking your blog to mine. I row and sail to protect the water and invite people to a sustainable way of travelling and living.
Giacomo – Grazie mille!
Thank you Steve. E' un mio piacere.

I’m building a 200 sf meditation cabin on land, adobe brick. I live in northern New Mexico where worst winter temps rarely go below 0 degrees F. Will the Little Cod heat it adequately? I genuinely hope so, because I’d love to make this work out. I’m interested in the model that is red and has the glass fire door. Should we talk? Bob

Bob – I certainly think that it would work just fine in that space. The person you should contact is not me, however, but Andrew … the builder of the stoves. Sounds like a great application, and the red would be gorgeous.

How is the draft working on your little cod? I was considering going with a 4″ to 5″ adapter for a wider draft. Do you find the 4″ sufficient? Will it get a decent draft even when the setup is in “low profile” (minus the exterior chimney addition) mode?
Just want to know before I finalize my install plans, thanks!
Eric – I have never had any issues related to inadequate draft (if anything, it can be a little hard to turn down if you get it too fired up!). For this size box, I don’t see any advantage to expanding to a 5″ pipe… that’s getting into home-scale stove territory. As to the “low profile” mode, I have not experimented with that enough to answer you. I should! That is certainly how I would like it to be set up if I were in the mode of sailing/anchoring through winter months.
Cheers and stay warm! Steve
Well if you do get around to trying it, do let me know. I would much prefer to have it set up that way then have a tall chimney pipe sticking out.
I have no doubt we will both be quite warm this season 🙂
One last question actually. Do you know where they got the spacer hardware that got your pipe through the roof? I have been having a hard time finding one that will connect to 4″ pipe.
Thanks again!
Eric – you mean the deck iron? That is what the pipe connects to; no intermediate hardware. The heat-reflecting disc and hole liner were fabricated…
You can get the deck irons for 3″ or 4″ pipe from Andrew.
http://marinestove.com/Accessories.htm

It is a lovely looking stove! How is it working out, say when you’re away from civilization and other heating sources and the temperature is below freezing? Pros and cons?
Does it get much untidy in the cabin from handling and stacking the wood, or coal?
I am surprised it could still be warm after 8 hours. We have a stove in the kitchen of our house, and the wood burns down very quickly, I’d say less than 2 hours, and in the morning it’s chill.
Does the boat get dirty on the outside from the smoke?

I just fell in love with the neoceram/pyroceram window concept! We’ve got a Little Cod manufactured by the Enterprise-Fawcett foundry located in Sackville, NB, and instead of two round ports on the top surface its got one large rectangular port (the stove also came with a rectangular grilling rack that can be put in place of the solid rectangular port). I’m going to look into the possibility of getting a piece of neoceram cut to fit in place of the cast iron port but before I do I’d love to know more about your experience with your round pyroceram window. I think I’d personally go the neoceram route given the fact its used for cooktops and looks to be able to take more of a beating than pyroceram, a factor given the large area of our rectangular opening.
So, how’s your’s working out and what thickness of material did you go with (I’m assuming 3/16″)?

NICE JOB, looking at your page for ideas for an install like this for an airstream trailer, this is great!
Hi Johan, and sorry I took so long to reply! Just got through another winter…
I have been lazily using other heat sources at the dock (mostly), so I can’t report much on day-to-day operation over an extended period. From my casual use, however, I can make a few observations:
Untidy in the cabin: yes. Wood storage is kind of a nuisance, and makes me wish I had more stowage space. Mill ends are neat, but I believe I linked above to an article about their hazards (dang); harvested firewood will need to be mostly kept in a covered place outside with just the current inventory in the cabin.
Below freezing use: no problem. My boat is 44′ and this heats well.
Warm after 8 hours: not in my experience… I am willing to believe that it might be possible with practice, however, though that is pushing it (from my years with daily use of other wood stoves).
Dirty outside: I have not had a problem with that. The smoke head is on the extension pipe, and I tie the boom off to the other side.
Hello, Kai…
Glad you like the window idea! I did in fact go with neoceram… a 6-inch disc, 3/16″ thick. My only issue has been that with cooler/casual/decorative fires instead of serious hot ones, it blackens with soot. Fortunately, that is easy to clean… no need to buy the special stuff that is available; just use a crumpled wad of newspaper, moisten it, pick up some of the ash in the bottom of the stove, and give it a quick scrub followed by a wipedown with a paper towel.

Hi, I am interested in installing the “sardine” model wood stove in my first boat (Fisher37). I am concerned about sparks exiting from the chimney and setting my neighbours’ (or my own) sails on fire. Does the spark arrestor (smoke head) completely stop sparks or do you have to be very selective about your solid fuel. Cheers, Glenn
HI Glenn – I have never seen any issues with that except for a little sparkly feistiness during startup (but nothing that would be able to ignite nearby fuels). The Sardine is a sweet unit!
Leave a Reply Cancel reply
You must be logged in to post a comment.
- Tree Planting
- ECODesign 2022
- Our Online Brochure
- The Hobbit Stove
- The Hobbit SE
- Little Range Cook Stove
- Installation Kits
- Extra Flue Parts
- Stove Extras
- Stovetop Kettles
- Spares and Maintenance
- Case Studies
- Small Stoves in Fireplaces
- Tiny Homes on Wheels
- Shepherds’ Huts
- Cabins and Studios
- Canal Boats
- Yurts and Tents
- Horse Boxes
- Mobile Homes
- Small Spaces
- Vehicles & RVs
- Small stoves in vehicles
- Small stoves in tiny spaces
- Small stoves in fireplaces
- Off-grid living
- Customising your small stove
- Installing a small stove
- Small stove accessories
- Small stove news
- Cooking on a small stove
- Free small stove cookbook
- Fuel for small stoves
- About our small stoves
- Manuals and documents
- Unpacking your Hobbit stove
- Lighting your small stove
- Using your small stove
- Cleaning and maintenance
- Tree Planting Scheme
- Eco Design 2022
- Accessories
- Authorised Dealers
- Our Case Studies
Touchstone Canal Boat

Canal boats due to their space management challenges have become a familiar home for a Hobbit stove. Either in the main lounge or fitted in the back cabin, the compact proportions of the little stove make it a more suitable solid fuel heating solution than bigger stoves such as the Morso 1410.
The Hobbit is now installed by boat builders and individual boat owners alike who want to max out the space they have and find the stove fits where others will not.
In response to greater calls for boat safety regarding the installation of solid fuel stoves Salamander stoves have developed a complimentary stove flue kit to facilitate installing the little stove in accordance with the code of practice BS 8511:2010, which requires the flue exiting the cabin to be twin wall insulated.
Additional Information
Colin, a keen boater on the K&A canal, installed a Hobbit stove in 2013 using the flue kit. Colin and Nicola had a cupboard at the front of their livaboard boat ‘Touchstone’™ which they wanted to replace for the added warmth it would give to the front cabin by having a stove fitted there. The problem, that whilst the solid fuel range fitted in the galley of the boat was great, it did not provide the comfort, focus and warmth supplied by a solid fuel stove with a big picture window. Colin documented the fitting in pictures and the job was finished in a day. The pictures show the various components used with the twin wall pipe exiting through the 3 slice cast iron deck flanges, which in turn are covered by the powder coated cover. The removable twin walled top section has an attachable rain cap. All of these components are also powder coated for a great looking finish and longer life.
- A small cast iron stove traditionally styled with brass or chrome fittings
- Galley rail and back boiler options.
- Installation kits to BS8511:2010
This British Standard code of practice was published by BSi in Feb 2010 and came into effect in Feb 2011. The code covers appliance selection, design considerations, installation requirements (including chimney arrangements), inspection and testing, and necessary safety information concerning maintenance and the safe use of solid fuel appliances on boats. A summary of this code can be seen below.
The Solid Fuel Technology Institute (Soliftec) have produced some simple guidance which describes what installing to the new BSi code means in practice
Click here for Canal Boat Stove additional instructions
Boat Flue stove Guidance PDF
The Canal Boat Safety Scheme
The Boat Safety Scheme (BSS) was established by British Waterways and the Environment Agency to promote all aspects of safety on boats on inland waterways.
The BSS website contains a great deal of information on all aspects of safety in respect of boats, their installations and components. Click here to link to BSS website
Our Hobbit Stove Has Been Fitted!
"We had a Hobbit stove fitted this week by Alex Reay from Flues and Fires, and I just wanted to get in touch to say it is AMAZING and we love it! We have a lovely cast iron tiled fireplace which I was desperate not to lose when we installed a small wood burning stove, but until I found the Hobbit on Google, everyone told me it would be impossible to keep the fire surround. The Hobbit is perfect - not only does it fit very snugly, but it looks fantastic and the blue door complements the tiles very nicely. We are sitting enjoying a fire now and absolutely loving it! Thanks for creating such an amazing product."
Nicola Williams

The Best Stove Ever!
"It’s the best stove ever! It’s easy to light, very efficient, burns anthracite and stays in overnight (ours has been in for three weeks now). It even keeps a kettle of water at the ready for a cuppa! What more can I say, we love it! Just the thing to make our Yorkshire home cosy, and the cat loves it too!"
Lynn and Andrew, West Yorkshire

First Small Stove Installation
Was looking for a small stove for my first self-install. Found Mark very helpful. Knowledgeable, friendly service. Stove burns well and generates lots more heat than the previous open fire. What is not to like?

A Huge Thank You!
"Dear Mark and Gill, a huge thank you for designing and making the Hobbit stove! We had two different London-based fireplace companies tell us that we simply had to knock out the old cast iron and tile fireplace to fit in a woodburning stove, and that there was no other option! Then we found you online. We are delighted with our little Hobbit, which swallows up logs and kicks out a good amount of heat. Perfect for the winter! I will also be writing to the London-based fireplace companies to put the Hobbit on their radar. Best wishes."

Delighted With Our Hobbit Stove!
"Mark, Gill, thank you for your assistance, we are delighted with our Hobbit! I fired it up this evening after taking all afternoon making a register plate to fit the opening."

It's Brilliant!
"Hi Mark, here's a photo of the Hobbit installed in my Yorkist grate. It’s brilliant! It also throws out a lot more heat than the grate did."

Just to Say Thank You!
"I just had a chat with Gill saying how delighted we are with our little Hobbit stove, and to also thank you both for your attention to detail and excellent customer service!"

The Little Hobbit Has Stepped Up To The Challenge!
"We just wanted to say how impressed and how much of a life saver our little Hobbit has been! It was fitted a few months ago in our holiday home in Rhu, Scotland, which is a large open plan conversion in a Victorian house. This weekend our boiler decided it was not going to play ball. The little Hobbit has stepped up to the challenge, providing heat to a very large area, about twenty eight foot by twenty four foot with a high ceiling of about eighteen foot, keeping the room reasonably warm, warm enough for us not to use cardigans!”

Very Pleased With Our Hobbit!
"We are very pleased with the stove and think it looks great! We restored our fireplace (it was hidden under plaster!) and the whole look is better than we hoped!"

Absolutely Delighted!
"Just had our Hobbit SE installed in our Victorian fireplace and we are absolutely delighted with the end result. We felt passionate about preserving our lovely fireplace!"

Our Pride And Joy!
"What a fantastic fireplace with the beautiful Hobbit stove. It fits perfectly into the small space and throws out a lot of heat. Here's a photo of our little stove, now our pride and joy and much admired by all who see and feel the warmth."
Chris and C

"Just to bid you all a Happy New Year and to say how much we’re enjoying having our Hobbit stove! It was easy to fit with the help of your excellent ‘how to’ videos and we’re just awaiting our inspection by building control for the certification. The Hobbit has fitted neatly into the hearth vacated by the old gas back boiler (with a little cosmetic rendering) and never ceases to surprise us how much heat it can deliver to the point that the new condenser boiler is having an easy life, thereby saving us on gas bills too! Everyone loves having a ‘real fire’ in the living room."
Philip Baird

A Brilliant Little Wood Burner!
"The stove we bought from you is really starting to come into its own as the weather cools down. Here is a photo showing how much one of our dogs is enjoying it!"

Brilliant Product!
"Just wanted to share a picture of our newly installed Hobbit. Absolutely delighted with it, and so pleased we were able to retain our existing fireplace as well. Brilliant product, thank you!"
Sign-up to our email newsletter to receive the latest news and offers from Salamander Stoves.
We never sell on our data, please view our privacy policy for more information.
Always here to help...
If you have any questions or simply want to talk through your options, please give our friendly team a call.
Tel: 01626 363507 | 01626 333230
Ph. 360 298 4623 / West Coast USA Time Zone / [email protected]
BURN WOOD PELLETS / " Drop In" pellet burner coming soon.
Please check our current build list status HERE .
enter stove site
Navigator Stove Works - Traditional stoves for Land and Sea - Orcas Island, Wa. USA copyright 2022 NSW, LLC., all rights reserved.
636-528-9443
[email protected], 521 main street.
Troy, Missouri 63379
Welcome to Hechlers.com
Your Fireplace Design Center

Starting now, Sale on Hearthstone Stoves
See our Sales & Specials Page
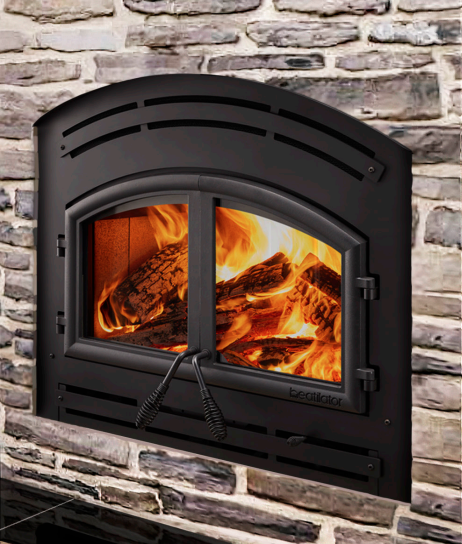
Heatilator Constitution Wood Firepl
Hargrove Cimarron Timbers Vent Free
- Decorative Wood Fireplaces
Heatilator Accelerator Wood Firepla
Empire Boulevard Vent Free Gas Fire
Electric fireplaces, online parts store, sales & closeouts, fireplace inserts, fireplace mantels, fireplace doors, flues, venting liners, parts & solutions, welcome to hechler’s mainstreet hearth & home.
Welcome to Hechlers.com, the online showroom for Hechler’s Mainstreet Hearth & Home in Troy, Missouri. Our 7,000 square foot showroom hosts an inviting array of traditional and contemporary designs. We have wood burning stoves, wood burning fireplaces, wood burning fireplace inserts, wood burning furnaces and outside wood furnace heaters. We have one of the largest displays of cast iron, soapstone and steel wood burning stoves for sale in stores in the St Louis area. Hechler’s also offers pellet stoves, pellet fireplace inserts and pellet pipe and repair parts. Hechler’s also has a large selection of electric fireplaces, electric fireplace inserts by Dimplex and Amantii. We offer installation of wood burning stoves and fireplaces.
We service the areas of St. Louis, St Charles, Lincoln, Warren, Pike, Montgomery, Franklin and Ralls counties. Many of our stoves and fireplaces are in homes in O’Fallon, St. Peters, Wentzville, New Melle, Chesterfield, Defiance, Lake St. Louis, Warrenton, Washington, Hannibal, and Bowling Green Missouri. We also serve the Columbia, Fulton, Mexico and Centralia areas of Missouri with fireplaces, inserts and stoves.
JavaScript seems to be disabled in your browser. You must have JavaScript enabled in your browser to utilize the functionality of this website.
You have no items in your shopping cart.
Wood Cook Stoves & More!
Our wood burning cook stoves come from the best known manufacturers in Italy, Spain, and UK and offer top notch durability, style, and quality. These stoves will heat up 2000-5000sf depending on the model, the space layout, and house insulation.
All videos posted on product pages come from our customers!

Wood Cook Stove La Nordica "Rosa Sinistra Reverse": 2 Colors

La Nordica Milly Wood Burning Cook Stove

La Nordica "Alaska" Wood Cook Stove

"Regina" Wood Burning Cook Stove by Corisit. 3 Options

"Rosa XXL" Wood Cook Stove by La Nordica

"Clasica" Cast Iron Wood Cook Stove by Lacunza

Wood Cook Stove La Nordica "Rosa Maiolica"

"Rustica" Wood Cook Stove Kit for DIY Masonry Heater

"America" Wood Cook Stove by La Nordica

"Rosa L" Wood Cook Stove by La Nordica

"Rosa Reverse" Wood Burning Cook Stove by La Nordica

Tiny Wood Cook Stove Range by Salamander Stoves

Wood Burning Cook Stove La Nordica "Rosa XXL Pietra"

Wood Burning Cook Stove La Nordica "Rosa XXL Maiolica": 2 colors

Wood Burning Corner Fireplace "Palma"

Refractory Wood Burning Fireplace "Ecomax Tondo 105"

Wood Burning Fireplace Insert with Cast Iron Walls "Ghisafort A90"

Masonry Wood Burning Fireplace "Ecomax A90"

Outdoor Wood Burning Stove

Asaparri 365+ With Lid
IMAGES
COMMENTS
The Dwarf 3kW. Our smallest stove, the Dwarf 3kW, is a great option for smaller boats and milder climates where less heat is required. The compact size is perfect for fitting in tight spaces. The tall firebox, airtight controls, and secondary burn technology give the Dwarf 3kW stove the longest burn time in the 3kW size.
Wood Stove Heating For Sailboats. Within the first 5 minutes of this video, there are several ideas that might be helpful to heat a sailboat for cool or cold weather. The rest of the video tells how to install a wood stove, similar, possibly, to what the good Captain Slocum might have used. At the end of the video, Rebecca explains why the ...
Mini wood stove designed to heat boats, cabins and RV's up to 40' long. Produces 6000 to 14000 BTU's! Measures only 11 x 12 x 10.5! Eco-friendly. Much safer than a diesel or propane heater. Durable! Constructed from laser cut steel plate 1/8 to 3/16 thick! Easy to install and easy to operate!
Formally of Brooklyn, N.Y., and now based on Orcas Island, Navigator produces three compact wood-burning, cast-iron stove models for use on land and at sea. Originally designed for use aboard boats, the scaled-down stoves are also popular for cabins, RVs, and other small structures on terra firma. Two of the Navigator stove patterns-the Sardine ...
Most folks installing a wood stove in an boat are going to be limited on space. Therefor, building a wall mounted heat shield tends to make the most sense. This will allow you to reduce clearance requirements for the stove and single wall pipe down to only 6" from any part of the stove or pipe to nearby combustible materials protected by the ...
Specifications And Features. The Little Cod wood stove is a robust and compact marine stove, crafted from high-quality cast iron. Its sturdy construction ensures durability and efficiency, making it a reliable heating solution for boats and small cabins. Height: 11.375 inches (28.5 cm) to top of cook surface, 13 inches (33 cm) to top of sea rail.
Frozen Orchids won't keep you warm! One step closer to being ready for the cold was to install the tiniest marine wood stove we could find on our sailboat.
So we went and installed a wood burning stove onto our 40yr old sailing boat that we live on. It's a brilliant little stove from a company called 'Cubic mini...
To prepare our sailboat Dawn Treader for the cold and damp of Patagonia, we installed a small wood burning stove made by Cubic Mini.Music by: Lemont. Find ...
Mini wood stove designed to heat boats, cabins and RV's up to 40' long. Durable! Constructed from laser cut steel plate 1/8 to 3/16 thick! Produces 6000 to 14000 BTU's! ... The Cub Wood Stove is Cubic Mini's first wood burning stove. It's birth was inspired by one too many cold, damp nights in a boat. Our Cubic Mini creator built this stove ...
- Great For Smaller Boats or Sleeping Cabins Aboard Larger Vessels. - 2/3'rds the size of the "Little Cod", similarly constructed. ... I am pleased with the way my Sardine Wood Stove heats my trailer on cold nights. By using hardwood I can keep a nice bed of coals burning for about four hours. The stove top works great for making oatmeal in the ...
Sail south. Fully insulate you sailboat. Use a forced-air furnace. Try a reverse cycle air conditioner. Get some electric heaters. Rely on hydronic heat. Warm up with a heating stove. If you have yet to hear about some of these heating options, keep reading. In this article, we'll discuss each heating method in-depth, including some practical ...
Homemade Wood Stove For a Small Boat. 6 inches wide by 6 inches high (excluding feet) by 8 inches deep. Out here on the 'Wet' Coast, specifically in the Lower Mainland of British Columbia, keeping the cabin of your boat warm and toasty makes for a better boating experience. A wood stove is a great solution, but marine wood stoves are costly.
Sardine Wood Stove Review: A Tiny Stove For Boats And Other Marine Vessels. The Sardine Wood Stove is one of three wood-burning stoves created by Marine Stove. It's a 2 - 5 kW (7,500 - 18,000 BTU) tiny wood stove with dimensions of 12 x 12 x 11 inches (30 x 30 x 28 cm) and weighing only 35 lbs (16 kgs). The other two models that Marine ...
Great job Steve! Great stove!.I am an Italian liveaboard, for 4 years in Venice (freezing cold and humid in winter) and always heating my days and night with an old wood burning stove. It makes the difference aboard. All my best and sincere compliments for your useful blog I am definitely linking your blog to mine.
The Halibut Cookstove is a solid-fuel marine stove designed for heating and cooking. It's made of heavy cast iron with a bronze sea rail. The stove has an oven, firebox, glass window in the door, and a shaker grate. It uses solid fuels like wood and coal, and can output 25-35,000 BTUs of heat. The Halibut is suitable for boats, small cabins ...
We are preparing for cold weather sailing in Patagonia, and review the options on how to heat a boat to stay warm while we liveaboard Sv Brick House. Who wou...
Colin, a keen boater on the K&A canal, installed a Hobbit stove in 2013 using the flue kit. Colin and Nicola had a cupboard at the front of their livaboard boat 'Touchstone'™ which they wanted to replace for the added warmth it would give to the front cabin by having a stove fitted there. The problem, that whilst the solid fuel range ...
Navigator Stove Works,Inc. manufactures traditional cast iron & porcelain enameled MARINE STOVES for Sea and Land ... 360 298 4623 / West Coast USA Time Zone / [email protected] . BURN WOOD PELLETS / " Drop In" pellet burner coming soon. Please check our current build list status HERE. enter stove site . Navigator Stove Works ...
We have one of the largest displays of cast iron, soapstone and steel wood burning stoves for sale in stores in the St Louis area. Hechler's also offers pellet stoves, pellet fireplace inserts and pellet pipe and repair parts. Hechler's also has a large selection of electric fireplaces, electric fireplace inserts by Dimplex and Amantii.
Though, EPA-certified wood burning stoves combine the high efficiency of a free-standing stove with the compact setup of a traditional fireplace. These types of stoves are fashioned into the wall and look like you might expect a typical fireplace to look. Lucky for you we have many wood stoves for sale including that indoor wood burning stove ...
Our wood burning cook stoves come from the best known manufacturers in Italy, Spain, and UK and offer top notch durability, style, and quality. These stoves will heat up 2000-5000sf depending on the model, the space layout, and house insulation. All videos posted on product pages come from our customers!
Best burning practices can be used to improve the heat efficiency of the stove and reduce the amount of smoke from your chimney. Follow these steps for a cleaner-burning stove and use the links in the Videos and Resources for methods to improve the operation of your stove. Household trash, including cardboard, plastics, foam, or colored ink on ...