Standing Rigging (or ‘Name That Stay’)
Published by rigworks on november 19, 2019.
Question: When your riggers talk about standing rigging, they often use terms I don’t recognize. Can you break it down for me?
From the Rigger: Let’s play ‘Name that Stay’…

Forestay (1 or HS) – The forestay, or headstay, connects the mast to the front (bow) of the boat and keeps your mast from falling aft.
- Your forestay can be full length (masthead to deck) or fractional (1/8 to 1/4 from the top of the mast to the deck).
- Inner forestays, including staysail stays, solent stays and baby stays, connect to the mast below the main forestay and to the deck aft of the main forestay. Inner forestays allow you to hoist small inner headsails and/or provide additional stability to your rig.
Backstay (2 or BS) – The backstay runs from the mast to the back of the boat (transom) and is often adjustable to control forestay tension and the shape of the sails.
- A backstay can be either continuous (direct from mast to transom) or it may split in the lower section (7) with “legs” that ‘V’ out to the edges of the transom.
- Backstays often have hydraulic or manual tensioners built into them to increase forestay tension and bend the mast, which flattens your mainsail.
- Running backstays can be removable, adjustable, and provide additional support and tuning usually on fractional rigs. They run to the outer edges of the transom and are adjusted with each tack. The windward running back is in tension and the leeward is eased so as not to interfere with the boom and sails.
- Checkstays, useful on fractional rigs with bendy masts, are attached well below the backstay and provide aft tension to the mid panels of the mast to reduce mast bend and provide stabilization to reduce the mast from pumping.
Shrouds – Shrouds support the mast from side to side. Shrouds are either continuous or discontinuous .
Continuous rigging, common in production sailboats, means that each shroud (except the lowers) is a continuous piece of material that connects to the mast at some point, passes through the spreaders without terminating, and continues to the deck. There may be a number of continuous shrouds on your boat ( see Figure 1 ).
- Cap shrouds (3) , sometimes called uppers, extend from masthead to the chainplates at the deck.
- Intermediate shrouds (4) extend from mid-mast panel to deck.
- Lower shrouds extend from below the spreader-base to the chainplates. Fore- (5) and Aft-Lowers (6) connect to the deck either forward or aft of the cap shroud.
Discontinuous rigging, common on high performance sailboats, is a series of shorter lengths that terminate in tip cups at each spreader. The diameter of the wire/rod can be reduced in the upper sections where loads are lighter, reducing overall weight. These independent sections are referred to as V# and D# ( see Figure 2 ). For example, V1 is the lowest vertical shroud that extends from the deck to the outer tip of the first spreader. D1 is the lowest diagonal shroud that extends from the deck to the mast at the base of the first spreader. The highest section that extends from the upper spreader to the mast head may be labeled either V# or D#.
A sailboat’s standing rigging is generally built from wire rope, rod, or occasionally a super-strong synthetic fibered rope such as Dyneema ® , carbon fiber, kevlar or PBO.
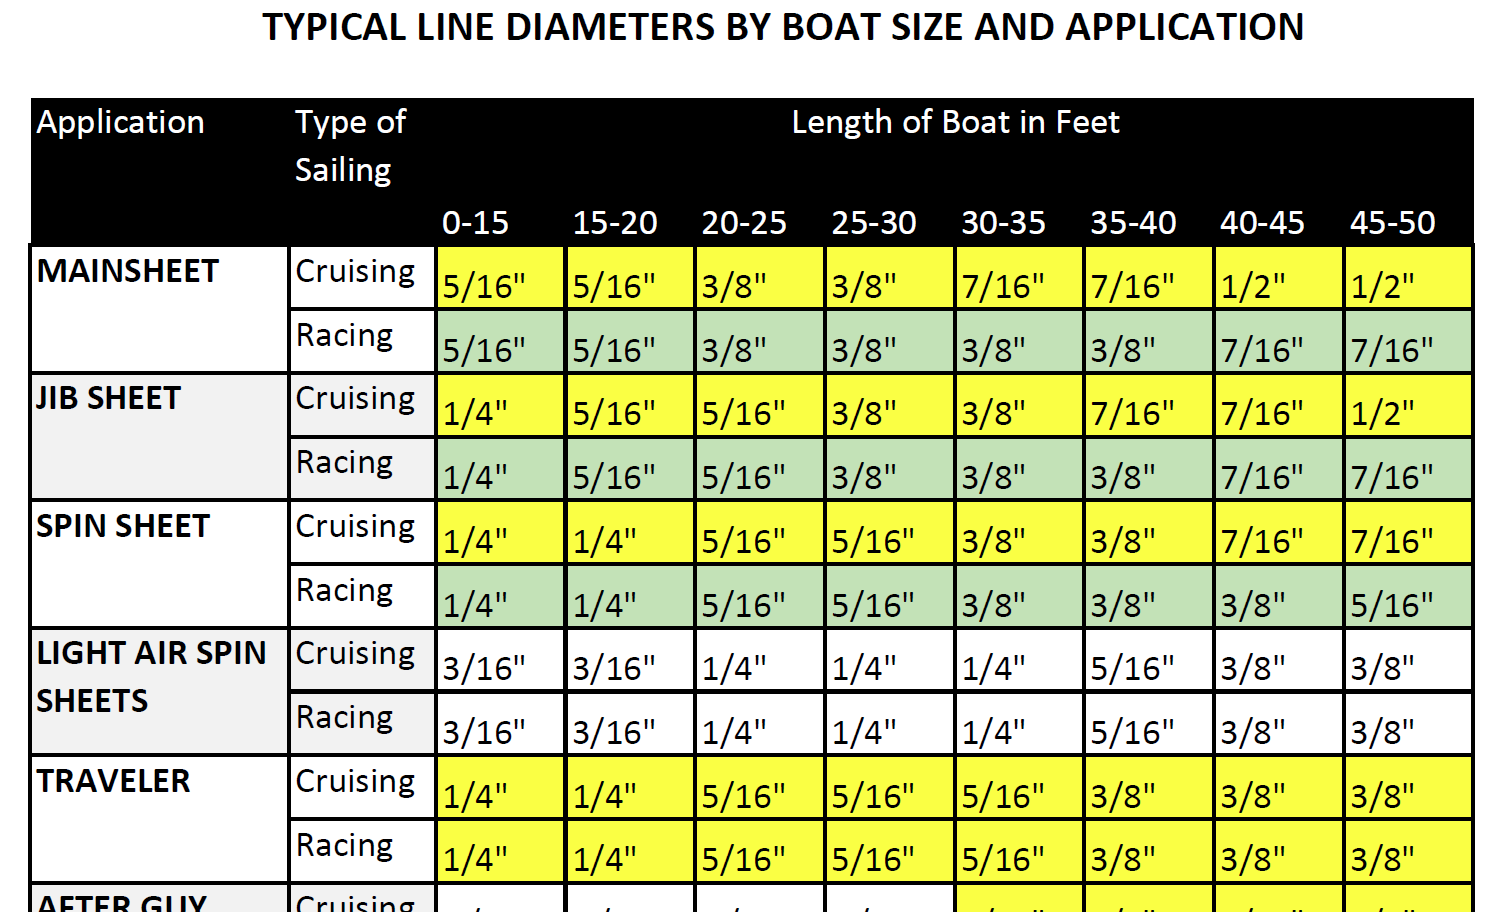
- 1×19 316 grade stainless steel Wire Rope (1 group of 19 wires, very stiff with low stretch) is standard on most sailboats. Wire rope is sized/priced by its diameter which varies from boat to boat, 3/16” through 1/2″ being the most common range.
- 1×19 Compact Strand or Dyform wire, a more expensive alternative, is used to increase strength, reduce stretch, and minimize diameter on high performance boats such as catamarans. It is also the best alternative when replacing rod with wire.
- Rod rigging offers lower stretch, longer life expectancy, and higher breaking strength than wire. Unlike wire rope, rod is defined by its breaking strength, usually ranging from -10 to -40 (approx. 10k to 40k breaking strength), rather than diameter. So, for example, we refer to 7/16” wire (diameter) vs. -10 Rod (breaking strength).
- Composite Rigging is a popular option for racing boats. It offers comparable breaking strengths to wire and rod with a significant reduction in weight and often lower stretch.
Are your eyes crossing yet? This is probably enough for now, but stay tuned for our next ‘Ask the Rigger’. We will continue this discussion with some of the fittings/connections/hardware associated with your standing rigging.

Related Posts
Ask the Rigger
Do your masthead sheaves need replacing.
Question: My halyard is binding. What’s up? From the Rigger: Most boat owners do not climb their masts regularly, but our riggers spend a lot of time up there. And they often find badly damaged Read more…
Selecting Rope – Length, Diameter, Type
Question: Do you have guidelines for selecting halyards, sheets, etc. for my sailboat? From the Rigger: First, if your old rope served its purpose but needs replacing, we recommend duplicating it as closely as possible Read more…
Spinlock Deckvest Maintenance
Question: What can I do to ensure that my Spinlock Deckvest is well-maintained and ready for the upcoming season? From the Rigger: We are so glad you asked! Deckvests need to be maintained so that Read more…
How to Tune a Sailboat Mast
Here are some general guidelines for tuning your mast’s standing rigging . please see our blog on how to properly adjust a turnbuckle before you begin. as always we recommend seeking the advice of a professional rigger for more specific tips and tricks regarding tuning your boat’s rigging..
Your boat must be in the water. Begin by just slacking off all of the side shrouds as evenly as possible, so that all stays can be adjusted by hand. Once loose, try and adjust all turnbuckles so that they are pretty much equally open (or closed) from port to starboard respectfully. Also go ahead and line up the cotter pin holes (if present) in the studs so that they are in a pin-able position. Now is also the time to balance out the threads, between the upper and lower studs of the turnbuckle, IF they are not even. Do this by unpinning the turnbuckle from the chainplate – BE CAREFUL HERE – to ensure the mast is secure before unpinning any one stay. Lastly, loosen all halyards or anything that may pull the mast to port, starboard, forward or aft.
1. Check by sighting up the backside of the mast to see how straight your spar is side to side. You can take a masthead halyard from side to side to ensure that the masthead is on center. Do this by placing a wrap of tape 3′ up from the upper chainplate pin hole on each upper shroud. Cleat the halyard and pull it to the tape mark on one side, mark the halyard where it intersects the tape on the shroud. Now do this to the other side, the mark on the halyard should also intersect the tape similarly. Please note: when the mast is equipped with port and starboard sheaves, instead of just one center-line sheave, it will appear slightly off to one side. Just keep this in mind……
2. Using the upper shrouds as controls, center the masthead as much as possible using hand tension only. Some masts are just crooked. If yours is(are) crooked, it will reveal itself when you loosen all of the stays and halyards initially and sight up the mast. Although you should use hand tension only, you can use a wrench to hold the standing portion (the stay portion) of the turnbuckle. If for some reason the shroud is totally slack and you still can’t turn the turnbuckle by hand then the turnbuckle may need to be serviced, inspected, and maybe replaced.
3. Tune the mast from the top shroud on-down, making sure the mast is in column. Remember: as you tension one shroud by adjusting the turnbuckle, to loosen the opposing shroud the same amount.

4. Once the mast is fairly straight from side to side, tighten the shrouds all evenly using tools for tensioning. Typically, for proper tension, the shrouds should be tightened using these guidelines; uppers are the tightest, and then fwd. lowers, then the aft lowers and intermediates should be hand tight plus just a turn or two. ~ With an in-mast furler it is recommended to tension the aft lower a bit more to promote a straighter spar (fore and aft) for better furling.
5. Now you can tension the aft most backstay (s). If the backstay has an adjuster it should be set at a base setting (500-1000 lbs). If the backstay simply has a turnbuckle then it should be tightened well. After this has been done, in either situation (adjustable or static backstay), one should site up the mast from a-beam and notice that the masthead has a ‘slight’ aft bias. If there is no aft bias, too much, or the mast is inverted (leaning forward), then the forward most forestay (s) will most likely need to be adjusted to correct this. If a furler is present then seek the council of a professional rigger or refer to your furler’s manual for instructions on how to access the turnbuckle if there is one present.
6. Finally, sight up the mast one last time and make any necessary adjustments.
7. MAKE SURE ALL TURNBUCKLES AND PINS HAVE COTTER PINS AND ARE TAPED NEATLY TO PREVENT CHAFE!
Read HERE for how to use a LOOS & Co. Tension Gauge!
Here is a little vid from our friend Scott at Selden Masts (click the link then hints and advice for more info) on rig tune…..
[youtube http://www.youtube.com/watch?v=rcCALZ4x6R4&w=420&h=315]
Is your mast fractionally rigged, only has a single set of lowers or is just plain different? Be sure to leave any questions or comments below.
Similar Posts
Annapolis spring sailboat show 2015.
2015 Annapolis Spring Sailboat Show
Views from Aloft
On this day we where conducting a rigging inspection and rig tune. Although it looked beautiful, it was disgustingly HOT! You can see clearly below that in order to remove the mast head sheaves the entire mast head needs to be un-bolted and removed. The sheave pins are hidden inside the mast wall. Slick, but…
Boxing Day…
… December 26th, is also the start of the Rolex Sydney to Hobart Race 2013. This race marks the 68th anniversary for the event; continuing the tradition of racing from Australia’s Port Jackson/Sydney Harbour, south across the Bass Strait, along the east coast of the historic island of Tasmania and into Hobart. [youtube=http://www.youtube.com/watch?v=KhMjlcE_UxQ&w=420&h=315] This epic event has…
Something of a Different Flavor
We don’t usually post about something like wake-skating as it is not really sailing related. Being that this sport gets very little publicity, I figured I’d share. I mean, it is a water sport after all and a pretty impressive one at that. [youtube http://www.youtube.com/watch?v=IKfNf1azEm0&w=560&h=315] Wake skating should win some sort of award as being the most…
A Modern Classic
A beautiful yacht with classic lines and modern technology, “PASHA”. Enough said….. [youtube=http://www.youtube.com/watch?v=nSLTxlz0PIU&w=560&h=315]
We went aloft for a safety inspection after this beautiful Cabo Rico experienced a lightening strike. You can see below that the brunt of the lightening strike was taken by the VHF antenna. Pictured below you will see two head-swivels on a set of Profurl headsail furlers. One with correct hoist and one…
Leave a Reply Cancel reply
Your email address will not be published. Required fields are marked *
Save my name, email, and website in this browser for the next time I comment.
54 Comments
I have a 1965 Alberg 30. On a starboard tack the boat has more weather helm than on a port tack. I have not been able to achieve a balanced helm on either tack. New full batten main, new 150 roller furl genoa.
Other than the boat being evenly ballasted from port to starboard, e.g. holding tanks, fuel tanks, below deck furnishings, and storage items, I would check the rig from side to side. A crooked mast or poor static tune can result in the boat sailing differently on both tacks. A good way to test this is either sighting up the mast at the dock to ensure that the mast is relatively straight side to side and in column. You can also see that when beating (aka hard on the wind), you have to make adjustment’s to the mainsail sheet tension (NOTE: the traveler will likely need to be adjusted to mirror the same setting as on the previous tack). If notice that with the traveler in the same position on each respective tack that the sail is bubbling or flogging more on one tack than on the other, it is likely necessary to re-tune the mast. This can be done at the dock by following the guidelines in the article once the everything has been appropriately loosened to tension.
Let us know if this helps.
Any Hints, tips for tuning a 1977 Whitby 27 sloop 1/4 ton rig?
Nothing special that I can think of. Just follow the guidelines in the article. From what I can gather there are only a single set of lowers correct? Are the spreaders aft swept at all or just straight out? If it is single lowers and no sweep to the spreaders you’ll need to set the rake using the forestay adjustment to set the rake and the backstay to control the forestay tension. If you are interested in optimizing sail tuning, like in racing situations: higher wind sailing conditions will desire more tension on the shrouds, a bit more tension on the lower than the upper, but only slightly; and in lighter winds loosen them up a bit, a tad looser on the lower than the upper.
Hope that helps, and good luck.
How do I tune /2 in rigging. Neither of the loos gaug s are large enough?
Thanks for the question. Yes, I think the Loos gauges only go up to 3/8″ wire. First let me say that a tension gauge is not a must for proper tuning, more for tension recording and also not exceeding max tension which is typically hard to achieve without additional fulcrums or wrench extensions. Having said that, if you know that you need one simply search google for cable tensioning gauges. There are a few others like this one https://www.checkline.com/product/136-3E , pricing is not easily apparent and may be excessive for your needs.
My recommendation is that if you have a good local rigger have them do a static dock-side tune and perhaps sail-tune in the boat’s ideal conditions. Perhaps they can provide a tutorial on their process for you to be able to make rigging adjustments over time.
Hope that helps.
Hi. Nice article. I have a Mirage 27 (the Bob Perry design). It’s a masthead rig with single spreaders and the shrouds on each side come to the same chainplate. I have been tuning so that tension on the lower and uppers is the same and trying to set them so that (as you say) the leeward shrouds are just slightly slack. But how do I induce mast rake? I have a split backstay with a 6:1 purchase on the adjuster; should the mast have rake even with the adjuster off? or do I just haul on it? or should the tension on the inners and outers be different?
HI Michael,
You will need to lengthen the headstay and shorten the backstay. This can be done a few ways either with turnbuckle adjustment or actually shortening and lengthening cables, sometimes you can add or remove toggles also.
Hope that helps!
- Pingback: Buying a second-hand luxury yacht? Here’s what you need to look for - Phuketimes news
I recently purchased a 1988 Catalina S&S 38 and experienced my first launch this season, including stepping the mast and tuning the rig. As we prepared, we found that the Cap Shroud and Intermediate Shroud were clamped together at the four spreader ends. The folks at the yard had never seen that, and I certainly didn’t know why it was there … possibly to keep the spreader ends and shrouds consistent? Anyway, as I am learning how to tune my rig, it seems to me that these clamps would prevent me from tuning the cap shroud and intermediate separately and correctly Thoughts? Should I remove them and re-tune the rig?
So it is a double spreader rig I take it? The upper shroud wire should run freely through the first spreader, or the closest one to the deck, and be clamped at the top spreader. The intermediate shroud wire should be clamped at the lower spreader.
Before stepping, if this was done correctly, both upper spreader and lower spreader should be clamped equal distance from the mast attachment point, when looking at the mast from port and starboard.
In other words, you should measure the distance from where the upper shroud attaches to the mast to the end of the upper spreader and it should be the same distance on the other side, port to starboard. Then the same goes for the intermediate shroud and the lower spreader. The upper shroud should run freely through the lower spreader although it is covered by the clamp, but not actually clamped at the lower spreader, j ust the top one.
If all 4 spreaders are clamped equally port to starboard. You should be good to tune from there. The spreaders should show a slight up angle, to be specific slightly more up at the upper spreader than at the lower, but all of them should be just ever so slightly pointing up. You even want to think about clamping them slightly higher than that before tensioning, as this will pull them down and into their preferred angle, just slightly up. Specific angles are really only determined on the spar builders drawing and vary for manufacturer to manufacturer. Generally it is pretty clear where they want to sit. With the shrouds loose if you find that angle that appears to be the right one, and push them up slightly from there then clamp. This will allow them to be pulled down slightly once tensioned.
Kind of a tricky thing to explain in writing but hopefully it helps.
Have further questions? Give us a call 443-847-1004, or email us [email protected]
I have a Catalina 275 fractional rig with single swept back spreaders and an adjustable backstay. My questions are: how much rake, tension on cap and lower shrouds and on chain plate should cap shroud be forward and lower aft. I am racing and want the best performance. Thanks for any help. Bill
If the two shrouds are on the same plate, right next to each other, and the pin holes are the same diameter, and the plate is configured in a fore and aft configuration, I would choose the aft hole for the lower shroud and the forward one for the upper shroud.
In terms of specific rake, you will need to look towards the maker of your sails and or the boat manufacturer. I discuss how to measure rake in the preceding comments.
“You can measure rake by hanging a small mushroom anchor from the main halyard, with the boat floating on its lines, if you wish”
For racing I would start off with a good static tune at the dock by following the points in the article. If you know it’s going to be light day, start off with light rig tension. Be sure to use either Velcro wrap style cotter pins or simply lash the upper and lower shroud turnbuckles together to secure them. This will give you access to removing the pins or lashing while sailing and adjusting the stays.
From there you will need to sail tune for that days specific conditions, your shrouds will tell you what needs to be tighter and looser. I have answered how to do this a few times already in the comments below, please take your time to peruse the comments section to see what sail tuning entails. Doing this will always ensure that the cable tensions are set up ideally for the conditions and the boat can be sailed at maximum potential.
“For racing, ideally once the static tune at the dock (the part we just talked about) is done, go out and sail tune. Do this by going hard on the wind and checking to see if the leeward shrouds are just starting to dance, this is ideal. If they are swaying about they are too loose for the current conditions. If the leeward shrouds are tight, they may be a touch to tight. Tension and loosen as needed; count what you did and to what shroud, then tack and do the same to the other side.
ALWAYS secure the turnbuckles when you are finished adjusting them.”
Just hit ‘Ctrl F’ and search the page for “sail tune” and “rake”
I am trying to tune a Hallberg Rassy HR36 masthead rig. The rig has two in-line spreaders. The cap shroud is 3/8 inch and terminates at the lower spreader. From the lower spreader, the cable transitions to a 5/16 inch cable passing over the upper spreader to the masthead. A second 9/32 inch cable runs from the lower spreader to the mast (just below the upper spreader). The Selden rigging suggests that the “upper shroud” be at 15 percent of the breaking strength of the cable. In this situation, is it 15 percent of the 3/8 inch lower portion? If so, how should the upper 5/16 inch and 9/32 inch cables be tensioned?
Thanks for your help.
Hi Bryant, good question. Once proper alignment and centering of the spar has happened (static tune), and you are perhaps a hair tighter than hand tight on all shrouds, you can begin to tension things to a percentage of breaking strength. Do this by using the cables at the deck and use their diameters to determine the tensioning amount.
The V1 (aka cap shroud) in your case is a 3/8″ cable which supports the two cables above ii, hence its large diameter. The 5/16 V2,D3 and the 9/32 D2 total 19/32. So if 15% of the 3/8 cable is achieved you will below that threshold for the cables aloft. Does that make any sense?
With that in mind there is a range of acceptable tension from light air to heavy air. 15% sounds like a good middle of the road tension. Generally you do not want to exceed 30%. Sail tuning in ideal conditions is generally the best way to determine the right tension, but 15% of breaking strength sounds like a good place to start.
Don’t forget your cotter pins and tape, especially aloft.
Hope that helps and thanks for the question.
T.R.C. Thanks you for the clarification regarding the V2,D3 and D2 load distribution. When I set the V1 tension to 15%, the tension on the V2,D3 was at 8 %. I then tensioned the forward shroud to 12 % and the aft shroud to 10 %. Then I tensioned the backstay to 14 %. After doing this, I measured the tension on the V1 to be 10 %. The only information I could find regarding tension on the D2 was that is did not have to be tensioned much. I tensioned it to 5%. The mast sights straight and I used a bossen seat on a halyard to measure to the lower part of the V1, which also indicated that the mast was straight. Did I overtension the fore and aft stays? Is the tension in the D2 too much or too little? Again, I appreciate your advice.
When you tighten the backstay it usually induces a bit of aft bend in the mast which will soften the upper shroud (V1) a bit. You can just take up on it again to get it back to 15% if you like. As I said there is a acceptable range for all of the stays, which you are well within. Everything else sounds like you did a pretty good job. Next up sail tune and see if there is excessive waggling on the leeward side, but in moderate breeze. The shrouds will begin to sway as the breeze builds, this could be a telltale to either reduce sail a bit or you can add some tension to the shrouds all the way around.
Should be all good as they say.
Cheers, ~T.R.C.
T.R.C., your advice has been invaluable. I took her out in 12-15 knots and was very happy with the sail luff and stiffness of the rig. Thanks for you help!😁⚓️
Hi , can you provide any tuning guides for a Swan 38 Tall mast single spreader rig with baby stay, I am keen to set the rig up for new North sails and race her competitively. The mast is an exact Nautor factory replacement in 1998. She shall not have furling sails.
Hi Peter and thanks for the comment.
Unfortunately we do not have a guide for that boat. I would ask the sailmaker however to see what info he or she might have. Alternatively you can always start with a good static tune and then sail tune the boat as I describe in some of the comments below. This is the best way. I may use a Swan 45 Tuning guide as the template and then just fill in my own numbers over time. This is ideal, but infidelity start with asking the sailmaker you are working with, he should have some good info.
This may seem like a silly question, but it has me perplexed. How long should my cotter pins be? Long enough to ‘jam’ against the surrounding body, to prevent rotation? Otherwise, I don’t see how they’ll prevent my stays from loosening.
The length should be the minimum amount to just be able to bend the legs. Too long and they get caught up on things, too short and you can’t adequately bend the legs to keep the pin in place. The head of the pin is a actually providing the security.
Does that help?
Great article to get me started, thanks! I just have a few questions…
I originally owned a Tanzer 7.5. Her mast was rigid and simple to tune with a LOOS and an eyeball. I however now own a Mirage 33 (1982) and things are a bit more complex (but not too much). When I bought her the mast was already stepped and the owners said they replaced the forestay (inside the furler) 1 season ago. I went about the boat tuning the rig as best I could but I started second guessing the rake. I found noticeable rake in the mast with virtually no backstay tension on. So I think my forestay stretched (being “new”) and I need to bring it forward.
How do I measure how much rake (at rest on the tensioner) is enough? With my rig as is I felt worried that if I pulled down on the backstay tensioner I might buckle my mast by bending it too far. It seems to me it’s ALOT of downward pressure on the column when you pull down on her especially if the mast was already raked or maybe in my case leaned too far back to start? She has a babystay too, I wasn’t sure how far to tension that other than to assist adding bend\rake but since I had too much already I just lightly tightened it and hoped for the best!
Thanks for the question. With the backstay tensioner completely off, you should be able to adjust the static/ base tension of the backstay with a turnbuckle (s). Loosen the Baby Stay so that it is completely loose, sloppy, to take it out of the equation. Then mark furling line spool direction and remove the line. Next, open the furler up to gain access to the turnbuckle inside, if present. Remove all cotter pins or locking nuts to free the turnbuckles on the headstay and the backstay. You should then loosen things so that the headstay and the backstay can be adjusted by hand. Close the headstay turnbuckle and open the backstay turnbuckle to reduce rake, and vice versa if wanting to add rake.
You can measure rake by hanging a small mushroom anchor from the main halyard, with the boat floating on its lines, if you wish. Then once you achieve the desired mast rake go ahead and tension the forestay and backstay a few turns equally with tools; not too tight, but a good base light air setting, or as loose as you can imagine the headstay ever needing to be. Lastly, tension the baby stay a bit until it just starts to tug on the mast, helping induce bend. From here the backstay tensioner will do the rest: wind it on and it will tension the headstay and induce mast bend via the baby stay. You may have to take the boat sailing and adjust things as you find out how it performs at various degrees of rake and bend.
I hope that’s not too wordy, but helps explain it all a bit. Feel free to email or call with further questions.
Regards, ~T.R.C.
Can you provide some specific information regarding rig for 1980 C&C 32. Looking to purchase new main and want to get the most from it for Wednesday nights. Boat currently does not have a pony stay, it has been removed. Can replace that track/car. What should initial bend look like, keel step is fixed so assume I need to some chock aft of mast at deck? Have rod rigging but no Loos gauge for same, should I acquire one? Love this site, very helpful RayK
Thanks for the compliment. This may be less technical than you might expect. I would start with the basic guidelines given in the article to ensure a good base, static tune setting. A Loos gauge is good but not needed. If you focus on getting the spar straight, side to side, with a slight aft bias and then the tension is set so that it feels fairly tight. I know that sounds vague, but keep this in mind: if you are anticipating heavier wind make things a bit tighter, and loosen things up if less windy. The order of tension, in regards to the which shroud (upper vs intermediate vs lower) is important; more so than the amount of tension. Make sure nothing is so loose it is just flapping about.
The headstay should have some good slack to it with the backstay adjuster totally off. Adjust the backstay and headstay turnbuckles, with them in the slack position until the masthead is favoring a slight aft lean or rake, but only slight. From there, tension the backstay adjuster very tight and see what the headstay tension feels like, should be very tight.
PLEASE NOTE: if the backstay adjustment is totally bottomed out at this point, the backstay needs to be shortened a bit. Just pay attention to how this affects the rake. …
This part is where the pony stay or the baby stay will play a critical part, for mast bend. You may even find the pony stay to be good for mast pumping in light air and waves. Making this baby stay removable is a good idea, as well as, we’ve found that Dynema rope is the best choice here.
So… a centered mast head, side to side. A straight, in column mast from the top on down. A slight aft rake to start with…and as you begin to wind on the backstay and the baby stay you will add some rake but also a good bit more bend.
Take this set up for a few test sails and see how things act, in different conditions. After that you can make some adjustments here and there as needed: weather helm, shroud tension, mast rake, pre bend, etc…Moving chocks and using a Loos gauge.
ADDT’L TIP: Chocks and mast step position affect bend and rake properties. Want more rake? Chock mast aft in collar and move step forward. Want more bend? Chock mast forward in collar and move mast aft. As all things, there is more to it than that, but that’s the gist of the whole chocks and mast step thing…
“Sail Tuning” is a blog we are in the works of, but the punchline is that if hard on the breeze, and the leeward shrouds are excessively loose, and you are sure you aren’t over canvased…then go ahead and take turns on the leeward side until they just stop waggling, count what you’ve done, tack and mirror the turns on the other side.
Once the boat is set up for that specific condition, and you return to the dock, you should take your loose gauge and record these settings…creating a tension gauge setting for various conditions.
Hi, Thanks for your information. I have a Dehler 34. 1986… How much mast prebend and rake is recommended? The boat is new to me in March. Raced ok but I want to get a new main and want it to fit a well tuned mast. What do you think of a 2 degree rake and 4″ prebend at the speaders? Also, I have a Harken furler, How do you measure the forestay tension? Thanks, Duke
The answer, this boat is pretty sporty so it should show some rake. The spreaders are swept slightly aft so this will produce some natural bend just to tension the headstay.
Head-stays are always tough to measure with any sort of gauge, there are some class specific tricks for using a gauge in funky ways in order to get data, but they aren’t really reliable in my opinion. If you live in a typically windy area, go for bit more shroud tension, headstay tension and mast bend, and see how the boat feels. This will take some trial and error. If the forestay feels too stiff, slot too tight, loosen the uppers a bit, thus reducing bend and slackening the headstay.
Once the boat is sailing well in the ideal conditions, record that bend and those tensions. This is where I would leave things set, record it, and then just adjust shroud tension to affect bend and headstay in order to compliment different wind strengths and sea states. It takes quite a bit of back and forth, and documentation to get it right. One designers have already worked all of this out and then they share it for others…..very helpful. The rest of us will have to be the trailblazers for this type of information for other boat owners with the same (similar) boats to benefit.
Hope that helps, thanks for the kind words, and good luck. Once you figure things out post a link here for others with the same boat…..would be helpful.
Hello, Thanks for all of this great info. I just purchased a 37′ boat with a 3/4 fractional rig and a tapered mast. I was wondering if there were any special considerations when tuning the fractional rig? Currently the stays and shrouds are a little loose and can be wiggled (borderline flopping) by hand although the mast stands and is visually centered. (We are in SW Florida and the boat went through a direct hit by hurricane Irma like this and still stands tall!) Also is it advisable to increase shroud tension in small increments first on one side and then do the same on the opposing side? Thanks so much for any info
Hi Nathan. There are some thoughts, so fractional masts are usually fitted with aft swept shrouds and spreaders. If so, this means that the uppers also tension the headstay and create mast bend. The lowers then also act to reduce mast bend, so the tighter you make them you are actually reducing mast curve, thus powering the mainsail up. So be conscious of these two thoughts when tensioning the shrouds. The rest is fundamentally the same as the guide suggests. Loose or wiggling shrouds (excluding the scenario where we are talking about the leeward shrouds under sail), should be tightened. Doing things in increments is definitely a good idea.
Hope that helps. Thanks for the questions.
Thanks!! Now that you say that about the swept spreaders helping create mast bend it makes perfect sense. I had an ‘oh duh’ moment. I’ll probably err on the side of looser lower shrouds knowing if we need more power we can always tighten them up. Thank you again this helped immensely!
I want to buy a tension gage. Most familiar with Loos. But do I need Pt 1 or 2? (Pretty sure I don’t need 3 or Pro.) I have two rigs to tune: a 1972 Morgan 27 and a Catalina 22, I think 73 or thereabouts. The Morgan 27 is mine, fresh water for life, and 99.9% most likely factory wire. The Catalina 22 is a borrower in the Gulf, but pretty sure the owner has never tuned it. My problem is I can’t find the gage of wire for either standing rigging anywhere! Any help?
I think this one will do… https://sep.yimg.com/ca/I/yhst-70220623433298_2270_120385950 . The Morgan is likely 3/16″ wire and the Catalina is likely 5/32″, that’s an educated guess. Hope that helps.
I just purchased a 1980 C&C 40. I was told that I need to replace the rod rigging as it is “too old”. The mast is down and the rod rigging seems ok but I have not done any penetration testing. Does rod rigging need to be replaced due to age? Thanks Rigging Co.
Not replaced, but re-headed. This can mean that some stays need to be replaced as a whole, but not typically not the whole set. There are instances where you’ve almost replaced all of it anyways, so full replacement just makes sense. Other than those scenarios, full replacement is due after a certain mileage with rod…60,000 NM. Please keep in mind these standards are very general recommendations. It sounds like in your case, you should send in the rod, tangs, and chainplates for service and inspection. once we receive everything we will make a quote for the recommended services and/or replacement.
Hope that helps and give us an email for more info.
I have had a problem with securing the spreaders to the shrouds, resulting in the spreaders dropping. I am using stainless wire to seize them but still having a problem. Any tips on how to do this properly?
Seizing the wire onto spreaders with hinged spreaders is a bit of a trick of the trade that requires some practice. We use the X’s and O’s method. The end result should be something that looks like this… https://theriggingcompany.files.wordpress.com/2011/11/2012-06-07_14-26-09_899.jpg?w=900 . A trick to make the wire bite into the spreader end a bit more is to wedge a small piece of leather between the spreader and the wire before seizing. Also parceling and serving the wire where it intersects the spreader will help create more bite too. Lastly, and I don’t like this method but you can install a bull dog cable clamp beneath the spreader, nuts facing in, to keep it from dropping when slack.
I hope that helps a little. Thanks for commenting.
I am struggling to get enough rake into my mast. 33 foot Charger 33 keel stepped. Have loosened forestay and moved mast foot forward by about 10 mm. Should the chocks in the collar be adjusted? Runners and 2 spreaders, and check spreader. Spreaders do not have much aft angle. Move mast step more forward? Outers are tight with inners looser. Thoughts?
Hey Bernard,
Yeah, it sounds like chocks are the last thing. Maybe remove the chocks with the rigging slack and see if you can get the mast to sit where you like it with just hand tension. Then chock it where it wants to sit. It sounds like you are on the right track everywhere else, perhaps add a toggle into the headstay and shorten the backstay is next. Good luck and I hope that helps somewhat.
Hi, We have a Lagoon Catamaran with fractional rig, upper and lower shrouds, fore stay and upper and lower diamonds. No back stay. The mast has a degree of pre-bend. I do not plan to drop the mast.
I may have to do some work on the port side upper diamond. Is it as easy as just undoing the turnbuckle? Or do I need to loosen the starboard one at the same time. If it needs replacement should I also replace the starboard one even if in good condition?
As a further question, what happens if a diamond breaks, does it result in mast failure?
You would need to loosen the other counterpart to that stay for sure. It is just good practice, will keep the mast straight, and also make your life easier for removal install. Now, do you replace both? I don’t know. How old is the standing rigging? Why are you replacing the one? If it is not all due for replacement and you are just replacing due to damage, just do the one, but loosen both sides to do this.
Hope that helps and thanks for the visit.
Hello! I recently purchased a keel-stepped 1982 Goman Express 30 which came with an Alado Furler. I have been sailing it since May of this year. My question is this: Despite relocating mast wedges at the cabin roof to bias the lower mast aft about 2″, I still have a pronounced backward bend (10 degrees or so) just above the highest spreader. When sailing on jib alone, most wave action causes the mast to pump right at the bend point. I have a split backstay that is as un-tensioned as possible and the forestay only has another inch of adjustment left. There is no baby stay.
How can I get the bend out of the mast? How concerned should I be that the mast might break at that point?
Thanks in advance for your reply!
Eric Hassam – Delta Flyer
Thanks for taking the time to comment on our site. It sounds like you are on the right track. So one other adjustment that you have is the mast step position. This greatly affects mast bend on keel stepped masts. For a stronger bend and less rake, move the mast butt aft. For more rake and less bend (probably what you need to try), move the mast step forward a bit. If neither of these help, you may be off to have your headstay shortened and this means it is too long. This is likely not the case, but it is a possibility.
Keep in mind….A mast should have a slight aft rake bias along with a small amount of mast bend. This is quite normal. You can send us a picture if you’d like a second opinion on if it is over-bent. Having said all of that, even if you remove all of the mast bend, the mast may still pump. This is a design flaw in many spar designs that lots of end users have experienced. This can be remedied by redesigning the stay lay out. Is there a place for a staysail stay and/ or runner backstays? If so add them. Is there a place for a baby stay? If not, that may be a consideration.
Thanks again and I hope that helps.
Hi, I have a 48 foot yawl with a 7/8 fractional rig, is the tuning procedure the same as a masthead rig? I seem to have trouble getting aft rake and proper headstay tension. Also, is there a particular tension number the upper shrouds should have? many thanks in advance
Hi Bill, thanks for taking the time. 7/8 is very close and I would treat it like a masthead rig, especially if the none of the spreaders are aft swept. Tesnsion the headstay using the backstay(s). This should pull the top of the mast aft. If there are any other forward stays, i.e. stay sail stay, forward lowers, or anything else that could be holding the mast forward, go ahead and loosen those completely. You then may need to tighten the Tri-attic (the stay that connects the top of the mizzen and top of the main) if present. OR if the mizzen needs more rake too, then lossen all forward stays and pull it back using the available aft stays for this as well.
Hope this helps and please email us and send some pictures if you need more help.
I have a 1972 Morgan 27, which has both forward and after lower shrouds. I wish to remove the forward lowers so I can trim a 110% jib inside the stays. I see a lot of boats without forward lowers and think this will work OK, but wonder if I should increase the size of the aft lowers and beef up the chain plates. Any suggestions?
THANKS FOR YOUR INPUT. I AM GOING TO REMOVE THEM ANYWAY AND SEE WHAT HAPPENS. “HOLD MY BEER, WATCH THIS….” FAMOUS LAST WORDS.
Lol! Good luck. Call us if you need assistance.
I have rod rigging on my Beneteau 32s5
Any other guidance on tuning them vs wire rigging
Hi and thanks for commenting.
Just follow the guidelines in the write up. The over all goal is that the mast needs to be straight and in-column when looking at it from side to side.
Fore and aft, the mast should show a very slight lean aft. Depending on whether or not the spreaders are in-line or aft swept; you should also see some slight bend if there is any aft sweep to the spreaders just from the tension of the uppers.
A Rod stay tends to run a bit tighter than wire, so keep that in mind.
For racing, ideally once the static tune at the dock (the part we just talked about) is done, go out and sail tune. Do this by going hard on the wind and checking to see if the leeward shrouds are just starting to dance, this is ideal. If they are swaying about they are too loose for the current conditions. If the leeward shrouds are tight, they may be a touch to tight. Tension and loosen as needed; count what you did and to what shroud, then tack and do the same to the other side.
ALWAYS secure the turnbuckles when you are finished adjusting them.
- Pingback: Tuning a Sailboat Mast | ChesapeakeLiving.com
- Pingback: Rig Tuned | middlebaysailing
Wow, I would hate to be charged by her for three trips up the rig and forget the screw driver the rubber plugs that are sacraficial and replaced everytime removed just to clean the stainless 1×19 rigging.
Username or Email Address
Remember Me
Lost your password?
Review Cart
No products in the cart.
- Privacy Overview
- Strictly Necessary Cookies
This website uses cookies so that we can provide you with the best user experience possible. Cookie information is stored in your browser and performs functions such as recognising you when you return to our website and helping our team to understand which sections of the website you find most interesting and useful.
Strictly Necessary Cookie should be enabled at all times so that we can save your preferences for cookie settings.
If you disable this cookie, we will not be able to save your preferences. This means that every time you visit this website you will need to enable or disable cookies again.
PDRacer.com Cheap, Creative, and Having Fun On The Water
Making Stays / Shrouds for a sailboat mast
There numerous methods for making wire stays for your sailboat. This essay presents a simple method using nicopress ferrule cable clamp fittings which are swaged on using a cheap swaging tool. The toughest part seems to be figuring how how long to make the stays, this essay presents 2 methods.
Method 1 - Measure & Pray
If you are replacing an existing stay on a sail boat, you might have the old one and will know how long it needs to be. Or if you are setting up a new rig, you can use trigonometry or scale drawings to calculate how long your stay needs to be. Make sure to pray a lot while doing your calculations and take into consideration how long your mast & hull connections are like the chain plates and stay adjusters. If you screw up, there are a large variety of variable sized stay adjuster, tangs and stay extenders incase you make one too small.
Mark your wire so that it will be long enough to span the distance, plus go around the timble and back into the ferrules. You can calculate how much extra wire is needed by laying out the ferrules and rolling the thimble along the wire.
Method 2 - Setup & Cut
This is a quick and easy way to make a set of stays. First you need to get a general sense of how long the stay needs to be. Measure the distance from the mast step to the chain plate. Then clamp one end of a measure tape to the mast. Use a 2nd measure tape to get the side distance and presto, you have a good idea how long they are going to be.
Make a set of stays with only one end swaged and attach them to the mast. Setup your mast holding it upright with ropes. The ropes should be tied to the hull much further back than the chain plates so that they won't have as much tension on them. Tie the side ropes to the stern corners if you can, or thru the oar locks.
To hold the wire I use a cable clamp.
Setup your wire on the stay adjusters with their thimbles and ferrules. Use a screw on type cable clamp to hold the wire so you can crimp it. Setup all of the stays this way and take a good look at the rig. Adjust as needed.
I prefer to setup my stays so they are in the 2nd hole down. This allows me to loosen one or the other incase I screwed up and have the mast leaning enough to be noticed. Also it allows for the wire to stretch and gives me room to tighten it down later.
Crimp The Stays
This is a cheap swage-it tool that I purchased, it is just a pair of bars with bolts to create the clamping pressure. The bars have several half moon shapes in them to fit the different sized ferrules.
Here is the finished product, this is the forestay. I like to use quick pins that have a push button. They are kinda expensive so I attach them to the stay adjuster with a little safety wire -- which is crimped the same way the stays are. That way I won't loose them in the drink.
Site Map Articles Members Free PDRacer Plans Contact Shorty Books Search Advertise At PDRacer.com Support the club: Get a HIN Plate or Donate Subscribe To The PDRacer Newsletter
Copyright (c) 2003-2024 David Danes LLC, All Rights Reserved
How to tune your rig for optimal performance
Optimizing the performance of your boat's rigging system is crucial for an enjoyable and safe sailing experience. This guide provides step-by-step instructions for tuning your rig and maintaining your sails.
How to Tune Your Rig for Optimal Performance
Sailing is an art that requires constant learning and adaptation. One of the most important aspects of sailing is ensuring that your boat’s rigging and sails are in top condition. In this article, we will discuss how to tune your rig for optimal performance, ensuring that you and your family can enjoy smooth sailing on your adventures.
Table of Contents
Understanding the basics of rigging, the importance of rig tuning, step-by-step guide to rig tuning, sail improvements for better performance, maintaining your rig and sails.
Before we dive into the process of rig tuning, it’s essential to understand the basics of rigging. The rigging system on a sailboat consists of various components, including the mast, boom, shrouds, stays, and sails. These components work together to provide stability, support, and propulsion for your boat.
Mast and Boom
The mast is the vertical pole that supports the sails, while the boom is the horizontal pole attached to the mast’s base. The mast and boom are critical components of your rigging system, as they provide the framework for your sails.
Shrouds and Stays
Shrouds and stays are the wires or ropes that connect the mast to the boat’s hull. They provide lateral and fore-and-aft support for the mast, ensuring that it remains stable and upright. Shrouds are typically attached to the sides of the boat, while stays are connected to the bow and stern.
Sails are the primary means of propulsion for a sailboat. They work by capturing the wind’s energy and converting it into forward motion. There are various types of sails, including mainsails, jibs, and spinnakers, each with its own unique characteristics and uses.
Rig tuning is the process of adjusting your boat’s rigging system to achieve optimal performance. Proper rig tuning can significantly impact your boat’s speed, handling, and overall sailing experience. Some of the benefits of rig tuning include:
- Improved boat speed and pointing ability
- Enhanced sail shape and efficiency
- Reduced wear and tear on rigging components
- Increased safety and stability
By regularly tuning your rig, you can ensure that your boat is always performing at its best, allowing you and your family to enjoy your sailing adventures to the fullest.
Rig tuning can be a complex process, but with the right knowledge and tools, it’s something that any sailor can learn to do. Here’s a step-by-step guide to help you tune your rig for optimal performance:
Step 1: Inspect Your Rigging
Before making any adjustments, it’s essential to inspect your rigging for signs of wear, damage, or corrosion. Check all components, including the mast, boom, shrouds, stays, and sails, for any issues that may affect your boat’s performance.
Step 2: Set Your Mast Rake
Mast rake refers to the angle of the mast relative to the boat’s centerline. Adjusting the mast rake can have a significant impact on your boat’s balance and performance. To set your mast rake, follow these steps:
- Attach a weight to your main halyard and let it hang freely over the side of the boat.
- Measure the distance from the halyard to the boat’s centerline at the chainplates.
- Adjust the forestay and backstay until the desired rake is achieved.
Step 3: Adjust Your Shrouds and Stays
Next, you’ll need to adjust your shrouds and stays to ensure proper mast alignment and tension. Follow these steps:
- Loosen all shrouds and stays.
- Tighten the upper shrouds until the mast is straight from side to side.
- Tighten the lower shrouds to remove any side-to-side play in the mast.
- Adjust the forestay and backstay to achieve the desired mast bend.
Step 4: Check Your Rig Tension
Proper rig tension is crucial for maintaining sail shape and boat performance. To check your rig tension, follow these steps:
- Attach a tension gauge to your shrouds and stays.
- Measure the tension in each wire, adjusting as necessary to achieve the desired tension.
- Ensure that the tension is even on both sides of the boat.
Step 5: Fine-Tune Your Rig
Once your rig is properly tensioned and aligned, you can make any final adjustments to optimize performance. This may include adjusting your sail controls, such as the outhaul, cunningham, and vang, to fine-tune sail shape and efficiency.
In addition to rig tuning, there are several sail improvements that you can make to enhance your boat’s performance. Some of these improvements include:
- Upgrading to high-quality sails made from durable, lightweight materials
- Regularly cleaning and inspecting your sails for signs of wear or damage
- Using sail battens to improve sail shape and efficiency
- Installing a roller furling system for easier sail handling and storage
By investing in these sail improvements, you can ensure that your boat is always performing at its best, allowing you to enjoy your sailing adventures to the fullest.
Regular maintenance is essential for keeping your rig and sails in top condition. Some maintenance tasks to consider include:
- Inspecting your rigging for signs of wear, damage, or corrosion
- Lubricating moving parts, such as sheaves and blocks, to reduce friction and wear
- Replacing worn or damaged components, such as shrouds, stays, and sails
- Regularly cleaning your sails to remove dirt, salt, and other contaminants
By staying on top of these maintenance tasks, you can prolong the life of your rig and sails, ensuring that your boat is always ready for your next adventure.
Tuning your rig for optimal performance is an essential skill for any sailor. By following the steps outlined in this article, you can ensure that your boat is always performing at its best, allowing you and your family to enjoy your sailing adventures to the fullest. Remember to regularly inspect and maintain your rig and sails, and don’t be afraid to make improvements and adjustments as needed. With the right knowledge and tools, you can transform your boat into a high-performance sailing machine that’s ready to take on the open sea.
What is a Sailboat Mast?

Last Updated by
Daniel Wade
June 15, 2022
A sailboat mast is the towering pole mounted to the deck. It attaches the length of the sail to the boat and supports the shape of the sail.
Sailboat masts are the most distinct feature of sailing vessels, and they hold the sails in place. Masts are often taller than the length of the boat. Most modern sailboat masts are made of aluminum, though traditional boats use wood. Sailboat mast type varies based on what type of sail plan they support.
Table of contents
Parts of the Mast
The mast itself is simply a pole and won't function without several essential parts. Starting from the deck is the mast boot, which keeps water from draining down the mast and into the cabin. The long wires connected to the mast on each side are the stays, and they keep the mast upright under tremendous force. The boom connects to the mast using a gooseneck fitting. Halyard lines, which run to the top of the mast, are used to raise and lower the sail.
Single-Mast Rigs
Single mast sailboats are what most people picture when they think of modern sailing craft. Single mast boats are popular because they're inexpensive to produce and relatively easy to operate singlehanded. The most common kinds of single-mast rigs are sloops, cutters, and catboats.
Sloop rig boats are the most common kind of sailboat today. Sloops feature a single mast mounted somewhere on the forward 3/5 of the deck, but some boat designs differ slightly. Generally speaking, a sloop mast lies somewhere in the middle to the forward-middle of the deck.
Sloop masts are rigged for a large mainsail and a jib. Bermuda-rigged sloops utilize a tall single mast and triangular sail. Gaff-rigged sloops, which are less common, use a much shorter mast and a larger four-point mainsail.
Catboat Mast
Catboats are unique vessels common to New England and feature a forward-mounted single mast and a long boom. Unlike sloop-rigged boats, catboats are only rigged for a single sail. Catboat masts are generally mounted almost at the very front of the boat, and they're often short and quite thick.
Catboats are almost often gaff-rigged. Gaff-rigged sail plans make the most of short masts and are relatively easy to control in a single-mast configuration. Gaff-rigged catboat masts are shorter than Bermuda-rigged boats of similar size but generally taller than similar gaff-rigged craft.
Cutter Mast
Cutter-rigged sailboats feature a tall single mast and multiple headsails. Visually, cutters are easy to mistake for sloops. But the mast of a cutter is usually taller than a comparably-sized sloop, as it utilizes multiple headsails instead of a single jib.
Gaff-rigged cutters are much more common than gaff-rigged sloops in many areas. Cutters are easy to distinguish from sloops, even when the sails are stowed. This is because cutters often feature a long bowsprit and two front stays (forestay and jib stay).
Multi-Mast Rigs
Mult-mast rigs are less common than single-mast configurations. That said, multi-mast sailboats are often elegant and seaworthy. Though they offer more than just good looks—multiple masts offer speed and precise control for experienced sailors. Most of these vessels feature two masts, which are often shorter than masts on comparably-sized single-mast craft. The most common variations are yawl rigs, ketch rigs, and schooner rigs.
Yawls are robust multi-mast vessels that vary in length from 20 feet to well over 50 feet. A yawl features a long forward mainmast and a short mizzen mast located towards the back of the boat. Yawls are often gaff-rigged and were once used as utility boats.
Yawl rigged sailboats can use the mizzen mast and sail as a form of self-steering. The yawl is easy to distinguish from other two-masted vessels, as the mizzenmast is comparably short—often about half the size of the mainmast. Additionally, the mizzen mast is positioned aft of the rudder post.
Ketch Masts
At first glance, a ketch can be mistaken for a yawl. But the ketch features two similarly-sized masts and a much larger mizzen. The mizzen mast on a ketch is positioned forward of the rudder post. Ketch-rigged boats are often gaff-rigged as well, utilizing topsails on both masts. Some ketch-rigged boats have triangular sailplanes, mitigating the need for topsails.
Like the yawl, the ketch utilizes a headsail, a mainsail , and a mizzen sail, which is comparable in size to the mainsail. Ketch-rigged boats can be sailed with one or more aft sails stowed.
Schooner Masts
Schooners are among the most elegant multi-mast sailboat types. Schooners are visibly closer to ketches than yawls. But upon closer inspection, a schooner will have a shorter foremast and a longer (or almost equally-sized) mast behind it.
Schooner masts are tall and thick but usually shorter than similarly-sized single mast boats. This is because two-masted vessels distribute the sail plan over two masts and don't need the extra length to make up for lost sail area. Schooners are usually gaff-rigged and often utilize topsails and topmasts that extend the height of the mast.
Tall Ship Masts
Tall ships are the classic large sailing vessels that dominated the oceans for hundreds of years before the age of steam. Famous vessels such as the U.S.S. Constitution and the H.M.S. Victory feature this enormous and complex rig configuration.
Tall ships have three or more enormous masts, which are often made from entire tree trunks. Some of the largest tall ships have five or more masts. Tall ships are usually 100 feet in length or greater, as the size and complexity of these square-rigged ships make them only practical at scale. Tall ships utilize one or more mainmasts, mizzenmasts, a foremast, and a gaff-rigged jigger mast aft of the mizzenmast.
Sailboat Mast Materials
Sailboat masts are usually made out of aluminum or certain varieties of wood. Up to the 1950s, virtually all sailboat masts were made of wood. That changed around the same time that fiberglass boats became popular. Today, aluminum is the most common mast material.
Aluminum Sailboat Masts
The most common modern mast material is aluminum. Aluminum masts are lightweight, hollow, and easy to manufacture. These relatively inexpensive masts hold up well to salt water. Aluminum masts are also strong for their weight.
One downside to aluminum masts is galvanic corrosion, which occurs frightfully fast when saltwater comes into contact with aluminum and another metal (such as steel or copper). Aluminum masts are most common on Bermuda-rigged sloops.
Wood Sailboat Masts
Wood is the traditional material for sailboat masts, and it's still used today on many custom boats. Wood masts are heavy but strong, and a well-maintained wood mast can last over a hundred years. Wooden masts are common on gaff-rigged boats, as wood is an ideal material for shorter masts.
The most common mast wood comes from the Fir family. Douglas fir is common, but regional varieties (such as British, Columbian, and Yellow fir) are perfectly suitable. Some sailboats (particularly tall ships) use pine or redwood as a mast material. Some varieties of cedar (such as Port Orford cedar, Oregon cedar, and white cedar) are also excellent materials for building masts and spars.
Carbon Fiber Masts
Carbon fiber masts are a new arrival to boatbuilding, and they offer some advantages to wood and aluminum masts. Carbon fiber is lightweight and extremely strong, which makes it ideal for tall-masted racing sailboats. Vessels that compete in America's Cup races utilize the most premium carbon fiber masts in the industry.
Unlike wood (and aluminum to some extent), carbon fiber masts aren't particularly flexible. The rigidity of carbon fiber makes it strong, but stiffness is also a weakness. Under the right conditions, carbon fiber masts can break violently and are impossible to repair once broken.
Mast Maintenance
It's essential to maintain your mast and all of its accompanying hardware. Mast stays, lines, and halyards should be inspected regularly, adjusted, and replaced at regular intervals. Wooden masts should be varnished and checked for signs of rot.
Aluminum masts are generally low-maintenance, but signs of corrosion warrant immediate repair. Work with your local boat mechanic or sailing expert to develop a comprehensive maintenance plan. And remember, preventative maintenance is always cheaper and easier than repairs.
Related Articles
I've personally had thousands of questions about sailing and sailboats over the years. As I learn and experience sailing, and the community, I share the answers that work and make sense to me, here on Life of Sailing.
by this author
Sailboat Parts
Learn About Sailboats
Most Recent

What Does "Sailing By The Lee" Mean?
October 3, 2023

The Best Sailing Schools And Programs: Reviews & Ratings
September 26, 2023
Important Legal Info
Lifeofsailing.com is a participant in the Amazon Services LLC Associates Program, an affiliate advertising program designed to provide a means for sites to earn advertising fees by advertising and linking to Amazon. This site also participates in other affiliate programs and is compensated for referring traffic and business to these companies.
Similar Posts

Affordable Sailboats You Can Build at Home
September 13, 2023

Best Small Sailboat Ornaments
September 12, 2023

Discover the Magic of Hydrofoil Sailboats
December 11, 2023
Popular Posts

Best Liveaboard Catamaran Sailboats
December 28, 2023

Can a Novice Sail Around the World?
Elizabeth O'Malley

4 Best Electric Outboard Motors

How Long Did It Take The Vikings To Sail To England?

10 Best Sailboat Brands (And Why)
December 20, 2023

7 Best Places To Liveaboard A Sailboat
Get the best sailing content.
Top Rated Posts
Lifeofsailing.com is a participant in the Amazon Services LLC Associates Program, an affiliate advertising program designed to provide a means for sites to earn advertising fees by advertising and linking to Amazon. This site also participates in other affiliate programs and is compensated for referring traffic and business to these companies. (866) 342-SAIL
© 2024 Life of Sailing Email: [email protected] Address: 11816 Inwood Rd #3024 Dallas, TX 75244 Disclaimer Privacy Policy
Rigging - Turnbuckles , Toggles , Wire & Rod Components, Norseman Cones & Fittings.
Furling Systems - Systems and replacement parts from a variety of Manufacturers.
Traveller Systems - Adjustable Track Systems for Mainsheet and other applications.
Sailboat Hardware - Rope Clutches, Blocks, Track & Fittings, Winches, etc.
Custom Parts - Custom items, or those out of production or otherwise unavailable.
Consultation - Special projects, research, or information not detailed on-site.
Copyright 1996 - 2024, Rig-Rite, Inc. Disclaimer Web Site maintained by The WATER Group
- Forums New posts Unanswered threads Register Top Posts Email
- What's new New posts New Posts (legacy) Latest activity New media
- Media New media New comments
- Boat Info Downloads Weekly Quiz Topic FAQ 10000boatnames.com
- Classifieds Sell Your Boat Used Gear for Sale
- Parts General Marine Parts Hunter Beneteau Catalina MacGregor Oday
- Help Terms of Use Monday Mail Subscribe Monday Mail Unsubscribe
Shortening Mast - Calculations for Stays
- Thread starter Ziggler
- Start date May 15, 2017
- Tags backstay forestay mast height re-rigging rerigging rigging shorten rigging standing rigging
- Forums for All Owners
- Ask All Sailors

PROBLEM: 1979 Paceship 23. Irreparably bent mast during haul out. Bought a new-to-me [used] mast. New mast is shorter. Have practically new standing rigging which I want to re-use. Side stays will transfer, but need to shorten fore and back stays. Old Mast: 27' 6" New Mast: 27' 1" QUESTION: What "formula" do I use to calculate how many inches to remove from the fore- and back- stays? Thank you in advance for any help!

A measuring tape

sides of a right triangle: distance from mast base to chain plate = A, distance from base of mast to stay attachment =B. Length of stay approximately =C. A squared+ B squared= C squared.

New stay length (in inches) will be equal to the square root of the square of the (old stay length in inches minus 3275. ) or NewStay squared = Old Stay squared - 3275.. so take PREECISE old stay length from point to point, square that, subtract 3275.. that is New Stay squared.. take the square root of that number and it will be the new stay length.. Another Injun-Ear should check me on that because it has been a while since Pythagoras and I have collaborated.. Even that number will be off by a very little (maybe a half inch) because I don't know the difference in height between the mast step and the top of the stay tangs. But it should be plenty close for this exercise and taken up in the turnbuckles..
Thank you, while I'm a virtual math illiterate, I knew there had to be some astonishing mathematical process to address this. I'm very grateful and most impressed with your wizardry. I'll plug in the numbers and see what pops out.
The mast is already off the boat and it will light enough to move around. Get some mason's twine. Secure one end to the forward chainplate take the other end to the mast step and mark it. The twine will not be horizontal, measure the angle with either a protractor or one of those carpenter tools that measures angles. Do the same with the back stay. Now, with the mast on the ground take the line from the front of the boat and stretch it out and put a stake in the ground or mark the pavement. Be sure to replicate the angle. Measure the distance from this mark to the mast tang. That will be your forestay length. Do the same with the back stay. Give these dimensions to the rigger. He'll compensate for turnbuckle length and fittings.
I don't think that you can do it with any kind of formula unless you know what the original mast rake a was.You'll also need to know the true relative position of that bow and stern connection points actually on your boat.Sailboat data makes it look like both those connection points on your boat are not level with each other.You could however construct a template using the new mast with the existing fore and back stays and adding a temporary 5 inch extension to the new mast.Measure from the tabernacle as others have suggested using a tape or masons twine to define the distance from the tabernacle to each station on the boat.Attach your existing stays to top of mast and bring them to meet the apparent positions of the existing attachment points while flat on the ground.Now remove your temporary extension and slide the mast to the tabernacle position on the ground and measure the distance of the stays to find your new lengths.Having said that if I were in your shoes I would be tempted to buy a new Johnson-lever for one and extension bar for the other stay, then put the mast up sloppy then figure out(measure) where to cut the stays. Just keep the mast up by using the halyards while cutting/measuring each stay.

Would it be easier to build up the mast step by 6" instead?

http://www.kijiji.ca/v-sailboat/red...er/1260334282?enableSearchNavigationFlag=true Here is a Paceship 23 for parts, its a bit of a drive but doable
My "formula" is not exact but because the triangles are similar (or very close) the difference in the stay lengths are going to be very close.. plenty enough for this exercise.. sooo for giggles, I calculated a typical backstay for this arrangement using mast height only (and a typical distance from mast to backstay @ 90deg), then calculated again using mast base 1 foot above the stay tang(s) .. The difference in the stay lengths between the two cases is about 1/8", which is close to how much hull flex ya get when ya tension the stays up.. The stay itself is going to be considerably different, but using the original, measured precisely, will give a good useful number.. I don,t know a couple of things but it turns out that they'll mostly factor out..
Very intriguing idea about building up the Mast step.... I'm going to give that serious consideration as it would save having to redo the lengths of my (nearly brand new) standing rigging. Otherwise, I'll spend some time sorting through the formulas and other ideas. Thanks all!

Could you repair the old with a section of the new welded in? Then you would have the full length mast. Otherwise, won't your sails need to be changed too?

Ziggler said: I'm going to give that serious consideration Click to expand
agprice22 said: Could you repair the old with a section of the new welded in? Then you would have the full length mast. Otherwise, won't your sails need to be changed too? Click to expand
Since the mast is stepped on deck, adding a 6" sleeve to the new spar is probably the best idea. Probably cheaper than adjusting all the shrouds, stays, and sails to fit a shorter mast in any case. If the bottom of the new (short) mast fits into the existing mast step, the sleeve could be added a bit above it. Otherwise it could be added to the bottom and made to fit into the step. K.I.S.S.!

JohnVTX said: A measuring tape Click to expand
Captain Marcus
kloudie1 said: New stay length (in inches) will be equal to the square root of the square of the (old stay length in inches minus 3275. ) or NewStay squared = Old Stay squared - 3275.. so take PREECISE old stay length from point to point, square that, subtract 3275.. that is New Stay squared.. take the square root of that number and it will be the new stay length.. Another Injun-Ear should check me on that because it has been a while since Pythagoras and I have collaborated.. Even that number will be off by a very little (maybe a half inch) because I don't know the difference in height between the mast step and the top of the stay tangs. But it should be plenty close for this exercise and taken up in the turnbuckles.. Click to expand
dlochner said: The mast is already off the boat and it will light enough to move around. Get some mason's twine. Secure one end to the forward chainplate take the other end to the mast step and mark it. The twine will not be horizontal, measure the angle with either a protractor or one of those carpenter tools that measures angles. Do the same with the back stay. Now, with the mast on the ground take the line from the front of the boat and stretch it out and put a stake in the ground or mark the pavement. Be sure to replicate the angle. Measure the distance from this mark to the mast tang. That will be your forestay length. Do the same with the back stay. Give these dimensions to the rigger. He'll compensate for turnbuckle length and fittings. Click to expand
Captain Marcus said: Hello, So you're saying lay it out on the ground do your calculations then cut. I'm thinking take our job laser at dusk at check heights of forestay attachment, mast step, and aft stay attachments. Click to expand
"If you get the measurements correct and the angles correct... " And if either one is off, the results will be too. Trig is lovely. When we get the angles and measurements correct it allows us to use a sextant to find our where we are on the globe within perhaps a mile of where we actually are. Marcus is coming in with a new question about a new mast height, but it is unclear what he is actually looking for. The calculated height - if the angles are measured correctly - will be the distance from the end of the forestay to a perpendicular point on the mast. This point on the mast does not necessarily correspond to the deck line, the partners, or the mast step. So what good does it do him to know this? How do you determine the angle without having the mast stepped? What about rake in the mast? It would seem that Marcus needs to explain his question better and might be better served by starting a new thread.
- This site uses cookies to help personalise content, tailor your experience and to keep you logged in if you register. By continuing to use this site, you are consenting to our use of cookies. Accept Learn more…
Sailboat Parts Explained: Illustrated Guide (with Diagrams)
When you first get into sailing, there are a lot of sailboat parts to learn. Scouting for a good guide to all the parts, I couldn't find any, so I wrote one myself.
Below, I'll go over each different sailboat part. And I mean each and every one of them. I'll walk you through them one by one, and explain each part's function. I've also made sure to add good illustrations and clear diagrams.
This article is a great reference for beginners and experienced sailors alike. It's a great starting point, but also a great reference manual. Let's kick off with a quick general overview of the different sailboat parts.
General Overview
The different segments
You can divide up a sailboat in four general segments. These segments are arbitrary (I made them up) but it will help us to understand the parts more quickly. Some are super straightforward and some have a bit more ninja names.
Something like that. You can see the different segments highlighted in this diagram below:

The hull is what most people would consider 'the boat'. It's the part that provides buoyancy and carries everything else: sails, masts, rigging, and so on. Without the hull, there would be no boat. The hull can be divided into different parts: deck, keel, cabin, waterline, bilge, bow, stern, rudder, and many more.
I'll show you those specific parts later on. First, let's move on to the mast.

Sailboats Explained
The mast is the long, standing pole holding the sails. It is typically placed just off-center of a sailboat (a little bit to the front) and gives the sailboat its characteristic shape. The mast is crucial for any sailboat: without a mast, any sailboat would become just a regular boat.
I think this segment speaks mostly for itself. Most modern sailboats you see will have two sails up, but they can carry a variety of other specialty sails. And there are all kinds of sail plans out there, which determine the amount and shape of sails that are used.
The Rigging
This is probably the most complex category of all of them.
Rigging is the means with which the sails are attached to the mast. The rigging consists of all kinds of lines, cables, spars, and hardware. It's the segment with the most different parts.
The most important parts
If you learn anything from this article, here are the most important parts of any sailboat. You will find all of these parts in some shape or form on almost any sailboat.

Okay, we now have a good starting point and a good basic understanding of the different sailboat parts. It's time for the good stuff. We're going to dive into each segment in detail.
Below, I'll go over them one by one, pointing out its different parts on a diagram, listing them with a brief explanation, and showing you examples as well.
After reading this article, you'll recognize every single sailboat part and know them by name. And if you forget one, you're free to look it up in this guide.

On this page:
The hull is the heart of the boat. It's what carries everything: the mast, the sails, the rigging, the passengers. The hull is what provides the sailboat with its buoyancy, allowing it to stay afloat.
Sailboats mostly use displacement hulls, which is a shape that displaces water when moving through it. They are generally very round and use buoyancy to support its own weight. These two characteristics make sure it is a smooth ride.
There are different hull shapes that work and handle differently. If you want to learn more about them, here's the Illustrated Guide to Boat Hull Types (with 11 Examples ). But for now, all we need to know is that the hull is the rounded, floating part of any sailboat.
Instead of simply calling the different sides of a hull front, back, left and right , we use different names in sailing. Let's take a look at them.

The bow is the front part of the hull. It's simply the nautical word for 'front'. It's the pointy bit that cuts through the water. The shape of the bow determines partially how the boat handles.
The stern is the back part of the hull. It's simply the nautical word for 'back'. The shape of the stern partially determines the stability and speed of the boat. With motorboats, the stern lies deep inside the water, and the hull is flatter aft. Aft also means back. This allows it to plane, increasing the hull speed. For sailboats, stability is much more important, so the hull is rounded throughout, increasing its buoyancy and hydrodynamic properties.
The transom is the backplate of the boat's hull. It's the most aft (rear) part of the boat.
Port is the left side of a sailboat.
Starboard is the right side of a sailboat
The bilges are the part where the bottom and the sides of the hull meet. On sailboats, these are typically very round, which helps with hydrodynamics. On powerboats, they tend to have an angle.
The waterline is the point where the boat's hull meets the water. Generally, boat owners paint the waterline and use antifouling paint below it, to protect it from marine growth.
The deck is the top part of the boat's hull. In a way, it's the cap of the boat, and it holds the deck hardware and rigging.
Displacement hulls are very round and smooth, which makes them very efficient and comfortable. But it also makes them very easy to capsize: think of a canoe, for example.
The keel is a large fin that offsets the tendency to capsize by providing counterbalance. Typically, the keel carries ballast in the tip, creating a counterweight to the wind's force on the sails.
The rudder is the horizontal plate at the back of the boat that is used to steer by setting a course and maintaining it. It is connected to the helm or tiller.
Tiller or Helm
- The helm is simply the nautical term for the wheel.
- The tiller is simply the nautical term for the steering stick.
The tiller or helm is attached to the rudder and is used to steer the boat. Most smaller sailboats (below 30') have a tiller, most larger sailboats use a helm. Large ocean-going vessels tend to have two helms.
The cockpit is the recessed part in the deck where the helmsman sits or stands. It tends to have some benches. It houses the outside navigation and systems interfaces, like the compass, chartplotter, and so on. It also houses the mainsheet traveler and winches for the jib. Most boats are set up so that the entire vessel can be operated from the cockpit (hence the name). More on those different parts later.
Most larger boats have some sort of roofed part, which is called the cabin. The cabin is used as a shelter, and on cruising sailboats you'll find the galley for cooking, a bed, bath room, and so on.
The mast is the pole on a sailboat that holds the sails. Sailboats can have one or multiple masts, depending on the mast configuration. Most sailboats have only one or two masts. Three masts or more is less common.
The boom is the horizontal pole on the mast, that holds the mainsail in place.
The sails seem simple, but actually consist of many moving parts. The parts I list below work for most modern sailboats - I mean 90% of them. However, there are all sorts of specialty sails that are not included here, to keep things concise.

The mainsail is the largest sail on the largest mast. Most sailboats use a sloop rigging (just one mast with one bermuda mainsail). In that case, the main is easy to recognize. With other rig types, it gets more difficult, since there can be multiple tall masts and large sails.
If you want to take a look at the different sail plans and rig types that are out there, I suggest reading my previous guide on how to recognize any sailboat here (opens in new tab).
Sail sides:
- Leech - Leech is the name for the back side of the sail, running from the top to the bottom.
- Luff - Luff is the name for the front side of the sail, running from the top to the bottom.
- Foot - Foot is the name for the lower side of the sail, where it meets the boom.
Sail corners:
- Clew - The clew is the lower aft (back) corner of the mainsail, where the leech is connected to the foot. The clew is attached to the boom.
- Tack - The tack is the lower front corner of the mainsail
- Head - The head is the top corner of the mainsail
Battens are horizontal sail reinforcers that flatten and stiffen the sail.
Telltales are small strings that show you whether your sail trim is correct. You'll find telltales on both your jib and mainsail.
The jib is the standard sized headsail on a Bermuda Sloop rig (which is the sail plan most modern sailboats use).
As I mentioned: there are all kinds, types, and shapes of sails. For an overview of the most common sail types, check out my Guide on Sail Types here (with photos).
The rigging is what is used to attach your sails and mast to your boat. Rigging, in other words, mostly consists of all kinds of lines. Lines are just another word for ropes. Come to think of it, sailors really find all kinds of ways to complicate the word rope ...
Two types of rigging
There are two types of rigging: running and standing rigging. The difference between the two is very simple.
- The running rigging is the rigging on a sailboat that's used to operate the sails. For example, the halyard, which is used to lower and heave the mainsail.
- The standing rigging is the rigging that is used to support the mast and sail plan.
Standing Rigging

Here are the different parts that belong to the standing rigging:
- Forestay or Headstay - Line or cable that supports the mast and is attached to the bow of the boat. This is often a steel cable.
- Backstay - Line or cable that supports the mast and is attached to the stern of the boat. This is often a steel cable.
- Sidestay or Shroud - Line or cable that supports the mast from the sides of the boat. Most sailboats use at least two sidestays (one on each side).
- Spreader - The sidestays are spaced to steer clear from the mast using spreaders.
Running Rigging: different words for rope
Ropes play a big part in sailing, and especially in control over the sails. In sailboat jargon, we call ropes 'lines'. But there are some lines with a specific function that have a different name. I think this makes it easier to communicate with your crew: you don't have to define which line you mean. Instead, you simply shout 'mainsheet!'. Yeah, that works.
Running rigging consists of the lines, sheets, and hardware that are used to control, raise, lower, shape and manipulate the sails on a sailboat. Rigging varies for different rig types, but since most sailboats are use a sloop rig, nearly all sailboats use the following running rigging:

- Halyards -'Halyard' is simply the nautical name for lines or ropes that are used to raise and lower the mainsail. The halyard is attached to the top of the mainsail sheet, or the gaffer, which is a top spar that attaches to the mainsail. You'll find halyards on both the mainsail and jib.
- Sheets - 'Sheet' is simply the nautical term for lines or ropes that are used to set the angle of the sail.
- Mainsheet - The line, or sheet, that is used to set the angle of the mainsail. The mainsheet is attached to the Mainsheet traveler. More on that under hardware.
- Jib Sheet - The jib mostly comes with two sheets: one on each side of the mast. This prevents you from having to loosen your sheet, throwing it around the other side of the mast, and tightening it. The jib sheets are often controlled using winches (more on that under hardware).
- Cleats are small on-deck hooks that can be used to tie down sheets and lines after trimming them.
- Reefing lines - Lines that run through the mainsail, used to put a reef in the main.
- The Boom Topping Lift is a line that is attached to the aft (back) end of the boom and runs to the top of the mast. It supports the boom whenever you take down the mainsail.
- The Boom Vang is a line that places downward tension on the boom.
There are some more tensioning lines, but I'll leave them for now. I could probably do an entire guide on the different sheets on a sailboat. Who knows, perhaps I'll write it.
This is a new segment, that I didn't mention before. It's a bit of an odd duck, so I threw all sorts of stuff into this category. But they are just as important as all the other parts. Your hardware consists of cleats, winches, traveler and so on. If you don't know what all of this means, no worries: neither did I. Below, you'll find a complete overview of the different parts.
Deck Hardware

Just a brief mention of the different deck hardware parts:
- Pulpits are fenced platforms on the sailboat's stern and bow, which is why they are called the bow pulpit and stern pulpit here. They typically have a solid steel framing for safety.
- Stanchons are the standing poles supporting the lifeline , which combined for a sort of fencing around the sailboat's deck. On most sailboats, steel and steel cables are used for the stanchons and lifelines.
Mainsheet Traveler
The mainsheet traveler is a rail in the cockpit that is used to control the mainsheet. It helps to lock the mainsheet in place, fixing the mainsails angle to the wind.
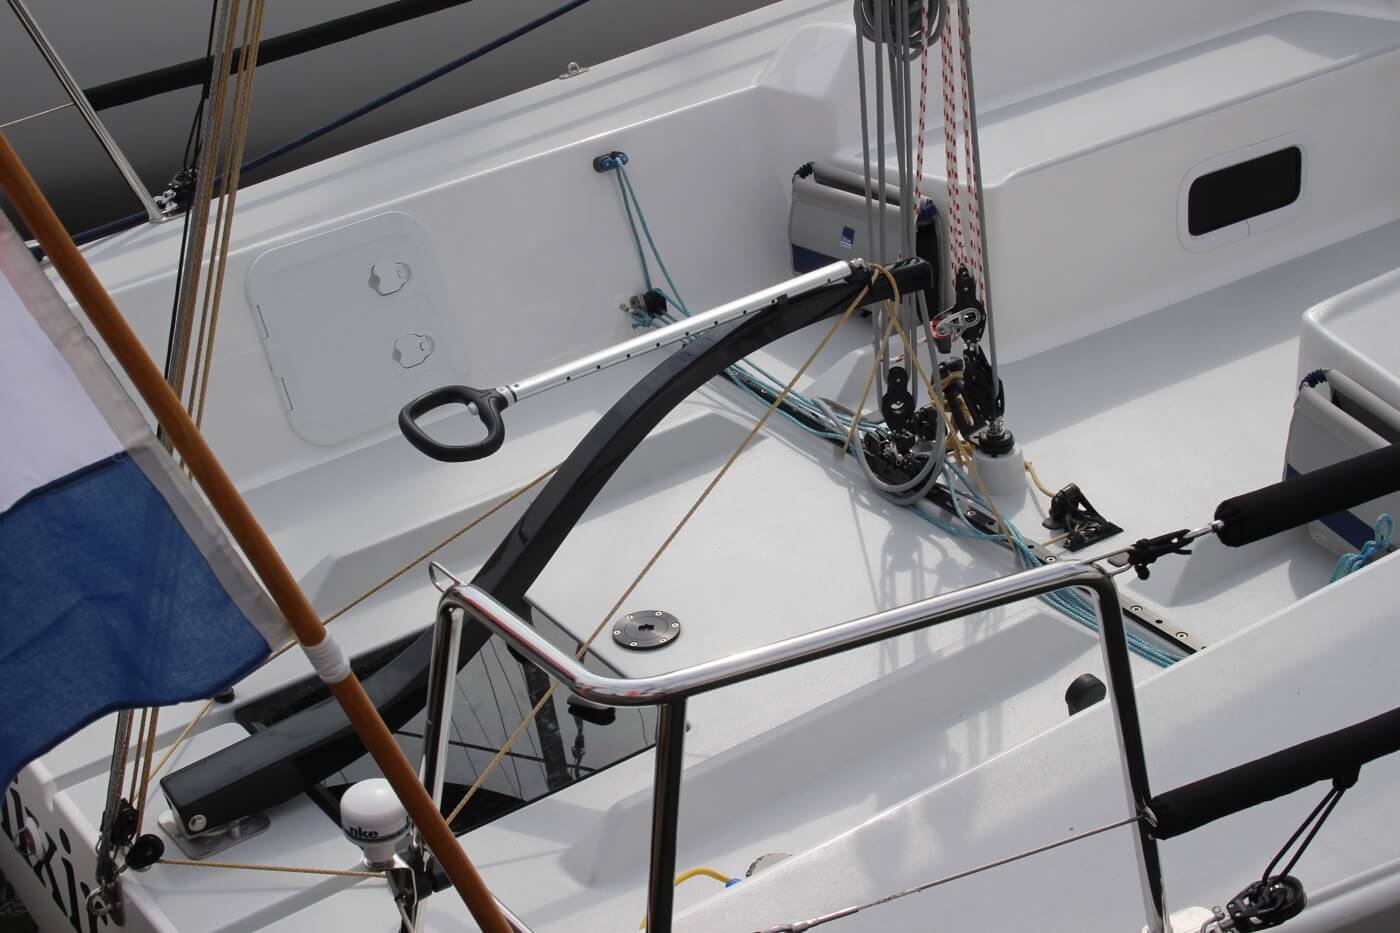
If you're interested in learning more about how to use the mainsheet traveler, Matej has written a great list of tips for using your mainsheet traveler the right way . It's a good starting point for beginners.
Winches are mechanical or electronic spools that are used to easily trim lines and sheets. Most sailboats use winches to control the jib sheets. Modern large sailing yachts use electronic winches for nearly all lines. This makes it incredibly easy to trim your lines.
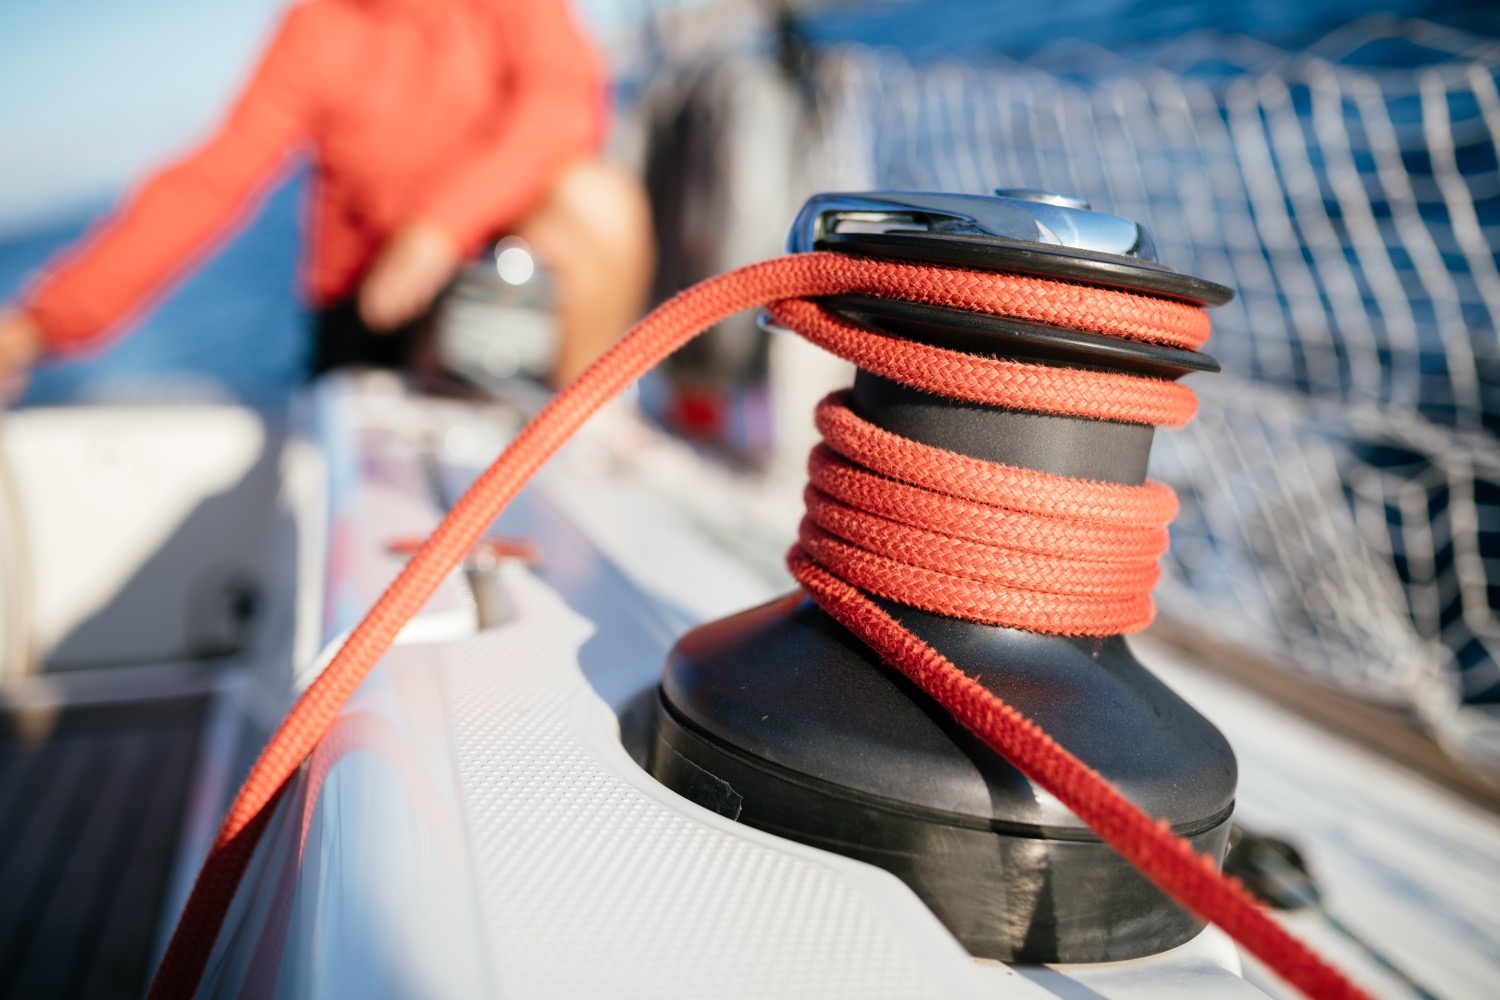
You'll find the compass typically in the cockpit. It's the most old-skool navigation tool out there, but I'm convinced it's also one of the most reliable. In any way, it definitely is the most solid backup navigator you can get for the money.
Want to learn how to use a compass quickly and reliably? It's easy. Just read my step-by-step beginner guide on How To Use a Compass (opens in new tab .
Chartplotter
Most sailboats nowadays use, besides a compass and a map, a chartplotter. Chartplotters are GPS devices that show a map and a course. It's very similar to your normal car navigation.
Outboard motor
Most sailboats have some sort of motor to help out when there's just the slightest breeze. These engines aren't very big or powerful, and most sailboats up to 32' use an outboard motor. You'll find these at the back of the boat.
Most sailboats carry 1 - 3 anchors: one bow anchor (the main one) and two stern anchors. The last two are optional and are mostly used by bluewater cruisers.
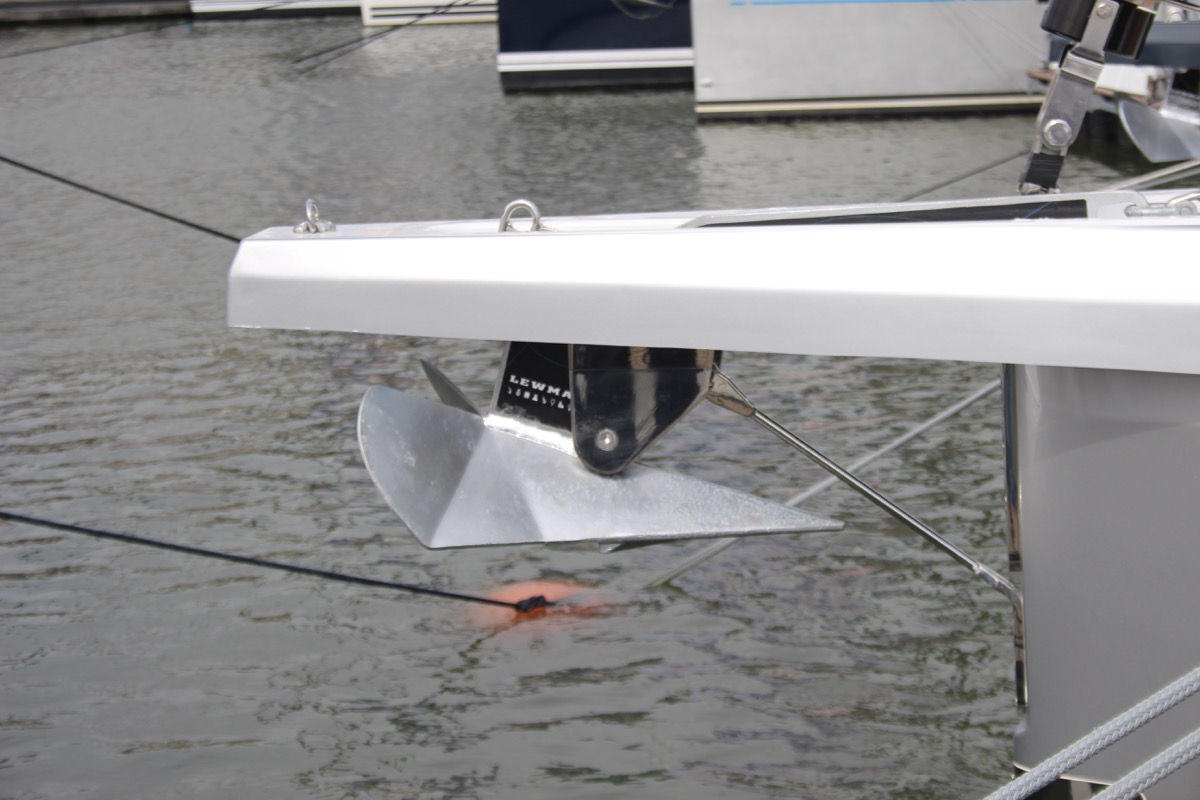
I hope this was helpful, and that you've gained a good understanding of the different parts involved in sailing. I wanted to write a good walk-through instead of overwhelming you with lists and lists of nautical terms. I hope I've succeeded. If so, I appreciate any comments and tips below.
I've tried to be as comprehensive as possible, without getting into the real nitty gritty. That would make for a gigantic article. However, if you feel I've left something out that really should be in here, please let me know in the comments below, so I can update the article.
I own a small 20 foot yacht called a Red witch made locally back in the 70s here in Western Australia i found your article great and enjoyed reading it i know it will be a great help for me in my future leaning to sail regards John.
David Gardner
İ think this is a good explanation of the difference between a ”rope” and a ”line”:
Rope is unemployed cordage. In other words, when it is in a coil and has not been assigned a job, it is just a rope.
On the other hand, when you prepare a rope for a specific task, it becomes employed and is a line. The line is labeled by the job it performs; for example, anchor line, dock line, fender line, etc.
Hey Mr. Buckles
I am taking on new crew to race with me on my Flying Scot (19ft dingy). I find your Sailboat Parts Explained to be clear and concise. I believe it will help my new crew learn the language that we use on the boat quickly without being overwhelmed.
PS: my grandparents were from Friesland and emigrated to America.
Thank you Shawn for the well written, clear and easy to digest introductory article. Just after reading this first article I feel excited and ready to set sails and go!! LOL!! Cheers! Daniel.
steve Balog
well done, chap
Great intro. However, the overview diagram misidentifies the cockpit location. The cockpit is located aft of the helm. Your diagram points to a location to the fore of the helm.
William Thompson-Ambrose
An excellent introduction to the basic anatomy and function of the sailboat. Anyone who wants to start sailing should consider the above article before stepping aboard! Thank-you
James Huskisson
Thanks for you efforts mate. We’ve all got to start somewhere. Thanks for sharing. Hoping to my first yacht. 25ft Holland. Would love to cross the Bass Strait one day to Tasmania. 👌 Cheers mate
Alan Alexander Percy
thankyou ijust aquired my first sailboat at 66yrs of age its down at pelican point a beautifull place in virginia usa my sailboat is a redwing 30 if you are ever in the area i wouldnt mind your guidance and superior knowledge of how to sail but iam sure your fantastic article will help my sailboat is wings 30 ft
Thanks for quick refresher course. Having sailed in California for 20+ years I now live in Spain where I have to take a spanish exam for a sailboat license. Problem is, it’s only in spanish. So a lot to learn for an old guy like me.
Very comprehensive, thank you
Your article really brought all the pieces together for me today. I have been adventuring my first sailing voyage for 2 months from the Carolinas and am now in Eleuthera waiting on weather to make the Exumas!!! Great job and thanks
Helen Ballard
I’ve at last found something of an adventure to have in sailing, so I’m starting at the basics, I have done a little sailing but need more despite being over 60 life in the old dog etc, thanks for your information 😊
Barbara Scott
I don’t have a sailboat, neither do l plan to literally take to the waters. But for mental exercise, l have decided to take to sailing in my Bermuda sloop, learning what it takes to become a good sailor and run a tight ship, even if it’s just imaginary. Thank you for helping me on my journey to countless adventures and misadventures, just to keep it out of the doldrums! (I’m a 69 year old African American female who have rediscovered why l enjoyed reading The Adventures of Robert Louis Stevenson as well as his captivating description of sea, wind, sailboat,and sailor).
Great article and very good information source for a beginner like me. But I didn’t find out what I had hoped to, which is, what are all those noisy bits of kit on top of the mast? I know the one with the arrow is a weather vane, but the rest? Many thanks, Jay.
Louis Cohen
The main halyard is attached to the head of the mainsail, not the to the mainsheet. In the USA, we say gaff, not gaffer. The gaff often has its own halyard separate from the main halyard.
Other than that it’s a nice article with good diagrams.
A Girl Who Has an Open Sail Dream
Wow! That was a lot of great detail! Thank you, this is going to help me a lot on my project!
Hi, good info, do u know a book that explains all the systems on a candc 27,
Emma Delaney
As a hobbyist, I was hesitant to invest in expensive CAD software, but CADHOBBY IntelliCAD has proven to be a cost-effective alternative that delivers the same quality and performance.
https://www.cadhobby.com/
Leave a comment
You may also like, guide to understanding sail rig types (with pictures).
There are a lot of different sail rig types and it can be difficult to remember what's what. So I've come up with a system. Let me explain it in this article.

The Ultimate Guide to Sail Types and Rigs (with Pictures)

The Illustrated Guide To Boat Hull Types (11 Examples)

How To Live On a Boat For Free: How I'd Do It

How To Live on a Sailboat: Consider These 5 Things
Own your first boat within a year on any budget.
A sailboat doesn't have to be expensive if you know what you're doing. If you want to learn how to make your sailing dream reality within a year, leave your email and I'll send you free updates . I don't like spam - I will only send helpful content.
Ready to Own Your First Boat?
Just tell us the best email address to send your tips to:
Better Sailing

Best Sailboats with Free Standing Masts
What is a mast in a sailboat? A mast in a sailboat is a spar or structure rising above the hull and upper portions of a boat or ship to hold sails, spars, rigging, booms, signals, and others, at some point on the fore-and-aft line, as a foremast or the mainmast. It is also described as any of the various portions of a single spar beside particular sails, as a top-gallant mast, and a royal mast formed as a single spar.
What then is a free-standing mast? A free-standing mast (also known as an unstayed mast) is a type of mast that is not supported by any stays (a sailboat stay is a cable, line, rope, or essentially any material that supports the weight of the mast and ensures safe sailing). A free-standing mast is often seen in small boats because of the pressure exerted on the sail. However, they can also be found on larger vessels.
What is the function of a mast? A mast is a tall wooden structure consisting of spars and is usually found at the center of a water vessel used in carrying a sail, derricks, and other structures. Although that is the primary function of a mast, it can be used for other purposes, such as adding navigation lights, a radio aerial, and other secondary functions.
Here Are Some of the Best Sailboats with Free-Standing Masts
The Nonsuch sailboat series is a boating brand with history. A part of the boat series was first developed as far back as three decades ago. It is a boating brand that has been refined over the years and is known for its quality products. The Nonsuch 30 was designed by Gorgon Fisher and Mark Ellis. After its construction, it was released in 1978, and it became popular in Canada and the United States.
Overall Features
The most apparent feature of this sailboat is its balance. The boat’s balance is unaffected by the full weight of a person on its rail because of its tall, tapered, unstayed mast with a wishbone boom. There is sufficient space above the deck due to the absence of chainplates, shrouds or stays, Genoa track or cars, mainsheet traveler, or primary winches on the cockpit coamings (there is one mainsheet winch well aft on the starboard coaming). The interior illuminates brighter than most sailboats, with three opening hatches in the coach roof, including nine opening ports. Two-quarter berths sit perfectly at either side of the companionway, and there is a sizable L-shaped galley to port.
The head comprises a shower and is a generous size, also is the forward lounging area, which has a port and a starboard settee, complete with a drop-leaf table on the centerline. The port side berth extends to render a double capacity bunk. A slide-up panel and bi-fold doors to close off the forward cabin were introduced in the later classical interior designs. This sailboat also boasts of sufficient storage space available in the form of a hanging locker in the forward cabin. The area designated for sleeping is private, quiet, comfortable, and free from interruptions. The diesel engines of the Nonsuch 30 span from Volvo MD11C Sail drive (most Classics) to a Westerbeke V-drive in the Ultra year’s edition.

>>Also Read: Best Small and Trailerable Sailboats
Tanton 44 Cutter
The Tanton 44 was built for a company called Offshore Marine. In the 1970s and early 1980s, small firms like Offshore Marine contracted Asian yards to produce boats of numerous designs. In 1982, the boat was built at the Ta Chiao Bros yard in Taiwan. It is otherwise called the Ta Chiao 44 or CT44. Tanton 44 was designed by one of the greatest, well-respected, prolific, and innovative designers of all time, Yves-Marie Tanton.
The Tanton 44 is structurally solid and designed so that its speed is up to par with that of a cruising yacht. The anodized rig is properly positioned and is on its second set of standing rigging. On deck, the bulwarks and braces for the stanchions provide an instant sense of anti-theft. The boat consists of a comfortable private stateroom forward of considerable size with a centreline berth and a custom-made inner-spring mattress. Also, the hanging locker and a linen cabinet below the starboard settee make room for adequate storage. To port is the expansive head compartment at the sink that alternates hot and cold pressure water. Close to the centreline, there are two deep stainless sinks to port. The major salon has a huge “L” settee to port with a straight settee to starboard.
There is enough room for at least six people to eat with a large leaf table and storage below. Proper storage has been prioritized with lockers and a spice rack that permit storage, and there is a large counter aft of the sinks. Rigged as a cutter, the potent sailplane is split into manageable sections. The subtle beam and fin keel/skeg rudder make this one of the unique performance cruisers. At about 26,000lbs designed displacement, the Tanton 44 has reasonable displacement and a long waterline of 37.6′. The Tanton 44’s all-around sailing peculiarities set her apart from conventional full-keel cruisers.

>>Also Read: Best Small Sailboats To Sail Around The World
Herreshoff Cat Ketch 38
The Herreshoffs were built by the Cat Ketch Corporation; although short-lived, the company built some peculiar cruising auxiliaries. They were all called Herreshoffs, named after their designer, Halsey Herreshoff. The boats were created between about 1982 and 1986, and they came into existence as a result of the collaboration between the company’s founder, third-generation boatbuilder John Newton, and Herreshoff (who similarly was the third generation in his family to venture into the same business.) Newton had experience building Grand Banks trawlers in Hong Kong; likewise, Herreshoff was not a novice in the field as he had also designed a couple of production boats. The Herreshoffs 38 were a one-time production, constructed with each vessel containing unique properties.
The Herreshoff 38 Cat Ketch is a blue water cruiser with available space for an extended cruise or to live aboard. The Herreshoff 38 cruiser offers a teak interior, parquet floor, two staterooms, spacious salon, and full galley. As you come underneath, the aft stateroom is on your left with a double berth, under-berth storage, and a hanging locker. A full galley with teak cabinets, a tile counter, stainless steel sink, an icebox, and even a dishwasher can be located by your right. The salon accommodates a large wraparound dinette, teak dining table with storage, under-seat, and bulkhead storage. The head compartment is enclosed and has mirrored vanity and shower stall. The forward stateroom has an offset berth, under-berth storage, dresser, and hanging locker.
On this boat, there is a spacious cockpit with enough seating, a helm pedestal, and a Bimini top on deck. To help you enjoy the fresh catch-of-the-day is a Magma grill. There is also a swim ladder to assist you as you get on board after swimming or diving. The wide side decks ensure free movement forward. The teak bow pulpit has a dual roller, rode, windlass, and two anchors with chain. Auxiliary power is made available by the Universal Diesel Engine that lights up the entire boat. The Herreshoff 38 is a one-of-a-kind blue water cruiser with potential that can serve dual functions; a vacation getaway or a liveaboard.

>>Also Read: Best Sailboats to Singlehand
Best Sailboats with Free Standing Masts – Final Thoughts
The boats that have made our list are the best boats out there that use a free-standing mast, a unique feature that is not popular. So now, you have an idea of the options and features to look out for if you want tο purchase a boat with a free-standing mast.

Peter is the editor of Better Sailing. He has sailed for countless hours and has maintained his own boats and sailboats for years. After years of trial and error, he decided to start this website to share the knowledge.
Related Posts

The Ultimate Guide to Choosing the Best Fishing Line for Trolling

Lagoon Catamaran Review: Are Lagoon Catamarans Good?

Best Inboard Boat Engine Brands

Are O’Day Sailboats Good? A Closer Look at a Classic Brand
- Buyer's Guide
- Destinations
- Maintenance
- Sailing Info
Hit enter to search or ESC to close.
Sailboat Mast: Everything You Need To Know
Anyone who loves sails and boating needs to know their sailing boat from the inside out. If you are new to the sport, then you are probably wondering about things like a sailboat mast and everything around it.
In this article, we have everything you need to know about a sailboat mast, like what it is, its different types, as well as the material it is made of.
All you have to do is keep reading below to find it all out!
What Is A Sailboat Mast?
A sailboat mast is a tall pole that is attached to the deck. It helps secure the sail’s length to the boat and upholds the sail’s structure.
A sailboat mast is the most defining characteristic of a sailboat, helping keep the sail in place. What’s amazing about it is that it can even be taller than the vessel’s length!
Although conventional sailboats use wood, the majority of the newer sailboat masts are constructed of aluminum. The kind of sailboat mast a vessel has depends on the kind of sail plan supported.
What Are The Parts Of A Sailboat Mast?
The sailing mast is essentially a pole that cannot operate effectively without certain critical components.
Moving from the deck to the rest of the sailboat, we can first see the mast boot, which prevents the water from draining down the mast and flooding the cabin.
The stays are the long cords hooked up on each side of the mast, and they hold the mast up off the ground under massive force.
A gooseneck pipe fitting joins the boom to the mast. The sail is raised and lowered using halyard lines that go to the mast’s highest point.
Types Of Sailboat Masts
Rigs with one mast.
Many people that are not aware of the modern sailboat design envision single-mast sailboats.
The reason why this type of sailboat is so widely known is that these masts are low-cost to construct and fairly simple to operate alone.
Sloops, cutters, and catboats are among the most popular rigs with only one mast.
Sloop Masts
Nowadays, sloop rig vessels are the most popular type of sailing boat. Sloops typically have only one mast positioned somewhere on the front third or the middle of the deck, even though some boat models might vary a bit.
A sloop mast is equipped with a big mainsail and a jib sail (see also ‘ Why Are Sails Made In A Triangular Shape? ‘). A Bermuda-rigged sloop has only one towering mast and a triangle-shaped sail. Other not-so-popular gaff-rigged sloops have a significantly smaller mast and bigger 4-point mainsails.
Catboat Masts
Catboats are distinctive New England boats that have a forward-mounted standard mast and a long boom. A catboat, unlike a sloop-rigged boat, is only equipped with one sail.
It is also typically mounted (more or less) right in front of the boat, and it is commonly short and relatively thick.
Catboats are frequently gaff-rigged. In a single-mast design, gaff-rigged sail designs (see also ‘ The Definition And History Of The Lateen (Triangular) Sail ‘) succeed in making the most out of short masts and are relatively simple to maneuver.
The mast of gaff-rigged catboats is shorter than that of a Bermuda-rigged boat of comparable size, but it is typically taller than that of comparable gaff-rigged crafts.
Cutter Mast
A cutter-rigged sailboat has only one towering mast and several headsails, which is why it can be mistaken for sloops when seen from afar.
However, because cutters use numerous headsails rather than one standard jib (see also ‘ Everything You Need To Know About Sailboat Jibs ‘), their masts are typically taller than those of comparable-sized sloops.
In several places, a gaff-rigged cutter is far more usual than a gaff-rigged sloop. Even at times when its sails are folded, a cutter can be distinguished from a sloop.
This is due to the fact that cutters frequently have a protracted bowsprit and two front stays; the forestay and the jib stay.
Rigs With Multiple Masts
Multi-mast sailboats (see also ‘ Small Sailboats: What Are They Called? ‘) are not as popular as single-mast sailboats. That is why the design and structure of a multi-mast boat usually make it classier and more navigable.
A multi-mast boat provides more than simply great looks. It also provides speed and efficient control for skilled seamen.
Most of these boats have two masts, which seem to be frequently smaller than the masts on comparable-sized single-mast crafts. Yawl, ketch, as well as schooner rigs, are among the most popular types.
Yawls are sturdy multi-mast boats whose length ranges from 20 to more than 50 ft. A yawl has a lengthy forward main mast and a small mizzen mast at the back of the vessel. This type is also frequently gaff-rigged and was previously used as a utility boat.
A yawl-rigged boat can also self-steer by using the mizzen mast and sail. The yawl can be distinguished from many other double-mast vessels by its short mizzen mast, which is frequently half the size of the main mast.
Furthermore, the mizzen mast is located toward the back of the rudder post.
Ketch Masts
Ketch masts can be mistaken for yawls with a quick look. However, ketch masts are equipped with two masts of comparable size and a significantly bigger mizzen mast. A ketch boat’s mizzen mast is located at the front of the rudder post.
Ketch-rigged vessels are frequently gaff-rigged, with topsails on each one of their masts. Triangle-shaped sailplanes on some ketch-rigged vessels prevent the necessity for a topsail.
Ketch masts, much like the yawl ones, have a headsail, a mainsail, and a mizzen sail that are similar in size to the mainsail. Finally, a ketch-rigged vessel can sail while handling more than one rear sail.
Schooner Masts
Schooners are some of the most beautiful multi-mast sailboats. They are clearly more similar to ketches than yawls. However, if you closely look at a schooner, you will see that it will feature a smaller foremast and a longer (or nearly equal-sized) mast behind it.
Schooner masts are large and heavy, but they are generally shorter than single-mast vessels of comparable size.
This is due to the fact that double-masted vessels share the sail plan over 2 masts and do not require the additional length to compensate for the reduced sail space.
Finally, they are typically gaff-rigged, with topsails and topmasts that expand the mast’s length.
Masts Of Tall Ships
Tall ships are those traditional large cruising ships that ruled the seas well before age of steam. Renowned ships with this massive and intricate rig setup include the U.S.S Constitution as well as the H.M.S. Victory.
Tall ships have 3 or more massive masts that are frequently constructed using big tree trunks. Tall ships with 5 or more masts are quite common too.
Tall ships typically are as long as 100 feet or more, since the size and sophistication of these square-rigged vessels render them only useful at scale.
Tall ships have main masts, foremasts, mizzen masts, and gaff-rigged jigger masts at the back of their mizzen masts.

Mast Materials For Sailboats
The masts of sailboats (see also ‘ Two-Mast Sailboat Types ‘) are typically constructed of aluminum or other specific types of wood. Until the 1950s, almost all sailboat masts were constructed of wood.
That began changing around the time that fiberglass vessels rose to fame, with aluminum being now the most used mast material.
Aluminum Masts For Sailboats
Aluminum has become the most popular modern mast material. Aluminum masts are lighter in weight, hollow, and simple to produce. Such reasonably priced masts efficiently withstand seawater. These masts are also heavy for their size.
If there is one drawback to this type of mast that would be galvanic corrosion, which happens extremely quickly once seawater is in contact with aluminum and another metal, like steel and copper.
So, in types like the Bermuda-rigged sloop which are frequently made with aluminum, that is an issue.
Wooden Masts For Sailboats
The typical material for sailboat masts is wood, which is still employed for many specially designed boats nowadays.
Wood masts are big and bulky, yet very sturdy, and proper maintenance can guarantee their lengthy (over 100 years!) lifespan. They are also prevalent on gaff-rigged vessels because wood is best suited for short masts.
The Fir family provides the most popular mast wood. Although Douglas Fir is widely used, regional models (such as British, Columbian, and Yellow Fir) are also ideal.
Several sailboats, especially the tall ships, have masts made of pine and sometimes redwood. Other cedar species like the Port Orford or the Oregon cedar, can also be used for masts and spars.
Carbon Fiber Masts For Sailboats
Carbon fiber masts are a relatively new addition to the boatbuilding industry, and they have a few perks over the wood and aluminum ones.
First of all, carbon fiber is both strong and light, making it perfect for sailboats designed for races and which typically have tall masts. The best top-quality carbon fiber masts in the business are used by ships competing in America’s Cup races.
Maintenance Of Masts
It is critical to maintaining the sailboat masts and all of their associated hardware. Masts’ stays, lines, and halyards must be regularly checked, modified, and replaced on a regular basis. Masts made of wood must be lacquered and inspected for rot.
Masts made of aluminum do not typically require regular checks and maintenance, but any indications of a corrosive environment should be acted upon right away.
Build a clear maintenance schedule with your regional boat repairman or boating specialist. Keep in mind that preventative maintenance is always less expensive and simpler than repair work.
Choosing The Right Mast
For those who own a production boat, the options will be determined by the model and manufacturer.
The important factors to keep in mind for one-off boats without a designer sail plan are:
- the masts step’s features
- the length and displacement of the boat
- the addition of backstays and running backstays
- the quantity and placement of chainplates
If the mast is on a step on deck rather than on the structural beam, an image of the step may be useful to the mast maker.
For those who frequently take part in races, a carbon mast will save them from the extra weight and enhance their performance.
The Bottom Line
We hope that this article was helpful in learning more about a sailboat mast, the different types of mast you can see on vessels, as well as the materials they are made of, and their maintenance requirements.
Masts play a vital role in holding the boats in place, allowing people to keep on sailing to their dream destination, and they are also an eye-catching element of sailboats thanks to their vertical form and their length that often surpasses that of the sailboat itself.
Depending on the use of the boat, you will get a different type of mast, and the material it will be made of, its size, height, and weight, will guarantee the best sailing experience!
Related Posts:

Sailing Mast: A Comprehensive Guide to Understanding and Choosing the Perfect Mast
by Emma Sullivan | Aug 3, 2023 | Sailboat Maintenance

Short answer: Sailing Mast
A sailing mast is a tall vertical spar, typically made of wood or metal, which supports the sails on a sailing vessel. It helps harness wind power to propel the vessel forward by providing a framework for hoisting and controlling sails. Masts vary in size and design depending on the type of boat or ship they are used on.
How to Choose the Perfect Sailing Mast for Your Boat
When it comes to sailing, the mast is arguably one of the most crucial components on your boat . It plays a significant role in determining your boat’s overall performance and handling characteristics on the water . Therefore, choosing the perfect sailing mast is essential for any sailor looking to optimize their sailing experience. In this blog post, we will guide you through some key factors to consider when selecting the ideal mast for your boat.
1. Rig Type: The first step in choosing the perfect sailing mast is to understand your rig type. There are various rig types available, such as sloop rig, cutter rig, ketch rig, and more. Each rig type requires a specific mast configuration and design to achieve optimal performance. For instance, a sloop rig typically requires a single mast with one or two sets of spreaders, while a cutter rig demands multiple headsails and additional support from the mast. Understanding your rig type will help you narrow down suitable options for masts.
2. Material: Mast materials come in various options such as aluminum, carbon fiber, wood, or a combination of these materials. The material you choose can greatly influence your boat ‘s performance and durability. Aluminum masts are known for their strength and affordability but may be heavier compared to carbon fiber counterparts that offer enhanced stiffness and weight reduction benefits at a higher cost. Wood masts provide an elegant classic look but require extra maintenance compared to other modern materials.
3. Length and Height: Determining the appropriate length and height of your sailing mast is crucial for achieving good sail balance and proper sail area distribution. A taller mast allows for larger sails and increased speed potential but may become challenging to handle in high winds or limited bridge clearance situations. On the other hand, shorter masts provide better maneuverability but might compromise speed capabilities if not properly compensated by sail adjustments.
4. Bend Characteristics: Understanding bend characteristics is essential when selecting a sailing mast. The amount of bend in the mast significantly affects the sail ‘s shape and performance. Masts with more bend can offer a better power delivery and less heeling force, making them suitable for cruising or heavy wind conditions. Masts with less bend are ideal for racers who require maximum control and efficiency in lighter winds .
5. Budget Considerations: While everyone desires the best quality, it is important to consider your budget when choosing a sailing mast. Evaluating your financial capacity will help you determine if you can afford high-end materials like carbon fiber or if you need to opt for alternatives such as aluminum or wood. Remember that durability and performance may vary with different price ranges, so strike a balance between affordability and quality that suits your needs.
6. Seek Expert Advice: Choosing the perfect sailing mast can be overwhelming due to the multitude of options available on the market. If you’re uncertain about any aspect or need professional guidance, don’t hesitate to consult experts in sailboat rigging or experienced sailors within your community. Their knowledge and expertise can provide valuable insights specific to your boat’s characteristics and intended use.
In conclusion, selecting the perfect sailing mast involves careful consideration of various factors such as rig type, materials, length and height, bend characteristics, budget constraints, and seeking expert advice when in doubt. By taking these aspects into account during your decision-making process, you’ll be well on your way to optimizing your boat’s performance and enhancing your overall sailing experience on the water!
Step-by-Step Guide: Installing a Sailing Mast on Your Sailboat
So, you’ve finally decided to take the plunge and install a new sailing mast on your beloved sailboat. Congratulations! Whether you’re a seasoned sailor or just starting out, installing a new mast can be an exciting and fulfilling experience. However, it can also feel like quite the daunting task if you’re not sure where to begin. But fear not, because we’re here to walk you through the process step by step.
Before diving into the nitty-gritty details, there are a few things to keep in mind. Firstly, make sure to gather all the necessary tools and equipment prior to starting this project. You’ll need items such as a tape measure, wrenches, screws, and possibly some extra hands to assist during certain steps. Additionally, ensure that your new mast is an appropriate fit for your sailboat – double-checking compatibility is crucial.
Now that we have our tools at hand and have confirmed our sailboat-mast compatibility let’s get started!
1. Preparation – Begin by thoroughly inspecting your sailboat’s existing mast setup (if applicable) or identifying the ideal location for installation if it’s a completely new addition. Take measurements of relevant areas such as height and width requirements while considering any potential obstructions that might impede proper functionality.
2. Removal (if necessary) – If you’re replacing an existing mast, securely stow away sails and rigging before carefully removing the old mast using appropriate safety measures (remember: safety first!). Ensure that any electrical connections or wiring are disconnected properly.
3. Assembling the New Mast – Unpack your brand-new shiny mast from its packaging ensuring that all parts are included and nothing is damaged during transportation. Follow manufacturer instructions for assembling various sections while taking care not to overtighten fasteners or strip threads.
4. Securing the Base – With assistance (if needed), carefully lift the mast into position on your sailboat . Align it correctly with base fittings or attachment points and securely fasten it using appropriate boat-specific hardware. Verify that all connections are tightened adequately, but be cautious not to overtighten.
5. Rigging Connections – It’s time to connect the rigging components to your newly installed mast . Begin by attaching shrouds and stays, carefully following your sailboat’s specific rigging plan to ensure proper placement and tensioning. Use turnbuckles, clevis pins, or other suitable connectors as necessary.
6. Wiring Setup – If you have electrical systems onboard, now is the perfect moment to reconnect them (if disconnected during removal). Ensure that all wires are properly routed and connected according to their respective devices or systems while double-checking for any worn-out insulation or sheathing.
7. Finishing Touches – Double-check each connection point for security and stability before moving on to adding finishing touches like spreaders, lighting fixtures (if applicable), wind indicators, antennas, or anything else you wish to incorporate onto your sailing mast.
8. Sea Trial – Once everything is properly assembled and secured, take your sailboat out for a sea trial in calm waters initially. Make adjustments as necessary along the way – inspect for potential issues such as excessive flexing or strain on any component.
9. Enjoyment! – Now that you’ve successfully installed a new sailing mast on your sailboat, give yourself a pat on the back – bravo! Take a moment to admire your handiwork before setting sail into uncharted waters with confidence and newfound excitement!
Installing a sailing mast may seem like an intimidating task at first glance, but armed with patience, attention to detail, and our step-by-step guide above, you’ll find yourself breezing through the process (pun intended) in no time at all! So don’t hesitate—get started on transforming your sailboat and get ready for endless hours of adventure on the open seas .
FAQs about Sailing Masts: Everything You Need to Know
Are you a sailing enthusiast or someone looking to learn more about the fascinating world of sailing masts? Look no further! In this comprehensive blog post, we will answer all your burning questions regarding these essential components of any sailboat. So, sit back, relax, and embark on an enlightening journey with us as we dive into the world of sailing masts!
1. What is a sailing mast?
Let’s start with the basics. A sailing mast is a tall vertical spar that forms an integral part of a sailboat’s rigging system. It supports and holds up the sails, enabling them to catch the wind and propel the vessel forward. Masts can vary in size and material depending on the boat’s type and purpose .
2. What materials are commonly used in sailing mast construction?
Sailing masts can be crafted from several materials, each offering its own unique advantages. Traditional wooden masts lend an air of elegance to classic boats but require careful maintenance . Aluminum masts are lighter, affordable, and easier to maintain but may lack the aesthetic appeal for some sailors. Carbon fiber masts are gaining popularity due to their strength-to-weight ratio, providing enhanced performance for competitive racing.
3. How do I choose the right mast for my boat?
Selecting an appropriate mast requires careful consideration of various factors such as boat size, weight distribution, sailing conditions, and personal preferences. Consulting with boat manufacturers or experienced sailors is often recommended to ensure compatibility and optimal performance.
4. Can I modify or customize my sailing mast?
Absolutely! Many modern sailboat owners love to personalize their vessels by adding custom features to their masts. From radar mounts and wind instruments to additional halyard sheaves or even integrated lighting systems – the possibilities are endless! Just be sure any modifications you make maintain structural integrity and do not compromise safety.
5. How do I properly maintain my sailing mast?
Maintaining your mast is crucial for its longevity and performance. Regular inspections for signs of wear and tear, such as cracks or corrosion, are essential. Cleaning the mast with mild soap and water, followed by occasional waxing, helps protect it from UV damage. Additionally, competent rigging checks and tuning should be performed periodically to ensure everything is in proper working order.
6. Can I repair a damaged sailing mast?
Yes, it is often possible to restore a damaged mast depending on the severity of the issue. Minor damages like small cracks or dents can be repaired using specialized adhesives or fillers made for your specific mast material. However, more extensive damage may necessitate seeking professional assistance or even replacing the entire mast.
7. Are there any safety measures I should take when dealing with sailing masts ?
While sailing masts are generally safe components of a boat’s rigging system, caution must be exercised during maintenance or modification activities. Using proper safety equipment like harnesses or securing lines and adhering to industry best practices will help prevent accidents or injuries.
8. Are there any alternatives to traditional sailing masts?
Innovations in technology have brought forth new possibilities in sail propulsion systems. Some modern boats employ novel concepts like wing sails or rotating masts that offer different advantages over traditional rigs. These alternative designs aim to maximize aerodynamic efficiency and enhance speed while requiring less physical effort from the crew.
Now armed with comprehensive knowledge about sailing masts, you’re ready to set sail on your next adventure ! Whether you’re an experienced sailor looking to upgrade your rigging or a curious landlubber dreaming of taking up sailing someday, understanding the ins and outs of sailing masts opens up a whole new world of excitement and possibilities!
Understanding the Different Types of Sailing Masts
When it comes to sailing, mastering the nuances of different types of sailing masts is essential for any sailor looking to navigate the waters with finesse. A sailing mast, simply put, is a vertical pole or spar that supports sails and provides stability to a boat or ship. However, not all masts are created equal; each has its unique characteristics that determine how a vessel performs under various weather conditions . In this blog post, we will delve deeper into the various types of sailing masts, understanding their features and advantages.
1. The Classic Mast: The classic mast is perhaps the most common type found on sailboats worldwide. Made from sturdy materials such as wood or aluminum, it offers excellent durability and reliability on the open seas . Designed with simplicity in mind, this type of mast suits sailors who prefer traditional aesthetics paired with dependable performance. It provides sufficient lift for the sails without compromising maneuverability, making it an ideal choice for recreational sailboats.
2. The Fractional Mast: The fractional mast differs from its classic counterpart by positioning a larger proportion of its length below the highest point of attachment for sails (the halyard). This design promotes easier handling and greater control over sail shape adjustments while sailing close to the wind – enabling sailors to navigate sharp turns swiftly. Its flexibility allows sailors to adapt quickly in shifting weather conditions without sacrificing speed or stability.
3. The Bermudian Mast: Originating from Bermuda during their heyday as world-renowned seafarers, this mast design gained popularity due to its exceptional performance capabilities in various wind conditions. Constructed from lightweight yet robust materials like carbon fiber or composite blends, Bermudian masts enhance both agility and speed on deck. Their aerodynamic shape reduces drag and enables better acceleration across tranquil waters or even stormy seas.
4. The Wing Sail Mast: If you’ve ever marveled at boats gliding effortlessly across the water , seemingly defying gravity, you were most likely witnessing a wing sail mast in action. Developed in recent years, this cutting-edge mast design features rigid wings that harness wind forces more effectively by minimizing turbulent airflow around the sails. By working on principles similar to an aircraft’s wing, wing sail masts allow vessels to achieve higher speeds with remarkable stability. While predominantly used in competitive sailing due to their complexity and costs, they bring a new dimension of excitement to the sport.
5. The Junk Rig Mast: Drawing inspiration from ancient Chinese sailing techniques, the junk rig mast is characterized by its unique arrangement of multiple sails or “battens” along a flexible mast. This unconventional setup enhances maneuverability and efficiency, allowing sailors to swiftly change directions by manipulating individual sails . Perfect for cruising enthusiasts looking for a hassle-free experience without excessive trimming or complicated systems, junk rig masts offer exceptional ease of use and reliability.
In conclusion, understanding the different types of sailing masts is crucial for both novice and seasoned sailors alike. Whether you’re looking for reliability, speed, maneuverability, or simplicity, there’s a mast design perfectly suited to your preferences and goals on the water. By familiarizing yourself with these variations – from classic masts to cutting-edge wing sail designs – you’ll be better equipped to make informed choices when it comes to selecting the right mast for your vessel’s needs. So go ahead and set sail towards new adventures armed with knowledge about these fascinating structures that shape your sailing experience!
Tips and Tricks for Maintaining and Repairing Your Sailing Mast
Welcome to our blog section, where we are dedicated to providing you with detailed professional tips and tricks for maintaining and repairing your sailing mast. Whether you’re a seasoned sailor or just starting out, it’s crucial to keep your mast in top condition for optimal performance on the water. So, buckle up and get ready to learn some clever ways to care for this essential part of your sailboat.
1. Inspect Regularly: Starting with the basics, regular inspection is crucial for identifying any potential issues before they become major problems. Take the time to carefully examine the entire mast, paying close attention to fittings, sheaves, rivets, welds, and other hardware. Look out for signs of damage like cracks, corrosion, or loose connections.
2. Keep it Clean: Maintaining a clean sailing mast not only gives your boat an appealing aesthetic but also enhances its functionality. Before hitting the water or during routine maintenance days, gently wash down the mast using mild soap and water. This will remove salt residue and prevent the buildup of dirt or grime that can cause long-term damage.
3. Lubricate Properly: Proper lubrication plays a significant role in keeping your sailing mast in excellent shape. Apply appropriate marine-grade lubricants to pulleys, fittings, tracks, and any moving parts regularly. This reduces friction, extends their lifespan while ensuring smooth operation on every voyage .
4. Protect Against UV Rays: Extended exposure to sunlight can degrade the integrity of your sailing mast over time. To prevent UV damage*, consider installing UV resistant covers on vulnerable areas such as spreader ends or using preventative products designed specifically for this purpose.
5. Preserve Through Winter Storage: When winterizing your sailboat for prolonged storage periods**, make sure you take special care of the mast too! Protect it from extreme temperature changes by storing it horizontally rather than vertically if possible; this will help maintain its structural integrity throughout freezing conditions.
6. Repair with Professional Help: Sometimes, no matter how diligent you are, repairs are inevitable. In such cases, it’s always wise to seek professional assistance from experienced mast repair experts who possess the necessary knowledge and equipment. They can assess the extent of damage accurately and perform repairs or replacements with minimal risk to your mast.
Remember, a well-maintained sailing mast not only enhances your boat’s performance but also ensures your safety on the water. So, be proactive in conducting regular inspections and adopting good maintenance practices, leaving you with a reliable and sturdy mast that withstands even the toughest sailing conditions.
*Author’s Note: Protecting against UV rays should be an essential part of maintaining any sailboat component exposed to sunlight. **Author’s Caution: Before storing your sailboat for winter, refer to manufacturer guidelines and consult with professionals if necessary
The Importance of Proper Rigging in Relation to Your Sailing Mast
Proper rigging plays a critical role in the performance and safety of your sailing mast. While many sailors focus on choosing the right boat and sails, they often overlook the importance of correctly setting up and maintaining their rigging. In this blog post, we will delve into the key reasons why proper rigging is essential for a successful and enjoyable sailing experience.
Firstly, let’s discuss what rigging actually means. Rigging refers to all the wires, lines, and fittings that support and control your mast and sails . It includes elements such as shrouds, stays, halyards, sheets, and various hardware components. These components work together like a well-choreographed dance to keep your mast upright, control its shape under different wind conditions, and overall enhance your boat ‘s performance.
One of the primary reasons why proper rigging is crucial is related to safety. A poorly rigged mast can lead to disastrous consequences while out at sea. Imagine being in rough weather conditions with an unsecured or weakly tensioned shroud – this could result in an unexpected dismasting or even worse accidents. Regularly inspecting your rigging for signs of wear and tear, corrosion or fatigue becomes imperative to avoid any unfortunate incidents due to equipment failure.
Furthermore, properly tuned rigging significantly contributes to your boat ‘s performance on the water. Fine-tuning the tension of shrouds and stays has a direct impact on how much bend or curve you can put into your mast. Adjusting these tensions allows you to control sail shape more precisely by changing factors such as luff tension or twist. Proper control over these variables means better efficiency in different wind conditions – whether you’re racing competitively or cruising leisurely.
The alignment of your mast also depends heavily on correct rigging setup. A misaligned mast can cause excessive sideways load on certain parts of its structure leading to premature wear on fittings or even chronic bending issues over time. This alignment also affects how well your boat balances, affecting its ability to stay on course and reducing your need to constantly adjust the rudder. Proper rigging ensures that your mast is correctly aligned vertically and horizontally, optimizing its overall performance .
Proper rigging isn’t just about safety and performance but also contributes to the longevity and maintenance of your sailing mast. Constantly overlooked, regular inspections of rigging are vital to identifying any potential issues before they become major problems. Regular lubrication or replacement of worn-out parts can ultimately save you from more costly repairs or replacements in the future.
In conclusion, proper rigging is an essential aspect of sailing that should not be taken lightly. It ensures both safety and optimal performance by supporting your mast, controlling sail shape, aligning the mast correctly, and maintaining its overall health. Staying diligent with routine inspections will help avoid any unexpected incidents while maintaining a well-maintained rig for years to come. So, pay close attention when it comes to rigging – it’s a small detail that makes a significant difference in your sailing experience!
Recent Posts
- Approaching a Mooring Buoy: Essential Tips for Safe Navigation
- Best Tiller Autopilot: Enhance Your Sailing Experience
- Nautical Navigator: Essential Tools and Techniques for Seamanship
- Sail Making Material: A Comprehensive Guide
- 2 Person Dinghy: The Ultimate Guide to Choosing the Perfect Boat
- Sailboat Gear and Equipment
- Sailboat Lifestyle
- Sailboat Maintenance
- Sailboat Racing
- Sailboat Tips and Tricks
- Sailboat Types
- Sailing Adventures
- Sailing Destinations
- Sailing Safety
- Sailing Techniques

What Is A Sailboat Mast?
A sailboat mast is one of the most defining features of a sailboat (along with the sails of course!) You can immediately tell that a boat is a sailing boat when you spot the tall mast sticking out of the hull.
But why do sailboats need a mast? Having lived on a sailboat for years now I’ve never really questioned the need for a mast. It’s such an integral part of the boat that I just sort of forget it’s there!
When our friends recently lost their mast due to a rigging failure it got me thinking – why do sailboats need a mast and what function (aside from holding up the sails) do they actually play. It turns out, quite a lot!
We’re going to dive into the fascinating world of sailboat masts, exploring different rigs, mast materials, and the different functions that masts play. It’s important stuff if you want to go sailing, and a lot of it I should have known sooner!

As an Amazon Associate, we earn from qualifying purchases. We also earn from other affiliate programs. This means we may receive a small commission on products purchased through our links at no extra cost to you.
Table of Contents
Why do sailboats need a mast, parts of the mast, what materials are masts made from, single mast rigs, sailboats with two masts, sailboats with three masts, how to look after your mast.

A sailboat mast is a vertical, upright structure that supports the sails of a sailboat. It is a crucial component of the boat’s rigging system and plays a key role in harnessing the power of the wind to propel the vessel. Typically located in the center of the boat, the mast extends upward from the deck or hull.
The height of the mast varies depending on the size and type of the sailboat, directly impacting the sail area and overall performance of the boat.
Together with the boom (a horizontal spar attached to the bottom of the mast), the mast allows sailors to control the shape and orientation of the sails, optimizing their efficiency in different wind conditions.
The design and configuration of the mast can vary depending on the type of sailboat, such as a sloop, cutter, ketch, or schooner.
Sailboats require a mast primarily to support the sails.
It holds the sails in an elevated position, allowing them to catch the wind effectively. Without a mast, the sails would lack the means to be raised and positioned to harness the power of the wind.
There are a few other important jobs that the mast plays:
Control and Manipulation of Sails: The mast, along with the boom (a horizontal spar attached to the mast’s lower end), enables sailors to control and manipulate the sails.
By adjusting the angle and tension of the sails through the mast, sailors can optimize their performance according to wind conditions and desired boat speed.
This control allows for maneuverability and efficient use of wind power.
Structural Integrity: The mast contributes to the overall structural integrity of the sailboat. It helps distribute the loads and forces exerted by the sails, rigging, and masthead components throughout the boat’s hull and keel.
The mast’s design and construction ensure stability and strength, allowing the boat to withstand the forces generated by the wind.
Attachment Points for Rigging: The mast provides attachment points for various rigging components, including halyards (lines used to raise and lower the sails), stays (wires or rods that support the mast in different directions), and shrouds (wires that provide lateral support to the mast).
These rigging elements are essential for properly tensioning the sails and maintaining the mast’s stability.
Height and Visibility: The mast’s height contributes to the sailboat’s visibility, allowing other vessels to spot it more easily, particularly when sailing in congested waters. The mast’s presence also serves as a visual reference for determining the boat’s position, orientation, and distance from potential hazards.
While the mast’s primary purpose is to support the sails and enable control over their position, it also plays a significant role in maintaining the structural integrity of the sailboat and enhancing its visibility on the water.
Basically, the mast is pretty darn important!

Along with a million other confusing sailboat terms , the mast has lots of different parts too. A sailboat mast consists of several distinct parts, each serving a specific function. Here are the different parts commonly found on a sailboat mast:
- Masthead: The masthead is the topmost section of the mast. It often includes attachment points for various components such as halyards (lines used to raise and lower the sails), the forestay (the wire or rod that supports the front of the mast), and other rigging elements. The masthead may also house instruments like wind vanes or antennas.
- Spreaders: Spreaders are horizontal bars attached to the mast, typically positioned at specific intervals along its length. They help support the rigging wires and prevent excessive sideways bending of the mast. The position and angle of the spreaders contribute to the proper alignment and tension of the rigging.
- Shrouds: Shrouds are the wires or cables that provide lateral support to the mast. They connect the mast to the sides of the boat, helping to stabilize the mast and distribute the loads generated by the sails. Shrouds are typically tensioned using turnbuckles or other adjustable fittings.
- Backstay: The backstay is a cable or wire that provides support to the rear of the mast. It helps counterbalance the forces exerted by the forestay and the mainsail, preventing the mast from excessively bending forward. Adjustable backstays allow for tuning the mast’s rigidity based on wind conditions and sail trim.
- Halyard Sheaves: Halyard sheaves are small wheels or pulleys located at the masthead or lower down the mast. They guide halyards, which are lines used to raise and lower the sails. Halyard sheaves minimize friction, allowing smooth and efficient hoisting or lowering of the sails.
- Gooseneck: The gooseneck is a fitting that connects the boom to the mast. It allows the boom to pivot or rotate horizontally, enabling control over the angle and position of the mainsail. The gooseneck may include a pin or other locking mechanism to secure the boom to the mast.
- Mast Step: The mast step is the base or fitting where the mast rests and is secured to the deck or hull of the sailboat. It provides stability and distributes the loads from the mast to the boat’s structure.
These are some of the primary parts found on a sailboat mast. The specific configuration and additional components may vary depending on the sailboat’s design, rigging system, and intended use.

I was surprised to learn that sailboat masts are commonly made from several different materials, each offering its own advantages in terms of strength, weight, and flexibility.
The choice of material depends on various factors, including the type and size of the sailboat, desired performance characteristics, and budget.
Here are some of the materials used for sailboat mast construction:
Aluminum is a popular choice for sailboat masts due to its favorable combination of strength, lightweight, and corrosion resistance. Aluminum masts are relatively easy to manufacture, making them cost-effective. They offer good stiffness, enabling efficient power transfer from the sails to the boat.
Carbon Fiber
Carbon fiber has gained significant popularity in sailboat mast construction, especially in high-performance and racing sailboats. You’ll see black carbon fibre masts on fancy sailboats!
Carbon fiber masts are exceptionally lightweight, providing excellent stiffness-to-weight ratios. This allows for enhanced responsiveness, improved performance, and reduced heeling (tilting) of the boat.
Carbon fiber masts can be precisely engineered to optimize flex patterns and provide targeted strength where needed.
Traditional sailboats, particularly those with a classic or vintage design, may have masts made from wood. Wood offers an aesthetically pleasing and traditional look.
Wooden masts can be constructed using solid wood or laminated techniques, which involve layering thin strips of wood for added strength and stability. Wood masts require regular maintenance, including varnishing and sealing to protect against moisture.
In some cases, steel may be used for sailboat masts, especially in larger vessels or those designed for specific purposes, such as offshore cruising or heavy-duty applications.
Steel masts offer robustness and durability, but they are heavier compared to other materials. They require adequate corrosion protection to prevent rusting.
Composite Materials
Sailboat masts can also be constructed using composite materials, such as fiberglass or fiberglass-reinforced plastics. These materials provide a balance between cost, weight, and strength. Fiberglass masts can be an option for recreational sailboats or those on a tighter budget.
It’s worth noting that advancements in materials and manufacturing techniques continually evolve, introducing new possibilities for sailboat mast construction.
The choice of mast material should consider factors such as boat type, intended use, performance requirements, and personal preferences, balanced with considerations of cost and maintenance.
Different Types Of Masts

There are several different types of masts used in sailboat designs, each with its own characteristics and purposes.
We’ve included how the masts are fixed on the boat. This one is an important one when buying a sailboat as you might have a preference over how your mast is attached to the hull or deck.
We’ve also included different rigs, as some boats have just a single mast and other sailboats will have two or more masts. Again, you might have a preference as to which rig set up you prefer so it’s worth knowing the pros and cons of each.
Keel-stepped Mast
A keel-stepped mast is one that extends down through the deck and is secured to the boat’s keel or structural framework. Keel-stepped masts offer stability and strength, as they transfer the loads directly to the boat’s foundation.
They are commonly found in larger sailboats and offshore cruising vessels. We loved knowing our deck was secured to one of the strongest parts of the boat.
It does come with some problems though, like the fact it can leak and start raining in the boat! A decent mast boot will stop this.
Deck-stepped Mast
A deck-stepped mast rests on a step or fitting on the deck, rather than extending down through it. Deck-stepped masts are typically used in smaller sailboats and are more straightforward to install, maintain, and unstep.
They are often lighter and less expensive than keel-stepped masts but may sacrifice some stability and rigidity.
Fractional Rig
A fractional rig features a mast where the forestay is attached below the masthead, typically at a point less than halfway up the mast’s height. This design allows for a larger headsail and a smaller mainsail.
Fractional rigs are popular on modern cruising and racing sailboats as they offer versatility, easy sail control, and improved performance in various wind conditions.
Masthead Rig
In a masthead rig, the forestay attaches at the top of the masthead. This design is commonly found in traditional sailboats. Masthead rigs typically feature larger headsails and smaller mainsails. They are known for their simplicity, easy balance, and suitability for cruising and downwind sailing.
There are various different rig set ups that just have one single mast. We’ll look at a few of the most popular types, but be aware that there are quite a few variations out there these days! It can get a little complicated!
The sloop rig is one of the most popular and widely used single mast rigs. It consists of a single mast with a mainsail and a headsail. The headsail, typically a jib or genoa, is attached to the forestay at the bow of the boat, while the mainsail is attached to the mast and boom.
Sloops offer simplicity, versatility, and ease of handling, making them suitable for a wide range of sailboats, from small day-sailers to larger cruising vessels.
A cutter rig utilizes two jibs : a smaller headsail attached to the forestay and a larger headsail called a staysail attached to an inner stay or a removable stay.
The mainsail is usually smaller in a cutter rig. This rig provides versatility and options for different sail combinations, making it suitable for offshore cruising and handling various wind conditions.
We absolutely loved our cutter rig as it gave so much flexibility, especially in heavy weather. A downside is that tacking is a little harder, as you have to pull the genoa past the stay sail.
Sailboats with two masts tend to be seen on older boats, but they are still popular and quite common, especially with long-distance sailors looking for versatility.
The yawl rig features two masts, with a shorter mizzen mast positioned aft of the main mast and rudder stock. The mizzen mast is usually shorter than the main mast.
Yawls offer versatility, improved balance, and increased maneuverability, making them suitable for offshore cruising and long-distance sailing.
A ketch rig has two masts: a taller main mast located near the boat’s center and a shorter mizzen mast positioned aft of the main mast but forward of the rudder stock. The mizzen mast is typically shorter than the main mast.
Ketch rigs provide additional sail area and options for sail combinations, offering good balance and flexibility for cruising and long-distance sailing. A lot of long-term cruisers love ketch rigs, though they tend to be found on older boats.
The downside is that you’ll have two masts with accompanying rigging to maintain, which isn’t necessarily a small job.
Sailboats with three masts or more are rare. They tend to be seen only on very large, expensive sailing yachts due to the additional expense of maintaining three masts, rigging and additional sails.
They aren’t great for single-handed crews but they do look very impressive and can power bigger vessels.
Schooner Rig
A schooner rig features two or more masts, with the aft mast (known as the mizzen mast) being taller than the forward mast(s).
Schooners are known for their multiple headsails and often have a gaff-rigged or square-rigged configuration on one or both masts. Schooner rigs offer impressive sail area, versatility, and classic aesthetics.
Schooner rigs are much rarer than the rigs mentioned above so it’s unlikely you’ll find one on a cruising vessel.
These are just a few examples of the different types of masts used in sailboat designs. Each rig type has its own advantages and considerations in terms of sail control, performance, balance, and intended use.
The choice of mast and rig depends on factors such as boat size, purpose, sailing conditions, and personal preferences.

We didn’t know the first thing about looking after our mast when we first moved aboard and we made it our mission to find out. When you’re sailing frequently then the last thing you want is to experience a mast coming down mid-passage!
Taking proper care of your sailboat mast is important to ensure its longevity and optimal performance. Here are some tips on how to look after your mast:
- Regular Inspections: Conduct regular visual inspections of your mast to check for any signs of damage, wear, or corrosion. Look for cracks, dents, loose fittings, or any other issues that may compromise the mast’s integrity.
- Cleaning: Keep your mast clean by regularly washing it with fresh water. Remove dirt, salt, and other contaminants that can accelerate corrosion. Use a mild detergent or boat-specific cleaner, and rinse thoroughly.
- Corrosion Prevention: Protect your mast from corrosion by applying a suitable corrosion inhibitor or protective coating. Pay particular attention to areas where fittings, rigging, or other components come into contact with the mast.
- Lubrication: Lubricate moving parts such as sheaves, shackles, and slides with a marine-grade lubricant. This helps prevent friction and ensures smooth operation. Be cautious not to over-lubricate, as excess lubricant can attract dirt and debris.
- Rigging Maintenance: Inspect your rigging regularly for signs of wear, such as broken strands, fraying, or excessive stretching. Replace any worn or damaged rigging promptly to avoid potential mast damage.
- UV Protection: The sun’s UV rays can degrade and weaken the mast over time. Protect your mast from UV damage by applying a UV-resistant coating or using mast covers when the boat is not in use.
- Storage Considerations: If you need to store your boat for an extended period, consider removing the mast and storing it horizontally or in a mast-up position, depending on the boat design. Store the mast in a clean, dry, and well-ventilated area to prevent moisture buildup and potential damage.
- Professional Inspections: Periodically have your mast inspected by a professional rigger or boatyard to assess its condition and identify any potential issues that may require attention. They can provide expert advice on maintenance and repair.
Remember, if you are unsure about any maintenance or repair tasks, it’s always recommended to consult with a professional rigger or boatyard to ensure proper care and safety of your mast.
We learned so much from having our rigging inspected, so we highly recommend you do this if you’re at all unsure.
Conclusion: What Is A Sailboat Mast?
In conclusion, a sailboat mast is a crucial component that plays a vital role in the performance, control, and integrity of a sailboat. It’s a good idea to learn about sailboats before you head out on a sail – unlike us!
The mast serves as a vertical structure that supports the sails, allowing them to capture the power of the wind effectively. The mast enables sailors to control and manipulate the position of the sails, optimizing performance based on wind conditions.
Additionally, the mast contributes to the overall structural integrity of the boat, distributing loads and forces throughout the hull and keel. Various rigging components, such as halyards, shrouds, and spreaders, are attached to the mast, providing support and enabling precise sail control.
By understanding the importance of the mast and properly caring for it through regular inspections, cleaning, corrosion prevention, lubrication, and rigging maintenance, sailors can ensure their mast’s longevity and optimal performance.
A well-maintained sailboat mast contributes to a safe, enjoyable, and successful sailing experience.
- How much do new sails cost?
- How long do new sails last?
- Storm sails
Similar Posts

13 Best Small Catamarans For Cruising 2024

How Long Do New Sails Last?

Sailing Stories

The Best Shallow Draft Liveaboard Sailboat 2024

Can You Sail In The Rain?

12 Tips For Restoring an Old Boat: Costs, Time, And Expert Advice
After sailing around the world, Cole Brauer says she's more grounded than ever

Cole Brauer's adventure put her in the history books and in the heart of the most isolated and dangerous places on Earth. Not to mention Instagram .
The southern oceans of the Atlantic and Pacific that Brauer endured alone in her 30,000-mile sailboat voyage brought her face-to-face with bigger waves and storms than most people will ever see."It's like going to Mars and hoping that you can breathe," says Brauer, who became the first American woman this month to sail solo nonstop around the globe . "It's not made for humans."
She's now a seafaring celebrity who has been deluged with more questions about aquatic travel and surviving the dangers of the deep than Jules Verne and Jacques Cousteau. That's because Brauer's social media followers now total half a million, and many are asking about her journey and how she did it.
"With this newfound fame, I want to keep my feet on the ground," says the 29-year-old from Long Island. She's looking to chart a new course in the sailing industry, which has historically been a bastion of elitism and exclusivity, she said.
Brauer used Starlink − the low-orbit satellite network owned by tech billionaire Elon Musk − to get an internet signal on her voyage so that she could talk to her team, FaceTime with her mother and post videos to Instagram from her 40-foot Class40 sailboat, First Light.
She departed from A Coruña, Spain, on Oct. 29 and was at sea for 130 days. She competed against 15 male sailors, eight of whom had to drop out. Sailors set off at staggered times, depending on the speed of their boat. Brauer finished second in the race, behind France's Phillipe Delamare.
"Cole put in a tremendous effort to achieve a tremendous result," said Marco Nannini, who organized the Global Solo Challenge race.
Treacherous conditions in the Southern Hemisphere
Because the race took Brauer around the world, she had to endure scorching temperatures near the equator and near-freezing cold in the globe's southern oceans − where waters are more choppy and dangerous to sail, she said.
"I always had respect for the ocean, but this was an absolute different level," Brauer said. "It's beautiful. It's uninhabited. It's just untouched by humans."
Stronger winds and underwater currents in the Indian, South Atlantic and Pacific oceans often react to form bigger waves and "crazy storms," Brauer said, making those areas "some of the most dangerous places to be on the planet."
Unlike the part of the Atlantic Ocean stretching between North America and Europe, the southern oceans have a lot less traffic, Brauer said. During the two months she sailed there, she said, she saw only one other boat. The weather was colder and grayer, and the nights were much shorter.
The scariest moment came about two weeks from the end of race, when over just a couple days a fellow competitor had to abandon his ship because it started to sink and another had to do the same after his boat lost its mast.
It caused Brauer to feel paranoid, she said, even imagining noises coming from her own boat, which was also going through normal wear and tear.
"I just felt like, 'Oh my gosh, what's going to break next?'" she said. "Is the boat going to break in half?"
Alone in the middle of the ocean, Brauer felt homesickness, then zen
Brauer made it all the way around the world the same way any sailor goes from one point to another: staying out of direct wind and tacking from one direction to the next until she finally got to the finish line.
"You want to go straight, but you can't," she said. "You can't sail directly into the breeze; you have to tack back and forth at a 45-degree angle. I went around the world tacking, and jibing, and eventually you make it there − but there's a lot of twists and turns."
Brauer also had to constantly check the weather and change sails while also maintaining the boat.
"Everything has the possibility of breaking," Brauer said.
Brauer slept on a pile of bedding on the boat's floor for two to four hours at a time. She boiled water and used a warm wash cloth to bathe, she said. She packed 160 days' worth of freeze-dried food, including a peaches and cream oats mix that became her favorite.
Despite the technical challenges of sailing around the world, homesickness was by far the biggest challenge, she said. In Spain, before she set off on the race, nightly family-style dinners with teammates and group outings in A Coruña created intense personal bonds that she longed for on the ocean.
"All of a sudden I had a family of like 12, and you get very used to being surrounded by all these boisterous and loud people," she said.
But then, something clicked one evening when Brauer was in the boat's bow watching the colors of the sunset bleed through a massive sail.
"My body and my mind finally got used to being out there and and knowing that this was like where I was supposed to be," she said.
Brauer said she saw dolphins, sea turtles, plenty of fish and even a whale as big as her boat.
"It's just so magical," she said.
Pitch-black night skies were another highlight, Brauer said, especially when she was sailing through hot areas and the darkness brought cooler temperatures.
Brauer documented every moment on Instagram
Brauer shared details of her journey with tens of thousands of followers on Instagram. At the start of the race, her Instagram account had 10,000 followers and now boasts nearly 500,000.
Creating and posting more than 150 original videos from the boat allowed Brauer to stay connected with other people even when she was in the middle of the ocean.
Many of Brauer's videos showed her raw emotions up close, like in one post from early in the race when she angrily vents about the moment she realized she'd have to fix several boat parts on her own.
"Right now I've been feeling just broken," she says in the video.
That vulnerability is what's allowing Brauer to chart a new course in the sailing industry, she said.
"I've shown a good piece of me. I've put my heart and soul out there and I think a lot of people are really afraid to do that," she told USA TODAY. "If you want to judge me for changing or molding myself a different way, you don't have to follow me."
Race win was a team effort
Brauer surrounded herself with a team of sailors and experts who helped guide her from ashore. There were medical staff, a weather router, an expert rigger, an electronic systems manager, a sailmaker and many other team members.
Next, Brauer and her behind-the-scenes team are preparing for the Vendée Globe in 2028, another around-the-world race with stricter rules and a bigger cash prize. She won 5,000 euros (about $5,430) for finishing second in the Global Solo Challenge.
That race will be far more difficult, Brauer said, because the sailors have to race on their own and cannot receive any verbal assistance from their teammates on land.
Almost two weeks since reaching dry land, Brauer said, she now craves being out on the ocean more than ever and even feels a sense of pain when she's not able to see the water or look up to see a sky covered in white, fluffy clouds.
"The fear used to be about the boat, when I was on the boat. Now the fear is not being out there," she said. "I'm not afraid of the ocean − I'm afraid of not being on the ocean."
As for her goal of sailing around the world?
"I did everything that it took to get here, and now I can bask in it. I made the biggest dream that I could possibly think of doing and then did it."
Sailor Cole Brauer makes history as the first American woman to race solo around the world
Aboard her 40-foot racing boat First Light , 29-year-old Cole Brauer just became the first American woman to race nonstop around the world by herself.
The New York native pulled into A Coruña, Spain, on Thursday after a treacherous 30,000-mile journey that took 130 days.
She thanked a cheering crowd of family and fans who had been waiting for her on shore.
“This is really cool and so overwhelming in every sense of the word,” she exclaimed, before drinking Champagne from her trophy.
The 5-foot-2 powerhouse placed second out of 16 avid sailors who competed in the Global Solo Challenge, a circumnavigation race that started in A Coruña with participants from 10 countries. The first-of-its-kind event allowed a wide range of boats to set off in successive departures based on performance characteristics. Brauer started on Oct. 29, sailing down the west coast of Africa, over to Australia, and around the tip of South America before returning to Spain.
Brauer is the only woman and the youngest competitor in the event — something she hopes young girls in and out of the sport can draw inspiration from.
“It would be amazing if there was just one girl that saw me and said, ‘Oh, I can do that too,’” Brauer said of her history-making sail.
It’s a grueling race, and more than half of the competitors have dropped out so far. One struck something that caused his boat to flood, and another sailor had to abandon his ship after a mast broke as a severe storm was moving in.
The four-month journey is fraught with danger, including navigating the three “Great Capes” of Africa, Australia and South America. Rounding South America’s Cape Horn, where the Atlantic and Pacific Oceans meet, is often likened to climbing Mount Everest because of its perfect storm of hazards — a sharp rise in the ocean floor and whipping westerly winds push up massive waves. Combined with the frigid waters and stray icebergs, the area is known as a graveyard for ships, according to NASA. Brauer said she was “so unbelievably stoked” when she sailed past Cape Horn in January.
Marco Nannini, organizer of the Global Solo Challenge, said the comparison to scaling Mount Everest doesn’t capture the difficulty of the race. Sailing solo means not just being a skipper but a project manager — steering the boat, fixing equipment, understanding the weather and maintaining one’s physical health.
Nannini cited the relatively minuscule number of people who have sailed around the world solo — 186, according to the International Association of Cape Horners — as evidence of the challenges that competitors face. More than 6,000 people have climbed Mount Everest, according to High Adventure Expeditions .
Brauer stared down 30-foot waves that had enough force to throw her across the boat. In a scare caught on camera, she badly injured her rib near the halfway point of the event. At another point, her team in the U.S. directed Brauer to insert an IV into her own arm due to dehydration from vomiting and diarrhea.
She was able to stay in constant communication with members of her team, most of whom are based in New England, and keep herself entertained with Netflix and video calls with family through Starlink satellites. That’s also how Brauer was able to use Zoom to connect with NBC News for an interview, while she was sailing about 1,000 miles west of the Canary Islands.
While Brauer was technically alone on First Light, she had the company of 450,000 followers on Instagram, where she frequently got candid about life on an unforgiving sea while reflecting on her journey.
“It all makes it worth it when you come out here, you sit on the bow, and you see how beautiful it is,” she said in an Instagram video, before panning the camera to reveal the radiant sunrise.
Brauer grew up on Long Island but didn’t learn to sail until she went to college in Hawaii. She traded in her goal of becoming a doctor for life on the water. But she quickly learned making a career as a sailor is extremely difficult, with professional racers often hesitant to welcome a 100-pound young woman on their team.
Even when she was trying to find sponsors for the Global Solo Challenge, she said a lot of people “wouldn’t touch her with a 10-foot pole” because they saw her as a “liability.”
Brauer’s message to the skeptics and naysayers? “Watch me.”
“I push so much harder when someone’s like, ‘No, you can’t do that,’ or ‘You’re too small,’” Brauer explained.
“The biggest asset is your mental strength, not the physical one,” Nannini said. “Cole is showing everyone that.”
Brauer hopes to continue competing professionally and is already eyeing another around-the-world competition, but not before she gets her hands on a croissant and cappuccino.
“My mouth is watering just thinking about that.”
Emilie Ikeda is an NBC News correspondent.
IMAGES
VIDEO
COMMENTS
16 - forestay 17 - boom vang. Stays are ropes, wires, or rods on sailing vessels that run fore-and-aft along the centerline from the masts to the hull, deck, bowsprit, or to other masts which serve to stabilize the masts. [1] A stay is part of the standing rigging and is used to support the weight of a mast .
If the boat builder placed the chainplates at slightly different spots, then the tensions in each stay will differ to maintain the mast in the proper position. Now that we have moved your mind away from a set number, lets look at the actual tightness of the stays. If you don't want the mast to move, then all the stays would need to be bar tight!
A sailboat stay is a cable or line that supports the mast. Stays bear a significant portion of the mast load. Stays are a significant part of a sailboat's standing rigging, and they're essential for safe sailing. Stays support the mast and bear the stress of the wind and the sails. Losing a stay is a serious problem at sea, which is why it's ...
A sailboat's standing rigging is generally built from wire rope, rod, or occasionally a super-strong synthetic fibered rope such as Dyneema ®, carbon fiber, kevlar or PBO. 1×19 316 grade stainless steel Wire Rope (1 group of 19 wires, very stiff with low stretch) is standard on most sailboats. Wire rope is sized/priced by its diameter which ...
1. Check by sighting up the backside of the mast to see how straight your spar is side to side. You can take a masthead halyard from side to side to ensure that the masthead is on center. Do this by placing a wrap of tape 3′ up from the upper chainplate pin hole on each upper shroud. Cleat the halyard and pull it to the tape mark on one side ...
Short answer: Sailboat stays and shrouds Sailboat stays and shrouds are essential components of the rigging system that provide support and stability to the mast. Stays run from the masthead to various points on the boat, preventing forward and backward movement, while shrouds connect the mast laterally to maintain side-to-side stability. Together, they help distribute
Short answer sailboat stays: Sailboat stays, also known as rigging stays, are structural wires or ropes used to support the mast of a sailboat. They provide lateral stability and prevent excessive vertical movement of the mast. Stays generally run from various points on the mast to different parts of the hull or deck, ensuring the.
Method 2 - Setup & Cut. This is a quick and easy way to make a set of stays. First you need to get a general sense of how long the stay needs to be. Measure the distance from the mast step to the chain plate. Then clamp one end of a measure tape to the mast. Use a 2nd measure tape to get the side distance and presto, you have a good idea how ...
Adjusting Tension: Proper tension adjustment for shrouds and stays plays an essential role in maintaining structural integrity and sail performance after stepping the mast. However, achieving optimum tension can be challenging due to factors such as limited visibility or excessive friction on turnbuckles when adjusting rigging lines under pressure.
That said, it is perfectly possible, though somewhat tedious, to change shrouds and stays in pairs with the mast up by using halyards and intermediate tackles to support it. Probably the trickiest will be the forestay and backstay, as these carry the greatest loads, although all the standing rigging can be loosened to some degree when at rest ...
Heavy aluminum Forestay/Staysail Stay Tang for weld-on applications has 1/2" (13mm) Pin Hole for Forestay or Staysail stay attachment. Tang is (maximum) 4" (102mm) long x 2" wide x 1/2" thick. Designed for welding to mast surface, Tang is cut from 6061-T6 aluminum plate with mill finish.
The rigging system on a sailboat consists of various components, including the mast, boom, shrouds, stays, and sails. These components work together to provide stability, support, and propulsion for your boat. Mast and Boom. The mast is the vertical pole that supports the sails, while the boom is the horizontal pole attached to the mast's base.
Mar 28, 2008. #1. A simple $2 fix to those who step their mast and worry about the mast shroud/stay "T" fittings not seating right. Disastrous dismastings can take place either when raising a mast at the ramp or under sail when twisted fittings eventually (and unannounced) finally fail.u000bu000bA very simple 1/2" grey pvc 2 hole pipe strap ...
A sailboat mast is the towering pole mounted to the deck. It attaches the length of the sail to the boat and supports the shape of the sail. Sailboat masts are the most distinct feature of sailing vessels, and they hold the sails in place. Masts are often taller than the length of the boat. Most modern sailboat masts are made of aluminum ...
Since 1961, RIG-RITE has engineered, manufactured and distributed Spars, Rigging and Hardware Systems for Sailboats. RIG-RITE stocks the largest variety of related Systems and Hardware available anywhere, Specializing in original replacement parts for Systems on yachts built the world over. Spars - Masts, Booms, Spreaders, Spinnaker Poles ...
A sailboat mast is a cylindrical, long vertical spar mounted on the deck and supports the vessel's sails. Masts are a distinctive feature of sailboats and hold the sails in place. ... The long ropes connected to the mast on each side are the stays that hold the mast upright under tremendous force. The boom is attached to the mast by a gooseneck ...
Since the mast is stepped on deck, adding a 6" sleeve to the new spar is probably the best idea. Probably cheaper than adjusting all the shrouds, stays, and sails to fit a shorter mast in any case. If the bottom of the new (short) mast fits into the existing mast step, the sleeve could be added a bit above it.
== Short answer: Sailboat mast == A sailboat mast is a vertical pole or spar that supports the sails of a sailboat. It provides structural stability and allows for adjustment of the sail position to effectively harness wind power. ... - Shrouds and stays: These supportive cables hold the mast in position while also countering sideways forces ...
The mast is the long, standing pole holding the sails. It is typically placed just off-center of a sailboat (a little bit to the front) and gives the sailboat its characteristic shape. The mast is crucial for any sailboat: without a mast, any sailboat would become just a regular boat. The Sails. I think this segment speaks mostly for itself.
A free-standing mast (also known as an unstayed mast) is a type of mast that is not supported by any stays (a sailboat stay is a cable, line, rope, or essentially any material that supports the weight of the mast and ensures safe sailing). A free-standing mast is often seen in small boats because of the pressure exerted on the sail.
A sailboat mast is a tall pole that is attached to the deck. It helps secure the sail's length to the boat and upholds the sail's structure. A sailboat mast is the most defining characteristic of a sailboat, helping keep the sail in place. What's amazing about it is that it can even be taller than the vessel's length!
Begin by attaching shrouds and stays, carefully following your sailboat's specific rigging plan to ensure proper placement and tensioning. Use turnbuckles, clevis pins, or other suitable connectors as necessary. 6. Wiring Setup - If you have electrical systems onboard, now is the perfect moment to reconnect them (if disconnected during ...
A sailboat mast is a vertical, upright structure that supports the sails of a sailboat. It is a crucial component of the boat's rigging system and plays a key role in harnessing the power of the wind to propel the vessel. Typically located in the center of the boat, the mast extends upward from the deck or hull.
The southern oceans of the Atlantic and Pacific that Brauer endured alone in her 30,000-mile sailboat voyage brought ... after his boat lost its mast. ... the boat allowed Brauer to stay connected ...
Aboard her 40-foot racing boat First Light, 29-year-old Cole Brauer just became the first American woman to race nonstop around the world by herself.