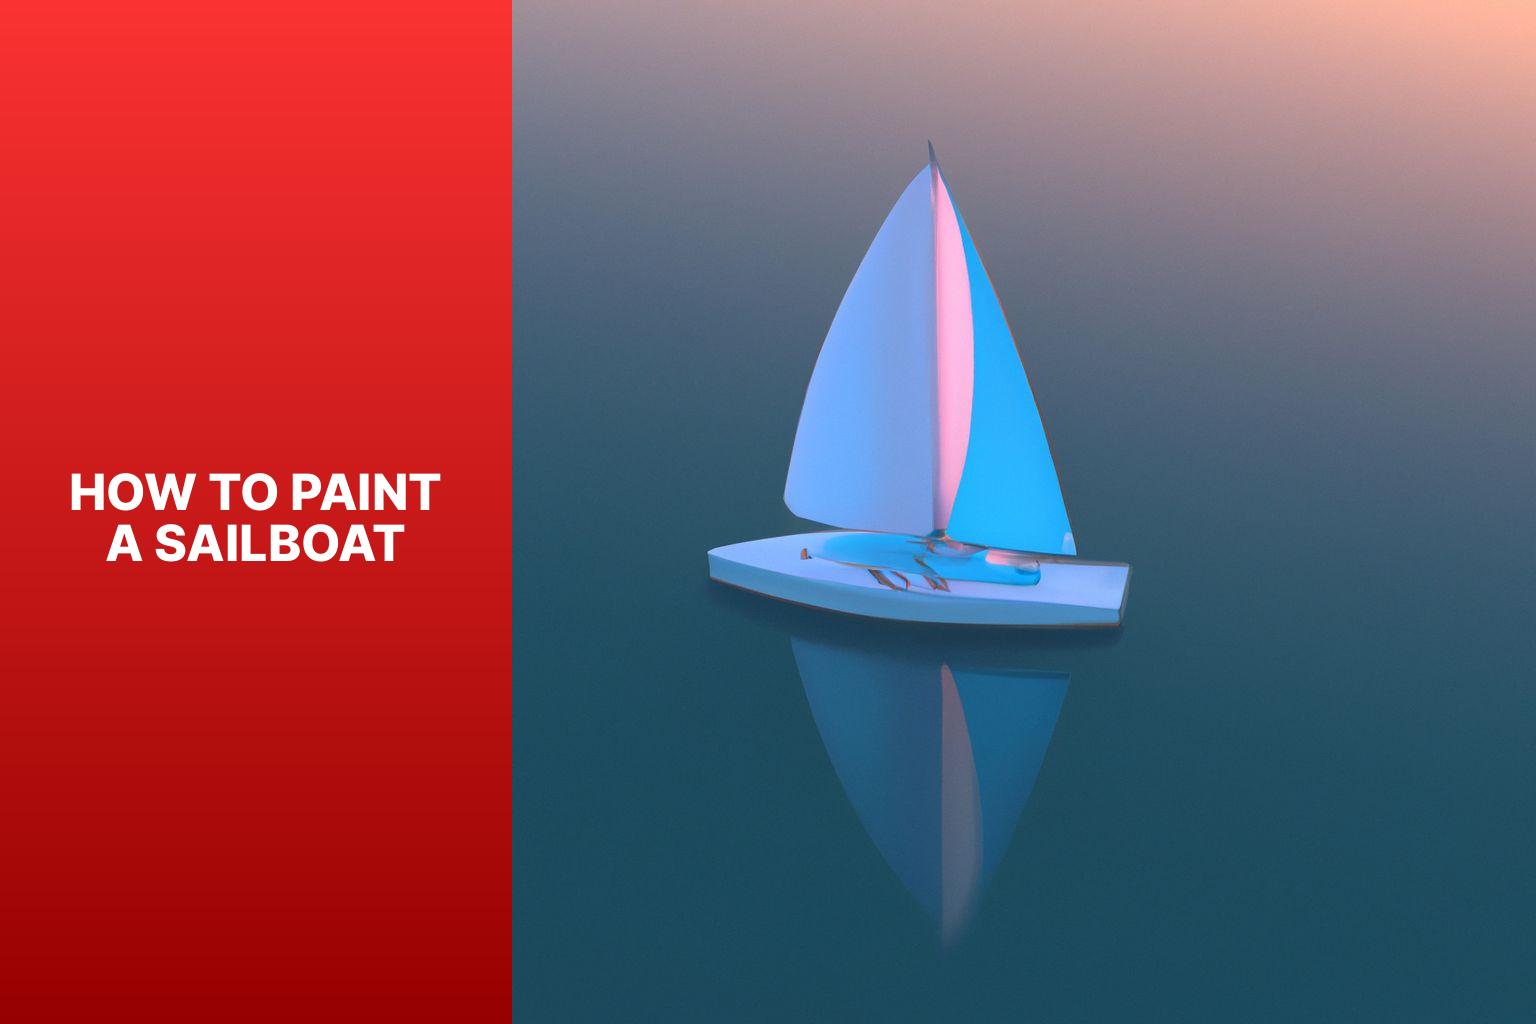
How to Paint a Boat

Learning how to paint a boat is easy, and if you want to make your boat look like new, you'll be surprised what a fresh layer of paint can do. Proper boat maintenance will go a long way in keeping your pride and joy looking great, but when that boat starts to appear aged, knowing how to paint a boat is the key to making it look like new again. And although painting a boat can be time-consuming and expensive, there’s no better way to improve an older boat’s appearance. While this is a rather complex process, we can boil it all down to these five basic steps.
How to Paint a Boat Step-by-Step:
- Remove all hardware (like rails, cleats, and vents) and/or any teak or wood trim on the boat.
- Repair any surface imperfections like chips, dings, or gouges.
- Prep the surface by washing, de-waxing, and thoroughly sanding it.
- Apply the primer, then the paint.
- Wax the boat from stem to stern to protect the new paint job.
Then, simply keep it clean, and rinse it thoroughly after use in saltwater. Remember, before you paint a boat always read the warning labels on all of the supplies and be sure to use the proper protective equipment.


How to Paint a Fiberglass Boat
Painting fiberglass boats isn’t really much different from painting wood boats, except for the type of paint you’ll use and a few details in the prep and application. We should note that the very best finish can be attained by professionals who spray on the paint, rather than applying it with a brush and roller. However, anyone can do a bang-up job painting a boat if they make sure the surface has been properly prepped, and take care during the application.
Paints for Fiberglass Boats
- Single-Part Enamel Paints – These paints are easiest to apply and are less expensive than some other options. However, they also are subject to UV damage over time and the gloss doesn’t tend to hold up as well over the long haul especially if it isn’t constantly waxed and maintained.
- Single-Part Polyurethane Paints – Urethane paints are also easy to apply, don’t cost nearly as much as two-part polyurethanes, and have a long-lasting gloss.
- Two-Part Polyurethane Paints – These undisputedly look best and last longest. Many people would even argue they can out-shine a boat’s original gel coat. However, they are very expensive and are more labor-intensive, as they require mixing, an epoxy primer, and specific temperature and humidity levels for application.
Whichever of these you choose, job number-one is following the manufacturer’s instructions to a tee. We can’t lay out all the details here because each paint has its own specific requirements. The bottom line, however, is that each has its own instructions that can be quite exacting. And remember that like any paint job, good prep work is the key to success. De-waxing is one of the most important factors, because even a tiny amount of wax will prevent the paint from adhering to the fiberglass. Either acetone or a dedicated wax-stripper can be used but in either case, be sure to do a thorough job.
Tips for Painting a Fiberglass Boat
- Most people will use a standard “roll and tip” method for painting large surface areas of a boat. This requires two people and both rollers and brushes. As one person rolls out the paint, another follows behind with a brush and lightly strokes across the paint to brush out the roller pattern.
- One important tip for creating the best surface is to apply multiple, thin, consistent coats, as opposed to one or two thick ones. Three coats of paint is generally considered best.
- Another important tip to keep in mind: be sure to allow the proper amount of cure-time between coats (again following the manufacturer’s recommendations). And if the work takes place outdoors keep an eye on the weather to ensure the temperature and humidity will be acceptable and consistent throughout the entire timeframe.

How to Paint a Boat Bottom
Painting a boat bottom is a completely different experience than painting the boat’s upper hull and topsides. In this case you’ll want an anti-fouling paint that prevents marine growth, and there are countless versions to choose from. Read Antifouling Paints: Which Paint is Best For Your Boat to learn more about some of the different options.
Here’s the good news: learning how to paint a boat bottom is much easier than it is for the rest of the boat, because bottom paint tends to be simpler to apply.
- If the bottom is fresh gel coat, the same sort of prep work (de-waxing and sanding) is necessary.
- If you’re applying over old bottom paint, you can skip the de-waxing process and simply sand or power wash away any old or loose paint. Also, you won’t need to roll and tip; most people skip the tip part of this equation since the bottom will be underwater anyway, and simply roll the paint right on.
- There is, however, one additional factor to applying bottom paint to a boat: you may need to properly time the boat’s launch. Some paints have a minimum dry time but a maximum time as well, and will need to be launched within a certain window.
How to Paint a Boat Hull
Painting a boat’s hullsides is usually a lot easier than painting the topsides, simply because you’re dealing with a large, smooth surface area. There will only be minimal hardware to remove (in this case you may want to simply protect it with masking tape, though this rarely provides as good a final finish), and you won’t have to worry about angled surface areas or tight corners.
There is one variable to note, however, about painting a boat hull. You will be working on a more or less vertical surface, and if you apply the paint too thickly, drips and runs will result. So it’s very important to apply the pint evenly and thinly.

How to Paint a Boat with Non-Skid
Molded fiberglass non-skid and non-slip surfaces can’t be painted the same way as the rest of your boat. It’s impossible to sand or apply paint between the tiny imprints, and even if you did paint it, it would wear unevenly as people walk across the top of the pattern without ever touching between the raised surfaces. But that doesn’t mean you can’t make that old non-skid look like new again.
- The best way to paint non-skid is to apply a textured compound. There are several on the market designed specifically to paint a boat deck. They have some sort of grit or tiny rubberized pellets mixed in with the paint, to give the boat’s deck a fresh look but still maintain its non-slip properties.
- Once again, each has its own set of specific application instructions, prep work is key, and several coats are usually necessary.
- On additional variable you need to know about is the roller; since these paints have solids mixed in, you usually need to use a roller brush specifically designed to spread them.
Yes, painting a boat is a big, time-consuming job. Sure, it requires some expense. But remember, there’s no better way to make an older boat look new again than to give it a fresh paint job.
Editor's Note: Remember that many paints, primers, and wax strippers emit chemical fumes, and sanding can also create potentially harmful conditions for both you and the environment. Before you paint a boat always read the warning labels on all of the supplies and be sure to use the proper protective equipment.
Learn More in our Boat Maintenance Guide
Looking for more on boat maintenance and upkeep? Read...
- Antifouling Paints: Which Paint is Best for Your Boat?
- Boat Storage: What Are My Options?
- How to Winterize a Boat
- Spring Start-Up Checklist

Join Our Newsletter!
Get community news, buying bargains, and how-to guides at your fingertips.
AJ’s Marine Group
Integrity anchored in every detail.

At AJ’s Marine Group, we deeply anchor integrity in every detail with our services. As a distinguished provider in the marine industry, we specialize in boat restoration, ceramic coatings, and meticulous mechanical work. Our commitment to excellence ensures that your vessel receives the highest standard of care, combining expertise with a dedication to preserving and enhancing the performance and aesthetics of your boat.
LOOK NO FURTHER THAN THE ULTIMATE SOLUTION TO PROTECTING YOUR INVESTMENT FOR YEARS TO COME!

Some of our services
Service & maintenance.
Caring for your boat is like giving it the attention it deserves. Regular service and maintenance are the nautical equivalent of a tune-up, making sure everything runs smoothly and stays shipshape. It's about keeping your vessel in optimal condition, so you can enjoy smooth sailing and longevity on the water.
Exterior Detailing
Picture exterior boat detailing as a spa day for your vessel. It's not just about cleaning; it's a rejuvenating experience that restores and protects the outer surfaces—hull, deck, and superstructure.
Interior Detailing
Interior boat detailing involves the thorough cleaning and restoration of a boat's inside areas, including upholstery, carpets, and hard surfaces.

Imagine ceramic coating for boats as a magic shield, giving your vessel a shiny, tough finish that wards off environmental wear and tear. It’s like a low-maintenance makeover, not only safeguarding your boat but also boosting its overall appearance.

Gel coats are like the superheroes for composite materials, especially fiberglass, both in their creation and upkeep. Think of them as the artists adding a smooth, durable, and good-looking finish to the outer layer, making sure everything looks just right.

Fixing fiberglass is a bit like giving a makeover to worn-out or damaged composite materials, like those in boats, car parts, or recreational gear. Whether it’s dealing with cracks, holes, or delamination, these repairs work their magic to bring things back to their sturdy and good-as-new state.

Custom boat paint jobs are like personalized works of art on the water. It’s not just painting; it’s creating something unique and expressive for your vessel. Think of it as crafting a visual masterpiece with custom designs, colors, and finishes that are uniquely tailored to your boat’s personality.
With a seasoned team and extensive marine industry experience, we provide a comprehensive range of services, from meticulous maintenance to extensive repairs and detailing.

AJ’s Marine Group | Fort Myers, FL

AJ’s Marine Group | Cape Coral, FL

Center Consoles

Yamaha & Mercury

Nor-Tech 450
Nor-Tech Boats | Cape Coral, FL
Client Testimonials
Check out what our clients have to say, bringing your boat back to life.
At AJ’s Marine Group of SWFL, we specialize in the art of bringing your boat back to life. With a team of certified professionals and a commitment to excellence, we offer comprehensive boat restoration services that go beyond the surface. Whether your vessel requires a revitalizing coat of paint, meticulous fiberglass repairs, or the application of protective ceramic coatings, our experts possess the skill and precision to breathe new life into your boat. Trust us to restore, protect, and enhance your vessel, ensuring it not only meets but exceeds your expectations for both performance and aesthetics.
Marine Services: AJ’s Marine Group
AJ’s Marine Group is your top choice for exceptional marine services. Committed to excellence, our skilled team is dedicated to fulfilling all your boating needs. From routine maintenance to extensive repairs and meticulous detailing, we’ve got you covered. With years of experience in the marine industry, your vessel is in capable hands with us.
Experience Excellence: AJ’s Marine Group
Experience excellence with AJ’s Marine Group, your partner for pristine boating. We prioritize the longevity and impeccable condition of your boat, ensuring seamless and enjoyable adventures on the water.

Service Area
Collier County, FL Charlotte County, FL Lee County, FL Sarasota County, FL
Connect With Us
- Privacy Policy
- Accessibility
2023 © AJ’s Marine Group.
- New Sailboats
- Sailboats 21-30ft
- Sailboats 31-35ft
- Sailboats 36-40ft
- Sailboats Over 40ft
- Sailboats Under 21feet
- used_sailboats
- Apps and Computer Programs
- Communications
- Fishfinders
- Handheld Electronics
- Plotters MFDS Rradar
- Wind, Speed & Depth Instruments
- Anchoring Mooring
- Running Rigging
- Sails Canvas
- Standing Rigging
- Diesel Engines
- Off Grid Energy
- Cleaning Waxing
- DIY Projects
- Repair, Tools & Materials
- Spare Parts
- Tools & Gadgets
- Cabin Comfort
- Ventilation
- Footwear Apparel
- Foul Weather Gear
- Mailport & PS Advisor
- Inside Practical Sailor Blog
- Activate My Web Access
- Reset Password
- Pay My Bill
- Customer Service

- Free Newsletter
- Give a Gift
How to Sell Your Boat

Cal 2-46: A Venerable Lapworth Design Brought Up to Date

Rhumb Lines: Show Highlights from Annapolis

Open Transom Pros and Cons

Leaping Into Lithium

The Importance of Sea State in Weather Planning

Do-it-yourself Electrical System Survey and Inspection

Install a Standalone Sounder Without Drilling

Rethinking MOB Prevention

Top-notch Wind Indicators

The Everlasting Multihull Trampoline

In Search of the Snag-free Clew

What’s Involved in Setting Up a Lithium Battery System?

Reducing Engine Room Noise

Breaking Point: What Can Go Wrong With Your Yanmar?

Mildew-resistant Caulks for Boats

Can We Trust Plastic Boat Parts?

Repairing Molded Plastics

Mailport: Marine plywood, fuel additives, through bolt options, winch handle holders

The Day Sailor’s First-Aid Kit

Choosing and Securing Seat Cushions

Cockpit Drains on Race Boats

Rhumb Lines: Livin’ the Wharf Rat Life

Resurrecting Slippery Boat Shoes

Shoe Goo’s Gift to Sailors

Tricks and Tips to Forming Do-it-yourself Rigging Terminals

Marine Toilet Maintenance Tips

Learning to Live with Plastic Boat Bits

The Ultimate Guide to Caring for Clear Plastic
- Boat Maintenance
Topside Paint Test Kicks Off with a Look at Application and Gloss, Tips and Techniques
Practical sailor rates dozens of enamel, one-part urethane, and two-part urethane paints..

All that glitters isn’t gold, and as the price of professional topside makeovers continues to climb, many do-it-yourselfers are looking to other alternatives.
A gleaming paint job remains an icon of yacht-quality maintenance, and paint makers spin the transformative ability of what comes in their cans. The good news is that there’s still some truth in advertising. After a close look at the latest paint systems, Practical Sailor testers offer a report on just how user-friendly topside paints have become.
A few decades ago, an aircraft paint company executive decided to paint his boat with the same stuff used to coat aircraft that flew at 450 knots—the stuff that seemed immune to UV degradation and shed hydraulic fluid like water off a duck’s back. The results were more than impressive, and his experiment with a paint called Alumagrip led to a marine-coatings revolution and the birth of Awlgrip.
With the new brand came a new coating process that featured an epoxy primer and a sprayed linear-polyurethane topcoat. Today, Awlgrip has expanded its line to both polyester and acrylic-modified polyurethane top coats. The paint has become the gold standard among pros, but it’s occasionally used by amateurs.
Paint companies have responded to the demand for do-it-yourself (DIY) glossy finishes, and a plethora of single-part modified alkyd enamels, mono-urethanes, and two-part products line chandlery shelves.
In the same vein as our bottom paint and wood coatings tests, this topside paint evaluation begins with a report on application, handling, coverage, and initial gloss. After some field testing, we’ll rate each paint’s hardness, gloss retention, and long-term durability. Our last long-term look at these products was launched in the Feb. 15, 2002 issue and closed with a final report in the May 2006 issue.
What We Tested

We applied 29 topside paints from nine manufacturers to fiberglass panels. With such a large test field, we opted to divide the products by paint type. Of the test paints, seven are alkyd enamels; 12 are one-part urethanes; and eight are two-part linear polyurethane. We’ve classified two as “other” as they fit into none of the categories.
• Enamels: We found that choosing the right topside paint for the job at hand is based both on paint characteristics and applicator skill. At the easiest-to-apply end of the spectrum are traditional alkyd enamels, paints that are relatively soft, easy to sand, and almost creamy in brushability.
In the days of carvel-planked and clinker-built wooden boats, an annual coat of topside paint was part of the spring commissioning routine. The softer enamels delivered a season of shine, oxidizing a little over winter, and by spring, they were ready for a light-scuff sanding and a rejuvenating coat of alkyd enamel. Products like Pettit’s Z-Spar 100 and semi-gloss 101 and Interlux Premium Yacht Enamel were hard to keep on the shelf.
Today, there’s still an “enamel” demand, and products like Sherwin-Williams 1000, Kirby’s Hull and Deck enamel, and Z-Spar 1195 have been added to the fray. These paints excel in their ability to be easily applied. They are reduced with mineral spirit-based solvents and are soft enough for easy sanding between coats. However, the long-term gloss retention and adhesion of enamel is not as good as that of the higher-tech paints that have cornered the market.
• One-parts: In the middle range of topside paint technology are one-part urethane modified enamels. These are harder, glossier, and tougher coatings than alkyd enamels. They exhibit traits more akin to two-part systems, yet handle with almost as much ease as a traditional enamel. They are faster-drying, quicker-to-skin paints, and must be carefully thinned with specific reducers to retain good flow characteristics. A major benefit of these paints is their forgiveness on vertical surfaces where “hangs and sags” are just waiting to happen. Single-part urethane enamels offer multi-year shine, and on a couple of applications we have been field testing, the paint has weathered four years as a nonskid surface in a cockpit sole (Interlux Brightside).

• Two-parts: At the high end of the topside paint spectrum—in cost, durability, and gloss—are the two-part linear polyurethane (LPU) products that use an isocyanate catalyst to cure the paint. More a plastic resin than an old-fashion enamel, these “wonder coatings” typically afford a wet look that packs automotive showroom brilliance. The downside of this reflective quality is the need for smooth, even, dust-free application, and the extra effort associated with surface preparation.
All of the two-part products we tested produced superior results but also proved to be more difficult to handle than one-part products. One factor common to all of the two-part paints is the detailed prep work required, but testers found that it does pay off in the long run.
What We Found
• Enamels: Don’t sideline traditional alkyd enamels. They are easy to handle, require less exacting preparation, and are a pure pleasure to brush on. When used in low-abrasion situations where modest gloss is an asset, they can prove to be just the right paint.

Pettit’s Z-Spar No. 1195 Grand Banks Beige stole the show with its smooth, even flow and Excellent coverage. Other oil-based alkyds in the Z-Spar line (Nos. 99 and 100) featured the same remarkable handling quality that makes it a favorite among carvel and clinker-built wooden boat owners.
Both Kirby’s Hull and Deck Enamel gloss white and semi-gloss proved easy to handle and developed a smooth, even skin. The only disappointment was the streaky nature of its medium-gray enamel. Even after re-stirring, it required three coats to develop a smooth hue. The difference highlights the fact that even though one manufacturer makes multiple colors of paint, one color may not have the same gloss or application qualities as another color.
Sherwin-Williams’ Seaguard 1000 was another smooth-flowing, user-friendly, oil-based alkyd enamel. It spread evenly on vertical surfaces and was reluctant to hang or sag.
Bottom Line: Most of the enamels we tested performed well, comparatively. Our top picks so far for application and initial gloss are the Z-Spar Solid Coat No. 99 and Marine Enamel No. 1195.
• Single-part urethane enamels: By far, DIY topside paint technology has grown the most in the one-part urethane modified enamels sector, a best-of-both-worlds formulation that boasts of shine and longevity. Almost as user-friendly as an alkyd enamel and with almost as much gloss as the two-part paints, these hybrids certainly live up to expectations.

In a near photo finish in our application testing, Interlux’s Toplac and Epifanes’ Mono-urethane crossed the line in a dead heat with Insignia’s Resilience rounding out the winners’ circle. (Resilience is branded as a “for pro application-only paint.”) Snapping at their heels were Interlux Brightside, Pettit Easypoxy, and West Marine’s SeaGloss Pro. Two of the most popular colors on the nautical pallet have been Interlux’s Kingston Gray and Hatteras Off White.
Bottom Line: This was a close race, but the very slight edge for application goes to Interlux’s Toplac.
• Two-part paints: When it comes to surface toughness, bright gloss, and maximum longevity, two-part paints stand alone. Paint in name only, these acrylic and polyester modified-urethane resins have the ability to suspend pigment in a flat, highly reflective skin. The trick lies in applying the coating evenly and just thick enough for it to flow, making brush strokes or orange peel disappear.
As with all forms of juggling, a minor slip can spell major problems. Consequently for DIY interest, we looked carefully for paints that behaved well when rolled and brushed. Once again, Interlux and Epifanes crossed the line in a dead heat: Interlux’s Perfection and Epifanes’ Polyurethane products flowed smoothly over horizontal and vertical surfaces and resisted the tendency to hang or sag.
Fabula Inc.’s Signature Finish, which comes with brushes, rollers, tape, mixing graduates, stirrers, and detailed instructions also hit the mark. Sherwin-Williams’s vivid red two-part was the smoothest flowing red of the three we tested. Insignia’s Brilliance, like Awlgrip is a “pro only” recommended product, and once the right amount of brushing reducer was added to cope with the warm weather, these products also ranked as standouts.

The volatility of the solvents in all these two-part system leaves the user with less time to muck around, and maintaining a wet edge is essential to the “cutting in” process. Each manufacturer provides a “slow” brushing reducer that has to be carefully used. Too much causes excess flow—and the drama mentioned earlier of hangs and sags. In short, two-part paints typically provide the best gloss and toughest, longest-lasting finish, but they are the hardest to handle.
Bottom Line: The Awlgrip, Epifanes, and Interlux two-parts were the only products to earn across-the-board Excellent ratings.
• Other: As soon as we popped the lid on the first can of CrystaLac Crab Coat, we noticed change in the air. Absent was the aroma of oil or the volatile solvent jolt of urethane-based chemistry. In fact, the smell was imperceptible, and that made this paint especially appealing for those working inside a shop or below deck.

Crab Coat is not a water-based paint, but it is hydrophilic enough to allow water-only cleanup. It handles more like a blend between thick, creamy enamel and a water-based Latex. However, this paint is meant for exterior marine use. Time and our test panels will spell out how it weathers the environmental onslaught. It brushed on smoothly, but its Mystic Green color presented a somewhat streaky appearance.
Bottom Line: Though not as glossy as the current crop of urethanes, the Crab Coat produces a very appealing semi-gloss finish.
Topside and deck painting are labor-intensive undertakings that can rejuvenate an aging vessel as well as protect the substrate that lies beneath. Those enamored by the finish of the dark-blue Hinckley and Morris fleets have a tall order to meet.
Those willing to stay with white or a light color who are ready to invest equal amounts of time, patience, and skill, can parlay the cost of materials into a durable and attractive finish.
To say that the average roll-and-tip finish is just as good as a pro-sprayed finish would evoke too much of the Pinocchio factor. The results attainable by the average applicator can be quite good, but to hit the bull’s eye takes a steady hand, or the willingness to follow an autobody shop approach one of the paint manufacturers recommends.
One paint maker, Signature Finish, offers three sets of instructions, allowing DIYers to choose the level that suits them. Level 1 is straightforward: Apply three coats of their two-part paint (no primer), scuff sand between coats, and accept the last coat as the done deal. A Level 2 finish involves buffing with 3M Super Duty rubbing compound, and for those with more vigor and higher standards, there’s an exacting Level 3: Apply three or more coats, and once it’s dry (three to five days), wetsand it down to 1,200 or 2,000 grit followed up with the machine-buffing process. The workable acrylic LPU paint is highly buffable, and the result is a smooth, glossy surface, but care must be taken not to remove too much material.
Before committing to a big project, do a bit of testing of your own. A good test is to paint a pair of dinghy oars with good-quality enamel, then paint the inside of the dinghy with a one-part urethane, and finally flip it over, and go through a full prep-and-prime process that leads up to a roll-and-tip application of a two-part LPU paint. From this experience, you’ll have developed important painting skills and better understand the task that lays ahead.
All of the products we tested ranked at least acceptable in handlability, and many excelled. Only time will answer questions about durability and gloss retention.
Regardless of the paint you choose, be sure to review all of the manufacturer’s printed and online technical information, follow all safety procedures, and keep in mind that when it comes to painting, success is in the eye of the paint-brush holder.
- How We Tested
- Practical Sailor Value Guide: Topside Paints Application
- DIY Notebook
RELATED ARTICLES MORE FROM AUTHOR
Leave a reply cancel reply.
Log in to leave a comment
Latest Videos

How To Make Starlink Better On Your Boat | Interview

Catalina 380: What You Should Know | Boat Review
- Privacy Policy
- Do Not Sell My Personal Information
- Online Account Activation
- Privacy Manager

Step-By-Step Guide: How To Paint A Sailboat Like A Pro
Alex Morgan
Painting a sailboat can be a rewarding and creative endeavor that not only enhances the appearance of your vessel but also offers protection against the harsh marine environment. Whether you’re a seasoned sailor or a novice boat owner, knowing how to paint a sailboat is a valuable skill. This comprehensive guide will take you through the step-by-step process of painting a sailboat, from gathering the necessary materials to applying the final touches.
To start, you’ll need a few essential materials for the painting project. These include:
1. Paint: Choose a marine-grade paint that is specially formulated for boat surfaces to ensure long-lasting durability.
2. Primer: Apply a suitable primer to create a smooth and uniform surface for the paint to adhere to.
3. Brushes and Rollers: Use high-quality brushes and rollers designed for marine applications.
4. Sandpaper: Prepare the boat’s surface by sanding it to remove any existing paint or imperfections.
5. Tape and Drop Cloths: Protect areas that you don’t want to paint by using tape and cover the surrounding surfaces with drop cloths.
Before diving into the actual painting process, it’s essential to prepare the sailboat properly. This involves a few key steps:
1. Cleaning the Surface: Remove dirt, grime, and any other contaminants from the boat’s surface using a suitable cleaning solution.
2. Repairing Any Damage: Inspect the boat for any cracks, chips, or other damage. Repair these areas using the appropriate techniques and materials.
3. Sanding the Surface: Smooth out the boat’s surface by sanding it with progressively finer grits of sandpaper. This helps the paint adhere better and provides a uniform finish.
Next, apply a primer coat to ensure proper adhesion and longevity of the paint job. Consider these steps:
1. Choosing the Right Primer: Select a primer that is compatible with the type of paint you’ll be using and suitable for the boat’s material.
2. How to Apply Primer: Follow the manufacturer’s instructions and apply the primer evenly across the entire surface of the sailboat. Use smooth, overlapping strokes for optimal coverage.
Once the primer has dried, it’s time to start painting the sailboat with the chosen paint. Keep these points in mind:
1. Selecting the Right Paint: Use a high-quality marine-grade paint that is specifically designed for boat exteriors and can withstand the effects of sun, saltwater, and other environmental factors.
2. Applying the Paint: Apply the paint using consistent and even strokes, following the manufacturer’s instructions regarding drying times and the number of coats required.
Add the finishing touches to complete the painting process:
1. Adding a Clear Coat: Consider applying a clear coat for added protection and a glossy finish. Ensure the clear coat is compatible with the paint used for the main coat.
2. Cleaning up: Clean your brushes, rollers, and any other painting equipment with the appropriate solvents, and dispose of any waste materials responsibly.
By following these steps, you can achieve a professional-looking paint job on your sailboat and enjoy the benefits of a visually appealing and protected vessel.
1. Painting a sailboat requires specific materials such as paint, primer, brushes and rollers, sandpaper, and tape and drop cloths. 2. Before painting, it is important to prepare the sailboat by cleaning the surface, repairing any damage, and sanding the surface. 3. When applying primer and paint, choosing the right products and following the correct application techniques are crucial for a successful outcome. 4. After painting, adding a clear coat and cleaning up are essential finishing touches to ensure a professional and long-lasting result.
Materials Needed for Painting a Sailboat
When it comes to painting a sailboat, having the right materials is crucial. In this section, we’ll dive into the essential items you’ll need to get started on your sailboat painting project. From paint and primer to brushes , rollers , sandpaper , and tape , we’ll explore each of these elements and how they play a role in achieving a successful paint job. So, grab your supplies, and let’s sail into the world of sailboat painting!
Painting a sailboat requires choosing the right paint for a successful and long-lasting finish. Here are some important points to consider:
1. Type of paint: Choose from marine enamel, polyurethane, or epoxy paint, as each type has its own advantages and suitability for different surfaces.
2. Durability: Opt for paint specifically formulated for marine use, with high UV resistance and excellent adhesion properties to withstand sun, saltwater, and abrasion.
3. Color selection: Select a paint color that suits your preferences and matches the overall aesthetics of your sailboat. Consider that darker colors absorb more heat and lighter colors may stain easily.
4. Finish: Decide between glossy or matte finishes. Glossy finishes are more reflective, durable, and easy to clean, while matte finishes provide a subtle and natural look.
5. Application method: Choose the application method that best suits your skill level and project size. Common methods include brushing, rolling, or spraying.
6. Coverage and drying time: Check the paint’s coverage rate and consider the number of coats needed. Also, take note of the drying time between coats, as it affects the project timeline.
7. Compatibility: Ensure the chosen paint is compatible with the primer and existing paint layers on your sailboat to prevent issues like peeling or bubbling.
8. Environmental considerations: Look for eco-friendly and non-toxic paints to minimize the impact on the marine environment.
When painting a sailboat, the primer is a crucial element to achieve a professional and long-lasting finish. Here are the key points to consider about primer:
Choose the Right Primer: It is important to select a marine-grade primer specifically designed for sailboats. This type of primer adheres well to various surfaces such as fiberglass, wood, and metal.
Apply the Primer: Make sure the surfaces are clean, dry, and free from any contaminants. To achieve a thin and even coat, you can use a brush or roller. Pay special attention to joints and areas that have been previously repaired. Allow the primer to dry completely before proceeding further.
Always remember that using the correct primer plays a crucial role in obtaining a smooth and durable paint finish on your sailboat. So take your time to choose the right primer and follow proper application techniques for optimal results .
3. Brushes and Rollers
When painting a sailboat, it’s crucial to have the appropriate brushes and rollers for a seamless and professional finish. Here are some crucial factors to consider:
1. Choose brushes and rollers of excellent quality that are suitable for the type of paint being used. Synthetic bristle brushes are effective for water-based paints , while natural bristle brushes are perfect for oil-based paints .
2. Take into account the size of the brushes and rollers. For intricate work and smaller areas, opt for smaller bristle sizes. On the other hand, for larger surfaces, larger brushes and rollers provide greater efficiency .
3. Make sure that the brushes and rollers are thoroughly cleaned and free from any residual paint or debris before starting the painting process. This will prevent any unwanted texture or imperfections on the sailboat’s surface .
4. Utilize a paint tray or bucket to hold the paint and dip the brushes or rollers into it. This will ensure even distribution and prevent any excess dripping.
5. Apply consistent pressure and strokes when using the brushes and rollers. Start painting from one end and work your way to the other, maintaining a uniform coat by maintaining consistent pressure.
By carefully selecting the appropriate brushes and rollers and using them correctly, you can achieve a paint job on your sailboat that looks professional .
4. Sandpaper
When painting a sailboat, sandpaper is crucial in preparing the surface for a smooth finish. Here are important points to consider about sandpaper:
1. Grit selection: Choose the right grit based on the surface condition. For rough sanding or removing old paint, use a coarse grit (80 or 100). For finer sanding and smoothing, use a medium or fine grit (120 or 220).
2. Sanding technique: Hold the sandpaper firmly and sand in a circular or back-and-forth motion. Apply even pressure to prevent unevenness. Sand evenly across the entire surface to remove imperfections or roughness.
3. Progression: Start with coarse grit and gradually switch to finer grits. This smoothes the surface and achieves a professional finish. Clean the surface between grit changes to remove dust or debris.
4. Safety precautions: Wear goggles and a mask to protect against sanding dust. Work in a well-ventilated area or use a dust collection system to minimize airborne particles.
5. Surface evaluation: After sanding, inspect for smoothness and uniformity. If rough spots or imperfections are visible, resand those areas before priming and painting.
The first documented use of sandpaper dates back to 13th-century China. Crushed shells, seeds, and sand were glued to parchment to create abrasive sheets. Over time, sandpaper production techniques evolved, and it became widely used in various industries for surface preparation, woodworking, and finishing applications. Today, sandpaper continues to be an essential tool for achieving smooth surfaces in painting and other projects.
5. Tape and Drop Cloths
When painting a sailboat, the use of tape and drop cloths is essential to protect areas from paint. Here are some important points to consider:
Choose painter’s tape to create clean lines, avoiding regular masking tape.
Prepare the surface by cleaning and drying it to ensure proper adhesion.
Carefully apply the tape along the edges, pressing firmly for good adhesion.
Use drop cloths or plastic sheets to protect surfaces from paint spills or splatters.
Overlap the tape slightly for smooth, clean edges and prevent paint seepage.
Remove the tape at a 45-degree angle when the paint is dry to the touch but not fully cured.
Following these steps will help you effectively use tape and drop cloths while painting a sailboat, ensuring a professional look and protecting desired areas.
Preparing the Sailboat for Painting
Get ready to transform your sailboat into a work of art! In this section, we’ll dive into the crucial steps of preparing your sailboat for painting. From cleaning the surface and repairing any damage to sanding it down, we’ll cover everything you need to know to ensure a smooth and long-lasting paint job. So grab your brushes and let’s get started on this exciting journey of turning your sailboat into a masterpiece .
1. Cleaning the Surface
When cleaning the surface of a sailboat before painting, it is important to follow these steps for thorough cleaning .
Start by removing any loose or flaking paint using a scraper or wire brush.
Next, wash the surface with a mild detergent or boat cleaning solution to effectively remove dirt, grease, or grime .
Rinse the surface thoroughly with clean water to ensure all cleaning solution residue is removed.
Take the time to inspect the surface for any stubborn stains or marks .
If needed, utilize a specialized boat hull cleaner to effectively eliminate them.
To create a smooth and even surface for paint adhesion, gently sand the surface with fine-grit sandpaper .
After sanding, wipe down the surface with a clean cloth or sponge to eliminate any dust or debris .
If you come across areas with mold or mildew , treat them with a mildew remover and allow it to sit for the recommended time before rinsing.
Ensure that the surface is completely dry before proceeding with painting or other preparation steps .
By diligently following these steps, you can guarantee that the sailboat’s surface is thoroughly cleaned and ready for painting , ultimately resulting in a professional and smooth finish .
2. Repairing Any Damage
To effectively repair any damage on a sailboat, follow these steps:
1. Assess the damage: Carefully inspect the sailboat for any cracks, scratches, or holes in the hull or deck.
2. Gather necessary materials: Make sure you have epoxy resin, fiberglass cloth, sandpaper, and a putty knife on hand.
3. Clean the damaged area: Use a mild detergent and water to remove any dirt, grime, or loose particles.
4. Sand the damaged area: Lightly sand the area to create a smooth surface for the upcoming repairs.
5. Apply epoxy and fiberglass: Follow the manufacturer’s instructions to prepare and apply the epoxy resin to the damaged area. Place layers of fiberglass cloth, ensuring complete coverage.
6. Sand and smooth the repair: Once the epoxy cures, carefully sand the repaired area for a smooth finish that seamlessly blends with the surrounding surface.
7. Prime and paint: If necessary, apply primer before painting to ensure proper adhesion. Then, paint the area to match the rest of the sailboat.
8. Clean up: Dispose of waste materials properly and clean your tools and work area.
By following these steps, you can expertly repair any damage on a sailboat while maintaining its structural integrity and overall appearance.
3. Sanding the Surface
To achieve a smooth and uniform surface, it is important to properly sand the boat’s surface. Gather all the necessary materials, including sandpaper of different grits ( 60 , 120 , and 220 ), a sanding block or power sander, and safety goggles . Before starting, make sure to protect areas that you don’t want to sand by using masking tape or drop cloths .
Begin the sanding process by using 60 grit sandpaper. This will effectively remove rough spots, peeling paint, or any previous coatings. When sanding, use a circular or back-and-forth motion with even pressure. It is crucial to avoid aggressive sanding that could potentially damage the boat’s structure.
Continuously check the surface for smoothness and evenness. Once the desired level has been achieved, switch to 120 grit sandpaper. This will further refine the surface and eliminate any remaining imperfections. Repeat this process with 220 grit sandpaper to ensure a completely smooth and uniform surface.
After sanding, ensure that the surface is thoroughly cleaned. Use a vacuum or tack cloth to remove any dust and debris. Take the time to inspect the sanded surface for any areas that may require additional sanding or touch-ups before moving forward with the painting process.
Throughout the entire sanding process, it is crucial to prioritize safety. Always remember to wear safety goggles and a mask to protect yourself from any airborne particles and dust that may be generated while sanding.
Applying Primer on the Sailboat
Applying primer on a sailboat is a crucial step in the painting process, ensuring a smooth and durable finish. In this section, we’ll dive into the essentials, from choosing the right primer to the step-by-step application techniques . So grab your brushes and get ready to give your sailboat the perfect foundation for a flawless paint job!
1. Choosing the Right Primer
Choosing the Right Primer
When painting a sailboat, selecting the appropriate primer is crucial for achieving a smooth and durable finish. Here are the steps to follow in choosing the right primer:
Assess the surface: Inspect the sailboat’s surface for damages such as cracks, dents, or peeling paint before choosing a primer.
Determine the surface type: Different sailboats may have fiberglass, wood, or metal surfaces. Select a primer designed for the specific surface.
Consider the environmental conditions: Take into account the climate and weather conditions the sailboat will be exposed to. Choose a primer with excellent corrosion resistance if the boat will be in harsh conditions or saltwater.
Choose the right primer type: There are epoxy primers, self-etching primers, and high-build primers available. Consider the needs of your sailboat and choose a primer with good adhesion and durability.
Consult professionals: Seek advice from paint specialists or experienced boat painters if unsure about which primer to choose.
By following these steps, you can ensure you choose the right primer for your sailboat, leading to a successful painting project.
Sailboat painting has a long-standing tradition in maritime culture. In the past, sailors used a mixture called “ship paint” consisting of tar and natural materials. This protected the boats from rot and deterioration and improved their performance in the water. Nowadays, sailors have a wide range of primers and paints designed specifically for sailboats. The right primer choice is critical for preserving and enhancing the beauty and functionality of sailboats. So, when embarking on a sailboat painting project, take the time to carefully choose the right primer for a successful outcome.
2. How to Apply Primer
To properly apply primer on a sailboat, follow these steps on how to apply primer:
1. Clean the surface: Before applying primer, it is important to ensure that the sailboat surface is thoroughly cleaned and free from any dirt, dust, or debris. To clean it effectively, use a mild cleaner or soap and water.
2. Repair any damage: Take a close look at the sailboat to identify areas that require repair. If you find any cracks, dents, or holes, use a suitable filler or epoxy to fix them.
3. Sand the surface: To create a smooth and even surface for painting, lightly sand the entire area that needs to be primed. Make sure to use fine-grit sandpaper and remove any loose or peeling paint.
4. Choose the right primer: Selecting the appropriate primer is crucial. Look for a primer that is specifically designed for boats and marine surfaces. Consider factors such as the type of paint, boat material, and any requirements specified by the manufacturer.
5. Apply the primer: Before applying the primer, stir it thoroughly to ensure proper consistency. Apply a thin and even coat of primer using a brush or roller. Work in small sections, and make long, smooth strokes along the natural lines of the boat.
By following these steps, you can effectively apply primer to your sailboat, creating a smooth and durable base for the paint.
Painting the Sailboat
Painting the Sailboat is where the real magic happens! Get ready to transform your plain sailboat into a work of art. In this thrilling section, we’ll dive into the nitty-gritty details of painting your beloved vessel. Discover the secrets to selecting the perfect paint that not only adds a pop of color but also protects your boat from the harsh elements. Then, we’ll uncover the techniques for applying the paint like a pro, ensuring a flawless finish that will make heads turn. Get ready to unleash your creativity and make your sailboat truly shine!
1. Selecting the Right Paint
Selecting the Right Paint
– Type of paint: When selecting the right paint, it’s important to consider the options available such as marine enamel paint , epoxy paint , and polyurethane paint . Each type has its own set of advantages and disadvantages, so it’s important to choose the one that best suits your needs and budget.
– Compatibility: Making sure that the paint you choose adheres well to the sailboat’s surface is crucial. This will help ensure a long-lasting and durable finish.
– Color: The color you choose for your paint should not only be based on your personal preference, but also on how well it complements the overall aesthetic of the sailboat. It’s also important to consider how the color will be affected by sunlight and weathering over time.
– Durability and resistance: In a marine environment, it’s essential to select a paint that is formulated to withstand the harsh conditions. Look for paint options that offer UV resistance , saltwater resistance , and resistance to scratches and abrasions.
– Application method: Depending on the paint you choose, different application methods may be required. Some paints may need to be sprayed, while others can be applied with a brush or roller. It’s important to choose a paint that aligns with your level of expertise and the equipment you have available.
– Budget: Consider your budget when selecting the right paint. Different paints come at different price points, so it’s important to choose one that offers a balance between quality and affordability.
2. Applying the Paint
To apply paint on a sailboat, follow these steps:
– Preparation: Clean and dry the surface before applying paint. Remove dirt, dust, or grease using a cleaning solution and cloth.
– Tape and protect: Mask off areas that you don’t want to paint, such as windows or hardware, using tape. Cover surrounding areas with drop cloths to prevent accidental splatters.
– Primer: Apply a coat of marine-grade primer to the sailboat following the manufacturer’s instructions. Allow the primer to dry completely.
– Select the paint: Choose a marine-grade paint suitable for the sailboat’s material. Consider durability, weather resistance, and color. Follow the recommended applicator type.
– Application: Apply paint to larger areas of the sailboat first using a roller or brush. Use smooth, even strokes for a uniform finish. Work in sections, moving from one part to another.
– Second coat: Assess if a second coat is needed once the first coat has dried. Apply a second coat following the same technique for a vibrant and long-lasting finish.
– Clean up: Clean brushes and rollers according to the paint manufacturer’s instructions. Dispose of used materials properly.
By following these steps, you can effectively apply paint to your sailboat and achieve a beautiful and protective finish.
Finishing Touches
The Finishing Touches section is where we add the final elements to our sailboat painting, giving it that extra dose of awe-inspiring sophistication . In this part, we’ll dive into two key sub-sections: Adding a Clear Coat and Cleaning up . Prepare for the exhilarating moment of applying the clear coat, which not only enhances the colors but also protects the artwork for years to come. Plus, we’ll share some neat tips on how to clean up any stray brushstrokes or smudges effortlessly. Let’s make this sailboat masterpiece shine !
1. Adding a Clear Coat
To incorporate the provided keywords naturally in the provided text, the rewritten text can be as follows:
To add a clear coat to a painted sailboat and ensure long-lasting protection for your sailboat, follow these steps:
Ensure the painted surface is clean and completely dry .
Use a high-quality clear coat designed for marine applications , specifically for adding a clear coat.
Apply the clear coat in thin , even layers using a brush or spray gun .
Allow each layer to dry completely before applying the next layer, contributing to the process of adding a clear coat.
Cover the entire surface of the sailboat with the clear coat for maximum protection , fulfilling the purpose of adding a clear coat.
Check for any drips or uneven spots and sand them down before adding more coats, which is an essential part of adding a clear coat.
Follow the manufacturer’s instructions to determine the number of coats needed, a vital step in successfully adding a clear coat.
Adding a clear coat to a painted sailboat is crucial for protecting the paint job from UV radiation , saltwater , and other damaging elements. By following these steps and using the appropriate materials for adding a clear coat, you can achieve a professional-looking finish and ensure long-lasting protection for your sailboat.
2. Cleaning up
Cleaning up after painting a sailboat is an important step that ensures a neat finish and maintains the longevity of your painting tools. To effectively clean your sailboat, follow these steps:
- Remove excess paint from brushes and rollers.
- Clean brushes and rollers with warm soapy water.
- Rinse brushes and rollers to remove soap residue.
- Allow brushes and rollers to air dry completely.
- Dispose of leftover paint or materials according to local regulations.
- Remove protective tapes and drop cloths from the sailboat.
- Collect debris or trash and dispose of properly.
- Wipe down the sailboat with a clean cloth to remove dust or particles.
- Inspect the area for touch-ups or missed spots and make necessary corrections.
- Store brushes, rollers, and other painting materials in a clean and dry place for future use.
These steps will help you incorporate the cleaning up process into your sailboat painting routine effectively. Sailors have always taken pride in keeping their vessels clean for efficiency and well-being. Proper cleaning techniques have been passed down through generations to preserve sailboats. Today, sailors continue to adhere to these principles to honor the traditions of the sea.
Some Facts About How To Paint A Sailboat:
- ✅ Painting your sailboat is essential for its safety and protection. (Source: Life of Sailing)
- ✅ The paint acts as a barrier against salt, barnacles, and rotting, keeping your sailboat well-maintained. (Source: Life of Sailing)
- ✅ Painting your sailboat yourself can save you money and allow you to acquire a valuable skill. (Source: Life of Sailing)
- ✅ The frequency of painting depends on the type of paint and the amount of time your boat spends in the water. (Source: Life of Sailing)
- ✅ Choosing a sailboat paint that contains copper provides biocidal properties, preventing the attachment of sea life. (Source: Life of Sailing)
Frequently Asked Questions
How important is painting a sailboat for its safety and protection.
Painting your sailboat is essential for its safety and protection. The paint acts as a protective layer, guarding against saltwater corrosion, barnacles, and rotting. It also adds an added layer of aesthetic appeal to your boat, making it stand out.
What are the benefits of painting a sailboat yourself?
Painting your sailboat yourself offers several benefits. It allows you to save money as you won’t have to hire a painting contractor. It provides an opportunity to learn a valuable life skill. It allows you to add your creative flair and personalize the paint job according to your preferences.
Which paint brands are recommended for painting a sailboat?
When painting a sailboat, it is recommended to choose paint brands that contain copper. Copper acts as a biocide, preventing the attachment of sea life to the boat’s hull. This helps in maintaining the boat’s performance and reduces the need for frequent cleaning and maintenance.
What is the frequency of painting a sailboat?
The frequency of painting a sailboat depends on the type of paint used and the amount of time the boat spends in the water. Bottom paint, which protects the hull, should be applied annually. On the other hand, top paint, which adds color and gloss to the boat, can be done every 3 years.
What are the necessary tools for painting a sailboat?
When painting a sailboat, you will need various tools such as sandpaper, paint, primer, brushes, rollers, paint thinner, and solvent. It is essential to have a well-ventilated workspace and ensure you wear safety gear such as a face mask, goggles, and gloves.
What is the process for painting a sailboat?
The process for painting a sailboat involves several steps. First, inspect the boat for any damage and make necessary repairs. Next, sand the surface using different grits of sandpaper to achieve a smooth finish. Then, apply a layer of primer to improve adhesion. Apply multiple coats of paint, allowing sufficient drying time and sanding between each coat for a glossy looking boat. Good luck!
About the author

Leave a Reply Cancel reply
Your email address will not be published. Required fields are marked *
Save my name, email, and website in this browser for the next time I comment.
Latest posts

The history of sailing – from ancient times to modern adventures
History of Sailing Sailing is a time-honored tradition that has evolved over millennia, from its humble beginnings as a means of transportation to a beloved modern-day recreational activity. The history of sailing is a fascinating journey that spans cultures and centuries, rich in innovation and adventure. In this article, we’ll explore the remarkable evolution of…

Sailing Solo: Adventures and Challenges of Single-Handed Sailing
Solo Sailing Sailing has always been a pursuit of freedom, adventure, and self-discovery. While sailing with a crew is a fantastic experience, there’s a unique allure to sailing solo – just you, the wind, and the open sea. Single-handed sailing, as it’s often called, is a journey of self-reliance, resilience, and the ultimate test of…

Sustainable Sailing: Eco-Friendly Practices on the boat
Eco Friendly Sailing Sailing is an exhilarating and timeless way to explore the beauty of the open water, but it’s important to remember that our oceans and environment need our protection. Sustainable sailing, which involves eco-friendly practices and mindful decision-making, allows sailors to enjoy their adventures while minimizing their impact on the environment. In this…
- How to paint a boat: A step-by-step guide
Painting your boat not only enhances its visual appeal but also protects it from the damaging effects of saltwater, sunlight, and other elements. Whether you have a sailboat, powerboat, or kayak, the principles of boat painting remain largely the same.
Assessing your boat's condition
Before you begin, evaluate your boat's current condition. Inspect the hull for any damage, scratches, or rust that may need to be addressed before painting. Make a list of necessary repairs and tackle them first.
Gathering the right tools and materials
To paint your boat successfully, you'll need a range of tools and materials, including paintbrushes, rollers, sandpaper, masking tape, drop cloths, and, most importantly, the appropriate marine paint.
Preparing the boat surface
Proper preparation is the key to a successful paint job. Start by cleaning the boat's surface thoroughly to remove dirt, grease, and old paint. Sand the surface to create a smooth and clean canvas for the new paint to adhere to.
Applying primer
Priming is a crucial step to ensure good paint adhesion and durability. Apply a marine-grade primer that is compatible with the paint you've chosen. Allow it to dry thoroughly as per the manufacturer's instructions.
Read our top notch articles on topics such as sailing, sailing tips and destinations in our Magazine .
A man taking care of his ship.
Choosing the right paint
Selecting the right type of marine paint is essential. There are different types of boat paint available, such as antifouling paint, topside paint, and bottom paint. Choose the one that suits your boat's needs and your intended use.
Applying the paint
Start by applying the paint to the boat's surface using a paintbrush or roller. Use long, even strokes, working from one end to the other. Be mindful of the weather conditions, as extreme temperatures and humidity can affect the paint's drying process.
Applying additional coats
For best results, you may need to apply multiple coats of paint. Follow the manufacturer's recommendations for drying times between coats. Applying multiple thin coats is often better than one thick coat.
Drying and curing
Allow the paint to dry completely before launching your boat into the water. The curing time can vary depending on the type of paint and environmental conditions. Follow the paint manufacturer's instructions for specific guidance.
Final touches and cleanup
After the paint has dried, remove any masking tape and clean your tools and equipment. Inspect your boat's finish for any imperfections, and make any necessary touch-ups.
Painting a boat requires careful planning, preparation, and attention to detail, but the results can be incredibly rewarding. Not only will your boat look like new, but it will also be better protected against the elements, ensuring many more enjoyable days on the water.
Whether you're a DIY enthusiast or a boat owner looking to maintain your vessel's beauty and functionality, this step-by-step guide on how to paint a boat will help you achieve a professional and long-lasting finish. So, roll up your sleeves, gather your materials, and give your boat the makeover it deserves. Happy painting!
So what are you waiting for? Take a look at our range of charter boats and head to some of our favourite sailing destinations .
How To Paint A Sailboat: A Complete Guide

Last Updated by
Daniel Wade
June 15, 2022
Whether you’re new to owning a sailboat or not, you have likely put some thought into painting your boat yourself. It is important to keep your boat well painted as it can save you a lot of money in the long run. It can also save you a lot of money if you choose to paint your boat yourself.
Whether or not this is the first time you have painted your boat, you will still find this article useful. It has lots of tips and tricks for making sure you get the job done and get it done well. Hiring a professional may be easier, but there is a sense of pride and accomplishment in doing it yourself. If you use this article as a reference, you can’t go wrong.
Table of contents
Why is it important to paint your sailboat?
Painting your boat is not just an excuse to put some creative flair into your boat, it is an important process in keeping the boat safe. Safe from salt, safe from barnacles, and safe from damage. The paint acts as a vital protective layer, without it your boat will be vulnerable to all kinds of damage. If you have a wooden hull, this protective layer will keep the wood from rotting. It can also plug any minuscule holes that might allow sea life and salt to make its way into the body of the boat.
There is also, of course, the added benefit of having a boat that looks good . A boat is a point of pride and should be treated as such. Having a glossy looking boat is something to be proud of. Most boats are not painted far above the waterline, so it is even an opportunity to make your boat stand out. Some people also believe that painting a boat brings good luck. Unless of course, you paint it green, green is thought to bring bad luck. Whether or not you believe that is up to you.
What are the benefits of painting your boat yourself?
When it comes to painting your boat there are only two options. Hire a professional boat painting contractor, or bite the bullet and do it yourself. They both have their pros and cons, of course, but there is so much more to be gained by doing it yourself. First of all, painting your boat yourself is just as fun as it is difficult. Learning to paint is a valuable life skill that you won’t regret learning as early on in your sailing career as possible. If you can learn to paint your boat now, you will save yourself a small fortune in the long run.
Hiring a contractor is expensive, to say the least, it may be faster and easier overall, but the extra cost can make it simply not feasible. Or simply unappealing. If this is the first time you are painting your sailboat you will need to make a one-off purchase of all the equipment needed for prepping, painting, and finishing the boat. After these one-off purchases are out of the way, you will only need to buy paint and new rollers the next time. Even if you need to buy all the equipment brand new, it can be cheaper than hiring someone else to do the job for you.
How often do you need to paint your sailboat?
The general rule of thumb for painting your boat is that it will need bottom paint about once a year. This is when you will need to take the boat completely out of the water and give it a fresh new coat. If your boat spends all of its time in the water, it certainly needs painting at least once a year. The saltwater is so corrosive that you shouldn’t let your boat go without a fresh coat of bottom paint for more than 2 years. Even if your boat only spends half its time in the water, and the other half on land, you will find that its best to keep its coat topped up.
The top paint, or the above waterline paint, doesn’t need painting anywhere near as often. It isn’t in direct contact with the seawater so it simply isn’t going to get eroded down as much. The salty sea spray can still be damaging over time so this paint should be re-done every 3 years. It can be more or less frequent depending on use and personal preference. Some people like to do above waterline paint yearly, with the rest of their boat, but it isn’t necessary.
What are the best paints to use for your sailboat?
There are plenty of great brands of paint out there, in various colors and shades, so you won’t struggle for choice. There are some things you might want to look for in your paint . For example, you may have noticed that a lot of boats tend to have red hulls. This isn’t just a fashion statement, and while red is supposed to bring luck this isn’t the main reason either. The reason is that this red/orange paint is perfect for added protection along the bottom of your boat.
This red/orange paint is interestingly chosen because it is, of course, traditional; but mostly because of its copper. The copper is actually what gives the paint its red/orange color.
Copper is perfect for the bottom of your boat for several reasons. First, copper acts as a biocide. It stops worms from making their way into the hull if your boat is wooden. If it is metal or fiberglass, it still has the benefit of stopping barnacles and other sea life from attaching themselves deep into the hull of the boat. Copper is also strong enough to hold up to scraping.
Scraping is when you scrape barnacles and other sea life off the hull of your boat. Scraping is an important part of keeping your boat in good condition. It is important to check with the marina or port authority whether or not you are allowed to scrape. If you scrape without permission you may find yourself on the receiving end of a hefty fine. The reason is that they don’t want you introducing invasive species on to the marina floor. This is mostly a problem when you are coming from somewhere vastly foreign, not sailing from New York to Chicago for example.
How many coats of paint does a sailboat need?
When painting your boat it’s a good idea to think about how many coats of paint you are going to need. There is no exact number that is needed, it is mostly to do with how well protected your boat needs to be and how much time you have on your hands. Every coat takes time and attention to detail.
If you choose to do four coats of paint it is going to be time-consuming but very well protected. That being said, the minimum number of coats is two. One is not enough. If your boat only spends part of the time in the water, two to three coats are plenty.
If you are someone who lives on their boat full-time, or at least most of the time, you may want to do more coats. Three, maybe even four, might be ideal here. The reason is that first, your boat is going to experience way more wear and tear than one that is just an ocean part-timer. And second, taking out your boat (which is also your home) is a giant hassle. It is a tedious process, so doing it as infrequently as possible is probably in your best interest. More coats last longer. When you are sailing from place to place, finding somewhere to take your boat out of the water and perform this maintenance is inconvenient. You want to be doing it as little as possible.
What safety precautions do I need to take when painting my sailboat?
All paint can be toxic when inhaled. Even if it is “non-toxic” paint it is going to be harmful to your lungs. They aren’t meant to inhale anything but air, even non-toxic paint is going to be bad for them. This is why it is important to wear a face mask.
Your mask should be specifically for painting, not surgical masks or other cheap medial masks. They are not going to be strong enough, with a fine enough air filter. Whether you feel the need to wear eyewear is up to you during the painting process.
Before the painting begins, when you are scraping and sanding, it is a good idea to wear some goggles to keep debris and splinters out of your eyes. It is also a good idea to wear gloves. You don’t want to rough your hands up too much, they need protection from not only the paint but splinters and sharp pieces of metal.
Painting a boat can be dangerous work. Without taking the proper safety precautions you are putting yourself at unnecessary risk. This safety equipment costs just a few bucks and is equally important as any of the other tools needed to paint your boat.
What tools do I need to paint a boat?
There is more to painting your boat than just using paint and a brush . You will also need tough sandpaper , potentially an angle grinder or welder , paint, primer , brushes, paint rollers , paint thinner , and solvent. You will need to make sure you have all of these things before you start painting. You can pick any of these items up at a boating goods store.
It is a good idea to bring some buckets with you for filling with water, both for rinsing off your boat and your brushes. All of your safety equipment needs to be brought too.
If this is your first time painting your boat yourself, you may find you need to buy all of these things at once. That can be a lot to stomach when its all in one go, luckily, most of these tools and equipment can be reused. Besides, it is still going to be far cheaper than hiring someone to do it for you. All of this equipment is an investment in your boat.
How to paint a sailboat
Whether this is the first time you have painted your boat or not, you may find some of the tips in this next section useful. Painting your sailboat may be tricky at first, but over time you will get the hang of it. The problem with painting your boat is that it can be a very expensive mistake if you get it wrong.
It is important to read this guide carefully, take your time, and make sure you do the job properly. It may be slow going at first, speed will come over time. Once you have gathered all of your safety equipment and tools you are ready to get started.
The workspace
First of all, you need to ensure you have the right workspace. You cant paint your boat in the water so you are going to need to find somewhere to do your work. This is easy enough if you don’t live on your boat full time, take the boat to your house and do your painting on the driveway. If this isn’t an option because you don’t have space or live on your boat full time, you are going to need to rent somewhere. There are typically places affiliated with the marina that you can use. In some cases, these even come with a majority of the equipment you will need. This, of course, drums up the price a bit, but that’s unavoidable.
Your workspace needs to be well ventilated, or you risk making yourself very sick. Both from paint fumes, rubbing alcohol fumes, and fine matter from when you sand the hull down. This means painting your boat in your garage, if it even fits, is not always the best idea. If you do decide to paint outside, it is important to consider the chance of rain. Of course, your boat is pretty waterproof, but once you begin sanding rain might damage the wood if left to sit there.
Before you do anything else, it is important to look your boat over fully from top to bottom. You are looking for any bumps, scrapes, cracks and general damage. This damage is not going to be noticeable while the boat is in the water, so just before you paint it is one of the only times you get to have a close look. Once you have made note of all this damage, it is time to get to work repairing it. Depending on just how severe this damage is, you may want to get help with this next stage.
All of this damage needs to be repaired before anything else can take place. Painting over these damaged areas is just going to hide the problem temporarily, the next time it comes to painting you will find they are far worse. If you don’t deal with this now, they are going to snowball into complicated and expensive repairs.
After your repairs are done it is time to start sanding. This is very time consuming as you need to do it three times. Per coat. First, take the 600 grit sandpaper and make your way around the boat. It is best to use electrical tape to mark out a section at a time so you don’t keep losing your place. After you have finished with the 600 grit sandpaper, it is time to move on to 800, then 1200. This process is important so you will be painting on as smooth a surface as possible. It is then a good idea to wipe the surfaces of the boat down with a damp cloth to remove any of the dust and flakes of metal/wood. Otherwise, you end up painting over them.
You could wash the boat down with a hose but you want to avoid getting the boat unnecessarily wet now that the hull has lost its protective layer. If you are sanding down a boat with a copper paint bottom, you may find the sanding process difficult. Just do your best, it doesn’t need to be 100% perfect. It is important to get as much of the old paint off as possible. Your new paint won’t adhere to the old paint as well as it would to the boat hull itself.
Putting on a layer of primer is not 100% necessary but it is recommended. The idea is that you want your topcoat to adhere to the boat as well as possible, a layer of primer can help you do that. The primer needs to be painted on evenly all over the boat. If you only feel like doing below the waterline, that is fine too. It will save you a lot of time. Putting on the layer of primer is not the most time-consuming part, it is mostly the sanding down that you will have to do. You will need to sand down using the 600 grit paper, then the 800, then 1200. Just like last time. Your layer of primer needs to be as smooth as possible for the maximum adhesion.
Now comes the paint. It is recommended to do at least two layers of paint. One undercoat and one top. Some people choose to go as far as two layers of primer, two layers of undercoat, and three layers of topcoat. This is going to be very time consuming, remember you will need to sand down three times between each layer of paint. You can paint using a brush if you like but is far easier to use a roller. It is also far easier if you employ someone to help you with this stage. It could be your spouse, child, friend, or anyone. It doesn’t need to be a paid professional. It can take a long time to go through this process. Especially if you are effectively doing 8 layers of paint (including primer).
The fastest way to paint, especially if you are on your own, is to use a sprayer. They are easy to use, with a little practice. If you haven’t used one before you may find that you struggle to get an even coat. You should always paint in vertical stripes, not horizontal. Additionally, it is a good idea to have someone following after you with a small brush doing small touch-up jobs. Any unevenness will need to be sanded down and repainted. The whole painting process can take a week if you aren’t efficient.
Take pictures
It is a good idea to take pictures throughout the whole process. This is for future reference. For example, if you take pictures of the boat when you are assessing it for damage, you can compare them to after you have repaired or sanded the trouble spots down. If you cant see the trouble spots still, great! If you can, it will help you keep an eye on them after you have painted too. It’s a good idea to catalog all of these areas if they start to become regular problems you may want to have your boat looked at by a mechanic. You might also like to have a before and after picture for your blog, or just as a personal memento.
Hopefully, you now have all the theory needed to paint your boat. There is a lot more that goes into painting your boat than simply grabbing some paint and a brush. It takes planning, practice, and attention to detail. If you follow this guide you will have no trouble at all. If this is your first time painting your boat, don’t be disheartened if it takes a lot longer than you expected. Speed will come with time, it is far more important to get the job done right than get it done quickly. If you put the work in you will be painting like a pro in no time at all.
Related Articles
I've personally had thousands of questions about sailing and sailboats over the years. As I learn and experience sailing, and the community, I share the answers that work and make sense to me, here on Life of Sailing.
by this author
Repairs and Maintenance
Most Recent

What Does "Sailing By The Lee" Mean?
October 3, 2023

The Best Sailing Schools And Programs: Reviews & Ratings
September 26, 2023
Important Legal Info
Lifeofsailing.com is a participant in the Amazon Services LLC Associates Program, an affiliate advertising program designed to provide a means for sites to earn advertising fees by advertising and linking to Amazon. This site also participates in other affiliate programs and is compensated for referring traffic and business to these companies.
Similar Posts

How To Choose The Right Sailing Instructor
August 16, 2023

Cost To Sail Around The World
May 16, 2023

Small Sailboat Sizes: A Complete Guide
October 30, 2022
Popular Posts

Best Liveaboard Catamaran Sailboats
December 28, 2023

Can a Novice Sail Around the World?
Elizabeth O'Malley

4 Best Electric Outboard Motors

How Long Did It Take The Vikings To Sail To England?

10 Best Sailboat Brands (And Why)
December 20, 2023

7 Best Places To Liveaboard A Sailboat
Get the best sailing content.
Top Rated Posts
Lifeofsailing.com is a participant in the Amazon Services LLC Associates Program, an affiliate advertising program designed to provide a means for sites to earn advertising fees by advertising and linking to Amazon. This site also participates in other affiliate programs and is compensated for referring traffic and business to these companies. (866) 342-SAIL
© 2024 Life of Sailing Email: [email protected] Address: 11816 Inwood Rd #3024 Dallas, TX 75244 Disclaimer Privacy Policy
281-250-7383
Bottom jobs, bottom jobs for boats in dickinson, galveston, clear lake and texas city, texas.
Bottom jobs—or painting the bottom of a boat—are an important part of keeping your watercraft in good condition. Angel’s Marine, serving the Dickinson, Galveston, Clear Lake and Texas City, Texas area, specializes in bottom jobs for boats of all makes, models and years of manufacture. Our powerboat repair center has a lift to service many types of boats for bottom jobs, which will increase the longevity of your boat’s hull.

Why a Bottom Job is Vital to Boat Maintenance
Repainting the bottom of your boat not only protects the surface of the hull that is submerged in water, but allows your boat to sail through the water more effortlessly, increasing fuel efficiency. Paint on the bottom of a boat that is peeling and delaminating leads to hull deterioration, slower boating speeds and using more fuel. Our bottom job technicians offer professional repainting of your boat’s hull that will extend the life of your boat. Angel’s Marine provides expert bottom job services in Dickinson, Clear Lake, Galveston and League City, Sugar Land, Texas City, and Metro Houston, Texas.
Choosing Angel’s Marine for Hull Painting and Bottom Jobs
Let the professionals at Angel’s Marine arrange for your boat’s bottom job. We simply offer you much more value as a total boat repair service center. Did you know that we can save you time and money during a bottom job to complete any extra work that may be needed on your boat. Since your boat will be supported by a lift, blocks and scaffolding during a bottom job, we have convenient access to take care of repairing any dings and dents, scuffs and scratches and more, including replacing lights and inspecting other components that are typically below the water line. Plus, we can complete a comprehensive waxing and detailing for your boat.
Angel’s Marine Service Areas
Angel’s Marine provides complete repair, maintenance, restoration and customization services for boat owners in:

Get Started Today in Protecting Your Boat with a Pro Bottom Paint Job
We pick up and deliver boats, 2300 wyoming st dickinson, tx 77539.
Business Hours
Mon – Fri: 8:00 AM – 5:00 PM Sat – Sun: Closed
© 2024 Copyright. All Rights Reserved. Angel’s Marine. Privacy Policy
Design by Marketing Depot Inc.

Boating Basics Online is reader-supported. When you buy via our links, we may earn a commission at no cost to you. Learn more
How to Paint a Sailboat? – A Step-by-Step Guide
Written by J. Harvey / Fact checked by S. Numbers

Painting a sailboat hull not only lets you save money, but it can also be quite gratifying. Plus, learning how to paint a sailboat can be likened to taking that one important step of truly claiming your vessel as your own. I mean, they’re our darlings, right?
This simple guide teaches you how to paint the hull of a boat, including a sailboat’s. Overall, it’s not hard to grasp – just a bit tiring, and plenty of waiting is involved.
Table of Contents
Prepare the Following
Step 1. give the sailboat a thorough cleaning., step 2. start sanding the hull’s surface., step 3. prepare the primer, then apply it., step 4. prepare the paint, then start applying the topcoat and antifouling coat., the importance of painting your sailboat, how often do i need to paint my sailboat, some best paints to use for a sailboat, safety tips for painting.

- Marine-grade paint
- Primer (epoxy recommended) and hardener
- Sandpaper (80-grit, 220-grit, and 400 grit)
- Cleaning cloth
- Masking tape
- Roller (or paint sprayer)
- PPEs such as gloves, a coat, and a respirator
Choose a workspace with good ventilation to avoid exposing yourself to fumes, which have many detrimental but highly avoidable side effects. Painting the boat on its trailer on a clear, dry day and positioning it so the paint won’t get direct sunlight exposure are ideal.
Practical Steps for Painting a Sailboat
This guide works well for fresh paint jobs and even if you’re repainting the boat.

Any dirt, debris, and grease should be taken care of in any sailboat paint job. Check for debris and algae clinging to the hull and the sailboat deck, and just use the brush and cloth to get it off.
Double-check parts of the keel because mud and seaweed tend to stick to it the most. If there are barnacles present, you may have to power wash them or any stubborn green stuff you encounter.
Dip the sponge in a mix of boat soap and water, then start scrubbing any stains. Afterward, give the sailboat a good rinse. Wait for it to dry.

Put on your respirator and coat. Use an 80-grit or 100-grit to roughen the surface and remove any lingering trace of old paint by scrubbing in circular motions.
Then, grab the 220-grit to smoothen the surface more. That said, an 80-grit or 40-grit paired with a sander will do just as well, based on my experience every time I repaint a fiberglass boat .
You’d want the surface to be as even and smooth as possible before applying the first coat.

The epoxy primer helps to ensure that the paint will adhere well, too, so I recommend you don’t skip it. Epoxy also acts as a good sealant and prevents cracking and rust.
Before you apply it, put some masking tape over the areas of the hull that you don’t want the coats to go over. It will ensure even coats, too.
Every epoxy primer and hardener combination is different in one way or another. As such, follow what the manufacturer recommends when mixing. Be mindful of how quickly the mixture hardens.
Once you’re done with that step, use the roller to apply even coats of it over the whole surface of the hull. Depending on the size of your boat, this may take a while and can be tiring, so I suggest you ask for help.
Done? It’s time to wait a day to apply another layer. The next day, you can either apply another coat of primer (up to 4 coats is great) or proceed to the painting part.

Mix the paints according to the instructions.
You need to make sure the primer has dried before painting. I suggest two layers of topcoat followed by two equal coats of antifouling paint. But you can also skip to the antifouling paint immediately – your boat, your choice.
- Be sure to pick a good marine-grade paint like TotalBoat’s Alumipaint AF or Interlux’s Fiberglass Bottomkote Aqua. Better yet, you can just head to your local marine shop and ask for recommendations (trust me, they know their sailboat paint best).
- We’re not exactly doing something artsy here, like making an easy sailboat painting with acrylics. You want coats that can take a beating, so choose marine grade only.
Once you’re ready to work, use a roller or a sprayer to apply the paint. Personally, I’d suggest the latter choice because if you spray paint a boat, you’ll get a sleeker, more attractive finish, although it requires some skills.
Therefore, if you’ve never handled a sprayer, the best way to paint a boat would be with a roller. Here are some tips to ensure the best results:
- Pour the paint into the t
- Slightly dampen the roller with clean water.
- Lightly dip the roller into the paint so that no more than half of it is submerged.
- Run the roller on the paint tray’s ramp a few times to evenly distribute the pigment.
- Run the roller from the top to the bottom of the hull. Make sure you apply even pressure as you do so. Remember: the strokes should be parallel and uniform; under no circumstance should you change the stroke to a different pattern.
- Use a paintbrush to access cavities and holes on the hull that your roller can’t reach.
- Apply the suggested number of coats for each type of paint, taking care to sand with the 400-grit or higher with each However, make sure you confirm that it’s recommended by the paint’s manufacturer.

- The first is aesthetics. How can your gaze possibly not be arrested by an exquisitely painted sailboat sailing in the distance? It’s an automatic postcard image.
- Secondly but just as important (if not more), you’re protecting your baby from damage, barnacles, rot, and other nasty things, extending its life and boosting its value.
- It exercises your creativity. Try out some sailboat paint schemes available on sites like Pinterest, and you’ll know what I’m talking about.
I’ve certainly tried one or two of these ideas myself, but not on a skiff and jon boat that I made from scratch. My wife and buddies were positively mesmerized.
- Much like how videos on YouTube showing easy boat acrylic painting puts my mind at ease, I can say the same for when I’m painting sailboat hulls.
A lot of my friends who love to sail, fish, and paint sailboats on canvas say the same since they’re often more than willing to stop by and lend a helping hand during my paint days. We exchange sailboat painting ideas occasionally, and they like the method I’ve shared here.
As such, painting boats can be a way to relax your mind and help you connect with like-minded people. You may also learn helpful tips regarding sailing and boat maintenance along the way.

You need to paint your boat every year if you let it sit in the water all the time and the vessel shows signs of degradation.
That said, if you paint your sailboat with high-quality products, such as marine-grade paint, the coating can last for as long as 10 years, especially if you’re extra careful with your boat and have proper storage for it.
Besides the two brands I mentioned above, you can also try antifouling paints by Rust-Oleum. I just rotated between TotalBoat, Rust-Oleum, and Interlux because these three provided the best results among the sailboat paints I tested.
Rust-Oleum’s Topside Paint paired with the brand’s fiberglass primer work well with fiberglass hulls. But I can say the same for TotalBoat’s Topside Paint. To me, it’s really just whichever of the three is available on my local marine shop’s shelf. Besides choosing the right paint, you may also ask yourself how much it costs to paint a boat. Is it worth it? Check out this article to get the answer!

If you follow most of the preliminary preparatory steps I’ve shared here, you will be keeping yourself safe from start to finish.
- Wear the PPEs I said above every time you’re sanding and applying epoxy and paint on the surface.
- Read any warning labels on the paint and other chemicals you use, like acetone for drying the paint quickly. Handle it with care always.
- Learn how to dispose of your paint properly. It’d be even better if you learned how to recycle it.
- Beware of accidents that may happen while you’re doing the cleaning and prep work. I mean, I’ve hit my head on a sailboat mast while doing them, so I reckon the chance of such misfortunes happening isn’t zero, even on a paint job.
To recap everything I’ve said regarding how to paint a sailboat:
- Position your boat in a good workplace.
- Clean and sand its hull well using boat soap and water and sandpaper.
- Apply 4 coats of the primer, 2 coats of the topcoat, then 2 antifouling coats, or skip to the antifouling paint coat immediately.
- Decide how you’re going to apply the paint based on the finish you want and your skill in using each tool.
We wish you the best of luck with your painting project. If you want to share your results with us, feel free to reach out via the comment below.

“My intention from the first day establishing Boating Basics Online is to provide as much help as possible for boaters who want to experience a first safe and convenient trip. So feel free to join us and share your beautiful journeys to the sea!”
How to Paint a Boat: A Step-by-Step Guide for a Fresh Finish
There’s something special about a well-maintained boat gliding through the water, its sleek and vibrant appearance turning heads along the shore. Boat maintenance plays a vital role in preserving both the aesthetic appeal and the structural integrity of the vessel. Among the many aspects of boat care, painting is a key element that can truly transform its appearance and provide long-lasting protection.
Painting a boat is not just about maintaining its beauty; it’s a process that instills a sense of pride and accomplishment. The sight of a freshly painted boat, glistening under the sun, evokes a feeling of satisfaction and signals to others your commitment to preserving your vessel.
In this comprehensive guide, we will take you through the necessary steps and provide valuable tips to help you effectively paint your boat. Whether you are restoring an old boat or looking to give a new life to your current one, this article will equip you with the knowledge and techniques needed for a successful paint job. Get ready to embark on a journey that will not only enhance the appearance of your boat but also protect it for years to come.
Assessing the Boat’s Condition

Before embarking on the painting process, it is crucial to assess the condition of your boat. Here’s why it’s important:
- Identifying Damage and Corrosion: Assessing the boat’s condition allows you to identify any damage or corrosion that needs to be addressed before painting. Look for areas where the fiberglass, wood, or metal may be compromised, such as cracks, blisters, or rust. Repairing these issues ensures a solid foundation for the paint and prevents further damage.
- Surface Imperfections: Surface imperfections like dents, scratches, or peeling paint can affect the overall finish. Identifying these imperfections allows you to address them through proper surface preparation techniques such as sanding, filling, or fairing. Achieving a smooth surface is crucial for a professional-looking and long-lasting paint job.
- Proper Preparation: Adequate preparation is key to achieving a durable and flawless paint finish. This includes cleaning the boat’s surface to remove dirt, grease, or contaminants, as well as removing any loose or flaking paint. Properly preparing the surface ensures good adhesion of the paint and improves its longevity.
By assessing the boat’s condition, you can address any existing damage or imperfections and ensure proper preparation for the painting process. This sets the foundation for a smooth and durable finish that not only enhances the appearance of your boat but also protects it against the elements for years to come.
Gathering the Necessary Supplies
To paint a boat effectively, it is important to gather the necessary supplies. Here’s a list of essential items you will need:
- Marine-Grade Paint: Choose a high-quality marine-grade paint specifically designed for boats. Consider the type of material your boat is made of (fiberglass, wood, aluminum, etc.) and select a paint suitable for that material. Marine-grade paints are formulated to withstand the harsh marine environment, providing durability, UV protection, and resistance to water, salt, and weathering.
- Primer: Use a primer designed for marine applications to ensure proper adhesion and longevity of the paint. The primer creates a stable base for the paint to adhere to, enhances its durability, and improves the overall finish.
- Paint Brushes or Rollers: Select high-quality paint brushes or rollers suitable for the type of paint you are using. Brushes with synthetic bristles are often recommended for applying marine paints. Rollers are ideal for larger areas and can provide a smoother finish.
- Masking Tape: Masking tape is essential for creating clean and precise lines between different painted areas. It helps protect areas that you don’t want to paint, such as windows, hardware, or trim.
- Sandpaper and Sanding Tools: Various grits of sandpaper, ranging from coarse to fine, are needed for surface preparation. Sandpaper helps smooth out imperfections, remove old paint or varnish, and create a suitable surface for the new paint to adhere to. Sanding tools like sanding blocks or orbital sanders can aid in achieving an even and consistent surface.
- Protective Equipment: Wear appropriate protective equipment, including safety goggles, a respirator mask, gloves, and protective clothing. These items help protect you from paint fumes, dust, and chemical exposure, ensuring your safety during the painting process.
It is crucial to select high-quality marine-grade paint that is specifically designed for the material of your boat. Using the right paint ensures optimal adhesion, durability, and resistance to the marine environment. It also provides a long-lasting finish that protects your boat and maintains its appearance over time.
By gathering the necessary supplies and choosing the right marine-grade paint, you set yourself up for a successful boat painting project, achieving a beautiful and durable finish that enhances the overall aesthetics and protection of your vessel.
Preparing the Boat for Painting
Preparing the boat’s surface is a crucial step in achieving a smooth and professional paint finish.
Here’s a guide to preparing your boat for painting:
- Cleaning the Boat’s Surface: Start by thoroughly cleaning the boat’s surface to remove dirt, grime, and any contaminants. Use a mild detergent or boat-specific cleaner and scrub the surface with a soft brush or sponge. Rinse thoroughly with clean water to ensure no residue remains. Cleaning the surface allows the paint to adhere properly and ensures a clean base for the new coat.
- Removing Loose or Flaking Paint: Inspect the boat’s surface for any loose or flaking paint. Use a scraper or putty knife to gently remove the loose paint. Be careful not to damage the boat’s underlying material. Removing loose paint helps create a smooth and even surface for the new paint to adhere to.
- Sanding the Surface: Sanding is essential to create a suitable base for the new paint. Start by using coarse-grit sandpaper (around 80-120 grit) to remove any remaining old paint, smooth out imperfections, and promote adhesion. Use a sanding block or orbital sander to ensure an even and consistent sanding pattern. Gradually progress to finer-grit sandpaper (around 220-320 grit) for a smoother finish. After sanding, clean the surface again to remove any sanding dust.
- Filling and Fairing: If there are any dents, scratches, or imperfections on the boat’s surface, use a suitable filler or fairing compound to repair them. Follow the manufacturer’s instructions for the specific product you are using. Apply the filler or fairing compound with a putty knife, smoothing it out to create a level surface. Once the filler has cured, sand it lightly to ensure it blends seamlessly with the rest of the surface.
By cleaning the boat’s surface and removing loose or flaking paint, you create a clean canvas for the new paint. Sanding helps create a smooth and suitable base, promoting proper paint adhesion and ensuring a professional-looking finish. Filling and fairing any imperfections further enhance the overall appearance of the painted surface.
Remember to wear appropriate protective equipment, such as gloves and a respirator mask, during the preparation process to protect yourself from dust, chemicals, and fumes. Proper preparation sets the stage for a successful paint job, ensuring a beautiful and long-lasting finish for your boat.
Applying Primer and Paint

Applying primer and paint is a critical step in the boat painting process. Here’s a guide to help you achieve a professional finish:
The Role of Primer:
Primer plays a vital role in the painting process. It enhances paint adhesion, improves durability, and helps create a uniform surface. It also seals the underlying material, preventing moisture penetration and protecting it from potential damage. Applying primer ensures that the paint adheres properly and provides a long-lasting and high-quality finish.
Applying Primer:
- Preparation: Ensure the surface is clean, dry, and properly sanded. Follow any specific instructions provided by the primer manufacturer.
- Mixing: Thoroughly mix the primer according to the manufacturer’s instructions. Use a stir stick or paint mixer to ensure proper blending of the components.
- Application: Apply the primer using a high-quality brush or roller suitable for the type of primer you are using. Start from one end and work your way across the surface in smooth, even strokes. Ensure even coverage and avoid leaving thick or thin spots. Follow the manufacturer’s recommended coverage and application thickness.
- Drying Time: Allow the primer to dry according to the manufacturer’s instructions. This usually ranges from a few hours to overnight. Avoid touching or disturbing the surface during the drying process.
Applying Paint:
- Preparation: Ensure the primer is dry and properly cured before applying paint. Stir the paint thoroughly to achieve a consistent color and texture.
- Application: Apply the paint using the same techniques as the primer, starting from one end and working your way across the surface. Use smooth, even strokes to achieve consistent coverage. Avoid applying the paint too thickly, as it can lead to drips or runs. Allow each coat to dry before applying subsequent coats, following the manufacturer’s recommended drying times.
- Multiple Coats: Apply multiple coats of paint as necessary to achieve the desired color and finish. Allow each coat to dry and lightly sand between coats to promote adhesion and ensure a smooth surface.
Maintain good ventilation during the painting process, and follow all safety precautions recommended by the primer and paint manufacturers.
Properly applying primer and paint ensures a durable and visually appealing finish. Adhere to the manufacturer’s instructions for mixing, application, and drying times to achieve the best results. Take your time, be patient, and aim for even coverage to create a beautiful and long-lasting paint job for your boat.
Painting Different Boat Surfaces
Painting different boat surfaces requires specific considerations and techniques. Here’s a guide to help you achieve optimal results on various surface types:
Fiberglass:
- Clean the fiberglass surface thoroughly to remove any dirt or contaminants.
- Use a marine-grade fiberglass primer designed specifically for fiberglass boats. Follow the manufacturer’s instructions for proper mixing and application.
- Apply multiple thin coats of marine-grade paint, allowing sufficient drying time between each coat.
- For optimal results, sand lightly between coats to promote adhesion and achieve a smooth finish.
- Follow the manufacturer’s recommended number of coats and drying times for the specific paint you are using.
- Ensure the wood surface is clean, dry, and properly prepared.
- Apply a suitable wood primer to seal the surface and promote proper paint adhesion. Follow the manufacturer’s instructions for application and drying time.
- Use marine-grade paint suitable for wood surfaces. Apply multiple thin coats, allowing each coat to dry fully before applying the next.
- Sand lightly between coats to achieve a smooth finish and promote adhesion.
- Consider using a varnish or clear coat as a final protective layer over the paint, especially for areas exposed to direct sunlight and water.
- Clean the metal surface thoroughly to remove any rust, grease, or contaminants. Use a suitable metal cleaner or solvent.
- Apply a metal primer designed to inhibit corrosion and promote adhesion. Follow the manufacturer’s instructions for proper mixing and application.
- Use marine-grade paint suitable for metal surfaces. Apply multiple thin coats, ensuring even coverage and avoiding drips or runs.
- Consider using a rust-inhibiting paint or a paint specifically designed for metal surfaces exposed to saltwater.
- Sand lightly between coats to promote adhesion and achieve a smooth finish.
Each surface type presents unique challenges and requirements. Following the manufacturer’s instructions for the specific primers and paints you choose is essential. Pay attention to the recommended number of coats, drying times between coats, and any specific instructions regarding surface preparation or sanding.
Remember, proper surface preparation, the use of high-quality primers and paints, and allowing sufficient drying time between coats are key to achieving optimal results. Take your time, follow the instructions, and enjoy the process of transforming your boat into a stunning work of art.
Finishing Touches and Cleanup

The finishing touches and cleanup are essential steps to complete your boat painting project. Here’s a guide to help you with these final tasks:
Finishing Touches:
- Remove Masking Tape: Once the paint has dried sufficiently, carefully remove the masking tape to reveal clean and crisp lines. Pull the tape at a 45-degree angle to avoid peeling off any fresh paint. Inspect the edges and make any necessary touch-ups with a small brush.
Cleaning Paint Brushes or Rollers:
- Clean Immediately: It’s important to clean your paint brushes or rollers immediately after use to prevent the paint from drying and hardening on the bristles.
- Use the Proper Solvent: Refer to the paint manufacturer’s instructions for the recommended solvent or cleaning agent to use for the specific type of paint you used. Some paints may require water-based cleaners, while others may need mineral spirits or other solvents.
- Thoroughly Clean: Rinse the brushes or rollers with the appropriate solvent, working the bristles or nap to remove all traces of paint. Repeat the process as needed until the brushes or rollers are clean. For stubborn paint, you may need to use a brush comb or wire brush to remove it.
- Dry and Store: After cleaning, allow the brushes or rollers to dry completely before storing them. Hang brushes upside down or store them flat to maintain their shape.
Proper Disposal and Cleanup:
- Disposing of Paint Cans: Dispose of empty or partially empty paint cans according to local regulations . Many areas have specific guidelines for proper disposal of paint cans, which may include recycling or hazardous waste centers. Check with your local authorities for the appropriate disposal methods to protect the environment.
- Cleanup: Clean up the work area, ensuring all paint cans, brushes, and other materials are properly stored or disposed of. Dispose of any used masking tape, drop cloths, or other debris responsibly.
Paying attention to the finishing touches, such as removing masking tape for clean lines, enhances the overall appearance of your paint job. Cleaning paint brushes or rollers promptly after use helps maintain their quality and extends their lifespan.
Proper disposal of paint cans and responsible cleanup is crucial for protecting the environment. Follow local regulations and guidelines to ensure you dispose of any materials in an environmentally friendly manner.
By giving attention to these final steps, you can proudly admire your beautifully painted boat and enjoy the satisfaction of a job well done.
Watch Fiberglass boat painting made easy: prep, paint and top coat with a roller | Video
Top 5 FAQs and answers related to How to paint a boat
How long does it take to paint a boat.
The time it takes to paint a boat can vary depending on factors such as the size of the boat, the number of coats desired, the surface condition, and weather conditions. It is recommended to allocate several days or even weeks for the entire process, including surface preparation, priming, and painting, allowing for proper drying times between coats.
Can I paint my boat myself, or should I hire a professional?
Painting a boat can be a DIY project, but it requires careful planning, proper preparation, and attention to detail. If you have experience with painting or feel confident in your abilities, you can certainly tackle it yourself. However, if you’re uncertain or have a large boat with complex surfaces, hiring a professional painter with expertise in marine applications may be a wise choice to ensure a high-quality finish.
Do I need to remove the old paint before applying a new coat?
In most cases, it is recommended to remove loose or flaking old paint before applying a new coat. However, if the existing paint is in good condition, you can sand it lightly to create a suitable surface for the new paint to adhere to. It is important to ensure a clean and smooth base for optimal results.
How many coats of paint should I apply to my boat?
The number of coats depends on several factors, including the type of paint, desired color intensity, and personal preference. In general, it is recommended to apply at least two or three coats of paint to achieve good coverage and durability. Follow the paint manufacturer’s instructions for the specific product you are using, as they will provide guidance on the recommended number of coats.
How do I maintain and protect the newly painted boat?
To maintain and protect your newly painted boat, it’s important to follow proper care and maintenance practices. Regularly clean the boat’s surface using mild cleaners and avoid abrasive materials or harsh chemicals that could damage the paint. Apply a protective wax or polymer coating to enhance the paint’s durability and UV resistance. Additionally, inspect the painted surface periodically for any signs of damage or wear and address them promptly to prevent further issues.

Painting a boat is a rewarding and satisfying part of boat maintenance, and with the knowledge gained from this comprehensive guide, you can achieve a fresh and impressive paint finish. Let’s recap the key steps and considerations discussed:
- Assess the boat’s condition, identifying any damage, corrosion, or surface imperfections that require repair before painting.
- Gather the necessary supplies, including marine-grade paint, primer, brushes or rollers, masking tape, sandpaper, and protective equipment.
- Prepare the boat’s surface by cleaning it thoroughly, removing loose or flaking paint, and sanding to create a smooth base.
- Apply primer to ensure proper adhesion and durability, following the manufacturer’s instructions for mixing, application, and drying times.
- Apply paint using even strokes, ensuring proper coverage, avoiding drips or runs, and allowing each coat to dry before applying the next.
- Pay attention to specific considerations for different boat surfaces, such as fiberglass, wood, or metal.
- Attend to finishing touches, such as removing masking tape and ensuring clean lines.
- Clean paint brushes or rollers immediately after use, following the manufacturer’s instructions for the specific type of paint used.
- Dispose of paint cans and cleanup materials responsibly, following local regulations to protect the environment.
Thorough preparation, selecting high-quality materials, and following proper application techniques are essential for achieving a professional and long-lasting paint finish on your boat. Take pride in your boat’s appearance and enjoy the process of transforming it into a stunning vessel on the water.
With the knowledge and guidance provided in this guide, you have the tools to embark on your boat painting project with confidence. So, get ready to give your boat a fresh new look and take pride in the impressive results you’ll achieve. Happy painting!
Share How to Paint a Boat: A Step-by-Step Guide for a Fresh Finish with your friends and Leave a comment below with your thoughts.
Read How to Remove Water Stains from a Fiberglass Boat? Guide until we meet in the next article.
Similar Posts

5 Most Common Problems with Seven Marine
Seven Marine engines, with their formidable horsepower and sleek designs, tempt boaters seeking high-octane adventures on the water. But even the most powerful engines can encounter hiccups. So, before unleashing the Kraken (figuratively, of course!), let’s dive into the most common problems Seven Marine owners face and explore potential fixes: 1. Power Play Issues: 2….

How to Avoid VAT on Boats? Guide for Boat Buyers and Owners
Introduction to the topic Boating enthusiasts know that owning and maintaining a boat can be an expensive endeavor. From the initial purchase price to ongoing expenses such as fuel, maintenance, and mooring fees, the costs can quickly add up. However, one aspect that often catches boaters by surprise is the Value Added Tax (VAT) imposed…

4 Symptoms to Detect a Clogged VST Filter
Picture this: you’re out on the water, the sun is shining, and the gentle waves carry you across the lake. Suddenly, your boat’s engine sputters and loses power, bringing your idyllic day to a halt. If this scenario sounds all too familiar, you know how crucial a smoothly running engine is to your boating experience….

Pontoon Boat Fishing Rod Holders: The Angler’s Guide
Picture this: a serene morning on the water, the gentle rocking of your pontoon boat, and the thrill of fishing. Pontoon boats have become increasingly popular for anglers who crave a leisurely yet productive fishing experience. But to make the most of your fishing adventure, you need the right equipment. That’s where fishing rod holders…

Are Mercury Black Max 150 Motor Reliable and Good?
The Mercury Black Max 150 outboard motor stands as a testament to power, reliability, and excellence in the world of boating. Renowned among boating enthusiasts, this engine has earned its reputation as a dependable choice for a variety of water adventures. With a legacy of performance and innovation, the Mercury Black Max 150 has captured…

How to Drive a Pontoon Boat: Step-by-Step Guide
There’s a unique charm in gliding across serene waters, surrounded by friends and family, soaking in the sun’s gentle warmth, and savoring the tranquility of the open expanse. Pontoon boats, with their leisurely pace and spacious decks, epitomize this idyllic aquatic experience. These versatile watercraft offer a haven of relaxation and the promise of unforgettable…
THE 10 BEST Moscow Boat Rides & Cruises
Boat rides & cruises in moscow.
- Boat Rentals
- Scuba & Snorkeling
- Fishing Charters & Tours
- Water Sports
- Stand-Up Paddleboarding
- Surfing, Windsurfing & Kitesurfing
- Kayaking & Canoeing
- Waterskiing & Jetskiing
- Parasailing & Paragliding
- River Rafting & Tubing
- Dolphin & Whale Watching
- Speed Boats Tours
- Submarine Tours
- 5.0 of 5 bubbles
- 4.0 of 5 bubbles & up
- 3.0 of 5 bubbles & up
- 2.0 of 5 bubbles & up
- 3rd Transport Ring (TTK)
- District Central (TsAO)
- Garden Ring
- District Northern (SAO)
- Good for Big Groups
- Good for Couples
- Good for a Rainy Day
- Budget-friendly
- Good for Kids
- Hidden Gems
- Honeymoon spot
- Good for Adrenaline Seekers
- Adventurous
- Things to do ranked using Tripadvisor data including reviews, ratings, photos, and popularity.
1. Flotilla Radisson Royal

2. Moscow River Boat Tours

3. Sup-Club
4. Akvanavt Diving Centre
5. Diving Center Crocus City Oceanarium

6. CheapRussia Tours
7. Kite School Kiteclass

8. SUP Center
9. Erwin. Reka
11. Easy Russia Tour Guide
12. Lovely Russia Tours

13. Capital River Boat Tours - Moscow Centre

14. Alfa Centr
15. Diving Club Divers
16. Sup Outdoor

17. MORE MOSCOW
19. Soho Sailing Style
20. Diving Center Crocodile
21. Dive-Project

22. Mosparokhodstvo
24. Kosinskiy Children Marine Club
25. Kayak Moscow
26. DIVECLUB CHE
27. FLOW Moscow
28. Moswake

29. Morskiye Volki

30. S-cruises
What travelers are saying

- CheapRussia Tours
- Easy Russia Tour Guide
- Lovely Russia Tours
- MORE MOSCOW
- Insider Moscow Tours
- Flotilla Radisson Royal
- Moscow River Boat Tours
- Capital River Boat Tours - Moscow Centre
- Diving Center Crocus City Oceanarium
- Images home
- Editorial home
- Editorial video
- Premium collections
- Entertainment
- Premium images
- AI generated images
- Curated collections
- Animals/Wildlife
- Backgrounds/Textures
- Beauty/Fashion
- Buildings/Landmarks
- Business/Finance
- Celebrities
- Food and Drink
- Healthcare/Medical
- Illustrations/Clip-Art
- Miscellaneous
- Parks/Outdoor
- Signs/Symbols
- Sports/Recreation
- Transportation
- All categories
- Shutterstock Select
- Shutterstock Elements
- Health Care
Browse Content
- Sound effects
PremiumBeat
- PixelSquid 3D objects
- Templates Home
- Instagram all
- Highlight covers
- Facebook all
- Carousel ads
- Cover photos
- Event covers
- Youtube all
- Channel Art
- Etsy big banner
- Etsy mini banner
- Etsy shop icon
- Pinterest all
- Pinterest pins
- Twitter All
- Twitter Banner
- Infographics
- Zoom backgrounds
- Announcements
- Certificates
- Gift Certificates
- Real Estate Flyer
- Travel Brochures
- Anniversary
- Baby Shower
- Mother's Day
- Thanksgiving
- All Invitations
- Party invitations
- Wedding invitations
- Book Covers
- About Creative Flow
- Start a design
AI image generator
- Photo editor
- Background remover
- Collage maker
- Resize image
- Color palettes
Color palette generator
- Image converter
- Creative AI
- Design tips
- Custom plans
- Request quote
- Shutterstock Studios
0 Credits Available
You currently have 0 credits
See all plans

Image plans
With access to 400M+ photos, vectors, illustrations, and more. Includes AI generated images!

Video plans
A library of 28 million high quality video clips. Choose between packs and subscription.

Music plans
Download tracks one at a time, or get a subscription with unlimited downloads.
Editorial plans
Instant access to over 50 million images and videos for news, sports, and entertainment.
Includes templates, design tools, AI-powered recommendations, and much more.
Search by image
Custom Car Paint royalty-free images
7,515 custom car paint stock photos, vectors, and illustrations are available royalty-free for download., close up of the flames on a vintage hot rod.

Retro hot rod car tuning show.Custom painted classic American vehicle with orange flames. MOSCOW-7 AUGUST,2016:

Busy male mechanic in mask sticking tape on car before painting in workshop

Racing Flames

Yellow Flames on Red Vintage Car

Chameleon holographic colour car. Side view. Driver's door and side mirror. closeup. Car wrapping. Car exhibition.

Tuned Customised Cars

Unique purple and orange automotive background

Spray gun. Vector illustration.

Details of a customized vehicle on display at a car show.

Paint protection film installation on fender panel surface of luxury sports car. PPF is polyurethane film applied to car surface to protect the paint from rock chip and scratch. Shallow DOF. Hand move

classic auto paint and tire detail

SANDOWN PARK, UK - MARCH 26: Custom graffiti paintwork on a VW Beetle, used to help raise money for and advertise the Comic Relief aid charity. Volksworld, Sandown Park, UK. March 26, 2011.

Red vintage

Kiev / Ukraine - 04.10.19: car Volkswagen Golf 7 R is covering film of color iridescent. Car Parking Concept

colorful flaming paintwork and headlamp on a custom hotrod

Set of nine colorful cartoon cars

BMW M3 F80 wrapped in chameleon vinyl wrap, equipped with custom wide body kit, carbon fiber parts, forged wheels and low profile race tyres on Drift And Cars Show. KYIV-15 MAY,2021

Tampa, FL - August 25, 2021: Tesla Model Y Performance with custom wheels and a custom vinyl wrap covering the car's paint parked on top of a parking garage during the middle of the day.

Hot 442 engine, found on cars in the 50's to early 70's

60s sports car head light

Front of vintage car, white with blue flames paint job

Car design with carbon sticker

Paint protection film installation on door panel of luxury sports car. PPF is polyurethane film applied to car surface to protect the paint from rock chips & scratch. Shallow DOF. Hand movement

Chameleon colour car on the parking among other cars. Unique bright colour vehicle. Custom paint wrap. Eye-catching concept photo.

Hot Rod Racing Flame Graphics

Old African toy - Bush taxis from Dakar to M'Bo ur (Senegal)
")
colorful flaming paintwork on a custom hotrod vehicle

Classic Street Rod At Show

MOSCOW, RUSSIA - JULY 23, 2021: Car. Automobile on street of Moscow city, Russia. Unusual tuning car. Custom car, customized cars. Tuning auto, cars at Tuning Open Fest in Moscow. Custom paint cars

Flame graphic paint job on hot rod car

Carbon mat metallic grey car wrap

black tuning car with a lot of Light Bulb

Vintage car on dark background. For other views or colors of this car please check my portfolio.

Close-up LED headlight expensive car part with exclusive iridescent painting. Vehicle covered with vibrant chameleon film

BANGKOK, THAILAND - JULY 8, 2020: Paint protection film attached to front panel of Audi TT. PPF is polyurethane film that help protect paint from scratch. Selective fous & shallow DOF.

GLOUCESTER, VA- MAY 12:A Chevy P/U at the relay for life car shows sponsored by Auto Max & the MPCC at the Main St shopping center in Gloucester Virginia, 2012 in Gloucester Virginia on May 12, 2012.

painted flames on car

Bordeaux , Aquitaine France - 05 27 2021 : Jeep Wrangler zebra car paint 4x4 model all road custom paint

Wheel and Side of Car with custom graphics

customized muscle car with supercharger and flames

black chevy truck, with blue sky reflected in bodywork

car graphic design for t-shirt

door handle of vintage car

Closeup of a vehicle hood receiving a custom paint job

Chevrolet Camaro new concept car. Detroit Motor Show 2008. The same as "Bumble Bee" in the "Transformers" movie.

Vintage car. Sepia

Custom car flames

BUDAPEST-MARCH 19: Tuned Nissan Skyline R34 GT car with fresh green painting and special bumper (Bomex bodykit) on international tuning show in Hungexpo at 19th of March, 2010 in Budapest, Hungary
 on international tuning show in Hungexpo at 19th of March, 2010 in Budapest, Hungary")
Classic Red Custom Street Rod Car with Hotrod Flames and Chrome Rims Isolated Vector Illustration

Details of the engine and graphics on a customized vehicle.

green classic car

Custom Flame Paint Job

Closeup of a classic custom car.

Kiev / Ukraine - 04.10.19: car with painting color iridescent color in the parking lot in the evening

Detail of a beautifully restored and chromed engine

Hot American muscle car cartoon. Purple and black paint, aggressive stance, low profile, big tires and rims.

Vector Illustration of old vintage custom collector's car on Urban abstract background in grunge style

Classic Custom Car

Flames on a Street Rod

Classic hot rod fifties muscle car with a cool man and cute blonde woman cruising, low profile, big tires and rims, jet black paint, cartoon vector illustration

Dual exhaust pipes on a custom car with rear spikes and teal paint. Custom cars in Southern California summer 2017

PRAGUE, CZECH REPUBLIC - SEPTEMBER 3rd 2017: Close view of custom built chameleon painted Mercedes on display during Prague Car Festival on 3rd September 2017 in Prague, CZE.

GLOUCESTER, VA- SEPTEMBER 6: T Bucket right side in the 23rd Annual 2013 MPCC(middle peninsula car club)meeting at the Main St shopping center in Gloucester, Virginia on September 6, 2013
meeting at the Main St shopping center in Gloucester, Virginia on September 6, 2013")
GLOUCESTER, VA- JULY 13: A 67 Ford Mustang in the (middle peninsula car club) blast from the past car show at the Main St shopping center in Gloucester, Virginia on July 13, 2013
 blast from the past car show at the Main St shopping center in Gloucester, Virginia on July 13, 2013")
Custom hot rod

Man driving SUV.

SAN FRANCISCO - NOVEMBER 21: A custom painted Chevrolet Camaro is on display during the 2011 International Auto Show at the Moscone Center in San Francisco on November 21, 2011

A Red Antique Truck Isolated on White

Vintage red car on dark background. For other views or colors of this car please check my portfolio.

DETROIT - JANUARY 17: Concept cars from the North American International Auto Show on January 17, 2010 in Detroit, Michigan.

auto paint logo template
Auto Body Painting

GLOUCESTER, VA- JULY 13: A Custom Chevy S-10 P/U in the (middle peninsula car club) blast from the past car show at the Main St shopping center in Gloucester, Virginia on July 13, 2013
 blast from the past car show at the Main St shopping center in Gloucester, Virginia on July 13, 2013")
classic car hot rod

Paint protection film installation on bonnet panel of luxury sports car. PPF is polyurethane film applied to car surface to protect the paint from rock chips & scratch. Shallow DOF. Hand movement.

Purple Delight

red sport and fast car over mirror; three dimensional shape

Car detailing custom logo design retro badge baroque luxury element polish coating service
Classic Car Interior

65 chevelle engine

Paint protection film installation on door panel of luxury sports car. PPF is polyurethane film applied to car surface to protect the paint from rock chips and scratch..car coating detailing sticker .

BMW M3 F80 vehicle wrapped in purple matte chameleon vinyl wrap,equipped with custom wide body kit with carbon fiber parts and laser led headlights on Drift And Cars Show. KYIV-15 MAY,2021

GLOUCESTER, VA, USA -SEPTEMBER 16: Vintage 1970 Ford Boss 427 Mustang in the Middle Peninsula Classic Cruisers Club weekly Car Show. Main Street Center. September 16, 2011 in Gloucester, VA, USA

The modern handle of a door of the red car

Vector Stripes Decal Stickers fits for all racing car, Door Side Car Accessories

MANILA, PH - NOV. 6: Customized car sound system at Manila Auto Salon on November 6, 2016 in Manila, Philippines. Manila Auto Salon is a annual gathering exhibit for automotive aftermarket industry.

GLOUCESTER, VA- MAY 25: 1969 Chevy Camaro SS in the (middle peninsula car club) relay for life car show at the Main St shopping center in Gloucester, Virginia on May 25, 2013
 relay for life car show at the Main St shopping center in Gloucester, Virginia on May 25, 2013")
Auto car paint logo design with creative concept and business card design Premium Vector
Close up of matching orange leather upholstery of custom classic vintage car interior

Key hold with door handle of vintage car

Our company
Press/Media
Investor relations
Shutterstock Blog
Popular searches
Stock Photos and Videos
Stock photos
Stock videos
Stock vectors
Editorial images
Featured photo collections
Sell your content
Affiliate/Reseller
International reseller
Live assignments
Rights and clearance
Website Terms of Use
Terms of Service
Privacy policy
Modern Slavery Statement
Cookie Preferences
Shutterstock.AI
AI style types
Shutterstock mobile app
Android app
© 2003-2024 Shutterstock, Inc.
IMAGES
VIDEO
COMMENTS
Boat Painting jobs. Sort by: relevance - date. 2,646 jobs. Painter/Laborer. Hiring multiple candidates. Midwest Manufacturing and Mechanical, Inc 3.2. Nashwauk, MN 55769. $35,000 - $65,000 a year. Full-time. 8 hour shift. Easily apply: Initial pay will be based upon experience. Employer Active 3 days ago.
Marine Plumbing Co., LLC. West Palm Beach, FL. $15 - $35 an hour. Full-time. Monday to Friday. Easily apply. Advise manager and/or Service Writer when additional work is required for a customer's boat.·. Seeking a full time person for a busy marine service company. Posted.
252 Boat Paint jobs available on Indeed.com. Apply to Deckhand, Painter, Technician and more!
Prep the surface by washing, de-waxing, and thoroughly sanding it. Apply the primer, then the paint. Wax the boat from stem to stern to protect the new paint job. Then, simply keep it clean, and rinse it thoroughly after use in saltwater. Remember, before you paint a boat always read the warning labels on all of the supplies and be sure to use ...
69 Marine painters jobs in United States. Most relevant. SEA Marine. Master Marine Technician. Port Townsend, WA. USD 28.00 - 33.00 Per Hour (Employer est.) Easy Apply. Familiar with mechanical repair tools.
Custom boat paint jobs are like personalized works of art on the water. It's not just painting; it's creating something unique and expressive for your vessel. Think of it as crafting a visual masterpiece with custom designs, colors, and finishes that are uniquely tailored to your boat's personality.
Rust-Oleum Marine Flat Boat Bottom Antifouling Paint. As one of the most respected brand names in the bottom paint industry, Rust-Oleum is known for producing some of the best sailboat bottom paint and the Marine Flat Boat Bottom Antifouling Paint is one of them. This bottom pain is designed to be suitable for various conditions (both ...
A gleaming paint job remains an icon of yacht-quality maintenance, and paint makers spin the transformative ability of what comes in their cans. ... an aircraft paint company executive decided to paint his boat with the same stuff used to coat aircraft that flew at 450 knots—the stuff that seemed immune to UV degradation and shed hydraulic ...
By following these steps, you can achieve a professional-looking paint job on your sailboat and enjoy the benefits of a visually appealing and protected vessel. 1. Painting a sailboat requires specific materials such as paint, primer, brushes and rollers, sandpaper, and tape and drop cloths. 2. Before painting, it is important to prepare the ...
Proper preparation is the key to a successful paint job. Start by cleaning the boat's surface thoroughly to remove dirt, grease, and old paint. Sand the surface to create a smooth and clean canvas for the new paint to adhere to. Applying primer. Priming is a crucial step to ensure good paint adhesion and durability. Apply a marine-grade primer ...
After you have finished with the 600 grit sandpaper, it is time to move on to 800, then 1200. This process is important so you will be painting on as smooth a surface as possible. It is then a good idea to wipe the surfaces of the boat down with a damp cloth to remove any of the dust and flakes of metal/wood.
Bottom jobs—or painting the bottom of a boat—are an important part of keeping your watercraft in good condition. Angel's Marine, serving the Dickinson, Galveston, Clear Lake and Texas City, Texas area, specializes in bottom jobs for boats of all makes, models and years of manufacture. Our powerboat repair center has a lift to service many ...
Full job description. Marine Insulators needed for short term job in the Baltimore area. Must have MINIMUM of 2 years experience with insulation and Lagging. Must be willing to work overtime hours as needed. Please ensure your resume shows at least one recent (last 3 years) Marine Insulator position if you want to be considered for the job.
Painting the boat on its trailer on a clear, dry day and positioning it so the paint won't get direct sunlight exposure are ideal. Practical Steps for Painting a Sailboat. This guide works well for fresh paint jobs and even if you're repainting the boat. Step 1. Give the sailboat a thorough cleaning.
Apply primer, if necessary, and resand. Apply the finish paint with a partner, using roller and brush. Let each coat dry completely before lightly sanding for the next, laying on a minimum of two coats. Protect yourself and the environment. A smooth application of bottom paint helps boat performance.
Proper preparation sets the stage for a successful paint job, ensuring a beautiful and long-lasting finish for your boat. Applying Primer and Paint. Applying primer and paint is a critical step in the boat painting process. Here's a guide to help you achieve a professional finish: The Role of Primer: Primer plays a vital role in the painting ...
Polishing to remove defects from boat paintwork. Mixing paint to apply to boats. Applying paint products correctly and to a high standard. Filling and sanding for boat paintwork. Duties of each job: 1. Preparation of surfaces: The technician is responsible for preparing the surface of the boat for painting.
2116. jobs in moscow, id. RN MDS Coordinator. Cascadia Healthcare Aspen Park —Moscow, ID. Coordinate and oversee the completion of the Minimum Data Set (MDS) assessments for all residents in accordance with state and federal regulations. From $38 an hour.
Explore the scenic and historic attractions of Moscow from the water with the best boat tours and cruises. Enjoy the views of the Kremlin, the Cathedral of Christ the Savior, and the Sparrow Hills on a relaxing or informative boat ride. Or, spice up your trip with some water sports and activities in Moscow. Find out more on Tripadvisor.
251 Boat Paint Jobs jobs available on Indeed.com. Apply to Deckhand, Seaman, Entry Level Trades Opportunities and more!
7,262 custom car paint stock photos, 3D objects, vectors, and illustrations are available royalty-free. See custom car paint stock video clips. MOSCOW, RUSSIA - JULY 23, 2021: Car. Automobile on street of Moscow city, Russia. Unusual tuning car.
Inspect boat surfaces for defects such as air voids, cuts, cracks, chips, etc. Fiberglass and gel-coat repair. Must be able to block, sand, repair patchwork, and buff boat hulls, decks, and small parts. Job Type: Full-time. Pay: $52,000.00 - $65,000.00 per year.
Walking tour around Moscow-City.Thanks for watching!MY GEAR THAT I USEMinimalist Handheld SetupiPhone 11 128GB https://amzn.to/3zfqbboMic for Street https://...