- Marine Supplies
Maintenance & Boating Guides

How to Restore a Fiberglass Boat: Fiberglass Boat Restoration Tips
By: B.J. Porter Editor

Classic old boats have a lot of beauty under those dull, oxidized finishes, and with some effort, you can bring some shine back to the classic lines of that tired-looking but classic fiberglass boat. It’s hard work, but the results can be spectacular. Here are some of our top boat restoration tips.
Oxidation is Your Enemy

Gelcoat is the layer of resin on the outside of your boat that holds the color and protects the fiberglass underneath from the elements. It has no stiffening strength, but it takes a beautiful shine when polished. But it’s not impervious, and sunlight and salt water can wear it and age it.
That chalky white stuff clouding your older boat’s finish is oxidation , the long-term result of gelcoat aging in the sun without regular washing and waxing . A boat gets its beauty and shines from the gelcoat layer over the structural fiberglass, but age, neglect, and exposure to the elements lead to discoloration and loss of shine. To bring back a boat’s glossy finish, you polish away the oxidized layer and put a new finish on the gelcoat.
You might also be interested in: Pontoon Boat Covers: Which is Best for You?
Fiberglass Boat Restoration Tips
There are several steps to restore cloudy, oxidized fiberglass to bring the color back to your boat. You need to clean the hull, polish out the faded surface, then protect it all once you’ve brought back the shine. How you approach each step depends on just how much oxidation you have on the gelcoat.
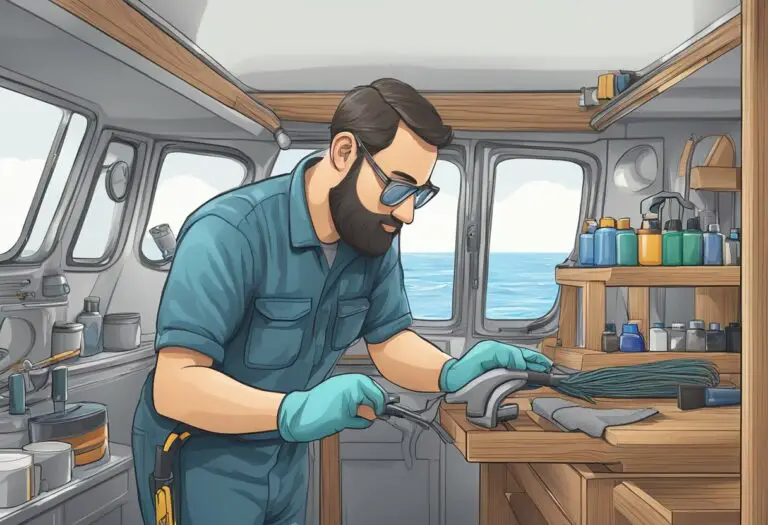
Always wear protective clothing, gloves, and eyewear throughout the entire process. Almost all the detergents, solvents, and compounds used can irritate your skin or hurt your eyes.
Clean, de-grease, and de-wax the Hull

From stem to stern, clean the hull with quality boat soap, and remove all surface dirt or debris. Scrub well, and leave nothing on the surface. You’re going to be rubbing and polishing the hull, and you don’t want to grind dirt and grit into the surface.
To ensure there’s no grease or wax on the hull after you’ve scrubbed the hull with detergent, clean the hull again with MEK or acetone and clean the rags. Fold and turn your rags to keep working with clean spots.
Remove stains
Clean as many surface stains off the boat. Tougher water and rust stains may not come off with a scrub brush and soap, so you may need a special cleaner. Take care to follow the instructions carefully and wear protective gear as directed, most of these special cleaners use harsh chemicals or acids. Rinse all heavy-duty cleaners off with plenty of fresh water when you’re finished.
If you can’t get the worst stains out, buffing may still get them off, but it’s best to clean them first.
Buff with Rubbing Compound to Remove Oxidized Gelcoat
Rubbing or “cutting” compound is a liquid with abrasives suspended in it that can remove surface layers of oxidized gelcoat. To buff your boat, start with a small section of the hull and buff by hand or with a polisher. Work in small sections of about two feet square, and don’t let the compound dry on the hull.
For smaller boats, you can buff by hand, but for larger and heavily oxidized boats a high-speed buffer with a soft buffing pad is recommended. As you buff each section of the boat, follow the instructions on the compounding liquid about application and removal.
Always keep an electric buffer moving, and don’t press too hard in any one spot or you may damage the gelcoat. The goal is to remove as little material as possible while removing the oxidized layer.
If the rubbing compound isn’t taking the oxidation off, you may need to wet sand. Wet sanding with 1200-grit paper is more aggressive than rubbing compound but may be necessary. You can also try multiple passes with the polisher and rubbing compound.
Polish and Shine

Boat polish differs from rubbing compounds in the grit of the abrasives. It’s much finer and will remove any fine surface scratches from wet sanding or compound rubbing to leave a bright, shiny finish.
The process is like buffing with the compound – work in small patches and don’t let the compound dry, working your way around to polish the entire hulk.
Apply Wax to Protect the Hull
The last step to preserve your hard work and keep the boat shiny longer is a good application of wax. Wax is best applied on cooler, overcast days, to slow drying and give you more time to buff. Apply wax to a small section of the boat, and buff it off as per the instructions.
NOTE: You can often find one-step “polish and wax” products. If you’re already compounded the hull and are ready to polish, this can be a time saver, cutting out one step.
The Right Tools for Restoring Your Fiberglass Boat
You’ll need a fair amount of tools, rags, and chemicals to restore your boat, so plan and make sure you’ve got what you need before you start.
To do the job right, you’ll need to include:
- Rotary buffer or polisher
- Buffing pads
- Lots of clean rags
- Boat soap or detergent
- Boat brush.
- Stain removers (as needed for rust, water, and other stains)
- Rubbing and finishing compound
- Protective gear – gloves, coveralls, eye protection, as needed.
- MEK, acetone, or another degreaser.
- Hose, source of water, bucket, and sponge.
Choosing Buffers and Polishers
Buffers come in several types – random orbital, rotary, and high speed. And cordless and corded.
Random orbital buffers and polishers use an offset rotor to move the buffing pad in random back-and-forth motions, versus a straight, rotary motion. Random orbital polishers are good for wax jobs or light polishing. But they don’t spin quickly; only a high-speed rotary polisher will have enough speed to build the heat you need to get the oxidation off your boat. If you have a serious restoration to do, you will need a high-speed rotary polisher.
Whether or not to get a corded polisher is a matter of budget and preference. Corded units are cheaper and never run out of power, but cordless tools let you work without a plug. Neither one will survive a drop in the water well, so secure them with a lanyard.
No matter which you use, never stop the buffer in one place on the boat, as you can mark the hull and damage the gelcoat.
If you also wanna prepare your boat for winter, take a look at this post: A Guide to Winterizing Your Pontoon Boat
Picking Compounds and Waxes for Polishing
There are dozens of rubbing, polishing, and “cutting” compounds on the market. Unfortunately, they’re rarely labeled by specific characteristics like grittiness or what sort of liquid it is. Rather, they’re labeled with words like “quick,” “fast,” “heavy,” and so on.
For strongly oxidized hulls, you want the coarsest cutting compound you can get that won’t damage the gelcoat or leave visible scratches you’ll have to buff out. If you can’t tell the coarseness from the labeling, check the manufacturer’s website for more detail.
Almost all of them are hazardous and can irritate the eyes and skin.
Waxes range from pure wax pastes to easy on/off liquids and combined polish/wax products. Most of the easy application products work well, and you may save some work with a polish/wax combination.
- How to Paint The Bottom of a Boat
Frequently Asked Questions
If you do it yourself, you can expect to spend several hundred dollars for the initial equipment and supplies. A quality variable speed rotary polisher costs $100 to $300. Buffing pads are $20-$30 each, and you'll need several, though some can be cleaned and reused. Rubbing compound costs from $20 to $60 per quart. How much you need depends on the size of your boat and how oxidized the hull is. Additional materials like rags, stain removers, protective gear, and degreasers add another $100-$150 to the job. If you hire someone to do it for you, expect a price range of from $25.00 to $75.00 per foot for a complete de-oxidation/restoration.
Yes, gelcoat can be reapplied to a hull, but it is not cheap or easy. If there is too much damage or crazing in the gelcoat to buff smooth and clean, then a new gelcoat layer may be the best way to restore the boat. The old gelcoat needs to be fully sanded until faired down and smooth, then a new gelcoat can be applied.
Rubbing with an abrasive compound will remove the surface layer of oxidized gelcoat from a hull. Some chemicals may remove a small amount of oxidation, but rubbing is the best way to remove heavy buildup.
Regular washing after use and periodic waxing of your boat will prevent oxidation.
Only if the rubbing compound isn't cutting through the oxidation. It's nothing to be afraid of, but it's an aggressive technique which you should only use if nothing else works.
Some "boat restorers" coat your boat with a shiny polymer coat, quickly bringing back shine to a dull surface. But they don't remove oxidation. An oxidized hull won't look good through a shiny layer of polymer, and the polymer will need to be removed before proper restoration can be done, so they're best not used on heavily oxidized boats.

Troubleshooting Pontoon Boat Battery
Pontoon boats are a great way to enjoy the water and spend quality time with family and friends. But just like any other boat, they rely on a battery to power various systems, including navigation lights, trolling motors, and other…
Boat Accessories

Best Ice Fishing Fish Finders in 2023
In search of the best ice fishing fish finders in 2023? Not all fish finders are created equal, particularly when it comes to ice fishing. Specialized features are crucial to ensure successful outings in harsh winter conditions. You require a…

Best Side Imaging Fish Finders in 2023
Navigating the world of angling equipment can be challenging. That's especially true when it comes to side imaging fish finders, given the extensive range of options available in 2023. This post makes it easy for you to narrow down your…

How to Choose a Fishfinder for Your Boat: A Comprehensive Guide
Today, we embark on a journey to unravel the secrets of choosing the perfect fish finder for your boat. As we navigate through an ocean of options, we'll explore different types of fish finders, delve into their key features, and…
Accessories

5 Best Portable Fish Finder in 2023
Looking for a portable fish finder for kayaking, ice fishing, or other activities? The good news is that there are a lot of solid products out there. The year 2023 has ushered in an array of advanced models, each brimming…

Charging Your Trolling Motor Battery with a Solar Panel
Charging your trolling motor battery with a solar panel is not just the right thing to do for the environment, it is extremely convenient. When you’re out on the boat, with any luck, you’ll have access to a good amount…
Don't miss out
How to restore a classic sailboat
Restoring a classic sailboat can be a fulfilling and rewarding process, allowing you to create a personalized vessel for exploring the open sea with your family.
How to Restore a Classic Sailboat
Restoring a classic sailboat is a labor of love that can bring immense satisfaction and pride to those who embark on this journey. It’s a chance to breathe new life into a vessel that has seen better days, and to create a unique and personalized space for you and your family to enjoy the open sea. In this article, we’ll guide you through the process of restoring a classic sailboat, from finding the right boat to the final touches that make it truly your own.
Table of Contents
Finding the right sailboat, assessing the condition, creating a restoration plan, hull and deck repairs, interior restoration, rigging and sails, electrical and plumbing systems, engine and propulsion, final touches.
The first step in restoring a classic sailboat is finding the right boat. This can be a challenging process, as there are many factors to consider, such as the size, age, and condition of the boat, as well as your budget and personal preferences.
When searching for a sailboat, consider the following:
- Size : Think about how much space you and your family will need, both for living and storage. A larger boat may offer more comfort and amenities, but it will also require more work and expense to restore and maintain.
- Age : Older boats may have more character and history, but they may also require more extensive restoration work. Be prepared to invest more time and money into an older boat.
- Condition : Assess the overall condition of the boat, including the hull, deck, rigging, sails, and interior. A boat in poor condition may be a good candidate for restoration, but it will also require more work and expense.
- Budget : Determine your budget for both the purchase of the boat and the restoration process. Keep in mind that restoration costs can quickly add up, so it’s important to have a realistic understanding of what you can afford.
Once you’ve found a sailboat that meets your criteria, it’s time to assess its condition in more detail. This will help you determine the extent of the restoration work required and whether the project is feasible for your budget and skill level.
Consider hiring a marine surveyor to conduct a thorough inspection of the boat. They can provide valuable insights into the condition of the hull, deck, rigging, sails, and other components, as well as identify any potential safety issues or structural problems.
Take note of any areas that require immediate attention, such as leaks, cracks, or signs of rot. These issues should be addressed before any cosmetic work is done, as they can compromise the integrity of the boat and lead to more serious problems down the line.
With a clear understanding of the boat’s condition, you can now create a restoration plan. This should outline the work that needs to be done, the order in which it should be completed, and an estimated timeline and budget for the project.
Start by prioritizing the most critical repairs, such as fixing leaks or addressing structural issues. Then, move on to less urgent tasks, such as cosmetic improvements and upgrades.
Be realistic about your abilities and the amount of time you can dedicate to the project. Restoring a sailboat can be a time-consuming and labor-intensive process, so it’s important to have a clear understanding of what you’re getting into before you begin.
The hull and deck are the foundation of your sailboat, and any issues with these components should be addressed as soon as possible. Common problems include cracks, blisters, and signs of rot or corrosion.
To repair cracks or holes in the hull or deck, you’ll need to clean the area thoroughly, remove any damaged material, and fill the void with an appropriate filler or epoxy. Once the repair has cured, sand the area smooth and apply a protective coating, such as paint or gelcoat.
For more extensive repairs, such as replacing large sections of the hull or deck, it may be necessary to consult with a professional boatyard or shipwright. They can provide guidance on the best materials and techniques for your specific boat and ensure that the repairs are done correctly.
Restoring the interior of your sailboat can be a rewarding process, as it allows you to create a comfortable and personalized space for you and your family. Start by assessing the condition of the interior, including the cabinetry, upholstery, and flooring.
If the cabinetry is in good condition, you may be able to simply refinish or paint the surfaces to give them a fresh look. If the cabinets are damaged or outdated, consider replacing them with new, custom-built units that meet your needs and preferences.
Upholstery can be cleaned or replaced, depending on its condition and your personal taste. New cushions, curtains, and other soft furnishings can make a big difference in the overall appearance and comfort of the interior.
Flooring options for sailboats include marine-grade carpet, vinyl, or teak. Choose a material that is durable, easy to clean, and complements the overall aesthetic of the boat.
The rigging and sails are essential components of your sailboat, and their condition will have a significant impact on the boat’s performance and safety. Inspect the rigging for signs of wear or damage, such as frayed lines, corroded fittings, or bent or cracked hardware. Replace any components that are in poor condition or no longer meet safety standards.
Sails should be inspected for tears, fraying, or signs of UV damage. Small repairs can often be made with sail tape or by sewing, but larger issues may require professional repair or replacement. Consider upgrading to modern sail materials and designs for improved performance and durability.
The electrical and plumbing systems on a classic sailboat may require updating or replacement to meet modern standards and ensure safety and reliability. Inspect the wiring, switches, and electrical components for signs of wear or damage, and replace any outdated or faulty parts.
Plumbing systems should be checked for leaks, corrosion, or other issues. Replace any damaged hoses, fittings, or fixtures, and consider upgrading to modern materials and designs for improved performance and ease of maintenance.
The engine and propulsion system are critical to the performance and safety of your sailboat. Inspect the engine for signs of wear or damage, and perform any necessary maintenance or repairs. This may include changing the oil and filters, replacing belts or hoses, or overhauling the entire engine.
The propeller and shaft should also be inspected for signs of wear or damage, and any issues should be addressed promptly. Consider upgrading to a modern, efficient propulsion system for improved performance and fuel efficiency.
With the major restoration work complete, it’s time to add the final touches that make your sailboat truly your own. This may include installing new electronics and navigation equipment, adding custom artwork or graphics, or outfitting the boat with personalized accessories and gear.
Take the time to celebrate your hard work and enjoy the fruits of your labor. Your restored classic sailboat is now ready for new adventures and memories with your family.
Restoring a classic sailboat is a challenging but rewarding endeavor that can provide you and your family with a unique and personalized vessel for exploring the open sea. By carefully assessing the condition of the boat, creating a detailed restoration plan, and tackling the project one step at a time, you can breathe new life into a once-neglected boat and create a lasting legacy for future generations.
You are using an outdated browser. Please upgrade your browser or activate Google Chrome Frame to improve your experience.

- Boat Accessories
- Where to Buy
Special until March 31st: 40% off Teak Deck Sealant for the month of March. Use Code MAR24 at checkout. *restrictions apply
Free ground shipping in the Continental US for any orders over $150!
Classic Fiberglass Boat Restoration Tips...
Classic fiberglass boat restoration tips.

There is nothing that makes a boat look new like quality fiberglass. If you’re restoring a classic boat, this can do wonders for its appearance. But that means unsightly fiberglass has the unfortunate effect of just the opposite: it ages your boat. To keep your boat looking great, you need to restore fiberglass to its original finish. But fiberglass can be a finicky material. To handle it, you’ll need more than just a few products. Here are a few classic fiberglass boat restoration tips to help you with your project.
While Cleaning, Don’t Use Products that Remove the Gelcoat
If you’re giving your classic fiberglass boat a complete fiberglass restoration, you’ll need to remove the gelcoat so you can work with the fiberglass surface directly. That’s part of the process.
But in the meantime, make sure you buy boat cleaners that won’t harm your fiberglass gelcoat. This gelcoat is there to maintain your fiberglass’s appearance and protect it against everything that your boat faces on a regular basis.
When Your Boat Looks Faded or Worn, It’s Time for a New Gelcoat
Maybe you ignored the previous tip for a long time. In that case, now is a good time for a full fiberglass restoration process that removes and replaces the gelcoat.
In addition to using a detergent to clean off your boat first, consider using an acetone to remove the gelcoat on your fiberglass. Wear strong rubber gloves for this process to protect your hands. After properly applied, your fiberglass will be ready for a new waxing and polishing.
Combine Waxing and Polishing at the Same Time
Our PolyShine product , when combined with LifeWax , will extend the wax protection on your boat’s hull for about three years. That means you won’t have to continually rub new wax into the fiberglass to keep your boat’s hull protected.
When You Expose Fiberglass, Use a Fiberglass Rubbing Compound
Remember to use this before adding a coat of wax to the boat, as this compound is designed to work with the fiberglass directly.
Consider an Electric Buffer
The key to all the classic fiberglass boat restoration tips above? You have to actually get yourself to do them. And doing them all by hand is sometimes an unenviable task, particularly if you’re working with a large boat.
An electric buffer is a great way to make quick work of fiberglass restoration without losing any of the quality. While you browse all our wax and polish products , don’t forget that an electric buffer is just as valuable an investment in the quality of your fiberglass—and ultimately, the quality of your boat.
Share this:
- Click to share on Twitter (Opens in new window)
- Click to share on Facebook (Opens in new window)
Featured Products
Liquid LifeSeal® Sealant 5.2 fl. oz. Clear

Stainless Steel Cleaner 16 fl. oz.
Related blogs, thanksgiving trivia.
Thanksgiving is one of America’s oldest and most loved holidays. Even though the story is steeped in a dark history […]
Detailing Your Boat
There’s nothing better than hitting the water in a beautiful boat. A warm summer day with the sun shining, there’s […]
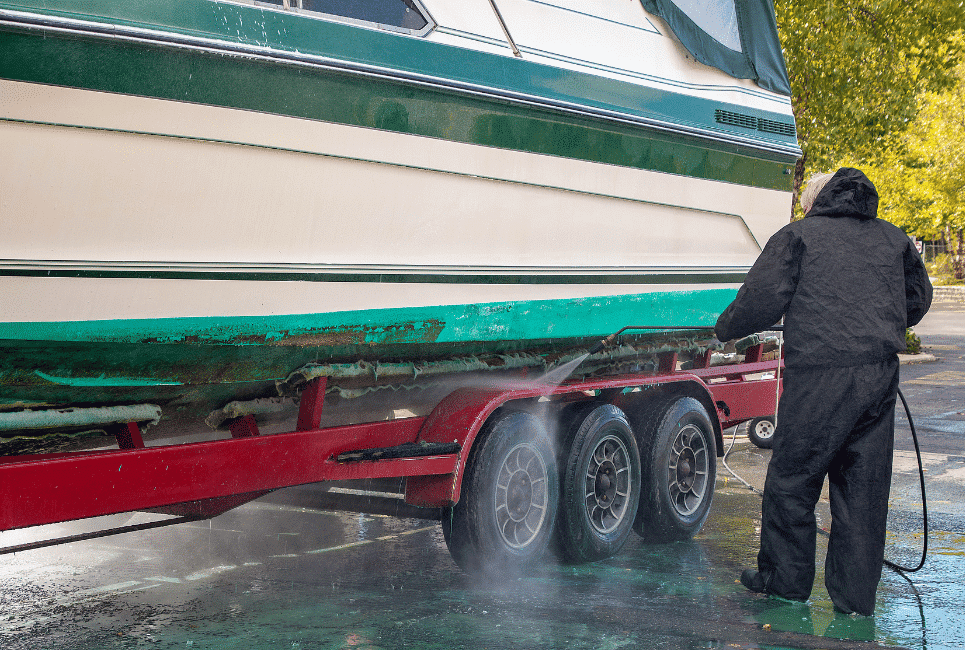
How To Properly Clean Your Boat Trailer
We all know that cleaning your boat is important to not only keep it looking great, but to also ensure […]
All products proudly made in the usa
DIY Boat Restoration: Tips and Tricks for a Budget-Friendly Makeover

Restoring an old boat can be a rewarding and cost-effective way to breathe new life into a beloved vessel.
While it may seem like a daunting task, with the right tips and tricks, you can embark on a DIY boat restoration project that’s easier on your wallet and more satisfying than you might expect.
Helpful Boat Restoration Guides
1. set clear goals, 2. create a detailed plan, 3. prioritize safety, 4. do your own research, 5. salvage and recycle, 6. budget-friendly materials, 7. diy fiberglass repairs, 8. refinishing and painting, 9. upholstery on a budget, 10. routine maintenance.

Boat Restoration Guide

Fiberglass Boat Restoration Guide

Metal Shape Welding Instructions For Boat Building
10 Tips To Make Boat Restoration Simple
In this guide, we’ll share valuable insights and cost-saving strategies to help you navigate your boat restoration journey with confidence.
Before you dive into your boat restoration, determine the scope of your project.
Are you looking for a complete overhaul or just some minor repairs and cosmetic touch-ups?
Setting clear goals will help you avoid overspending and stay focused on your budget.
A well-thought-out plan is essential. Take the time to assess the boat’s condition and identify areas that require attention.
Create a checklist of tasks, including materials and tools needed.
A comprehensive plan will prevent impulse purchases and keep you on track.
Safety should always be a top priority.
Inspect the boat for structural issues, such as rot or damage, and address them first.
This ensures that your boat is safe for use, and you won’t compromise your safety while on the water.
Become a savvy researcher. Look for DIY boat restoration resources, such as books, online forums, and video tutorials.
Learning from others’ experiences can save you from common pitfalls and provide valuable insights.
When possible, salvage and recycle materials from your boat. Old hardware, wood, and even upholstery can often be refurbished or repurposed.
This not only saves money but also adds character to your project.
Shopping for materials doesn’t have to break the bank.
Consider marine-grade plywood alternatives, explore second-hand stores for décor, and compare prices from different suppliers to find the best deals.
Don’t forget to inquire about discounts or bulk rates.
Many small fiberglass repairs can be done at home.
Learning basic fiberglass repair techniques will save you money on hiring professionals.
Invest in a fiberglass repair kit and follow instructional videos to tackle small cracks or holes.
For cosmetic improvements, you can save money by refinishing and painting your boat yourself.
Proper sanding, priming, and using quality marine paint can make your boat look as good as new. Don’t forget to choose colors that won’t fade quickly under the sun.
Reupholstering your boat’s seats and cushions can be expensive. Consider buying discounted marine-grade vinyl and learning basic sewing skills to make your own seat covers.
Alternatively, look for deals on pre-made seat covers.
After your boat is restored, keep it in top condition by following a regular maintenance schedule.
Routine care will extend the life of your boat and prevent costly repairs in the future.
Embarking on a DIY boat restoration project can be both a labor of love and an excellent way to save money.
By setting clear goals, creating a detailed plan, and implementing these tips and tricks, you can transform your old boat into a source of pride without breaking the bank.
Remember that patience and perseverance are key to a successful boat restoration, and the satisfaction of sailing in a vessel you’ve restored with your own hands is truly priceless.
You may also be interested in reading our guide that shows you how to build a flat bottom boat and also our boat building plans .
Mick McGrath
Recent Content
518 Illustrated Boat Plans
518 boat plans for less than the price of your lunch! MyBoatPlans Reviews MyBoatPlans is a comprehensive collection of 518 boat plans, 40 videos and about 500 pages of boat building guides. I've...
Set Sail with Confidence: Essential Boat Safety Tips for All Ages and Furry Friends
Picture yourself gliding over crystal-clear waters, the wind in your hair, and the sun kissing your skin. The open sea offers endless possibilities for adventure, but before you hoist the sails, it's...
- Skip to primary navigation
- Skip to main content
- Skip to primary sidebar
- Skip to footer
Yacht Cruising Lifestyle
Everything fun you can do from your yacht
Boat Restoration Tips, Tricks, and Costs
August 29, 2021 by Martin Parker 6 Comments

Are you considering boat restoration as a cheap way to get on the water? While restoring a tired boat can save you money if you do most of the work yourself, there is a lot to consider and plan for if the costs are not to get out of hand.
Restoring a boat is a labor of love and something you are not likely to take on unless the boat concerned has some special meaning for you or you’re trying to save money. It is vital to understand that boats do not generally appreciate value unless they have some historical significance. Unlike car restoration, where collectors will pay big money for classic cars, the same is not true in the yachting world.
Don’t let that put you off, though. Bringing a boat back to pristine condition is hugely satisfying and something to be proud of.
Step-By-Step Process of Boat Restoration

Do You Need a Survey Before Commiting to Boat Restoration?
If you’ve recently purchased a boat, then you should have had a survey carried out already. If this is a boat you’ve owned for a while and intend to restore it, then a survey could be a good idea before you start. There are different types of surveys available, but the most common is the condition and value survey. The surveyor assesses the boat’s overall condition, reports any problems, and gives a market valuation.
You may need specialized surveys for the engine and other systems, and you can find accredited surveyors on the NAMSGLobal website or the Society of Accredited Marine Surveyors .
Clean the Boat Thoroughly
While it may seem an odd suggestion, thoroughly cleaning the boat has a practical purpose. While cleaning your boat, you can spot any problems you may have missed previously. Cleaning also gives you a base standard to start from and will save you time in the long run. Unblock all the drainage holes, thoroughly clean the bilge, and lift any hull access points to clean and inspect.
List Broken Items
Making a list of parts that need replacing or repairing is vital. Some areas of the boat will only be accessible during the restoration. Suddenly remembering a component that you needed to replace when the restoration is complete is not great! Completing this step enables you to plan the boat restoration in a logical order.
Check Any Through-Hull Fittings
Any fitting that penetrates the hull can potentially flood the boat, so these must be checked and repaired. All through-hull fittings use specialized sealants where they mate with the hull. Don’t skimp in this area, as you will regret it when the first leak appears.
Check the Seacocks Are Working
Seacocks have two purposes. Some are there to let water in, for engine cooling, for example, while others let water out, such as cockpit drains. In either case, it’s vital to ensure they are working correctly. The seacocks for cockpit drains and sinks etc., are usually closed at sea as the rolling movement of the boat can let water enter the hull. A seacock seized open has caused many boats to flood and sink.
Check the Condition of the Hull
What you are looking for will depend on the materials used to make the hull. A thorough inspection inside and out is required.
Fiberglass Hulls have a gel coat to protect the surface, but water may have penetrated the core if cracked and damaged. You can repair small areas of damage yourself, but extensive damage will need a professional eye. Pay particular attention to any fittings, such as cleats, stanchions, and chainplates, as cracking often occurs here. On older boats, the gel coat may have faded and stained. As long as the surface is good, you can restore it using a jetwash and readily available materials.
Wooden Hulls can suffer from rotten or dried-out wood if the protective coating is damaged. Repairing wooden hulls is a specialist skill that you shouldn’t attempt unless you are very confident. If the woodwork is sound, then resealing is a simple but time-consuming task.
The surveyor’s report should have highlighted all the damaged areas that he can see, but it depends on the type of survey you commissioned.
Check Load-Bearing Fixtures
Load-bearing fixtures such as cleats and chainplates put immense stress on the deck. Behind every load-bearing fixture, there should be a backing plate to spread the load and prevent damage. Make sure the backing plates are in place and in good condition.
Inspect Every Halyard, Sheet, or Control Line
The materials used in making halyards and sheets are very resistant to the damage caused by saltwater and the sun. But over time, they do weaken. Inspect all the lines carefully for any wear or fraying, and replace where necessary. Any lines in good condition can be washed in a very light non-bio detergent but ensure you rinse with plenty of fresh water.
Inspect Your Sails
Your sails work in a hostile environment, constantly exposed to UV light, saltwater, and extreme tension in heavy winds. Checking your sails during a restoration is a vital step to getting back on the water.
Check the following areas particularly:
Stitching: The sails stitching is the most common area affected by ultraviolet light from the sun. If you find anything, you should send the sail to a professional for repair.
Cringles: A cringle is stitched in to feed a sheet or line through at each attachment point. Check for damage to the metal or fraying of the stitching. Anything you spot here will most likely need professional attention from a sailmaker.
Sail Surface: Look out for fraying stitching, tears, and holes. Small holes can be repaired using repair tape or by sewing.
Sail Edges: Again, look out for fraying or loose stitching, but also signs of stretching.
Mold: Although mold won’t damage a sail, it looks unsightly, but luckily it is relatively easy to remove. Any sails that pass inspection should be thoroughly washed, dried, folded, and stored in a cool, dry location. Do not be tempted to put your sails away wet, as this encourages mold.
Engine: You can commission a separate survey for the engine, but if you have just lifted the boat out of the water to restore it, then a good service is probably the only thing required. For any boat that has been unused for a long time, it may be more economical to lift the engine out for a complete overhaul. Each situation will be different, and getting several quotes is a good idea.
If you decide to leave the engine in place, then at the very least do the following:
– Drain fuel tank
– Change engine oil
– Change gearbox oil
– Replace oil and air filters
Estimate the Cost of Boat Restoration
You’ve completed a complete survey of your boat, and it’s time to start the task of estimating the cost of the repairs. This is a critical stage and not one to rush. Finding the cost of replacement parts is relatively easy, so long as they are available. Older boats will be out of production, and the boatyard that built it may no longer be in business. A degree of improvisation and adapting similar parts may be required, which takes longer and costs more.
Many jobs may be labor-intensive, such as stripping back the Gelcoat or sanding down wooden decks. If you can do these jobs yourself, you’ll save a lot of dollars, but don’t exclude the cost of your time in the restoration cost. If you need to use skilled trades, then ask for quotes.
Once you’ve built a complete estimate of the cost of restoration, only you can decide if it’s feasible or not. If you hope to profit by selling the restored boat, this is a simple financial decision. A boat with some historical or sentimental value can make a choice more difficult.
Planning For Boat Restoration
Now you have a good idea of the costs involved, and you’ve decided to go ahead and embark on your boat restoration project. Congratulations! It’s probably going to be a long but worthwhile road ahead.
Take some time now to plan out the restoration in stages. You should complete some jobs before others, such as replacing damaged structural parts before relaying the deck. It’s also worth setting yourself some realistic deadlines to complete the stages. Not only is it something to aim for, but there is a sense of satisfaction as you complete stages. It sounds obvious, but it is easy to miss or forget something along the way if it’s not written down.
Boat Restoration Costs

Some people will say pick a number out of the air and then double it, and you’ll still be well under the final cost! There are so many factors to consider. If you are restoring a small boat, say 25 feet LOA, a conservative estimate might be $15,000 to $20,000. But as you discover more problems along the way, the final bill could be much higher. As the size of the boat increases, the cost increases exponentially.
The final cost will depend on how much needs doing and the quality of the work. We cannot emphasize enough the importance of a good inspection, cost estimate, and a well-thought-out plan.
As an example, you may buy a tired-looking 30-foot boat for $30,000. Add on around $25,000 for the restoration work carried out by skilled trades, plus $15,000 for your own time—a total cost of approximately $70,000. Compared to the price of a new 30-foot yacht of around $120,000, that’s quite a saving. On the flip side, the resale value of the restored boat may only be around $45,000. Having spent so much time, money, and effort on the restoration, you’re unlikely to sell any time soon.
Boat Restoration Tools
Apart from some specialist tools for specific jobs, you will need a good set of basic hand and power tools. When you are buying tools, it is better to buy quality rather than quantity. The cheap grocery store tool kit with 100 items for 20 bucks will not stand the test of time.
The best advice I ever got was to buy the quality tool you need when you need it, rather than trying to build a complete tool kit from the beginning with cheap items.
Boat Restoration Materials
The list below gives you an idea of the materials you may need to buy based on a 30-foot yacht. There will be more. Make sure you add these items to your estimate of costs.
Rigging: An older boat that needs restoring will most likely need some of the rigging replaced. If you don’t like heights, this is a job for professionals. Expect a cost of around $1000 to $1500.
Metalwork: Replacing broken cleats, chainplates, etc. Replacing the chainplates could cost a few hundred dollars if you do the work yourself or several thousand if you employ skilled trades.
Sails: Replacing any damaged sails and repairing where possible. For a new jib and mainsail, expect somewhere between $2,500 and $4,000
Halyards, Sheets, and Control Lines: Replace any that are past their useable life. Prices for rope can range between $2 to $10 per meter, depending on thickness and quality.
Engine: Replacing oils, fuel, and filters and renewing coolant hoses, fuel lines, and pump belts.
Batteries: Any yacht that has stood for a long time will probably need new batteries, but get them tested first.
Gelcoat Repair Kits and Polishing Tools, or Varnish for Wooden Hulls: Gelcoat can be bought in bulk if needed. Around $30 for a 1kg tin.
Winches and Blocks: After cleaning them with fresh water, check for smooth operation and service them. If you need to buy new winches, budget for at least $500 upwards for a self-tailing version.
Expert Help
Specialized expert help in the boating world is expensive. The more you can do yourself, the better, but include your labor cost in the final estimate. Qualified tradespeople may cost you more, but they will complete the job in a shorter time, getting you out of the yard and on to the water sooner. Experienced, skilled tradespeople can charge around $100 an hour for their services.
Boatyard Fees
Many people overlook the cost of storing your boat in the yard while the work is in progress. If you only work on your boat at weekends, it could be several years in the yard before you finish the restoration.
Continuing Costs
Owning a boat has continuing costs if you plan to maintain your restored yacht to the standard you’ve made it. We wrote an article covering the cost of boat ownership to help you know what to expect as a first-time boat owner.
Boat Restoration Tips and Tricks

When to Replace or Repair Yacht Components
A yacht operates in corrosive conditions of saltwater and sun, and particular items need regular checks and repairs. We’ve compiled a table below for the average lifespans of components, but many variables affect these estimates.
Component Expected Life Before Repair or Replacement
– Standing Rigging 10 years
– Sails 4,000 hours
– Halyards and Lines 5 to 10 years
– Engine (Diesel) 5,000 hours
– Mast Inspect and repair every five to six years depending on use
– Batteries 4 to 5 years
– Gelcoat 5 years
– Wooden deck stain Yearly
Do You Have the Skills for Boat Restoration?
Be very honest with yourself about your skills. Some jobs should be left to the professionals unless you are very confident. Electrics and the engine, for example, both require specialist skills.
Gelcoat Repairs
An older fiberglass boat will very likely have some Gelcoat damage, so how do you repair this? We have chosen three videos showing the standard method for gelcoat repairs.
The first Gelcoat repair video is from someone attempting it for the first time. Watching this video should help you to avoid some common mistakes. The repairer uses a patch paste kit that is available from most boatyards.
In this next video, we follow another Gelcoat repair, but this time mixing the Gelcoat by hand and repairing small cracks instead of a hole.
The last video on Gelcoat repairs focuses on spider cracks that are so common in fiberglass boats.
Buffing and Polishing the Hull of a Fiberglass Boat
You’ve repaired the Gelcoat and now need to bring back the lustrous shine that your boat had when it was new. Here are a couple of videos showing you how to buff and polish Gelcoat.
This method uses only polishing creams and buffing tools to restore the Gelcoat finish . An alternative approach is to start with 2000 grit sandpaper before using the buffing tools and rubbing compound to polish the Gelcoat .
Finally, this time-lapse video shows a complete boat restoration from start to finish , completed in an incredible six weeks.
Do you Need Certifications for Any of the Work?
There are no requirements to have your electrical or mechanical work certified for privately-owned pleasure boats that don’t take paying customers. However, your insurer may insist that a qualified person approves any work you have completed. We would suggest that it’s in your interest to have the work checked before you first launch your restored boat.
If you intend to use your boat commercially, then a whole set of regulations will apply.
Sell Your Boat or Restore It?
As we previously mentioned, restoring a boat is not going to make you a profit. But you’ll finish up with a boat that was cheaper than buying brand new. The decision between selling the boat and restoring it will depend on numerous factors.
– Does the boat have any sentimental value to you?
– Do you have the time and money to complete the restoration?
– Will you lose interest partway through the restoration? Be honest with yourself!
Only by answering those questions can you decide whether to sell or restore your boat.
Avoid Expensive Brand Name Products
Boatyards will happily sell you branded products, but it is possible to use cheaper alternatives in some cases.
– Regularly wash your boat with fresh water to reduce the need for chemical products
– Use household products instead of chemicals where possible
– Use chemicals sparingly
– Vinegar is good for removing stains on cloth materials
General Cleaner: Use one cup of white vinegar in a gallon of water to scrub decks and surfaces, then rinse with fresh water.
Stain Remover: Mix baking soda and water to form a paste. Use it to remove fiberglass stains, then rinse.
Mildew Remover: A 1:1 mix of lemon juice and salt will remove mildew stains on cloth and canvas.
Need more information on a specific boat restoration project or task? Reach out to the #BoatLife community with a question or comment on our community forum!
If you found this article helpful, please leave a comment below, share it on social media, and subscribe to our email list.
For direct questions and comments, shoot me an email at [email protected]
Sharing is caring!
Reader Interactions

September 24, 2021 at 9:11 pm
I found it helpful when you said that you would need to replace your boat’s chainplates for a few hundred dollars when restoring a boat. This is something that I will share with my father so he could be financially prepared in restoring his boat. He said yesterday morning that he is planning to shop for used boat parts that would meet his budget. Thanks for sharing this.

September 27, 2021 at 4:26 pm
Hi Shammy, thanks for reading!
We’re happy that this guide could be of some help to you and your father. Buying used parts is a great way to cut down on the financial burden of restoring a boat, and we’re huge fans of budget-minded boating over here at #Boatlife.
We wrote an article that would be of some big help when considering used boat parts. Here’s the link: https://www.hashtagboatlife.com/buy-boat-for-sale/
The article covers everything you need to know about buying used, what to look for in a boat and its parts, how to source things, and much more. Take a look and let us know if anything is missing or if you have any additional questions! We are always happy to help out where we can.

December 11, 2021 at 12:00 pm
I am a marine artisan and restore boats on a daily basis. I enjoyed this article, it provides a fair representation of the “hidden” or seldom thought of expenses. For example storage fee’s. Sometimes people have a niave, over simple impression of how much work and time is involved. The author did an excellent job touching on so many issues.

December 24, 2021 at 12:36 pm
Quality content is important to interest the viewers to visit the website, that’s what this site is providing.

August 8, 2022 at 8:56 pm
I appreciate all of the tips you provided for properly restoring a boat. I agree that it is smart to clean a boat thoroughly to help you spot problems you had not noticed before. It would also be smart to invest in quality marine paint so you can restore the appearance of your boat as well.

July 14, 2023 at 6:26 am
thank you so much for this cool post.
Leave a Reply Cancel reply
Your email address will not be published. Required fields are marked *
Save my name, email, and website in this browser for the next time I comment.
MB #20512 PO BOX 480 Sevenoaks Kent TN13 9JY
Tel: +44 56 0386 9163
Keep In Touch
Thank you for reading.
Join our online crew and find more about the #boatlife
Service Locator
- Angler Endorsement
- Boat Towing Coverage
- Mechanical Breakdown
- Insurance Requirements in Mexico
- Agreed Hull Value
- Actual Cash Value
- Liability Only
- Insurance Payment Options
- Claims Information
- Towing Service Agreement
- Membership Plans
- Boat Show Tickets
- BoatUS Boats For Sale
- Membership Payment Options
- Consumer Affairs
- Boat Documentation Requirements
- Installation Instructions
- Shipping & Handling Information
- Contact Boat Lettering
- End User Agreement
- Frequently Asked Questions
- Vessel Documentation
- BoatUS Foundation
- Government Affairs
- Powercruisers
- Buying & Selling Advice
- Maintenance
- Tow Vehicles
- Make & Create
- Makeovers & Refitting
- Accessories
- Electronics
- Skills, Tips, Tools
- Spring Preparation
- Winterization
- Boaters’ Rights
- Environment & Clean Water
- Boat Safety
- Navigational Hazards
- Personal Safety
- Batteries & Onboard Power
- Motors, Engines, Propulsion
- Best Day on the Water
- Books & Movies
- Communication & Etiquette
- Contests & Sweepstakes
- Colleges & Tech Schools
- Food, Drink, Entertainment
- New To Boating
- Travel & Destinations
- Watersports
- Anchors & Anchoring
- Boat Handling
- ← Install & Repair
Fiberglass Repair
Advertisement

Few things are more disheartening to the boat owner than staring at the jagged edge of broken fiberglass. However, the repair-ability of fiberglass is one of its best characteristics. Even large holes in a fiberglass hull can be repaired with a bit of glass fabric, a supply of resin, and equal parts skill and care. And the repair is less patch than graft-a new piece of skin indistinguishable from the old. The best part is that a properly done repair can be as strong as (or stronger than) the original.
West System , which has been a leader in this field for many years, offers a huge amount of information online including detailed guides for many types of fiberglass work. Another good resource is found at MAS Epoxies and in particular, their how to videos. Following are some general tips. Your job may require very different steps and you should always carefully follow product instructions.
Cut Away the Damage
Never try to save damaged fiberglass; always cut it out and replace it with new laminate. Check all the edges and enlarge the hole if you find any additional delamination.

Use a disk sander loaded with a 36-grit disk to grind a 12-to-1 bevel around the perimeter of the hole inside. Also grind an area of the inner surface a few inches beyond the bevel to accommodate a finishing layer of cloth.
Mask and Mold
Mask off the area around the exterior of the hole and tape heavy paper or plastic below the hole to prevent resin runs from adhering to the surface.
Cut the first piece of fiberglass matt to fit the hole with a substantial overlap over the edge. Cut the next piece the size of the hole, and the succeeding pieces larger and larger to build the laminate up and out to fit the leveled edge. You may have to allow the first layers to set a little and stiffen before applying additional layers. Unless you have reason to follow a different schedule, begin with two layers of 1 1/2-ounce mat, then alternate mat and 6-ounce cloth.
Using Polyester or Vinylester Resin
For above-the-waterline repairs you can use either polyester or vinylester resin. Polyester is less expensive than vinylester and readily available but is more susceptible to osmosis, even above the waterline. Of course, for an even stronger repair you can also use epoxy, but if the surface of the repair will be gelcoat you'll have to spend more time preparing, sanding and dewaxing the resin to achieve adherence.
The catalyst for both polyester and vinylester resin is methyl ethyl ketone peroxide, or MEKP. Do not confuse MEKP with the common solvent MEK; they are not the same.
Gelcoat is essentially pigmented resin. It both protects the fiberglass underneath but primarily provides a cosmetic covering. This is a point where you must very carefully follow product instructions.
For a finished look, cut a rectangular piece of mat and one slightly larger of cloth and apply these over the patch, smoothing them with a squeegee. Seal this top layer with plastic or PVA to allow a full cure. Remove the backer from the exterior surface. Fill imperfections in the new gelcoat with gelcoat paste and allow it to cure fully. Clean the area around the patch, then sand — if necessary — and polish the repair area.
Related Articles
The truth about ceramic coatings for boats.
Our editor investigates the marketing claims of consumer-grade ceramic coatings.
Fine-Tune Your Side Scan Fishfinder
Take your side-scanning fishfinder off auto mode, and you’ll be spotting your prey from afar in no time
DIY Boat Foam Decking
Closed-cell foam flooring helps make boating more comfortable. Here’s how to install it on your vessel
Click to explore related articles
BoatUS Editors
Contributor, BoatUS Magazine
Award-winning BoatUS Magazine is the official publication of Boat Owners Association of The United States. The magazine provides boating skills, DIY maintenance, safety, news and more from top experts.
BoatUS Magazine Is A Benefit Of BoatUS Membership
Membership Benefits Include:
Subscription to the print version of BoatUS Magazine
4% back on purchases from West Marine stores or online at WestMarine.com
Discounts on fuel, transient slips, repairs and more at over 1,200 businesses
Deals on cruises, charters, car rentals, hotel stays and more…
All for only $25/year!
We use cookies to enhance your visit to our website and to improve your experience. By continuing to use our website, you’re agreeing to our cookie policy.
- (678) 322-7877
- 9605 Jot Em Down Rd. Gainesville, GA 30506.
How to Repair Boat Fiberglass
Did you know you can repair holes in the hull or deck of your fiberglass boat? To make these strong and to near cosmetic perfection, visit a shop that specializes in boat fiberglass and gelcoat repair. A DIY enthusiast can also achieve good results with fiberglass and gelcoat repair. Learn the techniques and materials that are used to get the best results.

A hole in the side of this Boat was permanently repaired to cosmetic perfection by choosing the right fiberglass materials and applying the proper repair techniques.
What is Fiberglass and What Gives Fiberglass Strength?
Fiberglass is from two components: resin and fiber. It is called fiberglass because the structural fiber used is actually woven with tiny flexible strands of glass. The fiber is then saturated with resin, stretched into place, and when it cures through a chemical reaction, the result is a hard and durable material. The strength of the fiberglass largely depends on the weight of the structural fabric that is used. There are different weave patterns to the fabric that render it useful for different applications. The resin component is either polyester resin or epoxy resin. Epoxy resin is stronger. If the repair area is large and is in a high-stress part of a boat below the waterline, epoxy resin is the superior choice. This is because it has excellent bonding properties to an existing surface and is strong. Polyester resin is commonly used. However, one drawback is that it shrinks as it cures and thereby diminishes its adhesive qualities. This shrinkage is insignificant in small repairs, even in high-stress areas. But because of the shrinkage and reduced adhesion, there are limitations to using polyester resin for large repairs in high-stress areas. However, outside of large structural repairs, polyester resin is the material of choice and is used in the bulk of fiberglass repairs.

For small fiberglass repairs, polyester resin is used in combination with mat or chopped cloth mixed in resin to make a sturdy repair.
Fiber Choices For Fiberglass Repair
The most common type of fabric is plain weave cloth. It is easily recognized as it is woven at 90 degrees, and it looks like cloth. It comes in different weights, and a thicker cloth is stronger. One limitation of plain weave cloth is that it doesn’t conform to complex shapes or curves. It’s best applied on an even plane. For complex shapes and compound curves that require strength, the best fabric is modified twill. Its weave appears to be diagonal, but in reality, it is also woven at 90 degrees and is a looser weave with flexibility. It can conform to complex shapes without wrinkling. The most flexible fabric is called a mat. It has hair-like strands going in every direction. Mat is bonded with glue that dissolves in polyester resin, enabling it to conform easily to complex shapes or compound curves. However, it has less strength and is often used in cosmetic applications unless built up in many layers. Lastly is a fabric called roving. This is a fabric that has course bundles of strands in its weave. It is a very heavy fabric for the strongest of applications. It will be used in combination with layers of mat to give a smooth final surface.

Structural fiberglass cloth and cosmetic mat are used in combination with resin to make a strong fiberglass repair.
Repairing a Hole With Fiberglass
When repairing a hole with fiberglass, repairs are best made by access from both the inside and the outside of the repair. However, access from the interior may not always be possible because a floor or interior wall may block access. If it’s a serious structural repair in a high-stress area, you’ll have little choice but to cut a hole through the floor or wall to access the inside of the repair. However, doing a repair from the outside only is possible for small repairs or repairs in low-stress areas. The first thing to do is assess the damage carefully by cleaning the exterior with acetone. This will make hairline cracks evident, and you’ll want to grind all the way back until the crack terminates. First, using a 4-inch grinder with 80-grit sandpaper, grind or cut away any broken material in the perimeter of the hole that lacks structural integrity. Then with the grinder, taper the edges of the hole using a 12:1 rule. That is, taper back the edge of the hole at an angle that is 12 times the overall thickness of the fiberglass material.
Checkout marine product sales online for all your boat repair equipment.

To repair a hole, use a 4-inch grinder and coarse sandpaper to grind away any broken material that lacks integrity. Then taper back the edges of the hole.
If it’s a repair from both the inside and outside, the taper will be centered on the thickness of the fiberglass and taper back on both inside and outside, resembling the cutting edge of an ax. If the repair is done from the exterior only, then the taper will start at the bottom of the thickness of fiberglass and taper toward the outside, resembling the cutting edge of a carpenter’s chisel. Next, after the taper from the edge of the hole outward is complete, grind back toward the perimeter to where the hairline cracks ended. Now the entire repair area has been defined. Repeat the same on the inside of the repair if you’re doing a two-sided repair. Clean all surfaces with acetone to be free of dust so the resin will adhere.
For a two-sided repair, next, you’ll cut a piece of fabric that extends to the outer margin of the repair. Mix up resin and hardener, and on a scrap piece of cardboard, lay your piece of fabric, and use a brush to saturate the cloth with resin. Turn the fabric over and coat the other side. Next, take the brush and apply resin to the interior repair area. Then carefully stretch the resin-soaked fabric over the hole, so it’s on a smooth plane and wrinkle-free. Use the brush to press out any air pockets, so the patch sits flat against the existing interior surface. Once the interior fiberglass patch has been set up and is somewhat hard, have already cut a piece of cloth or several layered pieces of cloth that will fill the thickness of fiberglass to near the surface plane of the exterior. The outermost layers will be a resin-soaked mat, so it will be smooth and not show the texture of the cloth.
Let the patch dry. Once it is dry, grind down the high spots with 80-grit sandpaper until it is on the plane with the finished surface. At this point, clean off the sanded area, and assess the low spots. If there are still high spots, continue to grind them down. Next, you’ll use a resin that’s mixed with chopped strands of fiberglass. This is a cosmetic layer, as the structural layers are already in place. This will fill the low spots and bring the repair up to plane with the exterior surface. Once the chopped strand layer is set up and hard, grind down the high spots until in plane with the finished surface. The next step is to mix up what is referred to as “peanut butter .”This is resin and thickener and is the consistency of smooth peanut butter. Using a plastic applicator, apply the peanut butter resin mixture to give the final surface all the way to the perimeter of the repair. If it is a curved surface, use a metal, plastic, or plywood flex board to smooth the final contour. Once this layer is dry, grind it down so you’re perfectly on the plane with the exterior surface. Now there should only be some minor pits and pinholes to fill. Use a skim coat resin and hardener and apply using a plastic applicator. Once dry, sand to perfection using fine sandpaper.
Spray the Gelcoat
The Gelcoat is the shiny hard finish surface on the boat exterior. Once the color is matched, spray on the finish coats of gelcoat. Once the topcoat dries, use 600-grit wet sandpaper and higher to seamlessly blend the new gelcoat with the original finish. Lastly, use wax to give the final buff to make the repair invisible.

Gelcoat is the shiny cosmetic finish to Fiberglass repair. It is sprayed on and built up in multiple applications to create a glossy topcoat.
Repairing a Minor Chip or Gouge in the Gelcoat
In this case, the structural fiberglass has no damage, and it’s just the finish layer of gelcoat that needs repair. Grind the repair with a Dremel tool to expose clean fiberglass and bevel back the repair edge. Mix up the correct color of gelcoat with hardener, and take a small brush and create a slightly raised puddle of gelcoat that entirely fills the void and extends just past the margins of the repair area. Let the puddle dry hard, then using 600-grit wet sandpaper, sand until flush with the finished surface. On a flat surface, use a sanding block to create a perfect plane. End with a coat of wax to make the repair blend in perfectly.
Repairing fiberglass is a multi-step process. However, even the most unsightly damage from hitting a rock, bumping into a dock, or even a collision can be repaired to look just like new. Lakeside Marine offers professional boat fiberglass repair from minor dings to major structural repairs. We also handle fiberglass repairs for boat insurance claims, making the repair and insurance reimbursement process seamless. We even do boat modifications and restorations.

Lakeside Marine does fiberglass repairs for boat accident insurance claims, classic boat restorations, and custom high-performance boat modifications.
For professional results for your boat fiberglass repairs, call email [email protected] or go to our webpage and learn about our [fiberglass repair services], and read customer testimonials about how Lakeside Marine performed outstanding fiberglass repair while providing exemplary customer service.
Book a Boat Fiberglass and Gelcoat Repair
NEVER MISS A POST
Sign up for free and be the first to get notified about updates

Pre Winterization Maintenance Tips
Oct 27, 2022
Your boat served you well over the past boating season. However, with normal wear and tear, your boat requires attention. Maintain your boat as service needs arise, and keep its value and performance at its peak. Reasons to perform boat maintenance in the fall and...

Boat Fire Prevention and What to do in case of Fire
Aug 2, 2022
Boat fires are serious, and here’s how to maximize your safety. We discuss the common causes of boat fires, how to prevent them, and what action to take if a boat fire breaks out. What are the common causes of Boat Fires? Electrical fires Explosive gas or propane...

Why is Boat Bottom Painting Necessary?
Dec 27, 2021
Boat bottom painting is necessary for any boat that stays in the water continuously for long periods. Bottom paint, also called anti-fouling paint, deters the growth of aquatic organisms, plants, and algae that damage your boat’s hull, affect the boat’s performance,...
Submit a Comment Cancel reply
Your email address will not be published. Required fields are marked *
Save my name, email, and website in this browser for the next time I comment.
Submit Comment
Fiberglass Boat Repair Techniques: Quick and Effective Fixes
Understanding Fiberglass Boat Repair
With 20 years of boating experience , I’ve learned that maintaining the integrity of a fiberglass boat is essential. The repair process involves several crucial steps which require attention to detail and a systematic approach.
Firstly, assessing the damage is critical. Fiberglass boats can suffer from a range of issues, from minor scratches to major holes. As someone who’s handled many such repairs, identifying the extent of the damage dictates the repair strategy.
Here are the basic steps I follow:
- Inspect the affected area carefully to understand the depth and extent of the damage.
- Prepare the repair site by cleaning the area and removing any damaged or loose material.
- Sand the damaged area to create a rough surface for better adhesion of repair materials.
Next, selecting the materials is just as important as the repair technique itself. Epoxy resin is my go-to due to its strong adhesion and long-lasting repair qualities. Here’s a guide on basics of selecting repair materials .
Applying the repair materials involves layering fiberglass cloth and resin. The fiberglass cloth provides strength, while the resin, when cured, restores the integrity of the hull.
Remember, practice makes perfect. Working with fiberglass can be daunting, but with patience and care , a meticulously completed repair is indistinguishable from the original structure. Each repair I’ve completed over the years has reinforced my precision and skill, ensuring lasting results that keep my vessel seaworthy.
Materials and Tools Required
In my 20 years of boating experience, I’ve found that having the correct materials and tools is crucial for a successful and durable fiberglass boat repair. Knowing what to use will save you time and ensure the integrity of your boat’s structure.
Essential Materials
- Fiberglass Cloth: A foundational element for any repair, providing strength and stability to the damaged area. The quality of the cloth directly affects the repair’s resilience.
- Resin (Epoxy or Vinyl Ester): Acts as a binder for the fiberglass cloth. Epoxy resin is preferable for its strong bond and water resistance.
- Gelcoat: For aesthetic touches and to protect the repair from UV rays and water intrusion, gelcoat is applied as the outermost layer.
Recommended Tools
- Sandpaper (Various Grits): Starting with coarser grits for shaping and finer grits for finishing provides a smooth surface for repair.
- Acetone: Essential for cleaning the repair area and ensuring that contaminants do not compromise the bond.
- Brushes and Rollers: For applying resin evenly. Brushes are used for detail work and rollers for larger areas.
- Mixing Sticks and Cups: Necessary for preparing and mixing the resin before application. Accurate measurements are key to achieving the desired cure and bond strength.
Assessing the Damage
In my 20 years of boating experience, I’ve come to understand that thoroughly evaluating the type and extent of damage is critical before undertaking any repair work on a fiberglass boat.
Types of Damage
Structural Damage: This occurs to the supporting framework and influences the boat’s overall integrity. A cracked hull, for instance, compromises the vessel’s safety and needs immediate attention.
Cosmetic Damage: These are surface-level issues, such as gelcoat cracks and scratches, that do not affect the boat’s seaworthiness, but restoring the appearance is important for maintaining value.
Damage Assessment Process
Visual Inspection:
- Examine the hull and deck for any obvious signs of impact or wear.
- Look for hairline cracks, which could indicate more severe damage beneath the surface.
Tap Testing:
- Gently tap the fiberglass with a plastic hammer.
- An area that sounds hollow or different could be suffering from delamination or water intrusion.
Moisture Readings:
- Use a moisture meter to detect any water retention within the fiberglass.
- Higher readings signify potential problems with the laminate that could lead to further deterioration.
Assessing the damage with precision sets the stage for an effective and necessary repair. While smaller repairs may be DIY-friendly, significant structural damage often requires professional intervention.
Preparing for Repair
With 20 years of boating experience, I’ve learned that successful fiberglass boat repair starts with meticulous preparation. Whether you’re patching a small chip or mending a larger gash, setting the stage correctly is crucial for a long-lasting fix.
Surface Preparation
Before any resin or gelcoat is applied, the area must be clean and properly prepped. First , the damaged spot should be sanded down to remove any jagged edges and create a receptive surface for bonding. Then , washing the area with a dewaxing solvent is essential to eliminate any wax or mold release, which could compromise the repair. I’ve found that skipping this step can result in weak adhesion of the new material. Visit Repairing Fiberglass On Boats for a comprehensive guide on working with fiberglass.
Safety Measures
Fiberglass repair requires handling hazardous materials, so safety cannot be taken lightly. Always wear:
- Gloves : to protect your hands from sharp fiberglass strands and chemicals.
- Respirator mask : to avoid inhaling hazardous dust and fumes.
- Safety goggles : to shield your eyes from debris.
Moreover, maintaining a well-ventilated workspace is non-negotiable to dissipate fumes from resins and solvents. This minimizes the risk of respiratory issues and ensures a safer working environment.
Fiberglass Repair Techniques
With 20 years of hands-on boating experience, I’ve developed a deep understanding of fiberglass repair techniques that are essential for sustaining the integrity and appearance of your vessel. The key to successful repair lies in identifying the scale of the damage and employing the correct method.
Minor Repairs
Minor damages to a fiberglass boat, such as small scratches or chips, can often be repaired with simple DIY solutions.
- Materials Needed : For such repairs, you’ll need resin, hardener, fiberglass cloth, sandpaper, and a suitable gelcoat.
- Process : Begin by cleaning the area thoroughly and sanding down any rough edges. Cut the fiberglass cloth to size, mix the resin with hardener, and apply it to the affected area. Once the resin cures, sand it down to a smooth finish and apply the gelcoat for aesthetic appeal.
To illustrate, fixing a hairline crack would typically involve cleaning the area, applying a mixed resin, and laying down a piece of fiberglass cloth. After the resin has cured, I’d sand the area flush and then apply a gelcoat to match the boat’s original finish.
Major Repairs
For more significant damage, such as holes or structural weaknesses, the repair process is more complex and may require professional intervention. However, I’ve tackled such challenges myself when possible.
- Materials Needed : A list of materials includes thicker fiberglass matting or cloth, epoxy resin, a release agent, and reinforcing materials.
- Process : The area in need of repair must be ground away to remove any damaged material and to create a beveled edge where new material can be applied. Next, layers of fiberglass and resin are built up until they fill the area. It’s critical to ensure no air pockets are trapped, as this could compromise the repair’s integrity.
For example, repairing a hole in the hull involves placing a backing material behind the hole, then layering fiberglass and resin until the repair is level with the hull surface, finishing with sanding and gelcoat application. Each layer must cure properly before the next is applied, ensuring a bond as strong as the original hull.
By applying these techniques, I’ve been able to extend the lifespan of boats and maintain their value and performance.
Finishing the Repair
In my 20 years of boating experience, I’ve learned that achieving a flawless finish on a fiberglass repair is crucial for both aesthetics and the boat’s integrity. Accurate sanding, followed by meticulous buffing and polishing, are the final steps to ensure a repair blends seamlessly with the boat’s original surface.
First Pass: Coarse Grit. I start with a coarse-grit sandpaper to remove the excess cured fiberglass, working my way towards the repair margins. Care is taken not to gouge the surrounding area, which could require additional repairs.
Second Pass: Medium Grit. Once the high points are leveled, I switch to a medium-grit sandpaper. Gradual transitions are essential to avoid noticeable edges or low spots in the final product.
Final Pass: Fine Grit. To prepare for finishing, I use fine-grit sandpaper. This smoothens the surface further, removing any scratches left by coarser grains and creating a surface ready for polish.
Buffing and Polishing
Buffing Stage. After sanding, I buff the area with a rubbing compound to remove any fine scratches. This process requires a gentle touch and a steady circular motion to achieve a uniform shine without creating swirl marks.
Polishing Stage. The final step is applying a high-quality marine polish. This not only enhances the shine but also adds a protective layer against UV rays and saltwater. For the best results, I apply polish in thin layers, allowing each to dry before buffing it to a high gloss.
Gelcoat Application
In my 20 years of experience with fiberglass boats, I’ve learned that the key to a superior gelcoat finish lies in meticulous mixing and precise application methods. Ensuring the mix is correct and the application is smooth will greatly affect the longevity and appearance of the boat’s surface.
Gelcoat Mixing
Before applying gelcoat, it’s crucial to prepare the mix accurately. I always start with a clean mixing container to avoid contamination. Then, I add the gelcoat base, followed by a catalyst—typically methyl ethyl ketone peroxide (MEKP)—at a precise ratio, which is often around 2% of the volume of the gelcoat. Mix thoroughly for at least 2 minutes, ensuring a uniform color and consistency with no streaks.
Gelcoat Application Methods
When applying gelcoat, I use two main methods: brushing and spraying. Each has specific advantages, so I choose based on the repair’s nature and size.
- Ideal for small repairs or areas that are not easily accessible.
- Use a high-quality brush for an even coat and to avoid brush marks.
- Preferred for larger areas to achieve a more consistent finish.
- Requires a gelcoat spray gun and personal protective equipment to prevent inhalation of fumes.
Regardless of the method, it’s important to maintain a wet edge to avoid visible lines in the finish and apply multiple thin layers rather than one thick one to reduce the likelihood of sagging or running. After application, curing times can vary, but I usually wait a minimum of 24 hours before sanding or polishing.
Curing and Post-Cure Procedures
With two decades of handling boats, I’ve learned that meticulous attention during the curing and post-cure phases is critical for dependable fiberglass repair.
Curing Process
The curing process is when the resin hardens and bonds with the existing fiberglass. I ensure that the temperature is between 70-80 degrees Fahrenheit, as too cold or too hot can affect the cure. When I apply resin, I layer it with a catalyst, make sure the area is well-ventilated, and keep it free from dust. I use plastic film or PVA as a seal over the last resin layer to ensure a thorough cure without any tackiness.
Post-Cure Inspection
Once the resin has fully cured, my next step is a thorough inspection. I feel for imperfections such as bumps or air pockets. Any found imperfections are then addressed with gelcoat paste and allowed to cure fully. After it has cured, the patch should be sanded smoothly and polished to match the surrounding area, restoring the boat to its original condition.
Maintenance Tips

With my 20 years of boating experience, I’ve learned that regular upkeep and a proactive approach to maintenance can save you from costly repairs in the long run. Let’s dive into what I consider essential practices.
Routine Maintenance
Inspect and Clean: Every time I return from the water, I make it a practice to inspect my boat thoroughly for any signs of damage or wear, especially on the hull. I pay close attention to scratches or cracks that can worsen over time. After inspection, a thorough cleaning with soap and water helps identify any new issues that may have been obscured by dirt or debris.
- Simple Repairs: For minor scrapes that haven’t penetrated the gelcoat, I apply a marine polish to protect the area. It’s a simple but effective method to maintain the integrity of the fiberglass. However, if the damage is deeper, I make sure to apply a patch at the earliest opportunity to prevent water infiltration.
Preventive Measures
Regular Waxing: I ensure that twice a year, my boat receives a good layer of quality marine wax. This acts as a barrier against UV rays, salt, and pollutants that may harm the fiberglass. It’s an effective way to extend the boat’s aesthetic appeal and structural integrity.
- Storage and Cover: When not in use, I store my boat in a dry and shaded area. A sturdy cover is essential to protect it from the elements. I’ve learned that proactive covering minimizes the exposure to sun, moisture, and temperature fluctuations that can lead to fiberglass degradation.
Remember, a well-maintained boat ensures not just longevity but also safety and reliability. It pays to adopt a meticulous care routine.
Frequently Asked Questions
Drawing from my 20 years of boating experience, I’ve compiled a list of frequently asked questions relevant to fellow boaters looking to repair their fiberglass vessels. These inquiries cover the essentials of materials, procedures, and costs involved in keeping your boat seaworthy.
What type of epoxy is best for repairing boat hulls?
In my experience, marine-grade epoxy is the most reliable for repairing boat hulls due to its strong adhesion, resilience to water, and ability to bond with fiberglass. It’s crucial to select an epoxy that cures hard and can be sanded and painted over for a uniform finish.
What steps are involved in repairing large gelcoat damage on a boat?
Repairing large gelcoat damage typically involves cleaning the damaged area, removing any loose material, applying a gelcoat matching your boat’s current color, and then sanding it smooth. The repair area should be thoroughly dewaxed before applying new gelcoat. After curing, I always recommend polishing to restore shine and protect the repair.
How can you fix a serious gouge in a fiberglass boat’s surface?
To fix a serious gouge, I first clean the area with a dewaxing solvent, then fill the gouge with a fiberglass filler or resin. It’s important to apply the filler in layers and sand smoothly between applications. Once filled, the area should be finished with gelcoat, epoxy, or paint as necessary.
Is it possible to repair structural damage to a fiberglass boat by oneself, and what materials are needed?
Yes, it’s possible to manage structural repairs, but it requires careful planning and quality materials, including fiberglass mat, resin, and hardener. For internal structural damage, it may be necessary to use a thicker fiberglass mat for added strength when layering over the damaged area.
What is the average cost to repair a hole in a fiberglass boat?
The cost to repair a hole in a fiberglass boat can vary significantly based on the size and location of the damage, with DIY repairs typically ranging from $75 to $300 for materials. Professional repairs can escalate well into the thousands depending on the extent of the damage.
What are the most effective methods for fixing a leak in a fiberglass boat hull?
For fixing a leak in a hull, it’s effective to identify the source, dry the area, and then apply a marine-grade epoxy or fiberglass patch kit. The patched area must be adequately sealed to prevent future water ingress. In leaks where the damage is extensive or structural, professional assessment and repair are recommended for safety.

Leave a Comment Cancel reply
Save my name, email, and website in this browser for the next time I comment.
Keep in mind that we may receive commissions when you click our links and make purchases. However, this does not impact our reviews and comparisons. We try our best to keep things fair and balanced, in order to help you make the best choice for you.
As an Amazon Associate, I earn from qualifying purchases.
Vanquish Boats
500 Lewis Drive Carolina Beach, NC
+1 910-707-3599
© Vanquish Boats
- 2024 BOAT BUYERS GUIDE
- Email Newsletters
- Boat of the Year
- 2024 Freshwater Boat and Gear Buyers Guide
- 2024 Boat Buyers Guide
- 2024 Water Sports Boat Buyers Guide
- 2023 Pontoon Boat Buyers Guide
- Cruising Boats
- Pontoon Boats
- Fishing Boats
- Personal Watercraft
- Water Sports
- Boat Walkthroughs
- What To Look For
- Best Marine Electronics & Technology
- Watersports Favorites Spring 2022
- Boating Lab
- Boating Safety
How to Repair Gelcoat
- By Jim Hendricks
- Updated: February 10, 2020

Own a fiberglass boat long enough, and you’ll end up with a scratch, nick or gouge in the finish. It might be from a muffed landing, a dropped pair of fishing pliers or just a hole drilled in the wrong place. You can usually fix gelcoat repairs yourself. It takes a bit of patience, but do it right and few will notice.
Complications occur when there’s damage on a textured surface like diamond nonskid or on a multitone finish. For these, call in a pro. Also, deep gouges may need structural fiberglass work or filler before you repair the gelcoat. On horizontal surfaces, liquid gelcoat works, but for vertical surfaces, a paste is easier to apply. The first step is identifying the finish on your boat.
Getting Started Finish Time: 1-2 hrs Skill Level: 3/5
Tools and Supplies *Masking tape *Hand-held grinder and bits *Countersink bit and drill motor *Gelcoat resin and catalyst *Coloring agents *Acetone *Mixing cups *Stir sticks *Latex gloves *Dust mask *Cleanup rags *Putty knife *Wet/dry sandpaper (320-, 600- and 1,000 grit) *PVA curing agent *Rubbing compound *Boat wax
You’ll need to fill deep gouges with resin and filler before applying finish. Epoxy resin and fillers adhere better than polyester products but cost more and require several extra steps prior to applying the finish color of either gelcoat or boat paint . If you choose paint, topside alkyd enamels, polyurethanes and others are available from Interlux and Pettit.

Gelcoat Repair
1. Match the Color For current boats , your dealer might be able to supply matching gelcoat. But due to weathering on your boat, it may not match. There are kits from companies such as Evercoat with pigments to add to the resin for a match. If you have a sample, you can match a gallon of gelcoat from Rayplex Composites (fibreglass.com).

2. Clean Up Edges Use a rotary grinder to smooth the edges to a 45-degree bevel and eliminate any loose material. If repairing a drilled hole, the surface might have become elevated from the upward pressure of an old fastener. Use a countersink bit or rotary file and a drill motor to carefully grind away the swollen perimeter. Scrape away any old sealant and clean up with acetone.

3. Tape It Off Carefully mask around the edges of the fiberglass boat repair area with two-inch-wide 3M ScotchBlue Multi-Surface Painter’s Tape No. 2090. Give yourself a 16th of an inch of unmasked margin around the scratch, gouge or hole. Also, mask off any adjacent areas or items to protect them from inadvertently applied gelcoat or errant sanding. Clean up the repair area again with acetone.

4. Mix the Gelcoat After you have color-matched the amount of gelcoat needed for the repair, add catalyst (aka hardener). Different gelcoat resins require different catalysts, so make sure you are using the proper formula, as well as the right two-part ratio (e.g., four drops of catalyst per teaspoon of resin). Mix the two parts thoroughly with a stir stick to ensure that the entire batch will cure at the same time.

5. Apply Gelcoat Use a small wood or plastic putty knife to spread the gelcoat smoothly over the gelcoat repair. You should have about 10 to 15 minutes of working time after adding the catalyst before it starts to harden and is no longer fluid. Fill the repair slightly higher than the surrounding surface to allow for sanding. If you don’t plan to sand, make it even with the surrounding surface. Either way, spray it with a PVA curing agent.

6. Sand It Out Peel off the PVA. Wet-sand the cured gelcoat with 320-grit wet/dry paper on a soft sanding block. Confining work to the immediate repair area, continue wet-sanding with 600-grit paper until nearly even with surrounding gelcoat. Finish wet-sanding with 1,000-grit paper; then buff out with rubbing compound followed by a coat of wax. If not sanding, just peel off the PVA and apply wax.
- More: diy projects , How-To , spring fitting-out
More How To

I Learned About Boating From This: Capsize, Rescue and Lessons Learned

Should You Abandon Ship During a Boat Fire?

38 Top Make-Ready Tips for the Spring Boating Season

On Board With: Andrew Robbins

We Test Interlux Trilux 33 Aerosol Antifouling Paint

Boating Shoes for Spring and Summer

MasterCraft Celebrates International Women’s Day With Fourth Annual ‘Let Her Rip’ Campaign

Garmin EchoMap Ultra 2 Series
- Digital Edition
- Customer Service
- Privacy Policy
- Terms of Use
- Cruising World
- Sailing World
- Salt Water Sportsman
- Sport Fishing
- Wakeboarding
Many products featured on this site were editorially chosen. Boating may receive financial compensation for products purchased through this site.
Copyright © 2024 Boating Firecrown . All rights reserved. Reproduction in whole or in part without permission is prohibited.
Repairing Fiberglass On Boats (Complete Beginner’s Guide)

Fiberglass boats are arguably the best kind of boats you can own. They’re lightweight, fun to use, and easy to maintain.
They’re even easy to repair, and in this post on repairing fiberglass boats, we’ll tell you exactly how to do just that.
Let’s get started!
Table of Contents
Fiberglass Basics You Should Know

Fiberglass is a wonderful material that can be used to repair all sorts of things.
Learn how to work with fiberglass, and you can repair boats, vehicles, bathtubs, and many other items.
You can even learn to create your own parts, canoes, and even coolers. An entire lifetime could be spent learning how to build and repair things using fiberglass.
But first, you need to know how fiberglass works as well as what it is. Fiberglass by itself is just a sheet of glass fibers woven or matted together. By itself, it is not hard, waterproof, or useful for anything.
However, once you apply a chemical resin to the fiberglass, it becomes waterproof, hard, and incredibly durable. It also remains lightweight, which makes it great for applications such as aircraft, automobiles, and boating.
The type of resin you use, the type of fiberglass you use, and the core material you use will determine just how hard and durable the constructed fiberglass becomes.
Types of Fiberglass Cloth
There are many different types of fiberglass cloths out on the market today.
Some of these cloths include chopped strand mat, biaxial mat cloth, woven roving cloth, continuous roving cloth, carbon fiber cloths, and the list goes on and on.
This being said, there are two types of fiberglass cloths that you’ll be working with:
- Fiberglass fabrics, or cloths
- Fiberglass mat.
The fiberglass fabrics will be your main structural material, but you may end up using a fiberglass mat to help you work around turns and to help waterproof low-stress areas like the live wells.
With these fabrics, you’ll also have different weights.
These weights will help determine how thick and strong the material is. Popular boating fabric weights are 10 ounces, 6 ounces, 4 ounces, and 1.5-ounce cloths. These fabrics are sold by the yard and generally come in widths between three and five feet.
The type of fiberglass fabric you choose will be determined by the application you’re using it for.
Also, lighter cloths can be applied in multiple layers, so if you need more reinforcement, you can always combine a 4-ounce cloth and a 6-ounce cloth in two different layers to provide the thickness and strength of a similar 10-ounce cloth.
Types of Resin
There are a lot of different resins out on the market these days, but the two you’ll most likely be working with are either epoxy resin or polyester resin. Epoxy resin is more expensive than polyester resin, but it is often considered stronger. It is also more versatile as the epoxy resin will bond well over polyester resin, but polyester resin may not work well over an epoxy.
This being said, different epoxy materials will work better with different core materials.
For example, the polyester resin will melt some foams and plastics. I found this out the hard way when I mixed some epoxy resin up in a plastic cup. The resin started leaking right through the bottom of the cup, and I was very thankful that I had decided to play with the fiberglass outside.
Some other types of resin you might run into are polyurethane resin and silicone resin. These resins are even more expensive than epoxy resin, and it doesn’t really make sense to use them for boat repairs anyway.
Core Materials
The core material is just the material that is encapsulated by the fiberglass cloth and resin. Core material on boats is usually balsam wood or a foam core. However, almost any material can become a core material.
For example, I’ve applied several different types of fabric with polyester resin over the top of pieces of cardboard. The fiberglass and resin are so strong that it turns the cardboard into a hard shell that you can use to make many different things, including small boats.
If you ever need to do a small one-off project that does not require structural support, think about using cardboard as a cheap and easy alternative to creating a mold or using traditional core material.
This being said, your best bet is to use a core material that is meant for your particular application. For obvious reasons, being out on the water in a damaged balsa wood and fiberglass boat is a whole lot safer than being out there in a damaged cardboard boat.
Also, keep in mind that you don’t always need a core material. Sometimes you can create a mold that simply holds the fiberglass and resin together until they dry and become components themselves. Many fiberglass hulls are built using molds that consist of a thick layer of fiberglass and resin, and they are designed to be very strong with many layers of built-up woven fabrics and mats with no core material.
Camper shells are also built this way without any core material. If you’re curious about what this looks like, just do a quick search for fiberglass campers on this website, and you’ll see plenty of examples.
When you’re doing repairs on an existing fiberglass boat, you may not be using any core material either.
This is especially true if you’re just repairing a crack or hole in a non-load-bearing area. In this case, you’ll just be applying cloth over the crack and sealing it with resin.
How Is The Fiberglass Applied?
There are a few different ways that fiberglass can be applied.
- Roll it on with a paint roller
- Paint it on with a brush
- Spray it on with a spray gun.
When doing fiberglass boat repairs, you’ll most likely be painting or rolling it on in small batches.
The way you’ll do this is you’ll mix up a small amount of resin that you can successfully paint on over the fiberglass within about 15 to 20 minutes. This is about how much time you’ll have before the resin begins to dry and harden. If you mix too much resin, you’ll end up wasting it, so it’s important to start small until you get a feel for working with it.
Also, keep in mind that all of your fiberglass should be laid out over the area you’re repairing before you begin mixing your resin.
Once your resin becomes active, you won’t have time to go back and cut out pieces of fiberglass.
General Tips for Working with Fiberglass

As we alluded to earlier, fiberglass must be mixed before it can become active. This is usually done with a hardener. The manufacturer will tell you just how much hardener needs to be added to the resin.
Gel coats can also be added to the resin, but this shouldn’t be done until you are on your final layer.
If you apply the gel coat too early, you’ll end up having to sand the layer down before you can add any additional layers.
Also, keep in mind that fiberglass resins are meant to be used at different ambient temperatures. If the temperatures are too high or too cold, the resin will not cure properly.
You’ll know the resin didn’t cure correctly if the fiberglass feels tacky afterward.
Safety Tips for Working with Fiberglass
Fiberglass resins and hardeners can be toxic, and it’s important to keep them off of your body and out of your lungs.
Personally, I only work with fiberglass outside, but any well-ventilated area will do.
Also, if you’re working with polyester resin, you’ll want to wear a respirator. Not only is polyester resin toxic to breathe, but it smells awful. The smell is so bad that I won’t even leave the closed bottle of polyester resin inside my house for fear that it will make the house smell bad.
You don’t want to get resin on your skin or your eyes either. Wear protective clothing, gloves, and safety glasses to prevent this from happening.
For additional protection, you can also get a lotion that will work to coat your hands. This way, if the resin gets through your gloves, you’ll have an extra layer of protection between the resin and your skin. If the resin does end up getting on your skin, be sure to wash it off immediately.
People have been known to develop allergies to epoxy resin, and once you get this allergy, you’ll never be able to be around epoxy resin again.
Fiberglass Buying Tips
- Always buy fiberglass by the roll. Unfortunately, many people will try to sell you folded pieces of fiberglass because it is cheaper and easier to pack, ship, and store it this way. Sadly, folding fiberglass cloth can weaken the strands, so when you buy fiberglass that is folded, you’re buying cloth that is already damaged.
- Buy the hardener with the resin. It’s always easier just to buy the hardener and gel coats with the resin. Different resins will need different amounts of hardener, and the manufacturer will usually sell the two as a kit.
- Get good mixing cups. A poorly mixed resin will not work properly. Get good mixing cups so that you can accurately mix the resin and get the most benefit from it.
- Buy it locally (at first). A local marine store owner can often offer you valuable tips for working with fiberglass, and they can help tell you where you went wrong when you run into trouble. You’ll probably end up paying a bit more for your resin, but you’ll often end up with some good and free advice.
- Buy the right fiberglass for the job. When you go to buy fiberglass, you’ll notice right away that chop strand mat is dramatically cheaper than all of the other types of fiberglass. There is a reason for this. Fiberglass mat is not very strong, and it can be difficult to work with. Only use fiberglass mat when the job specifically calls for it. Resins are expensive, so there isn’t any point applying them over inferior fiberglass cloths.
Repairing The Hull
Before you decide to repair your own boat hull, you may want to do a reality check.
Is the boat hull severely damaged? Is your boat an ocean vessel that is going to be put under a lot of stress?
If you answered yes to these questions, you might want to save this project until you have a lot more experience with fiberglass repair. In this situation, a bad repair job could put your life in jeopardy, so the money you save will never be worth it.
This being said, there are a lot of small hull repairs that you could tackle yourself without much risk. For example, a small hole in a small boat that you only take out on the lake shouldn’t be too much for you to handle. Small cracks or holes in the areas above the water line might not be a big deal either, but please use your best judgment.
Repairing Holes in The Hull
To repair a hole in the hull, you may need to get some new core material. Try to match the new core material with the existing core material. Make sure the remaining core material is dry.
Once you have the core material, you’ll need to fit it into the hole. Next, measure and cut your fiberglass cloth. Lay the fiberglass over the area, using fiberglass tape if you have to. Once everything is in place, mix up your resin and apply it over the damaged area. You may need to do multiple layers.
For professional repairs of ocean-going hulls, the surrounding fiberglass is ground back on a slope of 1:12 to make a large area to be repaired; a 1/2″ thick fiberglass structure would be ground back 6″ in every direction from the hole.
The patch is then built-up with increasingly larger pieces of fiberglass mat and resin. Again, you need experience before trying this.
Your final coat should be a gel coat that matches the color of your boat.
Alternatively, you could repaint the boat after the repairs have been made.
Repairing Cracks
Be careful when repairing cracks in your hull, as they could be a sign of bigger structural issues.
For example, a balsa boat with cracks in it could have rotten wood inside the hull.
However, if you just see some cracks from when you accidentally backed into a tree last week, feel free to try to take on the repairs yourself. You probably won’t need any new core material, but you will need some fiberglass and some resin to patch up the crack.
Measure, cut, and layup your fiberglass before mixing your resin, and you shouldn’t have any trouble with the repair.
One thought to keep in mind with a repair like this is that you’ll probably spend more time sanding and painting than you will be doing the actual repairs. The more time you spend sanding, the better the boat will look when you’re done.
Repairing The Floor and Deck
The first thing you should do before making any repairs to the deck or the floors is to check to see how severe the damage is.
Often-times, decks and floors are made from wood, and if they are spongy or have holes in them, the wood is probably rotten underneath.
Before making any repairs to the fiberglass, you’ll need to take out this rotten wood and replace it. What seems like a small repair, in the beginning, can often end up being an extensive repair. If you don’t believe me, just look at all the free “project boats” listed on Craigslist.
Oftentimes you’ll see that the person giving it away received the boat for free himself, thinking that he could do the repairs and get a free boat.
Once he started to tear the boat apart, he realized just how much work and money would be needed and decided to give up on it.
Once you do know what you’re in for, start replacing the decking and flooring, making sure to keep the materials dry until they are encapsulated with new fiberglass and resin. Also, be sure to make a note of where the different pieces of hardware are connected to the deck, as you’ll need to put them back on when your repairs are complete.
If you’re careful, you can use the old decking that you pull off the boat as a template for creating your new decking.
Once your new flooring is complete, secure it to the boat and begin placing the fiberglass cloth over it. Be sure to use a good amount of fiberglass as the decking will need to be strong enough to support people walking over it. Mix up your resin and apply it in small batches.
If you have a large area to do, you’ll be tempted to make larger batches but don’t do this as you’ll only end up rushing the job or finding the resin sets up prematurely.
Flooring Alternatives
Another thought to keep in mind is that you don’t always need to replace your wood flooring with wood. Some people will skip the fiberglass altogether and simply install an aluminum floor instead.
This can be useful in certain applications but not very useful in others, so you’ll need to analyze your particular situation before you decide to make any changes.
If you do decide to skip the fiberglass, just be careful to find out what changes this will have on the weight of your boat. Making a heavier boat could reduce your boat’s max capacity and affect the way your boat sits in the water.
Repairing The Keel
The keel is an integral part of a boat. On a sailboat, the keel keeps the boat upright in the water and helps to keep it stable in heavy winds.
Being at the bottom of the boat leaves it much more vulnerable to scraping the ground and running into rocks. For this reason, a keel can often take damage even when the rest of the boat remains trouble-free.
The question is, do you want to repair this damage to the keel yourself?
If you have a small recreational boat that you can easily bring up on land, I’d say go for it. You can flip the boat over in your backyard and spend as much time as you need applying a new resin and gel coat to the keel.
For boats that you know will be scraping the bottom again, you may want to apply a keel guard as well. This will help protect your keel, so you don’t have to constantly make repairs each season.
Repairing The Transom
A solid transom will ensure that your boat’s engine doesn’t fall into the water. If you’re going to make this repair yourself, make sure you’re prepared to do it properly.
Oftentimes the core of the transom needs to be replaced, and you’ll want to make sure you replace it with a material that is as strong or even stronger than the original. This is especially true if you’ve upgraded the original boat engine to something bigger and heavier.
Once you’ve replaced the core material, the steps for making the repair remain the same.
Apply your fiberglass boat cloth and use as many coats of resin as you need to get the job done.
This repair includes a lot of hard edges, so you may need to overlap your layers of fiberglass at the top to get a good seal. Take your time and make sure the fiberglass wraps properly, or you’ll end up having to do a lot of sanding at the end of the job. Also, be careful to account for where the engine will be mounted so that you can match the hardware appropriately.
Repairing Hatches
Hatches are easy repairs, and they’re great for getting started with fiberglass.
When replacing a hatch, use the existing hatch to make a template for the new one.
The new hatch should be easy to make, and you won’t have to use a lot of thick fiberglass cloth since it won’t be the main structure of the boat.
The main thing to keep in mind when doing this repair is that the hatch will need to be sealed properly afterward. Oftentimes, people will do a great job repairing or replacing the fiberglass hatch, but they won’t seal it properly afterward, and they end with a leaky hatch.
Repairing Scratches
Scratches in the fiberglass usually don’t require extensive repairs, and the cost is usually minimal.
The reason for this is that the fiberglass does not need to be replaced, and the core material is not yet affected.
Unfortunately, some deep scratches in the gel coat can end up creating a lot of prep work. You’ll end up needing to do a lot of sanding to get the boat to look new again.
You’ll also need to do a good job matching the color.
If your boat is new, this may not be a problem, but if your boat has been out in the sun for a while, you won’t be able to use the original boat color as it will end up being too dark.
You’ll have to color match the boat, or you’ll have to resign yourself to painting the entire boat over again.
DIY Costs vs. Professional Costs
Doing repairs yourself will usually save you money, and they can sometimes even save you on time.
However, some jobs are too big to be done by beginners, and some jobs just take too much time for the DIY repair to be worth it.
I’ll try to give you a breakdown of some of the costs here so you can decide for yourself whether or not the repair is worth paying for or doing yourself.
Example costs from FiberGlassSite.com:
- 6-ounce fiberglass cloth 50” wide and 5 yards long. – $25.00
- 1 gallon of polyester resin with hardener. – $39.00
With this much cloth and resin, you could do a lot of small repairs of cracks and holes.
A simple hole or crack repair might cost you $50.00 each, so you’d definitely save money on smaller repairs, and you may even have some extra fiberglass left over for the future.
For a balsa core deck repair, you might want ¾ inch core. This costs about $50.00 for a 2’x4’ piece. You’ll also need a 10-ounce fiberglass cloth and polyester resin.
This repair might end up costing you a couple of hundred dollars, but it could save you a thousand.
Foam core used for repairing heavy damage to the hull of a sea-going vessel will need to be very strong. Not only this, but you’ll need to consult with a marine technician to determine what the best combination of foam, resin, and fiberglass should look like.
Between material costs and consulting costs, you’ll end up spending thousands of dollars. You’ll also end up spending a lot of time, and you may devalue the worth of the boat since a buyer might not feel safe buying a boat that was repaired by an amateur.
In this case, you may be better off paying a professional boat repair company to do your repairs.
Final Thoughts
Working with fiberglass can be tricky, but it can also be a lot of fun.
Learn how to work with fiberglass, and you’ll find an almost endless number of projects to take on.
Just keep in mind that working with fiberglass is not cheap or easy to get into. If you decide to take on fiberglass projects, be prepared to spend some time and money doing so.
Also, be prepared to mess up a few projects while you’re learning.
Click to share...

- All Categories
- Abrasives CLEARANCE
- Accessories
- all_collection
- Carbon Fiber CLEARANCE
- Chopped Strand Mat
- Core Materials
- Epoxy Resin
- FEATURED PRODUCTS
- Fiberglass Cloth
- Fiberglass Mat- Clearance
- Fiberglass Rollers
- Fiberglass Tape
- Gelcoat Additives
- GENERAL PRODUCTS
- Kevlar and Carbon Fiber
- Knitted Fabric
- Mixing Supplies
- Mold Making
- Mold Release
- Polishing Agents
- Polyester Resin
- Polyurethane Pour Foam
- REPAIR KITS
- Solvents and Reducers
- Tooling Gelcoat
- Vacuum Bagging
- Vinylester Resin
You have no items in your shopping cart.

- Repair Kits
- Polyurethane Boat Pour Foam
- 2 lb Boat Pour Foam
- 6 lb Boat Pour Foam
- Learning Center
- Calculators

How to Repair Your Fiberglass Boat
A fiberglass boat is an investment that requires regular maintenance to keep it in good condition. But despite your best efforts, wear and tear is inevitable, and you may need to repair your boat eventually. Fortunately, fiberglass boat repair is something you can do yourself. With a few tools, materials, and the right knowledge, a DIY repair can save you a lot of money.
In this tutorial, we will walk you through some things you need to know about repairing a fiberglass boat. We’ll go over the tools and materials needed, as well as the steps you need to take to ensure your boat is repaired correctly. By the end of this post, you will have some knowledge and confidence to start a fiberglass boat repair on your own.
Assessing the Damage
The first step in repairing a fiberglass boat is assessing the damage. You need to determine the extent of the damage and whether it's structural or cosmetic. A damaged hull can be repaired, but if the damage is extensive, you will want to look at hiring a professional. With that said, you can utilize the following tips to assess the damage of your fiberglass boat properly:
-Assess the damage caused by external factors like accidents or collisions. This is important to do right away as the longer cracks or holes are left unrepaired, the more damage that can occur as water seeps in.
-Check for cracks, holes or depressions in the surface
-Check for any discoloration or changes in texture
-If the damage is located under the waterline, check for any water-filled areas
-Check for warped floor boards
Once you've assessed the damage, you can figure out the best way to start repairing your fiberglass boat.
Materials and tools
Next, you need to gather the necessary tools and materials. In most instances, you will need fiberglass mat or knit fabric , resin , hardener, a squeegee , rollers , sandpaper, a power drill, and a buffer. You’ll also need protective gear , like gloves, goggles, and a respirator, as the chemicals used in the repair process can be harmful. You may also need a gel coat depending on the resin you use and what was used on the surrounding area near the scratch or crack.
Repair the Damage
If your fiberglass boat has a scratch or crack, then you can fix it yourself. Here are the steps to follow:
-Clean the damaged area with a mild detergent and water, then sand it with 220 grit sandpaper. Clean with acetone.
-Apply fiberglass with an epoxy or vinyl ester resin over the damaged area. If the repair is not below the waterline, you can also consider polyester resin for the repair. Follow the instructions on the resin for specific resin to hardener mix ratios. You can use a roller and/or squeegee to work the resin into the fiberglass. If you are using chopped strand mat , you do not want to use epoxy resin. Epoxy resin and chopped strand mat are not compatible.
-Sand the surface again with 220 grit sandpaper to remove any bumps or ridges
-Finally, apply a gelcoat to match the color of the rest of the boat. If you are using an epoxy resin, you will need to use a different type of paint. Gelcoat is polyester based and will not adhere to the epoxy resin. It will adhere well to a polyester or vinyl ester resin.
**If the hull has large cracks and holes, you might need a professional to help.
If the damage is in the core or floorboards of the deck, the repair may be more extensive but still possible to do on your own. Feel around for soft spots or any giving areas in the floor to asses. If there is any warping or soft spots, the deck will need to be repaired.
- Remove the bad floor boards
- Tear out any core material that may have rotted.
- Let the area completely dry before moving on. This is a must.
- Replace core material with a plywood, balsa, foam or honeycomb.
- Add new floor boards
- Caulk any holes and around hardware. This is important to avoid having moisture seep in and causing future damage.
- Use fiberglass and resin over the floorboards to seal. You will need the same materials and tools as repairing scratches and cracks.
- Once fiberglass and resin have been applied and cured, you can install the carpet if using. If you are not using carpet, make sure the final layer of resin has a wax in it so it cures tack free. Polyester and vinyl ester resin, without wax will cure tacky. If you are working with epoxy resin, then this is not an issue as it will cure without a tack.
If the damage appears to just be in the gel coat, this can be simpler to fix. For information on different issues you can have with the gel coat and how to fix it, read HERE .
Prevent Future Damage
After repairing your fiberglass boat, it is always a good idea to take steps to prevent future damage. Here are some general tips to keep your boat in good condition:
- Use boat covers when not in use
- Regularly clean your boat with mild detergents and water
- Wax your boat regularly
- Make sure all holes are thoroughly caulked around hardware.
- Follow the manufacturer's recommendations for boat usage and maintenance.
Repairing fiberglass boats is not as complicated as it sounds, but it does require attention to detail and patience. Be sure to take any precautions that will prevent future damage. With a little knowledge, skill, and patience, you'll have a well-maintained fiberglass boat that will provide you with endless hours of fun on the water.
Still have questions? Don’t hesitate to reach out to our knowledgeable customer service team. You can email us at [email protected] or give us a call at 1-833-669-7899.
Leave a comment
Your email address will not be published. Required fields are marked *
Please note, comments must be approved before they are published
Related Posts
Customer spotlight: proglas epoxy projects, how to repair a hole in fiberglass parts like a pro, pools, pools and more resurfaced pools, love is in the air - epoxy resin ocean heart- video how-to, clear casting resin user guide, most common question during winter: how cold is too cold to work with resin, exotic vette corvette customization, bulk pricing option for large-scale fiberglass and resin projects, customer spotlight- canoe light fixture and a sup, proglas 1105 deep pour epoxy resin user guide, customer spotlight- motorcycle rear fender with fiberglass, repairing boat stringers with fiberglass and resin, creating soap with silicone molds made with artisil, fiberglass dcpd/ortho resin guide, pool resurfacing with fiberglass warehouse gelcoat, how to make your own epoxy resin chessboard, a comprehensive guide on how to fiberglass a deck, luxepoxy 1:1 table top/ art epoxy resin guide, customer spotlight- blackhawk helicopter, how to add different additives to resin or gelcoats: a beginner’s guide, customer spotlight- custom corvette build by rusted and busted, vinyl ester laminating resin guide, customer spotlight- top flite giant p-51 with 55cc gas engine, customer spotlight- epoxy resin tumblers, frequently asked questions (faqs) about our artisil silicone, mixing fillers with resin- types, mixing and consistencies, customer spotlight- proglas 1000 epoxy resin floor, simple candle making video tutorial using artisil 1025t silicone mold, angel fish window- table top epoxy resin art tutorial, artisil 1025t silicone mold making how-to video, another pool resurfacing project- before and after, tips and tricks for working with carbon fiber and resin, www.fiberglasswarehouse.com celebrates 20 years, delorean go kart- 3/4 scale copy of 1970 mclaren m14 f1 car rebuild, bathroom table top epoxy resin art- splish splash, making a fiberglass laminate: a step-by-step guide, customer project spotlight- fiberglass longboard, basic guide for making a candle using artisil silicone rtv rubber, new brand ambassador program, epoxy resin embellished trinket trays, customer project spotlight: 1956 dundee boat refinish, good, better, best...resins for your project, singing in the rain- proglas 1000 epoxy resin art tutorial, customer clear casting resin project, more pool resurfacing projects with gelcoat resin, basic fiberglass mold making guide, epoxy resin soap dishes, tips for working with rtv silicone for mold making, pool resurfacing- before and after pics, recent posts.
- Customer Spotlight: ProGlas Epoxy Projects March 07, 2024
- How to Repair a Hole in Fiberglass Parts Like a Pro February 29, 2024
- Pools, Pools and more Resurfaced Pools! February 20, 2024
- Love is in the Air!! - Epoxy Resin Ocean Heart- Video How-to February 13, 2024
- Clear Casting Resin User Guide February 06, 2024
- Most Common Question During Winter: How Cold is Too Cold to Work with Resin? January 30, 2024

Comparing box
How to Repair Fiberglass Boat Hull
- Uncategorized
- May 16, 2023

If you’re a boat owner, your fiberglass boat hull will need repair at some point. Don’t worry, though – it’s not as daunting of a task as it may seem! Anyone can easily repair a boat hull with the right tools and knowledge of boat maintenance management . As a licensed safety and first aid USCG Captain, I’m here to provide you with all the information necessary, so you can get back out on the water without worrying too much about how to repair fiberglass boat hull correctly. Let me walk you through everything from gathering materials to applying the final touches. By following my advice, you’ll soon have your boat looking like new again!
Overview Of The Process
Coincidentally, a large part of boat repairs is related to the hull. Whether made from aluminum or fiberglass boat hulls often require attention and maintenance .
The first step in any repair job is preparation – gathering all the necessary tools and materials beforehand, so you don’t have to keep running back and forth while working. The same applies here; preparing your workspace by cleaning off dirt, debris, and old paint helps ensure a successful outcome for repairing your fiberglass boat hull. Once prepped, use a putty knife or similar tool to remove any fragments still attached to the surface.
Next up are the actual repair steps. Begin by sanding down the affected area with 80-grit paper until it’s smooth enough to apply filler material like epoxy resin or polyester resin filler paste – both excellent choices for filling small cracks or holes in a fiberglass boat hull. After allowing adequate drying time (as specified by product instructions), apply primer followed by multiple layers of marine-grade automotive paint until desired results are achieved.
Finally, finish with two coats of clear varnish or urethane sealant for added protection against environmental elements such as saltwater exposure or sunlight damage.
Tools And Materials Needed
You’ll need epoxy resin, which comes in two parts: the resin and the hardener. This is used for filling holes or cracks in the hull caused by wear and tear or damage. You may also need gel coat paste; this will keep your paint job looking great after it’s been applied.
The most important tool here is a power drill with a hole saw attachment – this will be necessary for drilling out old hardware from your hull as part of the repair process. A good rubber mallet can come in handy when installing new hardware; just make sure that whatever hardware you use is compatible with your type of boat before purchasing it. Other items like rags, clamps, protective eyewear, and gloves should all be included in your toolkit so that you have everything you need close during the repairs.
Preparing The Fiberglass Boat Hull For Repair
To properly repair a fiberglass boat hull , preparation is paramount. To start this important process, one must first assess the damage on the hull and remove any debris that may have accumulated over time. A successful repair can be achieved confidently with careful consideration of these steps.
To begin preparing for repairs:
- Thoroughly inspect the area of damage to get an accurate understanding of what needs to be done
- Clear away any loose paint or surface buildup with sandpaper
- Vacuum out all dirt and dust from within the damaged area
- Use epoxy resin filler to seal off any open cracks in the hull before starting repairs
By following these simple steps when prepping a fiberglass boat hull, one can ensure that they are taking proactive measures towards making a lasting repair.
Making Repairs To The Hull
Now that you’ve prepped the hull for repair, it’s time to fix any damage. This can be done through various fiberglass boat hull repair techniques, including patching holes and sanding fiberglass boat hull.
Start patching holes or dents in the hull with epoxy resin. Mix equal parts of epoxy resin and hardener according to their instructions. Apply the mixture liberally over the affected area using a putty knife. Allow it to dry before continuing sanding.
To smooth out scratches and imperfections, start sanding off the top layer of fiberglass boat hull with medium-grit sandpaper. Use an orbital sander if possible; this will help ensure an even finish after repairs and allow for more precise control. Keep track of your progress, so you don’t accidentally go too deep into the material during sanding!
Finishing Up The Repair
Once the fiberglass boat hull is completely repaired, it’s time to finish up and make sure everything looks perfect. This will involve a lot of polishing, sanding, waxing, painting, and varnishing – all of which can feel like an eternity!
The first step is to properly sand all areas before applying any paint or varnish. You’ll want to use 220-grit sandpaper for this task – anything coarser could scratch off the epoxy resin used during repair. Once finished sanding, wipe away any dust residue using a damp cloth. Then move on to polishing with fine steel wool or a buffing pad to create a smooth surface – this will take care of any imperfections from repairs.
Once everything has been polished and is ready for coating, apply two layers of either primer or wax, depending on the material you plan to cover the area with. After that, you should apply two coats of marine-grade paint or three coats of clear varnish. With just one more coat left after this process, you’ll surely bring out a pristine shine on your newly repaired vessel worthy enough to show off at sea!

Frequently Asked Questions
How Long Does A Fiberglass Boat Hull Repair Typically Take?
When repairing a fiberglass boat hull, the time involved often depends on the damage. If you’re talking about minor scratches or dents, this could be done quickly with some basic supplies and know-how. On the other hand, if significant structural damage needs repair – such as cracks or breaks in the hull – then a more intensive approach will likely be required and may take longer to complete correctly.
No matter what type of repairs are being undertaken, preparation should always come first. Making sure everything is clean and debris-free before starting work can save much time later on.
Are There Any Special Environmental Considerations When Working With Fiberglass Boat Hulls?
Working on a fiberglass boat hull has special environmental considerations that must be considered. Fiberglass boat hull may contain hazardous materials that can impact the environment if not disposed of properly. It’s important to understand any special requirements for safely dealing with and disposing of these materials.
You need to identify the hazardous material in the fiberglass boat hull. Different types require different handling procedures, such as using protective gear like gloves or respirators when removing old layers of paint from the surface. Understanding how each type of hazardous material should be handled will help minimize your environmental footprint during repair work.
Are There Any Health Risks Associated With Working On Fiberglass Boat Hull?
The primary risk is exposure to dust particles created during sanding or grinding. This can contain irritating fibers and potentially hazardous chemicals used for laminating the boat’s structure. Therefore, always wear an approved respirator when working with fiberglass boat hull. Also, avoid contact between your skin and the material.
What Type Of Sealant Is Best To Use When Repairing A Fiberglass Boat Hull?
There are many options in choosing a sealant specifically designed for fiberglass repair . Typically, these products contain polyester resins or vinyl esters that provide excellent adhesion strength and durability when applied correctly. This ensures that any repairs made using this kind of sealant are strong enough to last over time without deteriorating due to moisture or other environmental factors. In addition, some specialized boat hull repair sealants can also help protect against UV rays from prolonged exposure to sunlight.
How Much Does It Cost To Repair A Fiberglass Boat Hull?
One of the first things people want to know is how much it will cost. Repairing a damaged hull can be expensive and time-consuming.
Firstly, the damage done will affect the price tag for repair costs. If the damage is severe or extensive, then more materials and labor will be needed than in a minor repair job. The exact materials used may also influence pricing – certain types are more expensive than others.
Secondly, depending on where you get your repairs done can make a difference too. Getting them done professionally at a marina might cost more but guarantees quality work, whereas DIY methods may reduce costs upfront but come with no warranty or guarantee.
Finally, remember that new parts such as hardware and accessories like cleats need to be purchased separately, so this should also be considered when budgeting for repairs.
It’s important to take time and care when repairing boat seats and fiberglass boat hull. It can be an expensive job, but it is also essential for maintaining your boat in good condition. The process may seem long and tedious at first, but once you get into the groove of things, it will become second nature. Keep in mind any environmental or health considerations when working on this type of project – safety always comes first!
At Boat Concierge, our expert team only uses market-grade sealants, epoxy resin filler, and proactive measures to ensure high-quality repair of fiberglass boat hull. Contact us today .
Fiberglass boat hull

How Often Should You Do Yacht Cleaning
Maintaining a yacht’s cleanliness is essential for its appearance, performance, and longevity. Just as you regularly care for your car or home, yacht cleaning demands

8 Boat Cleaning Hacks In Sarasota You Need to Know
Owning a boat in Sarasota is a source of pride and endless enjoyment, offering the thrill of adventure on open waters and moments of serene

7 Essential Tips to Protect Your Beloved Boat From a Sarasota Florida Storm
Florida is a haven for boating enthusiasts, with its stunning coastline and numerous waterways that beckon sailors year-round. However, this idyllic boating destination is also
The Boat Concierge is your trusted source in Sarasota for all your boating needs. We make boat ownership easier for you with our expert team and services.
Contact Information
- Phone: (941) 347-2628 (BOAT)
- [email protected]
- Address: PO BOX 3756 Sarasota, FL 34230
Keep in touch with us
- River City Live
- Newsletters
Old Boat Repair: How to flip a boat to fix it up
News4JAX Chief Meteorologist Richard Nunn flips his 1995 Scout 162 Sportfish with a gantry crane. Here's how to flip a boat so you can patch the bottom.
MORE VIDEOS
Watch news4jax at 4 p.m. : mar 19, 2024, path to the polls: how far will the supreme court go to regulate social media - vod, watch news4jax at noon : mar 19, 2024, river city+ : mar 19, 2024, watch the morning show : mar 19, 2024, river city live : mar 19, 2024, jacksonville beach residents sound off after 3 shootings sunday, watch news4jax at 6 a.m. : mar 19, 2024, watch news4jax at 5 a.m. : mar 19, 2024, watch news4jax at 4:30 a.m. : mar 19, 2024, watch news4jax at 11 p.m. : mar 18, 2024.
IMAGES
VIDEO
COMMENTS
Tips for safely using a polisher to restore your boat's finish.
Restoring a Boat's Finish. To restore shine to a fiberglass boat, it's necessary to remove the oxidized portion of the gelcoat, and return the outer surface to the glassy reflective finish it once had. It's necessary to polish, or compound first and then polish the boat to restore the finish. Polish is a mild abrasive that gently removes ...
Fiberglass Boat Restoration Tips . There are several steps to restore cloudy, oxidized fiberglass to bring the color back to your boat. You need to clean the hull, polish out the faded surface, then protect it all once you've brought back the shine. How you approach each step depends on just how much oxidation you have on the gelcoat.
Brightwork is what shows, but classic fiberglass boats often have structural wood, too—lumber-cored stringers and frames, plywood bulkheads, maybe plywood decks sheathed in fiberglass. (Some low-volume, semi-custom shops still build decks that way.) When restoring an older boat, both structural and decorative wood must be brought up to snuff.
I knocked a Chunk out of the bottom of my Boat! That's ok, I'm going to show You how to fix it. Gelcoat and Fiberglass repair can seem intimidating if you ha...
The first step in restoring a classic sailboat is finding the right boat. This can be a challenging process, as there are many factors to consider, such as the size, age, and condition of the boat, as well as your budget and personal preferences. Size: Think about how much space you and your family will need, both for living and storage.
Dewax. Before grinding, always wash the area around the hole thoroughly with a dewaxing solvent. The original fiberglass will have traces of mold release on the outer surface and wax surfactant on the inner surface. If you fail to remove the wax first, grinding will drag it into the bottom of the scratches and weaken the bond.
Learn Do It Yourself tips from a sailboat restoration company. Customize your boat or yacht. Want to refit the interior of a sailboat yourself? Learn Do It Yourself tips from a sailboat restoration company. ... Whether it is wood or fiberglass, knock every few feet along the hull. If possible, use a soft rubber mallet. Listen for sound changes ...
Fiberglass Rubbing Compound is designed to minimize gel coat damage while preparing your hull for a wax. This can be applied to "spot clean" common problems like oxidation and stains without completely removing the gel coat layer in the process. Remember to use this before adding a coat of wax to the boat, as this compound is designed to ...
Learning basic fiberglass repair techniques will save you money on hiring professionals. Invest in a fiberglass repair kit and follow instructional videos to tackle small cracks or holes. 8. Refinishing and Painting. For cosmetic improvements, you can save money by refinishing and painting your boat yourself.
Part 1 of 2. So You Damaged Your Gel Coat! That's ok, I'm going to show You how to fix it! Today I Will show you how to do a professional-grade Gelcoat repai...
As an example, you may buy a tired-looking 30-foot boat for $30,000. Add on around $25,000 for the restoration work carried out by skilled trades, plus $15,000 for your own time—a total cost of approximately $70,000. Compared to the price of a new 30-foot yacht of around $120,000, that's quite a saving. On the flip side, the resale value of ...
Few things are more disheartening to the boat owner than staring at the jagged edge of broken fiberglass. However, the repair-ability of fiberglass is one of its best characteristics. Even large holes in a fiberglass hull can be repaired with a bit of glass fabric, a supply of resin, and equal parts skill and care.
Once it is dry, grind down the high spots with 80-grit sandpaper until it is on the plane with the finished surface. At this point, clean off the sanded area, and assess the low spots. If there are still high spots, continue to grind them down. Next, you'll use a resin that's mixed with chopped strands of fiberglass.
Understanding Fiberglass Boat Repair. With 20 years of boating experience, I've learned that maintaining the integrity of a fiberglass boat is essential.The repair process involves several crucial steps which require attention to detail and a systematic approach.. Firstly, assessing the damage is critical. Fiberglass boats can suffer from a range of issues, from minor scratches to major holes.
Over time, the fiberglass gelcoat on your boat can break down. Constant UV exposure causes normal wear, but coming into a dock too fast, misplacing drill holes, or dropping a boat anchor can also cause damage that requires fiberglass gelcoat repair.. Fortunately, you can patch up most minor problem areas with the right approach and supplies.
Gelcoat Repair. Tape off the area around the damaged gelcoat. Boating Magazine. 3. Tape It Off. Carefully mask around the edges of the fiberglass boat repair area with two-inch-wide 3M ScotchBlue Multi-Surface Painter's Tape No. 2090. Give yourself a 16th of an inch of unmasked margin around the scratch, gouge or hole.
Paint it on with a brush. Spray it on with a spray gun. When doing fiberglass boat repairs, you'll most likely be painting or rolling it on in small batches. The way you'll do this is you'll mix up a small amount of resin that you can successfully paint on over the fiberglass within about 15 to 20 minutes.
Repairing the Bottom of a Fiberglass Boat. Clean the area: Start by thoroughly cleaning the damaged area with soap and water to remove any dirt, grease, or oil. Use a solvent-based cleaner if necessary to remove any stubborn stains. Sand the area: Use sandpaper to rough up the surface around the damaged area.This will help the repair material adhere better to the surface.
Photo 1: Remove old numbers and pinstripes to begin fiberglass repair. Set the heat gun to a low setting and peel off the old decals and numbers. Use adhesive remover to get rid of any residue. No boat spiff-up is complete without new license numbers, transom names and pinstripes.
If your fiberglass boat has a scratch or crack, then you can fix it yourself. Here are the steps to follow: -Clean the damaged area with a mild detergent and water, then sand it with 220 grit sandpaper. Clean with acetone. -Apply fiberglass with an epoxy or vinyl ester resin over the damaged area. If the repair is not below the waterline, you ...
The experts at Metan Marine Restoration show how to repair a small section of damaged hull, right down to the new gelcoat application. Check out the full art...
Mix equal parts of epoxy resin and hardener according to their instructions. Apply the mixture liberally over the affected area using a putty knife. Allow it to dry before continuing sanding. To smooth out scratches and imperfections, start sanding off the top layer of fiberglass boat hull with medium-grit sandpaper.
JACKSONVILLE, Fla. - We live in Florida, known as the state beloved by boat enthusiasts. According to the FWC, Florida leads the nation in recreational boat numbers, boasting over 1 million ...
Here's how to flip a boat so you can patch the bottom. 62 ... Tags: boat repair, flip a boat over, florida boats, gantry crane, news, ...