Average Cost to Replace Running Rigging (with Examples)
Replacing the running rigging is a crucial part of the upkeep of your sailboat. Its cost can vary, mainly depending on the size of your boat, the type of lines used, and whether you opt for professional installation or take on the project yourself. In this article, we will discuss some examples to give you a better understanding of what you may be looking to spend on running rigging replacement.
For a 30-foot sailboat, the cost to replace a main halyard can be around $500. The estimated cost of replacing your boat's running rigging with sheets is around $1,700–$2,000+. For an average 40-foot boat, you can expect to pay around $4,000 for wire rigging replacement, which may include control lines.
The average maintenance cost for boats under 30 feet is around $255 per month, or just under $3,000 per year, so you may want to plan for periodic rigging replacement. This way, you can avoid unexpected expenses and maintain your sailboat's performance and safety.
- Replacing the running rigging on your sailboat can be a necessary expense, but also an investment in safety and performance.
- Timely replacement of your sailboat's running rigging not only ensures a smooth sailing experience but also prevents costly scenarios such as having to hire a rigger to go up your mast to replace a broken halyard.
- Sta-set-x might be a suitable option for halyards as it has less stretch compared to other materials and only costs a few pennies more than regular sta-set.
- Make sure to include other additional expenses (like shiv replacement) if needed when estimating the cost.


On this page:
Average cost to replace running rigging, cost breakdown by rigging type, factors affecting replacement cost, ways to save on replacement costs, understanding running rigging replacement, when to replace running rigging.
In this section, we'll cover the average costs associated with replacing running rigging, focusing on different materials and professional services.
Dyneema lines offer a long-lasting solution
Dyneema lines are known for their strength, durability, and lightweight nature. They can be more expensive than other options, but they offer a long-lasting solution. The cost of replacing running rigging with Dyneema lines can be:
Keep in mind that pricing can vary based on the quality and brand of the lines.
Polyester lines offer a good balance between strength and handling
If you're looking for a more budget-friendly option, consider using double braid polyester lines. They are more affordable than Dyneema but still offer a good balance between strength and handling. The cost of polyester lines can be:
Wire rope for replacing running rigging
For specific applications like certain types of forestay and backstay, you might require wire rope. The cost of stainless steel wire rope varies depending on the diameter and type.
Basic materials cost for your running rigging
As an example, let's assume you're replacing all the running rigging for a 30-foot sailboat with polyester lines. Your total basic material cost could be around $180–300 with approximately 200 feet of line (main halyard, jib halyard , sheets, etc.).
Professional services cost to replace your running rigging
If you decide to hire a professional rigger, the service fees might increase the overall cost. For example, to replace the main halyard on a 30-foot sloop, a professional rigger may charge close to $500. Labor rates can vary, so it's recommended to get quotes from multiple riggers in your area to find the best deal.
Here's an overview table with the cost to replace rigging for different boat and rig types.
Below, we will break down the average cost of replacing running rigging for your sailboat, with examples for each type of rigging: Halyards, Sheets, and Control Lines.
Halyard replacement costs vary depending on the length, material, and quality of the line you choose
Replacing halyards can vary in cost depending on the length and material. For instance, a basic double braid polyester halyard for a 30-foot sailboat may cost around $500.
For a standard 30-foot sailboat, you can expect the cost to be around $500 for the main halyard. Keep in mind, this estimate includes installation by a professional rigger. If you opt to replace it yourself, the price might be lower. It is essential to research the specific halyards your boat requires and compare prices from different retailers to find the best deal.
Sheet replacement costs will depend on the size, material, and quality of the line
Sheets are essential for controlling sails, and their replacement cost also depends on length, material, and whether you're doing the work yourself or hiring a professional. Here are some average costs for different types of sheets:
A common material for sheets on smaller sailboats is a double braid polyester line. The estimated cost of replacing your boat's running rigging with this material is around $1,700–$2,000+ for a 30-foot sailboat. This cost includes hiring a professional to complete the task. Keep in mind that if you are comfortable replacing the sheets yourself, the overall cost might be lower. As with halyards, research your specific needs and compare prices from different retailers.
Control line replacement costs will vary depending on your sailboat's configuration
Control lines cover a wide range of rigging elements, each with different cost considerations. Some common control lines and their respective average costs include:
Control lines are often replaced with materials similar to those used for sheets, like double braid polyester. Unlike halyards and sheets, control lines are specific to the control systems used on your boat, such as traveler, vang, or furling systems, so the costs will vary depending on your sailboat's configuration. For an average 40-foot boat, you can expect to pay around $4,000 for wire rigging replacement, which may include control lines. It's crucial to understand the control lines you need to replace and their specifications before sourcing the best prices and materials for the job.
Material and quality of the rigging components
Higher-quality materials, such as Sta-Set-X , are more durable and offer less stretch, which translates to a slightly higher price. On the other hand, more affordable materials might not provide the same level of performance or longevity, requiring more frequent replacements.
Boat size impacts the amount of running rigging you'll need
A larger vessel requires more line, sheet, and other components, increasing the overall cost of replacement. For example, replacing the standing rigging on a sailboat can cost around $4,000 every ten years .
Labor charges when replacing running rigging
If you choose to hire professional help to undertake the project, you can expect to pay for their time and expertise. Labor costs vary by region and can also depend on the complexity of your boat's rigging system.
When it comes to replacing your sailboat's running rigging , there are a few ways to save money without sacrificing quality. By following these tips, you can ensure that you get the best value for your investment.

DIY approach on running rigging replacement
Although it might take some time and effort, learning how to replace your own running rigging will save you labor costs. Many sailors find this process rewarding and educational. Familiarize yourself with the different components and materials used in your sailboat's running rigging system, then research how to install and maintain them. There are numerous online tutorials and guides available to help you along the way.
Purchasing rigging materials in bulk
Instead of buying only the specific amount that you need for your boat, consider buying larger quantities at lower prices per foot. For example, Sampson Ropes and other manufacturers offer double braid Dacron rope products at prices ranging from $1.00 to $2.50 per foot. By purchasing larger quantities, you may be able to secure a more favorable price per foot, which will ultimately lower your overall replacement cost.
Take advantage of shopping deals and discounts
Keep your eyes open for sales and promotions at your local chandleries or online retailers. Signing up for newsletters from sailing or marine supply stores can provide you with access to exclusive discounts and information about upcoming sales. Additionally, consider purchasing gently used or clearance items, which can offer significant savings without sacrificing quality.
Running rigging consists of all the lines, sheets, and halyards used to haul and operate the sails. As a boat owner, you should be aware of the signs that your running rigging needs replacement and the average costs associated with it.
First, let's look at the reasons for replacing your running rigging. The primary reason is wear and tear caused by continuous use, exposure to the sun, saltwater, and friction . Over time, these factors can weaken your lines, making them prone to breaking or developing other issues that can impact your boat's functionality and safety. It's important to inspect your running rigging regularly and spot any signs of wear like fraying, chafing, or discolored fibers . These indicate a need for replacement before any accidents happen.
Now, let's discuss the average cost of replacing your running rigging. The overall cost varies depending on factors such as your boat's size, the quality of materials used, and labor expenses. For a 30-foot sailboat, the cost to replace a main halyard without going aloft can be around $500, including labor and materials. However, this is just an example, and costs may differ based on your specific boat and your location.
When planning to replace your running rigging, you can opt for various material options, each with its own price range and characteristics. Materials like polyester, Dyneema, and Vectran can offer different benefits, such as increased strength, reduced stretch, and improved durability. It's important to research and choose the right material for your sailboat based on your needs and budget.
Another aspect of expenses to consider is the labor cost , which depends on the rigging service you hire and the complexity of the replacement job. For instance, some tasks may require a rigger to climb the mast , adding to labor hours and overall costs. To save money, you can learn to do some running rigging replacements yourself; however, make sure you know your limits and call a professional for complex tasks.

Signs of wear and fraying on your running rigging
Regularly inspect key areas such as halyards, sheets, and control lines . If you notice any frayed or chafed sections, consider replacing the affected line immediately. A broken halyard can lead to expensive repairs and even pose safety risks for you and your crew while sailing. Keeping these components in good condition is crucial for smooth sailing and the optimal performance of your boat.
Maintenance schedule that includes regular inspection and cleaning of your lines
A proactive approach to maintaining your running rigging will prolong its life and ensure the safety of your vessel. It's a good idea to establish a maintenance schedule that includes regular inspection and cleaning of your lines. While it may be tempting to wait until a problem arises, preventative upkeep can help you avoid costly repairs or emergency situations in the long run . Check your rigging for signs of wear and replace parts when necessary to maintain optimal sailing conditions.
Leave a comment
You may also like, sailboat parts explained: illustrated guide (with diagrams).
When you first get into sailing, there are a lot of sailboat parts to learn. Scouting for a good guide to all the parts, I couldn't find any, so I wrote one myself.

Guide to Understanding Sail Rig Types (with Pictures)

Average Cost to Replace Standing Rigging (with Examples)

What's the Best Rig for Single-Handed Sailing?

The Ultimate Guide to Sail Types and Rigs (with Pictures)
Own your first boat within a year on any budget.
A sailboat doesn't have to be expensive if you know what you're doing. If you want to learn how to make your sailing dream reality within a year, leave your email and I'll send you free updates . I don't like spam - I will only send helpful content.
Ready to Own Your First Boat?
Just tell us the best email address to send your tips to:
No products in the cart.
Sailing Ellidah is supported by our readers. Buying through our links may earn us an affiliate commission at no extra cost to you.
The Running Rigging On A Sailboat Explained
The running rigging on a sailboat consists of all the lines used to hoist, lower, and control the sails and sailing equipment. These lines usually have different colors and patterns to easily identify their function and location on the vessel.
Looking at the spaghetti of lines with different colors and patterns might get your head spinning. But don’t worry, it is actually pretty simple. Each line on a sailboat has a function, and you’ll often find labels describing them in the cockpit and on the mast.
In this guide, I’ll walk you through the functions of every component of the running rigging. We’ll also look at the hardware we use to operate it and get up to speed on some of the terminology.
The difference between standing rigging and running rigging
Sometimes things can get confusing as some of our nautical terms are used for multiple items depending on the context. Let me clarify just briefly:
The rig or rigging on a sailboat is a common term for two parts, the standing , and the running rigging.
- The standing rigging consists of wires supporting the mast on a sailboat and reinforcing the spars from the force of the sails when sailing. Check out my guide on standing rigging here!
- The running rigging consists of the halyards, sheets, and lines we use to hoist, lower, operate and control the sails on a sailboat which we will explore in this guide.
The components of the running rigging
Knowing the running rigging is an essential part of sailing, whether you are sailing a cruising boat or crewing on a large yacht. Different types of sailing vessels have different amounts of running rigging.
For example, a sloop rig has fewer lines than a ketch, which has multiple masts and requires a separate halyard, outhaul, and sheet for its mizzen sail. Similarly, a cutter rig needs another halyard and extra sheets for its additional headsail.
You can dive deeper and read more about Sloop rigs, Ketch Rigs, Cutter rigs, and many others here .
Take a look at this sailboat rigging diagram:
Lines are a type of rope with a smooth surface that works well on winches found on sailboats. They come in various styles and sizes and have different stretch capabilities.
Dyneema and other synthetic fibers have ultra-high tensile strength and low stretch. These high-performance lines last a long time, and I highly recommend them as a cruiser using them for my halyards.
A halyard is a line used to raise and lower the sail. It runs from the head of the sail to the masthead through a block and continues down to the deck. Running the halyard back to the cockpit is common, but many prefer to leave it on the mast.
Fun fact: Old traditional sailboats sometimes used a stainless steel wire attached to the head of the sail instead of a line!
Jib, Genoa, and Staysail Halyards
The halyard for the headsail is run through a block in front of the masthead. If your boat has a staysail, it needs a separate halyard. These lines are primarily untouched on vessels with a furling system except when you pack the sail away or back up. Commonly referred to as the jib halyard.
Spinnaker Halyard
A spinnaker halyard is basically the same as the main halyard but used to hoist and lower the spinnaker, gennaker, or parasailor.
The spinnaker halyard is also excellent for climbing up the front of the mast, hoisting the dinghy on deck, lifting the outboard, and many other things.
A sheet is a line you use to control and trim a sail to the angle of the wind . The mainsheet controls the angle of the mainsail and is attached between the boom and the mainsheet traveler . The two headsail sheets are connected to the sail’s clew (lower aft corner) and run back to each side of the cockpit.
These are control lines used to adjust the angle and tension of the sail. It is also the line used to unfurl a headsail on a furling system. Depending on what sail you are referring to, this can be the Genoa sheet , the Jib sheet , the Gennaker sheet , etc.
The outhaul is a line attached to the clew of the mainsail and used to adjust the foot tension. It works runs from the mainsail clew to the end of the boom and back to the mast. In many cases, back to the cockpit. On a boat with in-mast furling , this is the line you use to pull the sail out of the mast.
Topping lift
The topping lift is a line attached to the boom’s end and runs through the masthead and down to the deck or cockpit. It lifts and holds the boom and functions well as a spare main halyard. Some types of sailboat rigging don’t use a topping lift for their boom but a boom vang instead. Others have both!
Topping lifts can also be used to lift other spars.
A downhaul is a line used to lower with and typically used to haul the mainsail down when reefing and lowering the spinnaker and whisker poles. The downhaul can also control the tack of an asymmetrical spinnaker, gennaker, or parasailor.
Tweaker and Barber Haul
A tweaker is a line, often elastic, attached to the sheet of a headsail and used to fine-tune the tension on the sheet.
Barber haul
A barber haul is a line attached to a headsail’s sheet to adjust the sheeting angle to the wind. It is often used to pull the clew further toward the center or outboard than the cars allow.
Boom Preventer
A boom preventer is a line attached to the boom’s end when sailing off the wind. Its function is to hold the spar in place and prevent it from swinging wildly.
If the boat were to get an accidental gybe, it could cause serious damage to the rigging or even harm people on board. It is important for the rigger to be cautious when setting up the boom preventer.
Running Backstay
Running backstays is similar to a normal backstay but uses a line instead of a hydraulic tensioner. Some rigs have additional check stays or runners as well.
Bonus tip: Reefing
The term reefing is used when reducing the effective sailing area exposed to the wind of a given sail. Headsails are usually reefed by partially furling them in, and they often have marks for what we refer to as 1st, 2nd, and 3rd reefs.
The mainsail is reefed similarly with an in-mast furling or in-boom furling system.
On a traditional mast, we use a system called slab reefing. The system has reefing lines running through the boom to reinforced points on the luff and leech, allowing you to pull the sail down to the boom and effectively reduce the sail area.
Having at least two reefing points in the mainsail is normal, but most cruising sailboats have 3. The 3rd is used for the heaviest conditions, giving you only a tiny bit of sail area exposed to the wind.
You want to reef your sails before the wind increases to a point where your boat gets overpowered.
It is essential to practice your reefing technique . You will find yourself in situations with rapidly increasing winds where you need to reduce your sails quickly.
Rule of thumb: If you think setting a reef might be a good idea, do it.
Shaking a reef is the term used when we sail with a reefed sail and want to increase the sail area back to full.
Hardware used for sail handling and the running rigging
Furling system.
Most sailboats have their headsail on a furling system. A furling system is a tube that runs along the forestay from the bottom furler drum to the masthead swivel.
This system allows you to roll the headsail around the forestay, making furling the sail in and out accessible. It is also convenient when reefing the sail when the wind picks up, as you can easily do this from the safety of the cockpit. These furling systems come in manual versions and electric versions.
In-mast furling
In-mast furling is a system that rolls the mainsail in and out of the mast. To unfurl the mainsail, we use the outhaul .
In-boom furling
In-boom furling is a system that rolls the mainsail in and out of the boom. This system has been costly and has mostly been seen on big yachts earlier. They are becoming more affordable and common on smaller boats, though. To unfurl this setup, we use the main halyard.
A Stack pack is also called a Lazy Bag or Lazy Pack. It is a bag with a zip attached to the boom where the mainsail is stored when unused. It protects the mainsail from UV rays from the sun and weather elements. It is a very nice and tidy way to store the mainsail and reefing lines if you don’t have in-mast or in-boom furling.
Lazy Jacks is a system of lines running from the stack pack to the mast. The Lazy Jacks guide the mainsail up and down from the Stack Pack and prevent it from falling down on the deck. It is also possible to rig Lazy Jacks without a Stack Pack.
A block is a pulley with a sheave wheel. Blocks are used to change the direction of a pull on a line or rope and give a mechanical advantage. They have many uses, especially onboard sailboats.
A winch is a metal drum that gives you a mechanical advantage to control and tighten lines. These can be operated by turning a rope around it and pulling manually or by a winch handle to get more force. Most modern winches are self-tailing, which means they lock the line on so you can winch the line without holding on to it. Some boats even have electrical winches operated by a button.
Mainsheet Traveler
The mainsheet traveler is a horizontal track that the mainsheet is attached to through a series of blocks. The traveler enables you to adjust and lock the boom at an angle and also plays a critical part in trimming the mainsail.
Most cruising sailboats have their traveler attached to the top of the coachroof in front of the spray hood. A racing boat typically has the traveler in the cockpit near the helm to give the helmsman better control over the mainsheet.
The cars are basically a pulley or block attached to a track on the port and starboard deck that your headsail sheets run through. Cars are used to control the angle of the sheet between the clew and the deck. The cars are handy when you trim the sail to set the right balance of tension between the foot and leech, depending on your point of sail.
The jammer is used to lock a line in place. Most sailboats use these for locking the halyards, mainsheet, outhaul, reef lines, traveler lines, boom vang lines, etc. You can pull or winch a line through a closed jammer, but it won’t run away if you let go of it unless you open the lock.
As I explained earlier, it is normal to have most or all of the lines led back to the cockpit, and they are usually run through a series of jammers.
The jammers are often labeled with the name of the line it locks, which makes it easier to remember which line goes where.
Spinnaker Pole
A spinnaker pole is a spar used to wing out a headsail when sailing off the wind, particularly the spinnaker. The spinnaker pole should have the same length as the distance between the mast and the forestay measured along the deck. We use a fore and aft guy and the pole’s topping lift to rig a pole correctly.
The rigging varies depending on the layout of the boat, but it usually looks like this:
- One line runs from the bow to the end of the pole.
- An aft line runs from near the stern to the end of the pole.
- A topping lift is used to raise and lower the pole.
Whisker Pole
A whisker pole is similar to the spinnaker pole and is rigged similarly. It is typically built lighter and attached to a track on the mast. These can be found in fixed lengths or adjustable lengths. Ideally, the length should be the same as the foot of the headsail you intend to pole out.
Boom Vang/Rod Kicker
The Boom Vang has a few different names. Rod-kicker, kicking strap, or kicker. It is used to tension the boom downwards. When you are sailing downwind and have the boom far out, the mainsheet won’t pull the boom down as much as inboard, and you can then use the vang to adjust the twist and shape of the mainsail.
Mooring line
A mooring line is a traditional rope lead through a fairlead to the vessel’s cleat and a mooring buoy, key, or pontoon.
Final words
Congratulations! By now, you should have a much better understanding of how the running rig on a sailboat functions. We’ve covered the different lines, their purpose, and the hardware used to operate them. I hope you’ve enjoyed this guide and learned something new.
Now it’s time to take what you’ve learned and put it into practice by getting out on the water, setting sail, and getting hands-on experience with the lines.
Or you can continue to my following guide and learn more about the different types of sails .
Sharing is caring!
Skipper, Electrician and ROV Pilot
Robin is the founder and owner of Sailing Ellidah and has been living on his sailboat since 2019. He is currently on a journey to sail around the world and is passionate about writing his story and helpful content to inspire others who share his interest in sailing.
Leave a Reply Cancel reply
Your email address will not be published. Required fields are marked *
Sailingmates
A site for sailors, by sailors, replace your sailboat running rigging, replacing running rigging on an older sailboat.
If you’re thinking of buying a used sailboat it’s probable that your final selection will be a boat that is a few years old – and the halyards, mainsheet, backstay, jibsheets and other running rigging will probably look a little old, dirty and frayed.
Your first thought may be to replace this old stuff with some of the bright new high tech line you can find in your local chandlery.
But you should think carefully before you go ahead and buy any high tech replacement running rigging. You could be setting yourself up for some serious problems, as well a spending a lot of unnecessary money into the bargain.
high tech is too strong
The biggest problem with rigging and older sailboat with high-tech lines to control the sails is that the lines are too strong for the boat. Old turning blocks, padeyes, sheaves and cam cleats as well as genoa tracks and rope clutches are just not capable of handling the loads you can exert using high tech line.
Consider this – a half inch diameter Samson Tech-12 (12 Strand Technora) line has an average breaking load of 33,000 pounds.
You could lift your boat with it!
And if you get a young, strong, enthusiastic “gorilla” on a halyard winch, he could pull the headboard out of the sail, damage the sheave at the masthead or pull the turning block at the base of the mast out of the deck.
no knots allowed
Tests done by the magazine Practical Sailor and others show that if you tie any type of knot in a high-tech line, you can reduce the breaking strength of the line by up to 80%. With very slippery high tech line it is also possible to pull the knot through itself, and with an extra slippery line such as Yale Light it’s even possible to pull an eye splice out..
This is a very serious problem for the average sailor.
Here are the problems in a nutshell:
- a bowline or other knot in a high tech line reduces the breaking strength by up to 80%
- for jib sheets you must increase the line size to account for the reduced strength – more $$$$
- an eye splice is required to attach a shackle to a halyard. Splices should be made by a professional
- high tech line is very difficult to cut. Normal rigging knives and hot knives are almost useless
- all turning blocks and sheaves must have a diameter of at least 8 times the line diameter
- old sheaves, turning blocks and other hardware will probably not be strong enough for high tech line
- high tech line can cost up to $10 per foot
- splicing any of these high tech lines is not for the faint hearted!
a possible solution
Generally it’s much better to stay with the more traditional line for the running rigging of older boats.
In the US, Sampson, New England Ropes and Yale all make a double braid dacron line very suitable for almost all the running rigging on an older sailboat.
Sampson Ropes make a double braid dacron called XLS, New England Ropes make a similar product called Sta-Set and Yale Ropes product is called Vizzion. Marlow Ropes in the UK produce Marlowbraid.
These products sell from $1.00 to $2.50 per foot. You’ll need about 500 feet for an average 30 footer.
Any line that you have to handle such as jib sheets, halyards and mainsheet should be about half inch (12mm) diameter for a good grip, and jib sheets and mainsheets should be one of the “softer” feel products.
As I have done a fair amount of club racing, my personal preference would be to use any of the above products for everything except the halyards and then go for a lighter, low stretch, high tech product such as New England Ropes T-900 for the halyards and get the eye splices done professionally.
Running Rigging for Sailboats: Everything You Need to Know
by Emma Sullivan | Aug 9, 2023 | Sailboat Maintenance

Short answer running rigging for sailboats:
Running rigging refers to the set of lines or ropes used to control the sails on a sailboat. It includes halyards, sheets, and control lines that regulate sail positioning, trim, and hoisting. These essential components are crucial for maneuverability and sail adjustment during sailing.
Introduction to Running Rigging for Sailboats: What You Need to Know
Sailing has captivated mankind for centuries, offering a unique sense of freedom as we harness the power of the wind to glide gracefully across the water. But behind this graceful dance lies an intricate system of ropes, lines, and cables known as running rigging. In this blog post, we’ll dive deep into the world of running rigging for sailboats and provide you with all the essential knowledge you need to embark on your sailing journey.
So, what exactly is running rigging? In simple terms, it refers to all the ropes and lines that control and adjust various parts of the sails on a sailboat . These components play a vital role in maneuvering your vessel and optimizing its performance on the water.
Let’s now take a closer look at some key elements of running rigging:
1. Halyards: Starting from the topmast, halyards are used to hoist or raise sails. There are different types of halyards depending on the type and size of sail being raised – genoa halyard for headsails, main halyard for mainsails, spinnaker halyard for spinnakers, etc. It’s crucial to have properly sized and well-maintained halyards that can withstand high loads while ensuring smooth operation.
2. Sheets: Sheets are lines connected to any control point on a sail such as clew (lower aft corner) or leech (outer edge). The primary function is to trim or adjust the shape and angle of your sail by controlling its tension. Jib sheets control headsail(s), while main sheets handle mainsails – their correct lengths contribute significantly to achieving optimal airflow over your sails .
3. Control Lines: These lines allow you to fine-tune specific aspects related to sail control . For example, cunningham (for mainsails) adjusts luff tension, outhaul regulates foot shape and tension (especially mainsails), and vang controls leech tension. These lines enable you to precisely tailor your sails to the ever-changing wind conditions, optimizing performance and speed.
4. Reefing Lines: When winds become too strong to handle full sails, reefing allows you to reduce sail area by partially furling or folding it. Reefing lines, often associated with booms or mast cars, make this process smooth and efficient. Understanding how to properly set up reefing lines is crucial for safety during inclement weather while ensuring your sailboat remains manageable in adverse conditions.
5. Lazy Jacks: Tired of dealing with a chaotic heap of lines when dropping your mainsail? Enter lazy jacks – an ingenious system that guides the sail down onto the boom neatly. These lines crisscross above the boom and effectively contain the falling sail until it rests securely on deck . Lazy jacks are a game-changer for solo sailors or those seeking a hassle-free experience when stowing their main sails .
6. Running Backstays: Designed for use on boats with fractional rigs or certain types of staysails, running backstays provide additional support to the mast from behind. By alleviating excessive mast bend under heavy loads, they enhance overall rig stability and performance in varying sailing conditions.
The world of running rigging offers endless possibilities for customization and upgradeability as per your specific sailing needs – whether you’re participating in racing competitions or unwind on leisurely cruises along coastal waters.
In conclusion, understanding running rigging is essential for any aspiring sailor looking to master their craft. It’s not merely a tangle of ropes; rather, it represents the fine art of controlling your vessel’s performance through precise adjustments of its sails and related components .
So next time you set sail on your magnificent vessel across sparkling waters, take a moment to appreciate the intricate web of ropes working together behind the scenes. Embrace the power and beauty of running rigging, knowing that it is your trusted friend in your quest for sailing excellence.
How to Choose the Right Running Rigging for Your Sailboat
Choosing the Right Running Rigging: The Art of Sailing Efficiency
When it comes to navigating the open water on your beloved sailboat, having the right running rigging in place can make all the difference in the world. But with so many options available, how do you go about selecting the perfect rigging that suits your sailboat ‘s needs? Fear not, as we are here to guide you through this challenging decision-making process.
First and foremost, one must understand that running rigging plays a vital role in optimizing the performance and safety of your sailboat. Essentially, it is a set of ropes and lines responsible for controlling various aspects of your boat’s sails during navigation. Now let’s dive into some considerations that will help you make an informed decision while choosing the ideal running rigging:
1. Understand Your Specific Requirements: Begin by assessing the specific needs of your sailboat . Are you a recreational sailor who enjoys leisurely cruises or an adventurous racer seeking maximum speed? The purpose and usage of your sailboat will heavily influence your choice of running rigging. Performance-oriented sailors may opt for high-tech materials such as Dyneema® or Spectra®, known for their exceptional strength-to-weight ratio.
2. Rope Selection – Material Matters: The material used for constructing running rigging significantly impacts its performance, durability, and handling. Traditional choices like polyester (Dacron) offer reliable strength at an affordable price point but may stretch over time. Alternatively, advanced fibers like Dyneema® provide excellent strength while being significantly lighter and less prone to elongation.
3. Tailoring Diameter Choices: While deciding on rope diameter may seem trivial initially, it holds immense importance in enhancing grip and ease of use for crew members aboard. Thicker lines tend to be more durable but might compromise handling efficiency due to increased bulkiness. Conversely, thinner lines offer improved flexibility but may lack adequate strength under heavy loads.
4. Understanding Line Construction: Different line constructions serve distinct purposes. A single braid construction, for example, offers enhanced grip and durability, whereas a double braid provides greater strength and handling flexibility. By considering the specific requirements and onboard conditions your sailboat faces, you can select the most appropriate line construction for optimal performance.
5. Balancing Stretch and Performance: Stretch is an inherent property of all ropes, but excessive elongation can adversely affect a sailboat’s maneuverability and overall power efficiency . For racers seeking maximum performance, low-stretch lines like Dyneema® are ideal. However, cruisers might prefer lines with moderate stretch to absorb shocks and prevent sudden jolts during maneuvers.
6. Colorful Choices for Easy Identification: While aesthetics may not seem critical when choosing running rigging at first glance, opting for lines that contrast against your sail colors can significantly improve crew coordination during hectic moments on board. Bold colors also make it easier to identify different lines quickly or spot potential tangles before they become problematic.
7. Seek Professional Advice: When in doubt or faced with multiple conflicting options, consulting professionals with extensive sailing experience can be invaluable. Sailmakers or rigging experts possess intricate knowledge of various rigging configurations suitable for different boat sizes and sailing styles. They can provide tailored recommendations based on your particular needs and constraints.
In conclusion, selecting the right running rigging requires careful consideration of factors such as boat usage, material selection, rope diameter, line construction, stretch characteristics, color coding possibilities, and professional advice where needed. Armed with this knowledge and a clear understanding of your sailboat’s requirements, you’ll navigate the vast seas efficiently while ensuring optimal safety and performance – seizing countless memorable adventures aboard your prized vessel!
Step-by-Step Guide: Setting Up Running Rigging for Your Sailboat
Setting up running rigging for your sailboat may seem like a daunting task, especially if you’re new to sailing. However, with this step-by-step guide, we’ll walk you through the process in a detailed, professional, witty, and clever way that will make it easy and fun!
Step 1: Assess Your Needs Before diving into setting up your running rigging, take some time to evaluate your sailing style and preferences. Consider factors like the size of your sailboat, the type of sailing you plan to do (racing or cruising), and any special requirements or equipment you might need.
Step 2: Gather Your Materials Now that you know what you need for your specific setup, gather all the necessary materials. This may include ropes (or lines), blocks, cleats, shackles, winches, and any other hardware required for your particular rigging configuration . Make sure to choose high-quality materials that can withstand the pressures of sailing.
Step 3: Plan Your Rigging Configuration Next up is planning! Think about how each line will be led through blocks or pulleys and where they will be attached on deck. This requires careful consideration as it affects both functionality and aesthetics. Aim for an organized layout that minimizes clutter while maximizing efficiency.
Step 4: Install Mast Hardware Start by installing any mast hardware needed for attaching halyards (lines used to raise sails) and other standing rigging components. Be precise in measuring distances between attachment points to ensure proper tension on the lines later on.
Step 5: Run Halyards With the mast hardware in place, run your halyards from their respective attachment points at the masthead down to where they will be managed on deck. Take care to avoid tangling ropes or creating unnecessary friction points along their path.
Pro Tip: As you work on this step, keep a witty pun jar nearby – every time you come up with a clever nautical pun, drop a quarter or dime. This will not only add some entertainment but also motivate you to think outside the box!
Step 6: Lead Control Lines Control lines, such as sheets and reefing lines, play a crucial role in adjusting sail trim and managing different sailing conditions. Run these rigging lines from their respective attachment points on the sails through blocks and down to the cockpit or other manageable locations.
Step 7: Cleat Securely Once you have all your running rigging lines in place, securely cleat them off at designated cleats on deck. Cleating properly is crucial for safety and ensures that your sails are appropriately tensioned while sailing.
Step 8: Test & Adjust Now it’s time for the moment of truth – test out your newly set-up running rigging! Take your sailboat out for a spin (pun intended), and pay attention to how smoothly the lines run through blocks and pulleys . Make any necessary adjustments to improve functionality or eliminate any unwanted friction points.
Final Thoughts Setting up running rigging for your sailboat may seem overwhelming at first, but by following this step-by-step guide with our witty tips along the way, you’ll be able to tackle this task with confidence. Remember, practice makes perfect when it comes to understanding how different adjustments affect boat performance.
So grab your materials, unleash your inner sailor wit, and get ready to enjoy smooth sailing with perfectly set-up running rigging!
Frequently Asked Questions About Running Rigging for Sailboats – Answered!
Running rigging plays a crucial role in the sailing of boats, providing control and maneuverability on the water. However, there are often questions surrounding this topic that can leave even experienced sailors scratching their heads. To help demystify running rigging for sailboats, we have compiled a list of frequently asked questions and provided comprehensive answers. So hoist those sails and get ready to explore the world of running rigging!
1. What exactly is running rigging? Running rigging refers to the various ropes used onboard a sailboat that control its sails, such as halyards, sheets, and control lines. Unlike standing rigging (the fixed cables and rods that support the mast), running rigging is adjustable and subject to frequent use during sailing maneuvers.
2. How important is choosing the right type of rope for my running rigging? Selecting the appropriate rope for your running rigging is paramount as it directly impacts performance on your boat. Factors like strength, stretch, weight, grip, and handling all come into play when choosing between materials like nylon, polyester, or Dyneema®️. Understanding these characteristics will enable you to optimize your sail ‘s efficiency and responsiveness.
3. Should I go for colored ropes or stick with plain white ones? While aesthetics play a role in color choice for running rigging, functionality should always take precedence over style. Colored ropes can aid in differentiating between different types of lines quickly and conveniently. For example, using red for port side lines and green for starboard side lines can eliminate confusion under pressure situations where clarity is crucial.
4. Are there any essential knots every sailor should know when dealing with running rigging? Absolutely! Learning some basic knots will greatly assist you when working with your boat’s running rigging system. The bowline knot allows you to make a secure loop at the end of a line while maintaining its strength. The cleat hitch helps you secure a line around a cleat, while the figure-eight knot prevents the end of a line from slipping through blocks or other hardware.
5. Can I easily replace my running rigging on my own, or should I seek professional assistance? Replacing your running rigging can often be done by sailors with some DIY skills and knowledge. However, it’s essential to consult with sailboat experts or riggers to ensure proper material selection and installation techniques. Their expertise can help you avoid rigging mishaps and costly mistakes that could jeopardize your safety on the water.
6. How frequently should running rigging be inspected and replaced? Regular inspection is crucial to assess the condition of your running rigging and identify any signs of wear or damage. Depending on usage and exposure to environmental elements like UV rays, you might need to replace certain lines every few years or sooner if they show visible signs of deterioration. Remember, prevention is always better than cure when it comes to sailing equipment .
7. What are some common mistakes to avoid when dealing with running rigging? One common mistake is neglecting regular maintenance and inspection of your running rigging, which can lead to unexpected failures at critical moments while sailing. Another mistake is overlooking proper line handling techniques like coiling ropes correctly to prevent kinks or twists that could compromise their strength.
In conclusion, understanding the ins and outs of running rigging is vital for any sailor looking to optimize their boat’s performance on the water. By selecting suitable ropes, learning essential knots, seeking professional advice when needed, regularly inspecting lines, and avoiding common pitfalls, you will ensure smooth sailing adventures through cleverly managed running rigging systems!
Essential Tips and Tricks for Maintaining Running Rigging on Your Sailboat
Maintaining running rigging on your sailboat is crucial for both efficiency and safety on the water. Your sailboat’s running rigging, including halyards, sheets, and control lines, play a vital role in adjusting sail shape and controlling the sails’ position. Here are some essential tips and tricks to help you keep your running rigging in top-notch condition.
1. Choose High-Quality Materials: Investing in quality running rigging materials might cost you a bit more upfront, but it will save you time and money in the long run. Opt for durable ropes made of materials like Dyneema or Spectra that offer excellent strength-to-weight ratios and resistant to UV damage.
2. Regular Inspection: Before every sailing trip, get into the habit of thoroughly inspecting your running rigging. Look out for signs of wear, fraying, or any other damage that may compromise their performance. Pay extra attention to areas where there is increased friction or stress points.
3. Cleanliness Is Key: Saltwater and dirt can accelerate rope degradation, so make sure to regularly clean your running rigging using mild soap and water. Rinse them well afterwards to remove any residue that can cause corrosion or weaken the fibers.
4. Protect From UV Rays: Prolonged exposure to sunlight can weaken ropes over time due to UV degradation. Apply a high-quality UV protector or use protective covers at chafe points to keep your running rigging shielded from harmful rays.
5. Proper Coiling and Storage: Coiling your lines correctly not only makes them easier to handle but also helps maintain their integrity over time. Avoid kinks by loosely coiling lines in large loops instead of tightly winding them around your arm or a winch handle. Store coils away from direct sunlight in a dry space to prevent mildew growth.
6. Lubricate Moving Parts: To ensure smooth operation of blocks, cleats, and other moving parts in your running rigging, apply a silicone or dry lubricant. Avoid greasy lubricants as they attract dirt and can lead to clogged systems or premature wear.
7. Tension Adjustment: Regularly adjust the tension of your running rigging to ensure optimal sail performance and safety. Over time, ropes may stretch or shrink due to exposure to environmental conditions, so keeping a keen eye on their tension is vital.
8. Replace Worn Out Lines: No matter how well you maintain your running rigging, there will come a time when replacement is necessary. Don’t hesitate to retire old and worn-out lines and replace them with new ones to maintain the highest level of safety and performance.
By following these essential tips and tricks for maintaining running rigging on your sailboat, you’ll not only extend their lifespan but also enhance your sailing experience. Regular inspection, proper cleaning, storage, and tension adjustment are all part of responsible boat ownership that ensures both efficiency and safety on the water. So take care of your running rigging like a pro sailor would, and enjoy smooth sailing adventures for years to come!
Advanced Techniques: Upgrading and Fine-Tuning Your Sailboat’s Running Rigging
Are you ready to take your sailboat to the next level? Upgrading and fine-tuning your running rigging is a thrilling endeavor that can greatly enhance your sailing experience. In this blog, we will delve into advanced techniques that will make your sailboat perform at its peak, ensuring smooth navigation and unbeatable speed on the water. So buckle up and get ready for an exhilarating ride!
First off, let’s address the importance of upgrading your sailboat’s running rigging. While it may seem like a daunting task, it is essential in optimizing performance and overall handling. Rigging plays a critical role in controlling the sail shape and maximizing efficiency, whether you’re cruising or racing.
One of the key areas to focus on is replacing old lines with high-performance ones. Technological advancements have given rise to innovative rope materials such as Dyneema or Spectra, which offer superior strength-to-weight ratios and low stretch properties. By using these modern marvels, you’ll experience minimal loss of power due to line sag or stretch – translating into more efficient power transfer from wind to acceleration.
Additionally, consider updating hardware components such as blocks or sheaves with newer models designed specifically for high loads and reduced friction. These upgrades enable smoother movements during maneuvers like tacking or gybing, boosting maneuverability while decreasing effort required at the helm.
Now let’s talk about fine-tuning techniques that can elevate your sailing game even further. One method involves adjusting line tension through various control points on deck. By experimenting with different configurations – tweaking halyards, outhauls, cunninghams, vangs, backstays – you can optimize sail shape for different wind conditions. The ultimate goal is achieving an aerodynamically balanced set of sails that maximize lift while minimizing drag.
Another valuable technique worth mastering is proper lead placement for your running rigging. This refers to positioning blocks or cleats in optimal locations along the deck, allowing for smooth line movement and ideal angles. Correct lead placement can transform the way your sailboat responds to wind shifts, providing unrivaled control and responsiveness in any sailing situation.
To fine-tune your rigging even further, consider installing adjustable backstays or runners. These additions allow for precise control over mast bend, thus altering the shape of the mainsail. Such adjustments are invaluable when adjusting sailing performance as weather conditions evolve throughout a race or cruise – making you one step ahead of your competition or ensuring a comfortable journey.
Of course, all these advanced techniques require skill and knowledge to execute properly . It’s highly recommended to consult with experienced riggers or sailmakers who can guide you through the process. They can offer expert advice on choosing the right materials and equipment, as well as assist in setting up initial configurations based on your sailboat’s dimensions and intended purpose.
In conclusion, upgrading and fine-tuning your running rigging is an exciting venture that will take your sailboat from ordinary to extraordinary. By using high-performance lines, upgrading hardware components, adjusting line tension strategically, placing leads optimally, and introducing adjustable rigging elements such as backstays or runners- you’ll unleash the true potential of your vessel. So don’t delay – embark on this thrilling journey today!
Recent Posts

- Sailboat Gear and Equipment
- Sailboat Lifestyle
- Sailboat Maintenance
- Sailboat Racing
- Sailboat Tips and Tricks
- Sailboat Types
- Sailing Adventures
- Sailing Destinations
- Sailing Safety
- Sailing Techniques
- Anchoring & Mooring
- Boat Anatomy
- Boat Culture
- Boat Equipment
- Boat Safety
- Sailing Techniques
Sailboat Running Rigging Explained
Running rigging refers to the essential lines, ropes, and hardware responsible for controlling, adjusting, and managing the sails on a sailboat. They directly impact a sailboat’s performance, maneuverability, and overall safety.
As a result, understanding different running rigging components and their functions can help us optimize our boat’s performance and make informed decisions in various sailing situations. This comprehensive guide delves deep into the world of rigging by examining its essential components and various aspects, including materials, maintenance, advancements, troubleshooting, knots, and splices.
Key Takeaways
- Running rigging consists of movable components like halyards, sheets, and control lines that control, adjust, and handle the sails.
- Synthetic materials like Dyneema, Spectra, and Vectran have revolutionized running rigging due to their superior strength-to-weight ratio, low stretch and abrasion resistance, and increased lifespan.
- Troubleshooting common running rigging problems involves untangling or untwisting lines, resolving jammed or stuck hardware, and ensuring lines hold tension correctly.
- Knowing how to tie knots and splice lines is crucial in connecting running rigging components, securing lines, and adjusting sails.
- To achieve the best performance, the boat's rigging should be tailored to specific sailing needs, either racing or cruising.
- Different sailboat types and configurations require specific running rigging setups.
Difference between running and standing rigging
Before diving into the components, it’s essential to understand the difference between standing and running rigging. Standing rigging consists of the fixed lines, cables, and rods responsible for supporting a sailboat’s mast(s) and maintaining stability. Examples of standing rigging include shrouds, stays, and spreaders.
Running rigging, on the other hand, comprises the movable components needed to control, adjust, and handle the sails. These elements allow us to raise, lower, and trim the sails according to wind conditions and the boat’s course. Understanding the distinction between the two types of rigging is vital in operating a sailboat safely and efficiently.
Components of Running Rigging on a Sailboat
Responsible for raising, lowering, and holding sails in their deployed position. The primary types include the main halyard (for the mainsail), jib halyard (for jibs or genoas), and spinnaker halyard (for spinnakers). They typically run from the head of the sail down to mast-mounted winches or lead back to the cockpit for easy adjustment.
Control the angle of a sail relative to the wind. They connect the clew to the deck or another part of the rigging (e.g., tack), allowing adjustments and fine-tuning of sail trim . The two main types of sheets are mainsheets (for mainsails) and jib/genoa sheets (for headsails).
Control Lines
Essential for adjusting the tension and shape of sails. Examples include outhauls (for foot tension), cunninghams (for luff tension), and reef lines (for reducing the area under high wind conditions). Proper use of these lines allows sailors to optimize sail shape, improve efficiency, and manage their boats in various wind conditions.
Maintenance and Care
Regular inspection.
Routine inspection of your rigging is essential to identify wear, damage, or issues before they escalate into severe problems. Conduct a thorough examination at least once a season or more frequently if you sail extensively. When inspecting, check for signs of chafe, abrasion, corrosion, frayed, or damaged rope sections. Address these issues promptly to prevent further complications.
Cleaning and maintaining
Proper cleaning and maintenance of your rigging will improve its lifespan and maintain its performance. Rinse ropes and cordage with fresh water and mild detergent, if necessary. Lubricate and clean hardware components using marine-grade products, following the manufacturer’s guidelines.
When to replace
Advantages and impact of advanced synthetic materials , advantages of synthetic materials.
- Higher strength-to-weight ratio: Advanced materials like Dyneema, Spectra, and Vectran provide impressive strength while remaining lightweight, ensuring a secure connection and control in an easy-to-handle braid
- Low-stretch and abrasion resistance: These materials are incredibly resistant to stretching, providing improved control and accurate responsiveness. They also maintain their integrity and durability in wear, abrasion, and weathering.
- Increased lifespan: Synthetic materials can endure harsh conditions and resist UV damage.
Impact on Sailing Experience
The use of advanced materials like Dyneema, Spectra, and Vectran has had a profound effect on the sailing experience, with benefits including:
- Improved sail control and responsiveness: These low-stretch materials allow precise, user-friendly, and efficient sail handling and adjustments, leading to better overall performance.
- Enhanced durability and reduced maintenance: High-performance materials resist wear and weathering more effectively, increasing the lifespan of rigging and lowering the frequency of maintenance or replacement.
- Greater performance potential: Advanced materials’ increased strength and lightness improve boat performance to higher levels, especially in competitive racing scenarios.
Troubleshooting Common Problems
- Tangled or twisted lines: angled lines can impede adjustments and create hazardous situations, like tangled jib sheets , which can cause control issues with your headsail. Always coil and store lines properly when not in use to solve this issue. Regularly inspect your lines for twists or tangles, and address them before they become problematic.
- Jammed or stuck hardware: Dirt, corrosion, or damage can cause hardware components like blocks or winches to jam or stick, making it difficult to control the lines. Clean and lubricate your hardware according to the manufacturer’s guidelines to fix this issue. Replace any damaged or worn-out components to ensure smooth operation.
- Lines slipping or not holding tension: Runners may sometimes slip from cleats or winches, causing the sail to lose its desired shape or position. To overcome this issue, ensure you use the proper cleating or winching techniques, and double-check the compatibility of your line materials with your hardware.
When to call a professional
Although boat owners can resolve many rigging issues, there are situations where the expertise of a professional rigger may become necessary. Consider consulting a professional when:
- You feel uncertain about your ability to diagnose or fix a problem safely and effectively
- You need to replace or install new running rigging components that require specialized knowledge or skills
- You have encountered complex issues that may require advanced troubleshooting techniques
The Art of Knots and Splices
Importance of knots and splices.
Knots and splices connect rigging components, secure lines, and adjust sails. Proper knowledge and execution of these techniques allow us to:
- Effectively connect lines and hardware
- Quickly and safely secure or adjust lines under various conditions
- Reduce the risk of lines slipping or coming undone while sailing
- Maintain the integrity and strength of our rigging
Commonly used knots and their uses
Numerous knots are available for various purposes within the rigging. Some of the most common and versatile knots include:
- Bowline: This popular and secure knot is used for creating a fixed loop at the end of a line, often employed for attaching sheets to sails or halyards to shackles.
- Cleat hitch: A handy knot that quickly and securely fasten lines to cleats; widely used for halyards, sheets, and dock lines.
- Figure eight: A practical stopper knot prevents lines from slipping through hardware, such as blocks or clutches.
Techniques for splicing lines
Splicing is joining two lines or creating a loop within a single line by weaving rope fibers together. Splicing often results in stronger, more secure connections than tying knots and can improve the overall aesthetic of your rigging. Some techniques include:
- Eye splice: This technique creates a fixed loop at the end of a line, ideal for attaching hardware, such as thimbles, shackles, or blocks.
- Short splice: This method joins two lines by interweaving their ends, resulting in a strong connection suitable for halyards or sheets.
- End-to-end splice: An effective way to join two lines end-to-end, maintaining the line’s integrity and minimizing chafe or bulk.
Safety Practices When Handling Running Rigging
Basic safety rules.
- Be aware of your surroundings: Before making any adjustments to your sails or lines, evaluate the environment, and pay attention to potential hazards, such as nearby boats, obstacles, or changing wind conditions.
- Communicate clearly: When making adjustments or performing maneuvers, communicate your intentions with your crew to prevent confusion and ensure necessary steps are started promptly and coordinated.
- Use appropriate gear: Wear gloves to protect your hands from rope burns, and always have a knife or multi-tool nearby to handle unexpected situations, such as cutting tangled or jammed lines.
Risk and injury prevention
While handling rigging, take precautions to prevent accidents or injuries:
- Maintain proper body positioning: When working with lines or winches, position yourself securely to avoid sudden slips or loss of balance that could result in injuries.
- Keep fingers clear: Be cautious when handling lines around winches or cleats to prevent pinched fingers or rope burns.
- Avoid standing in a “line of fire”: Be mindful of potential line snap-backs or sudden movements when tension is released from sails or hardware.
Emergency procedures related to rigging
Being prepared for emergencies is crucial. Familiarize yourself with procedures such as:
- Man Overboard Recovery: Practice techniques to quickly stop the boat and retrieve someone who has fallen overboard.
- Rapid sail reduction or deployment: In extreme weather or urgent situations, know how to quickly reef, furl, or set sails to maintain control and stability.
Tips and Techniques for Better Performance
Tips for optimizing performance.
- Regular inspection and maintenance: Ensuring your lines, hardware, and sails are in good condition and correctly cared for is crucial for performance optimization on the water.
- Tailor your rigging: Customize your rigging according to your specific requirements, whether racing or cruising, as this can affect your boat’s overall performance.
Techniques for Smoother Sailing
- Match line materials and diameters to their purpose: Select the proper line material and diameter for each rigging component, such as the mainsheet, to ensure better sail control, reduced friction, and smooth operation.
- Stay organized and avoid line clutter: Keep lines and hardware tidy using organizers and storage solutions to prevent tangles and confusion, leading to inefficiency or unsafe situations on the water.
Additional Sailboat Rigging Components and Techniques
- Guys: These lines, in conjunction with spinnaker sheets, offer lateral control of the spinnaker pole and consequently allow better management of the spinnaker shape as they help balance the tension between forestay and backstay , maximizing its efficiency in downwind sailing.
- Vangs (or boom vang or kicking strap): While controlling the boom’s angle to maintain shape, vangs also help prevent accidental gybes, increasing safety on board.
- Outhauls: By managing foot tension and the sail hoist, outhauls aid in achieving optimal sail shape according to the wind conditions and point of sail . Loosening the outhaul creates a deeper shape for light winds, while tightening it flattens the sail for heavier conditions.
Equipment Organization and Storage
- Line bags or organizers: Store coiled lines for different sails, like staysail, and keep aft rolling furling lines neatly organized to minimize tangles and clutter.
- Clutches or labeled cleats: Label the appropriate hardware for each line to prevent confusion when adjusting sails.
- Winch handle holders: Ensure winch handles are secured in a designated holder when not in use, reducing the risk of accidents or loss overboard.
Different Rigging Setups
- Sloop Rig vs. Cutter Rig: A sloop rig typically has one headsail, like a genoa, while a cutter rig features two or more, requiring additional rigging components like adding extra backstays for support, extra halyards, sheets, and control lines for the cutter rig.
- In-Mast vs. In-Boom Furling Systems: These systems allow easy reefing and sail deployment. Running rigging for furling systems will include additional lines and hardware to manage furling and unfurling processes from the cockpit.
- Racing Boats vs. Cruising: Racing boats may require specialized configurations, such as high-performance lines and lightweight hardware, while cruising sailboats may prioritize more versatile, durable, and easy-to-maintain rigging components.
Final Thoughts
Understanding and effectively managing running rigging is critical to sailing, directly affecting the boat’s performance, maneuverability, and safety. This comprehensive guide offers a detailed breakdown of rigging components, their care and maintenance, troubleshooting, and the essential knots and splices. It also explores the revolutionary impact of synthetic materials, provides safety practices, and highlights the importance of customizing your running rigging according to your sailing needs.
Standing rigging refers to the fixed lines, cables, and rods that support the sailboat’s mast and maintain stability. Running rigging refers to the movable components that control, adjust, and handle the sails.
Critical components of running rigging include halyards, sheets, and control lines. Additional components can consist of guys, vangs, and outhauls.
Synthetic materials like Dyneema, Spectra, and Vectran offer superior strength-to-weight ratio, low stretch and abrasion resistance, and an increased lifespan, resulting in better control and durability of running rigging components.
Ideally, if you sail extensively, you should inspect your running rigging at least once a season or more frequently if you sail extensively. Regular cleaning, lubrication, and replacement of worn-out components should be part of your maintenance routine.
Different sailboat types and sail configurations may require specific running rigging setups. For example, a sloop rig and cutter rig have additional requirements for headsails, thus requiring various running rigging components. Similarly, racing boats and cruising sailboats may require different running rigging setups to cater to their needs.
The Importance of the Sailboat Comfort Ratio
What is an impeller on a boat, related posts, whisker pole sailing rig: techniques and tips, reefing a sail: a comprehensive guide, sail trim: speed, stability, and performance, leave a reply cancel reply.
Your email address will not be published. Required fields are marked *
- Cookie Policy
- Privacy Statement
© 2023 TIGERLILY GROUP LTD, 27 Old Gloucester Street, London, WC1N 3AX, UK. Registered Company in England & Wales. Company No. 14743614
Welcome Back!
Login to your account below
Remember Me
Retrieve your password
Please enter your username or email address to reset your password.
Add New Playlist
- Select Visibility - Public Private
- New Sailboats
- Sailboats 21-30ft
- Sailboats 31-35ft
- Sailboats 36-40ft
- Sailboats Over 40ft
- Sailboats Under 21feet
- used_sailboats
- Apps and Computer Programs
- Communications
- Fishfinders
- Handheld Electronics
- Plotters MFDS Rradar
- Wind, Speed & Depth Instruments
- Anchoring Mooring
- Running Rigging
- Sails Canvas
- Standing Rigging
- Diesel Engines
- Off Grid Energy
- Cleaning Waxing
- DIY Projects
- Repair, Tools & Materials
- Spare Parts
- Tools & Gadgets
- Cabin Comfort
- Ventilation
- Footwear Apparel
- Foul Weather Gear
- Mailport & PS Advisor
- Inside Practical Sailor Blog
- Activate My Web Access
- Reset Password
- Customer Service

- Free Newsletter
What You Can Learn on a Quick Test Sail

Cabo Rico’s Classic Cutter

Bob Perrys Salty Tayana 37-Footer Boat Review

Tartan 30: An Affordable Classic

Preparing Yourself for Solo Sailing

Your New Feature-Packed VHF Radio

Preparing A Boat to Sail Solo

Solar Panels: Go Rigid If You have the Space…

Shoe Goo II Excels for Quick Sail Repairs

When Should We Retire Dyneema Stays and Running Rigging?

Rethinking MOB Prevention

Top-notch Wind Indicators

Worship Your Universal M-Series Diesel With the Marinized Kubota Block

Taking Care of Your 12-Volt Lead-Acid Battery Bank

Hassle-free Pumpouts

What Your Boat and the Baltimore Super Container Ship May Have…

Battle of the Teak Cleaners — Snappy Teak-Nu vs. Star Brite

New Seacocks for the Offshore Sailor

Bottom Paint Care

Quick and Safe Sail Cleaning

Are E-bikes Worth the Extra Weight and Cost?

How to Handle the Head

The Day Sailor’s First-Aid Kit

How to Select Crew for a Passage or Delivery

Re-sealing the Seams on Waterproof Fabrics

Waxing and Polishing Your Boat

Reducing Engine Room Noise

Tricks and Tips to Forming Do-it-yourself Rigging Terminals

Marine Toilet Maintenance Tips

Learning to Live with Plastic Boat Bits
- Sails, Rigging & Deck Gear
Market Scan: Running Rigging
Finding the right rope for the job used to be easy: polyester braid served almost every purpose on board, except for anchor rode. for most of us, it still does. but it's worth having a close look at some of the fancier rope. it does have its uses..

Do you occasionally contemplate replacing the frayed, stiff, dirty running rigging on your boat with some of the beautiful new stuff that hangs in reels on the wall of your chandlery?

Unlike having the luxury to replace all the furniture in your house at one time, which few of us ever can afford to do, replacing running rigging is within the realm of most nautical wallets.
As a guide to how close you can come to reality, this Practical Sailor market scan takes a look at cheap, medium-priced, and expensive approaches to fitting out a 32-foot sloop. For a different boat size, you can ratchet the figures up or down proportionally and still get close to the actual cost to do that glorious renewal of the lines that hoist, trim, lower or control the sails aboard your boat.
For actual tests for abrasion, splicing, and ease of handling, you can consult the many reports in Practical Sailor on rope intended for halyards, sheets, anchor rodes, etc. If you keep back issues, consult the annual indexes (published in the last issue of each year) or call PS for a steer to whatever interests you. (The Customer Service number is 800/424-7887.)
You can call it rope, line, braid, cable, plait, cordage—they’re all correct, although some purists like to use “rope” to refer to the stuff in a generic sense, and “line” when referring to rope that has an identified purpose; e.g. a jib sheet is a line made of rope. The main exception is the anchor rode, which is occasionally called a line, or even a cable, but never a rope.
The names of the lines themselves are of course based on function. To the unanointed, it may seem like jargon or overblown nonsense, but when a sailor asks for some action to be taken with a halyard, sheet, rode, pendant, topping lift, lazy guy, or after-spring, it may make a considerable difference in what happens next to you and everyone aboard the boat.
The little cords that landlubbers call string or twine? Sailors call it “small stuff,” or “sennet” if it’s braided. If it’s marled in bundles, it’s called “selvagee.” Aboard big sailing ships, it was anything less than about 5/16″ in diameter.
Whatever you call it, rope was one of mankind’s first tools. Long before learning how to spin or weave, man created rope of leather, vines, sinews, grass, hair… anything long and stringy.
Papyrus rope found in the Great Pyramid in Egypt and dating from 4000 BC has exactly the same twist and “lay” as modern rope.
In what might be regarded as a “middle” period, rope was made of natural fibers—Abaca (a member of the banana family), sisal (also known as henequen), jute (it’s that soft stuff of which fuzzy, brown twine still is made), hemp (Cannabis sativa, and you know what else they get from that…), flax (a.k.a. linen) and even cotton (as in ordinary clothesline).
Abaca was for several hundred years the most often used to make what was commonly called “Manila.” The Philippine Islands produced 90% of the world’s supply. Manila is murderous on the hands, as in splicing, because it extracts all the skin’s oil and leaves the skin dry and vulnerable to manila’s sharp-edged fibers.
In that era, rope was made on 600-foot ropewalks—long, low narrow buildings in which the rope maker, a bundle of stuff round his waist, walked backwards while twisting up strands in his hands. Henry Wadsworth Longfellow described it in his poem “The Ropewalk.”
In 1793, about 40 years into the Industrial Revolution, an Englishman, Joseph Huddart, invented the first rope-laying machine. John Tolman, of Boston, came up with a braiding machine in 1854. John Good, in New York City in the late 1800s, made practical improvements and patented his machines. By 1900, most of the world’s rope was made (and still is) on machines based on Good’s work.
Rope’s next metamorphosis came with nylon, which was developed by DuPont to reinforce automobile tires. Without the need for better automobile tires, sailors wouldn’t have had this marvelous new rope.
For sailors and their boats, nylon did to manila what rayon, the first man-made fiber, did to silk.
With the genie out of the bottle, the chemists quickly produced a string of thermoplastic (meaning flexible) filaments with bewildering names. (There are 17 official classes of such long-chain arrangements, one of which is called spandex, without which rockstars and health-clubbers might as well head home.)
Four Basic Types So, for a boat, which ones are best for what jobs?
Basically, there are four varieties.
Good old nylon is a long-chain polyamide. In other countries, nylon is called polyamide, Perlon, Lilion, Brinylon or Enkalon.
Traditional-appearing, three-strand, laid nylon is readily available. It’s still heavily favored for anchor rodes; its stretch makes it an ideal shock absorber.
Dacron, a name owned by DuPont but slowly slipping into common usage (we’ll probably get a letter from DuPont’s lawyers about taking this liberty) is polyester. In other countries, you might find it called Terylene, Tergal, Trevira, Wistel, Diolen or Fortrel.
Basic Dacron (polyester) is available in braid and in three-strand. In three-strand it’s smoother and slipperier than nylon, which calls for an extra tuck when splicing or another half-hitch on your clove hitch.
Whether nylon or Dacron, any of this traditional “twisted” rope is easiest to splice.
Olefin, a family that includes polypropylene and its near cousin polyethylene, was once rather scorned for marine usage, but is increasingly being worked into very high-tech line. Despite the fact that it’s lousy for lines (it’s slippery, difficult to knot or splice, and deteriorates in sunlight), its light weight pleases the dedicated racers. Polypropylene is the lighter and more buoyant cousin, used mainly for water skier towropes and as rescue lines on some throwable devices.
Finally—and that’s a poor choice of a word in this magic new world of manhandling the atoms—there are high-performance fibers, lots of them, a new one every year or so. Their generic names have fancy handles like HM (high modulus), polyester-polyarylate, para-aramid, PBO, or UHMWPE (ultra high molecular weight polyethylene).
They’re more commonly known by trade names like Kevlar, Technora, Spectra, Dyneema, Twaron, Vectran and Zylon, which get used in rope with proprietary names like Vizzion, Z-Tech, Crystalyne, V-12, Tech-12, Aracom, Spectron 12, Ultra-Tech, T-900, Spectron 12 Plus, Vectrus, SM Ultra-Lite, Warpspeed, Spectrum, HRC, Marstron.
For some reason, it’s popular right now to include “12” in a trademarked name. Hyphens are hot, too.
Progress never stops. The United States Army has a high-security laboratory in Massachusetts that is spinning atoms into something it calls “Spider Silk” that is twice as strong as Kevlar. Go fish.
How Much It Costs Rope prices vary radically. For example, for 1/4″ line you can pay as little as 8¢ a foot for stranded polypropylene made by Crowe Rope Industries, or 20 times as much, well past $1.50 a foot, for the exotic stuff.
For general comparison purposes, here are some basic, easy-to-remember figures:
For 1/2″ line, the best three-strand nylon is about a half a buck a foot. Good Dacron double-braid is about twice as much—75¢ to $1 a foot. The exotic stuff can be five times as much as Dacron, right up around $5 a foot.
Whatever line you like, Practical Sailor long has considered 1/2″ or 7/16″ a good all-around size for bare hands. When some pulling is called for, the smaller the line diameter, the tougher it is on the hands. A piece of quarter-inch Yale Vectrus Single Braid ($1.60 a foot) has a breaking strength of 8,000 pounds, but bare hands couldn’t tolerate a hundredth of that load.
About Breaking Strength In the rope industry, there’s an international move underway to clarify what “breaking strength” means. In the United States, it means “spliced breaking strength.” Rope is tested with the ends fixed with eye splices. In other countries breaking strength is a calculated figure based on individual yarn strength times the number of yarns; it yields a good comparative figure but it doesn’t hold up when a line is clamped, knotted or spliced. Use of the “spliced breaking strength” figure would deflate somewhat the foreign manufacturers’ claims.
The exotic lines, in those sizes that make it easy to handle, present different problems. They’re far stronger than is usually needed for sheets and halyards. With a 1/2″ piece of really fancy line, something like New England Ropes’ Z-Tech PBO Zylon ($10.50 a foot), you could pick up your whole 32-footer—plus the one next to it. (If you have a curious chemical bent, you might like to know that PBO is poly-paraphenylene-2 6 benzobisoxazole fiber made by polymerizing diaminoresocinol dichloride and trephthalic acid in polyphosphoric acid. With this chemical stuff, maybe it’s better not to ask.)
However, because it might help you in the selection of line, an accompanying chart displays the properties of seven of the chemical fibers used in marine rope.
The fancy lines made from these fibers have made a big difference to hardware manufacturers. Gear like blocks, padeyes, sheaves, cam cleats, track, and clutches rarely used to fail—and then usually only when hit with a huge shock load. More often, excessive loads resulted in parted lines. Now, with such strong line, it’s the hardware that’s at risk. Blocks with nylon ball bearings are found with ground-up remnants. Far more expensive Torlon balls are better. Solid metal bushings often are needed.
Because some new fibers don’t like to go around sharp bends (Kevlar, in fact, is so bad at it that most ropemakers have given up using it), sheaves have tended to become larger. To get long service from these lines, one must heed the sheave size recommendations.
Most of this powerful, modern line is made as braid. The braids first appeared as “double braids,” which were a loosely-braided core contained in a more tightly-woven cover. They could be hard or soft, stiff or pliable, fuzzy or shiny. They could rely completely on their cores for strength, or share the loads between core and cover . Such characteristics were controlled in the manufacturing process.
Nowadays, braid comes as not only double-braid (sometimes the core isn’t braided but is laid in “parallel” strands); it can be single braid, a.k.a. plait, multi-plait, eight-plait, 16-plait, or even (and we consider this one a misnomer) plait with a three-strand core. It could be called “strand/plait,” but try saying that fast three times.
By the way, if you’re of a curious mind, don’t ever pass up a chance to see ropemaking machines in action. It all happens in the open, right before your very eyes, but the high-speed machines are perhaps the most perplexing and noisiest devices known to man.
How are the high-tech braids to splice? From “not easy” to “very difficult.” Some are almost impossible to cut. A hot knife is useless. The common approach used by riggers is to use an old knife, sharpen it, hack away at the line, then sharpen the knife again.
Because most of the really exotic braids do not take kindly to ordinarily-reliable knots (see our story on page 14 for some eye-opening figures), it’s best to learn to make eye splices.
The Players Samson was the bellwether in this technology, and for a couple of decades had most of the yacht business. As part of something called The American Group, it still is the biggest rope maker in the Western Hemisphere.
Other big manufacturers are Columbian (which used to give Samson some competition), Crowe and Wellington. Wellington very recently bought the 132-year-old premium rope maker named Hooven Allison in Xenia, Ohio, also owns U.S. Rope and Gladding Braided Products (more widely known for fishing line) and claims to be the biggest US manufacturer.
In the halcyon days in the 1970s and 1980s, when pleasure boating ballooned, two smaller companies (New England Ropes and Yale) appeared and worked their way to the head of the parade. They were aided by Samson, which for some reason, decided to downplay its recreational line and concentrate on industrial business. (Most rope made is used by utilities, commercial fishing, and the construction business.) Several years ago, Samson decided to get back in the recreational fray.
There are some small makers—like Pelican in California and Novatec in Yarmouth, Nova Scotia—who turn out beautiful line, some of it favored by mountain climbers. There’s a company, Pigeon Mountain Industries in Lafayette, Georgia, that specializes in safety ropes and another, Whitehall in Lima, Pennsylvania, that makes line up to 11″ in diameter—with breaking strengths up to 2,200,000 pounds!
Good line also is made in Germany by Gleistein, in France by Lancelin, and in Britain by Marlow and Bridon.
However, the most conspicuous suppliers of rope for pleasure boaters in the U.S. currently are New England Ropes, Yale, and Samson.
The Processes All modern line is engineered to a fare-thee-well. The filament usually is coated not only to give it color and protect it from sun, water, and wear but to equalize the loads during the manufacturing process. The tension on each filament should be as nearly equal as possible.
As little as a quarter century ago, low-stretch line merely meant that a line had been stretched crudely and perhaps heated to make it less elastic. Rope-making has become intensely technical, with many different sorts of material and many designed-in characteristics.
It can be made hard (meaning tight and dense), soft (meaning flexible and easy on the hands), or stiff (a cowboy’s lariat is difficult to bend). The design can concentrate on straight-line strength, flexibility, durability or abrasion resistance—and, of course, the so-far impossible dream is to make a single line that is tops in all categories.
Again, there are problems attendant upon any such specialization—bending around sheaves and resisting the degradations of sunlight, to name two. As we found in our rope test this month (see page 14), not only are some of the high-tech ropes devilishly slippery, but they weaken considerably when knotted. And, as mentioned earlier, some line is almost impossible to cut with a knife, hot knife, hacksaw, or anything else, and so would not be a good choice for a life harness or liferaft tether.
Mix and Match Options Now, let’s return to the original proposition, which was a complete replacement—on three different cost levels—of basic running rigging for a 32′ sloop. Included are halyards, main sheet, headsail sheets, and topping lift. Not included is an anchor rode (a subject all in itself) and short lines used as outhauls, downhauls, barber haulers, reef pendants, cunninghams, preventers, vangs, etc.
The sailboat profile shown at left contains suggestions for the kinds and sizes of line that might be used and the approximate costs that are involved in cheap, medium, and expensive refits. If you wish to mix and match—expensive halyards but inexpensive sheets, for instance—a bit of arithmetic is in order.
For the three-level estimates, only the three major manufacturers of recreational marine line will be used. They are New England Ropes (NER), Yale and Samson. They are the rope makers favored, respectively in the order listed, in the discount catalogs of West Marine, BoatU.S. and Defender.
What’s involved here is more than 600 feet of line. That’s a heap of expensive spaghetti. To make price comparisons reasonable, lines from each manufacturer were chosen according to the makers’ recommendations or the lines’ rated breaking strengths. In some cases, the strength match-up was about 10% off. Many of these lines come in a choice of white with a bit of color coding or solid colors; for pricing purposes the lower-priced white always was selected.
Even with only three manufacturers, the choices, although logical, must be considered quite arbitrary; the lines were chosen primarily to illustrate three cost levels available to a boat owner interested in renewing running rigging. The totaled figures for New England Ropes, Yale, and Samson are intended only to show the price range.
If you wanted to keep things very simple you could, for $343 (55¢ a foot), rig the whole boat with the original Samson double-braid. Once called Parallay, it’s now called LS. Twenty years ago, many racing and cruising sailors were delighted to be rigged with Parallay (or perhaps Columbian’s Intrepid). Because you need 624′ of line, you might even get a special price on a 600-foot reel.
As shown on the sailboat diagram, the price to replace the running rigging with some good-to-beautiful line can be as little as $299 or as much as $1,552—a five-fold difference.
Every rope manufacturer listed below offers printed material describing its offerings, and most have excellent websites, some of these have rigging guides showing what kinds and sizes of line they suggest for various purposes.
Also With This Article Click here to view “Man-Made Fibers Used in Ropemaking.” Click here to view a cost comparison . Click here to view “English-MetricConversion Chart.”
Contacts— Aamstrand Ropes (Intrend), 629 Grove, Manteno, IL 60950, 800/338-0557. Buccaneer Rope, 22319 AL Hwy. 79, Scottsboro, AL 35768, 800/358-7673, www.aamstrand.com . Columbian Rope, 145 Towery, Guntown, MS 38849-0270, 800/821-4391, www.columbianrope.com . Crowe Rope Industries, Box 600, Waterville, ME 04901, 888/848-4405. G&B Ropes, 2921 Oro Ctr., Oro, ON LOL 2X0, Canada, 800/643-6350. Gladding Braided Products, Box 164, South Oselic, NY 13155, 315/653-7211. Marlow, 7600 Bryan Dairy Rd., Largo, FL 33777, 727/545-1911, www.marlowropes.com . New England Ropes Inc., 848 Airport, Fall River, MA 02720, 800/333-6679, www.neropes.com . Novatec Braids, 234 Water, Yarmouth, NS B5A 4P8, Canada, 800/856-6259, www.novatecbraids.com or R&W Enterprises, 404 Nash Rd., New Bedford, MA 02746, 800/260-8599. Pelican Products, 23215 Early, Torrance, CA 90505, 800/473-5422, www.pelican.com . Samson, The American Group, 2090 Thornton, Ferndale, WA 98248, 800/227-7673, www.samsonrope.com . Sunshine Ropes, 7520 N.W. 41st St. Miami, FL 331666799, 305/592-3750. Unicord, 12010 Paulina, Calumet Park, IL 60827, 800/929-3110. Wellington Puritan Marine, 1140 Monticello, Madison, GA 30650, 800/221-5054, www.wellingtoninc.com . Yale Cordage, 6 Morin, Biddleford, ME 04005, 207/282-3396, www.yalecordage.com .
RELATED ARTICLES MORE FROM AUTHOR
Leave a reply cancel reply.
Log in to leave a comment
Latest Videos

Beneteau 423: What You Should Know | Boat Review

Buying A Sailboat Is Scary! Yacht Broker Interview

The Great Loop – The Basics
")
Bottom Paint Showdown – Six Paints, One Winner! (John Stone photo)
- Privacy Policy
- Do Not Sell My Personal Information
- Online Account Activation
- Privacy Manager
Running Rigging Calculator
Get an instant estimate for your boat, select your boat brand.

Leaves warehouse: 12 business days
- Copyright 1998-2024 SB Owners, LLC. All rights reserved.

- Policies | Contact Us
- BOAT OF THE YEAR
- Newsletters
- Sailboat Reviews
- Boating Safety
- Sailing Totem
- Charter Resources
- Destinations
- Galley Recipes
- Living Aboard
- Sails and Rigging
- Maintenance
Running Rigging for Cruising Sailors
- By Bruce Bingham
- Updated: October 15, 2020
During my 75 years of sailing, I’ve become aware of the chasm between cruisers and racers. But I’ve never understood it because I have always been both. Even when I cruise, I’m racing—against changing weather, the need to get home in time for dinner, whatever. What that really means is that I’m determined to get the most speed out of my boat at all times. And to do so means having excellent running-rigging systems.
There are three issues in play when deciding on whether to install or upgrade your running rigging. First, do you want to increase your ease and convenience when adjusting sail trim? Second, are you willing to add lengths of line (as well as lengths of time) to make sail-trim adjustments? And last, how much investment are you willing to make to reach your sail-handling (i.e., running-rigging) goals?
I can scratch only the surface of this complicated topic and not present a comprehensive guide to all systems and conditions. Hopefully I’ll encourage you to think of how you might be able to improve your systems to make your sailing better and more satisfying.
Let’s begin by looking at sail-trim adjustments, which encompasses many items: sail curve (or draft, also called cord), luff tension, foot tension, sail twist from head to foot, and attack angle (the angle of wind as it approaches the sail’s leading edge, or luff).
On racing boats, all of the power required to make these adjustments is enhanced with more-powerful winches, larger crews, expensive low-friction blocks, and extremely strong and flexible lines. All of the running-rigging systems on racing boats are also appropriate for cruising boats, but cost often plays a deciding factor when making hardware and arrangement choices.
Increasing the power of running-rigging systems will always cost more, but it will also result in ease of handling and efficiency of controlling mainsail and headsail trim. Let’s move on, focusing first on the main.
Main Outhaul
Mainsail draft (depth of the sail’s curve) is controlled primarily by the outhaul but also may be supplemented by halyard tension and mast bend. So, let’s concentrate on the outhaul if for no other reason than its ease of use, as long as it is easily adjustable and also conveniently reachable. Unfortunately, most outhauls that I see on cruising boats are not adjustable and are usually a bundle of knots, difficult to reach when under sail, and almost impossible to untie without a marlinspike or fid. So let’s fix this first.
The mainsail outhaul on my Cape Dory 28 Nikki ’s boom end is a 2-to-1 tackle with its hauling end attached to another 2-to-1 tackle, also called a cascade or Burton. In light air, when sailing to weather, the draft of the main can be flattened by taking in on the 2-to-1 part of the tackle. In strong breezes, flattening the mainsail’s draft is easily done by hauling in on the Burton only, a total power ratio of 4-to-1. Both of the outhaul tackles have their own clam cleats mounted on the side of the boom.
I don’t recommend mast bending to most cruisers because its proper application depends largely on the boat owner’s knowledge of the nature and dimensions of the curve built into the sail by the sailmaker. In a nutshell, though, when sailing to weather, mast bend will flatten the luff of the sail. When sailing off the wind or in light air, a straight mast will increase the curve or draft of the sail for better drive.
If your halyards are only general-purpose Dacron line (like those used for dock lines and sheets), as you tighten them, they will stretch and have little to no effect on sail shape with increased wind. Keep in mind that as windspeed increases, the draft of your sails will also increase, causing a greater heeling moment. The increased draft will also cause the sail luff to become fuller and reduce the ability to point upwind.
I really like limited-stretch and no-stretch halyards. They help reduce the sail draft near the luff from increasing when the wind builds. Limited-stretch halyards won’t stretch markedly when tightened in order to flatten the sail luffs. No-stretch or limited-stretch halyards might sound racy and will cost more, but the payoff is better performance, especially in strong winds. Good halyards are an easy fix that pay big dividends.
Cunninghams and Downhauls
Cunninghams and downhauls are essentially the same thing: Their function is to provide tension adjustment to the lower portion of the luff of a sail. A Cunningham, however, is more associated with the mainsail; downhauls are generally used with a headsail or staysail.
The purpose of Cunninghams and downhauls is to provide a rapid and convenient method of changing and distributing the tightness of a sail luff from tack to head, primarily on sails whose luff is in a mast slot, aluminum furling extrusion or attached to a stay with piston hanks; all of which cause friction that resists the luff from equalizing its load along its length. Since the halyard pulls upward from the top and the Cunningham pulls downward from slightly above the tack, the load in both directions equalizes the tension of the sail’s luff.
When you hoist a mainsail, there will often be about twice the tension on the luff above the spreaders than between the spreaders and the gooseneck. The load on the Cunningham is used to increase the lower luff tension. So, instead of cranking the halyard so tight that the winch is nearly torn off the mast or cabin top, raise the sail only until you begin to feel the luff load up, then tighten up the Cunningham until it feels about the same as the halyard. That’s the way your mainsail was designed and made, with about equal tension along the full length of the luff.
The cordage used as a downhaul or tack attachment for staysails and headsails, including those with roller-furling systems, should be set up as tackles that are adjustable under sail. The cord should be long enough to set up a 4-to-1 tackle, and cleated or tied so that rapid luff tension can be adjusted without a hassle, whether slacking off in light air or tightening in a heavier breeze.
Gaining Mechanical Advantage
When I bought my schooner, At Last , back in the mid-’70s, she had lots of line and blocks but not a single winch. I think that most of her previous sailing had been done by a crew of six or a smaller crew made up of 300-pound gorillas. At that time, I weighed only 135 pounds, and my partner, Katy, was about 15 pounds lighter. Neither of us were what you would call “husky.”
Sailing At Last in light air was not difficult, but when it blew over 8 knots, every evolution became quite physical. We learned the first rule of manpower pretty quickly: The more line we pulled to achieve any sail adjustment (main or foresail sheet trimming, gaff hoisting, etc.), the more power was developed and less personal exertion was required.
Yes, eventually we did install sheet winches for each of the headsail sheets, but not for the main or foresail halyards or sheets, outhauls, vangs or topping lifts. For those, we added blocks and line to each system. It was like multiplying our crew. Every sail-trim maneuver became markedly easier—but slower. So, if we at least doubled the line length by adding sheaves, we also multiplied the power by the same ratio (not deducting for friction) and reduced the hauling load by the same ratio.
The rule of tackles is straightforward: The number of moving parts equals the mechanical advantage (power ratio). Google “block and tackle mechanical advantages,” and you will find excellent graphic diagrams with their power ratios.
Leading Systems to the Cockpit
More and more boat owners want every sail-control line led to the cockpit. This invariably requires at least three additional blocks or sheaves to be added to most running-rigging systems, thus increasing friction as well as adding lots of line (I call it “spaghetti”) in or near the cockpit. In the case of reefing, leading all lines to the cockpit actually makes most reefing much more difficult and inefficient.
In 2009, my 28-foot Nikki won the Florida West Coast Boat of the Year award in a long series of races over several months’ time. Most wins occurred in extremely high winds because we had practiced reefing in under 45 seconds. That had become possible largely because of deftly efficient tackles, all kept within a single person’s reach. Only the main sheet went to the cockpit and was usually handled by the helmsman.
Mainsheets and Travelers
Thirty years ago, virtually all mainsheets were attached to the aft end of the boom and to a multisheave block on a short and mostly inefficient traveler at the stern of the boat. Because of the position of the traveler, its angle of effectiveness was fairly narrow, so when far off the wind (beam and broad reaches and running), the amount of downforce on the boom became little to negligible, rendering the traveler useless.
A double-legged mainsheet never accomplished its intended goal of acting like a traveler. Such a mainsheet always vectors the load to the longitudinal center of the boat on all points of sail regardless how far apart the lower blocks are spread. It was the racers who came up with the idea of moving the mainsheet to the approximate middle of the boom and down to a longer track and adjustable car (the traveler), usually just forward of the main companionway hatch on the cabin top. With this arrangement, the mainsheet becomes the major controller of both boom angle as well as mainsail twist by its increased downforce on the boom and sail.
The traveler car should be controlled by a port and starboard tackle of at least 3-to-1 advantage for boats up to 24 feet, 4-to-1 for boats up to 30 feet, and 5- to 6-to-1 for boats up to 34 feet and beyond. I also recommend the use of cam or clam cleats for all traveler control lines.
Racing sailors also came up with the idea of a boom vang attached to the forward portion of the boom at the upper end, and to a bale at the base of the mast at the lower end. This is what you usually see on most sailboats today. That simple arrangement was a giant leap forward in the area of mainsail-twist control. But almost indiscernible additional improvement seemed to occur. Nowadays, most boom vangs aren’t all that efficient and ought to be brought into this century.
The first improvement should be to pull downward on the boom vang line in order to pull down the boom. However, I rarely see a vang rigged this way, which means it loses about half of its power advantage. Most vangs I see are pulled upward or aft to exert a download on the boom, thus losing more power.
A really practical boom vang should have at least a snap shackle on the lower block so it can be quickly detached from the mast base and moved to a car on the genoa track or a hole in a perforated aluminum toe rail. This will allow the boom vang to exert much more of a vertical download. The more vertical the vang, the more downforce on the boom. Another benefit to the detachable boom vang is that the lower block can be brought forward of the mast and attached to a stout deck-pad eye or perforated toe rail so the boom vang can also act as a preventer when sailing downwind.
Doubling the power of the boom vang can be accomplished simply and easily with a small investment by adding a 2-by-1 cascade (also, again, called a Burton), which is a single 7-by-7-foot or 7-by-37-foot stainless cable run though a wire block on the boom with one end shackled to the vang bale at the mast base. The other end of the wire is fashioned with an eye to which the upper end of the vang tackle is attached. So if your vang tackle is 5-to-1 and the cascade is 2-to-1, your vang will become 10-to-1. Then by moving the lower end of the vang from the mast to the toe-rail eye, a dedicated deck-pad eye or a genoa-track car, you have doubled it again, all for about $40.
The vang that I have described is most efficient when sailing long distances without jibing or tacking, but if you’re simply afternoon daysailing around the bay, the vang would be more conveniently left attached to the bale at the mast base.
I have never seen a rigid boom vang that was routinely adjusted while under sail; they’re really only a boom support system while under power or tied up to a dock.
Main Boom Topping Lift
I put the topping lift in the same underused category with the main outhaul; too often it’s a bundle of knots at the end of the boom that have not been adjusted or adjustable in decades.
A proper topping lift is meant to raise and store the boom off the Bimini when not in use. When under sail, however, its purpose is to adjust the weight of the boom so it changes the sail twist in various wind conditions and points of sail. It works in the opposite direction of a boom vang; it pulls the boom upward while the vang pulls downward. Upward increases sail twist, and downward reduces it.
A topping lift should also be used to take the weight of the boom off the mains’l leech when putting in a reef, then tightened again while shaking out the reef. The topping lift should be adjustable on any point of sail, which translates into “reachable.” Also, lifting your outboard from your dinghy becomes a simple matter by using your boom vang tackle attached to the end of the boom, and “topping” the boom with the topping lift so the outboard can clear the aft pulpit and lifelines.
Backstay Adjusters
These are used to apply tension to the backstay, which is transferred to the headstay for the purpose of flattening the luff of the headsail…or slacking the backstay, thus also easing the headstay to add more draft to the jib or genoa, as would be desirable when off the wind. When closehauled and/or sailing in a stiff breeze, a flattened headsail is preferred to lessen the boat’s heeling moment and to allow the boat to point up a little closer to the wind. With a backstay adjuster, this can be done in a few seconds with an adequate tackle arrangement.
Adjusting a headstay is usually impossible while under sail with the headsail sheeted in tightly. There are special turnbuckles and hydraulic backstay adjusters that can be used while under sail, but they are not as rapid as the appropriate backstay tackle systems. When tightening the backstay, the mast is also slightly bent to help flatten the draft and remove the “cup” from the luff of the mainsail at the same time as the headsail. So double benefits are derived from one simple adjustment.
Making your boat perform better does not have to be, nor should it be, a lot of work. In reality, effective running-rigging systems will make sailing a lot less strenuous, as well as more enjoyable and rewarding. Your boat will look better and perform better, and teach you a lot about getting the most out of the wind while adding joy to your afternoons under the clouds.
Don’t avoid the possibilities. Embrace them.
Boat designer, builder, writer, illustrator and longtime CW contributor Bruce Bingham lives aboard his Cape Dory 28, Nikki , on Florida’s Gulf coast.
- More: deck hardware , How To , lines , print oct 2020 , rigging
- More How To
How To Prioritize Your Sailboat’s Spring Checklist
How to protect your spars from corrosion, sailing totem refit series: the forward head makeover, fatty goodlander: dealing with chafe while cruising, tradewinds debuts 59-foot twe6 smart electric yacht, good bread for good health, center of effort, the halfway point: sailing to bermuda.
- Digital Edition
- Customer Service
- Privacy Policy
- Email Newsletters
- Cruising World
- Sailing World
- Salt Water Sportsman
- Sport Fishing
- Wakeboarding
Attainable Adventure Cruising
The Offshore Voyaging Reference Site
- Cruising Sailboat Running Rigging Inspection
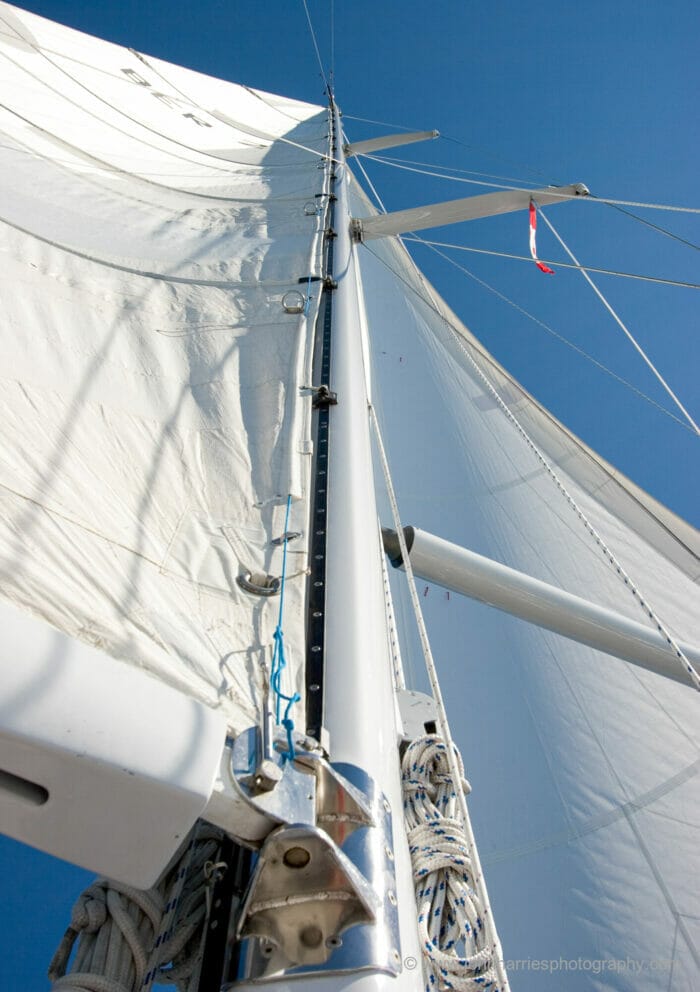
In Part 1 we inspected the mast, boom, and a lot of related stuff in the boat, including chainplates and the step, and in Part 2 we gave the standing rigging a good going over.
Now let’s move on to the running rigging.
Login to continue reading (scroll down)
Please Share a Link:
More Articles From Online Book: Sail Handling and Rigging Made Easy:
- Six Reasons To Leave The Cockpit Often
- Don’t Forget About The Sails
- Your Mainsail Is Your Friend
- Hoisting the Mainsail Made Easy—Simplicity in Action
- Reefs: How Many and How Deep
- Reefing Made Easy
- Reefing From The Cockpit 2.0—Thinking Things Through
- Reefing Questions and Answers
- A Dangerous Myth about Reefing
- Mainsail Handling Made Easy with Lazyjacks
- Topping Lift Tips and a Hack
- 12 Reasons The Cutter Is A Great Offshore Voyaging Rig
- Cutter Rig—Should You Buy or Convert?
- Cutter Rig—Optimizing and/or Converting
- Cruising Rigs—Sloop, Cutter, or Solent?
- Sailboat Deck Layouts
- The Case For Roller-Furling Headsails
- UV Protection For Roller Furling Sails
- In-Mast, In-Boom, or Slab Reefing—Convenience and Reliability
- In-Mast, In-Boom, or Slab Reefing —Performance, Cost and Safety
- The Case For Hank On Headsails
- Making Life Easier—Roller Reefing/Furling
- Making Life Easier—Storm Jib
- Gennaker Furlers Come Of Age
- Swept-Back Spreaders—We Just Don’t Get It!
- Q&A: Staysail Stay: Roller Furling And Fixed Vs Hanks And Removable
- Rigid Vangs
- Rigging a Proper Preventer, Part 1
- Rigging a Proper Preventer—Part 2
- Amidships “Preventers”—A Bad Idea That Can Kill
- Keeping The Boom Under Control—Boom Brakes
- Downwind Sailing, Tips and Tricks
- Downwind Sailing—Poling Out The Jib
- Setting and Striking a Spinnaker Made Easy and Safe
- Ten Tips To Fix Weather Helm
- Running Rigging Recommendations—Part 1
- Running Rigging Recommendations—Part 2
- Two Dangerous Rigging Mistakes
- Rig Tuning, Part 1—Preparation
- Rig Tuning, Part 2—Understanding Rake and Bend
- Rig Tuning, Part 3—6 Steps to a Great Tune
- Rig Tuning, Part 4—Mast Blocking, Stay Tension, and Spreaders
- Rig Tuning, Part 5—Sailing Tune
- 12 Great Rigging Hacks
- 9 Tips To Make Unstepping a Sailboat Mast Easier
- Cruising Sailboat Spar Inspection
- Cruising Sailboat Standing Rigging Inspection
- Cruising Sailboat Rig Wiring and Lighting Inspection
- Cruising Sailboat Roller Furler and Track Inspection
- Download Cruising Sailboat Rig Checklist

Your yes, to Tylska… is going back to this article on the new page.

Thanks, fixed now.

Hi John, Ginger gave me, years ago, an endoscope with a wireless display capability to a computer, Ipad or phone. It consisted of a small camera head (pencil diameter size), long cable (20-30 feet?) and a control box on the end for battery, transmitting and to adjust the light that surrounds the camera lens. The light can go quite bright and is a very important part of the package when pushed into dark corners. About once a year this device makes a job much easier, even possible and a few times a year, it is just handy to look at things and plan work before performing boat yoga to get to the job. It is water proof so I have used it, attached to a boat hook, to look at the prop and zincs when in really cold water which has allowed me to put off the chore of donning a wet suit etc. for a dive. It is on the boat, so I have no idea of the manufacturer and I would say that things have changed, probably for the better, in the last decade or so. My sense was that it was surprisingly inexpensive, but as a present, can’t speak to that as well. It is a very appreciated tool in my arsenal, and might be quite useful in looking into or up a mast at the lines. My best, Dick Stevenson, s/v Alchemy
That sounds very like mine, and yes I have found it useful for other things, but not so much for looking inside the mast, I think because the lens is such a wide angle. As you say, I’m hoping this tech has got better in the last couple of years and that someone will have a report on looking up the mast tube with one.

Hi John, such a valuable series but a real task. May I suggest mast/collar/deck seal checks for seal/movement, and then check any block attachment points? Background – popular in production boat rigs, we had a small leak (into the cabin headliner) offshore around the mast collar for our keel stepped Z-Spar mast that we couldn’t seal from above or below. Only when we removed the mast to re-rig did we realise the cause.
Our alloy mast collar not only covers and protects the mast/deck seal but also provides the attachment for the halyard, vang and mainsheet turning blocks. The aft end of the collar is held securely down with an independent tie rod that screws into the mast shoe, to counter the loads from the mainsheet and vang. But at the forward end of the collar it was secured only with bolts through the deck, allowing it some flex. The turning block for our Code-0 halyard (grey&white in photo) is attached to the starboard side of the collar forwards and takes a lot of load, but there was no forward tie rod (due to the proximity of a main bulkhead). This halyard load had been lifting the front edge of the collar along with the sealant between the collar and the deck, allowing water ingress to the mast/deck seal.
We also found hair-line cracks in the old collar (casting) so swapped it out (great stock service and value from US Spars).
We changed the two forward/corner fastening under the deck to eye-bolt nuts, then tied each down to a newly tapped mast shoe using wire ties, eye-bolts and bottle screws (just enough access). We then added an L shaped stainless bar for block attachment to either side, further stiffening the collar. No movement now and no leak!

Great suggestion, I will add that to part one since it will fit in nicely with checking the chain plates and step.
Hi Rob, I would keep a weather eye on the alloy collar. Mine started to show bending and dents from the stainless steel turning block’s shackles exerting pressure (point loading usually). I needed to augment with stainless steel collars. My best, Dick Stevenson, s/v Alchemy
Thanks Dick, agreed. The side halyard blocks all attach to the stainless angle bar. The vang and mainsheet attach with a shackle directly to the collar as the lead is serviceable, but not ideal. So I am going to change this design and use another piece of L-shaped angle bar bolted along the aft edge, to which these blocks will then shackle.

We have a tackle inside the boom for extra purchase on our outhaul. A mix of wire and rope. This will require the rivets holding goose neck end of the boom to be drilled out to remove it for inspection. I expect we are not alone in this arrangement and it’s probably a good time to take it out and have a look. (Boats with single line reefing setup probably have a selection of bits going on inside the boom). We also have a purchase system inside out vang which is easier to access but still needs an extra look.
In addition if you notice chaff on a halyard somewhere unexpected (like several meters from the end) check to see what it’s rubbing on. We now have added extra protection on our spreaders where halyards clipped to the bottom of the shrouds for storage were gentle wearing a groove in the aluminium.
Great tips, I will add them to the check list and this article.

I recently acquired a 10 m. endoscope with wifi connection to IOS devices that renders the camera image on a smart phone or tablet. It was made by Depstech, a company which offers a wide range of reasonably priced endoscopic imaging devices. It features greater depth of field than previous “bore scopes”. I’ve had some good results “fishing” messengers inside the mast with this kind of endoscope, and I bought this long one to hunt for a lost messenger that got loose in the mast during the 17 month covid layover while the boat was berthed in Montenegro. I’m worried that this loose messenger in the mast will eventually snag a halyard at an inopportune moment. Wish me luck.
Thanks for the report. Sounds like things have got better since I tried one. Which one did you get? https://depstech.com/collections/wifi-endoscopes
And good luck finding the messenger.
Hi John and all, I have secured certain threaded D shackles for decades with a dab of silicone on the threads, a practice I learned from the rigger at HR&R back in the day. This has worked well for me with a minimum of fuss or mess. I also do this with galvanized anchor shackles: not so much for securing as they will be moused, but more to make the threaded portion more easily removed when needed. Too often after a season (or two if I am remiss), these are quite hard to unscrew. My best, Dick Stevenson, s/v Alchemy

Hi John, I also love the Wichard shackles and on racing boats I have sometimes used them in applications with many times higher loads than they are meant for. I’ve managed to damage them, as in bending the bolt and changing the shape of the U part, but none have ever been close to actually letting go.
The collar that keeps the bolt from falling out is invaluable and the self-locking function is great, but many tighten them too hard, as we’re used too from other shackles. Too much can mar the surface and bend parts so the shackle works less smoothly. It still works just fine, but it’s a pity with such nice pieces.
Also, if the shackle is overloaded and bent, the U will become narrower and loose its spring function. Then (if not too much bent) it just works as a normal shackle. Conclusion: Totally worth going for, and even more so because of the reasonable price.

One horror story that I heard is when the outer sheath fails at the masthead sheave and bunches up inside, preventing dropping, or even reefing the sail. Inspection and prevention is the best solution. When we had splices on our halyards we saw chafe. With knots, much less. We have long tails on our halyards so can cut the top foot off and re-tie when I’m any doubt. Perhaps we are wrong, but with 12mm T900 halyards on a 47 ft boat, we feel that we do not need its full strength.
I guess we will have to agree to disagree on this one.
I strongly recommend against tying halyards made of T900 (I used that line for 15 years), particularly, since the core includes kevlar cousin (Tehnora) so it’s particularly susceptible to the problem I detail above with fiber breaking due to tight turns. The point here is not that you are losing a bit of strength from the knot, but that in all probability you are relying on the Dacron sheath, not the core, to take most of the load in the knot, which is a small fraction of the intended strength of the line and are taking a big risk of exactly the problem you postulate.

I see no mention of winches in the the rig maintenance articles. I suppose they’d go with running rigging? What is a reasonable for a maintenance schedule? What should the maintenance be? Does anyone have a recommendation for grease?
Hi Courtney,
https://www.morganscloud.com/jhhtips/qa-winch-service-intervals-grease/

Beginner’s Guide: How To Rig A Sailboat – Step By Step Tutorial
Alex Morgan
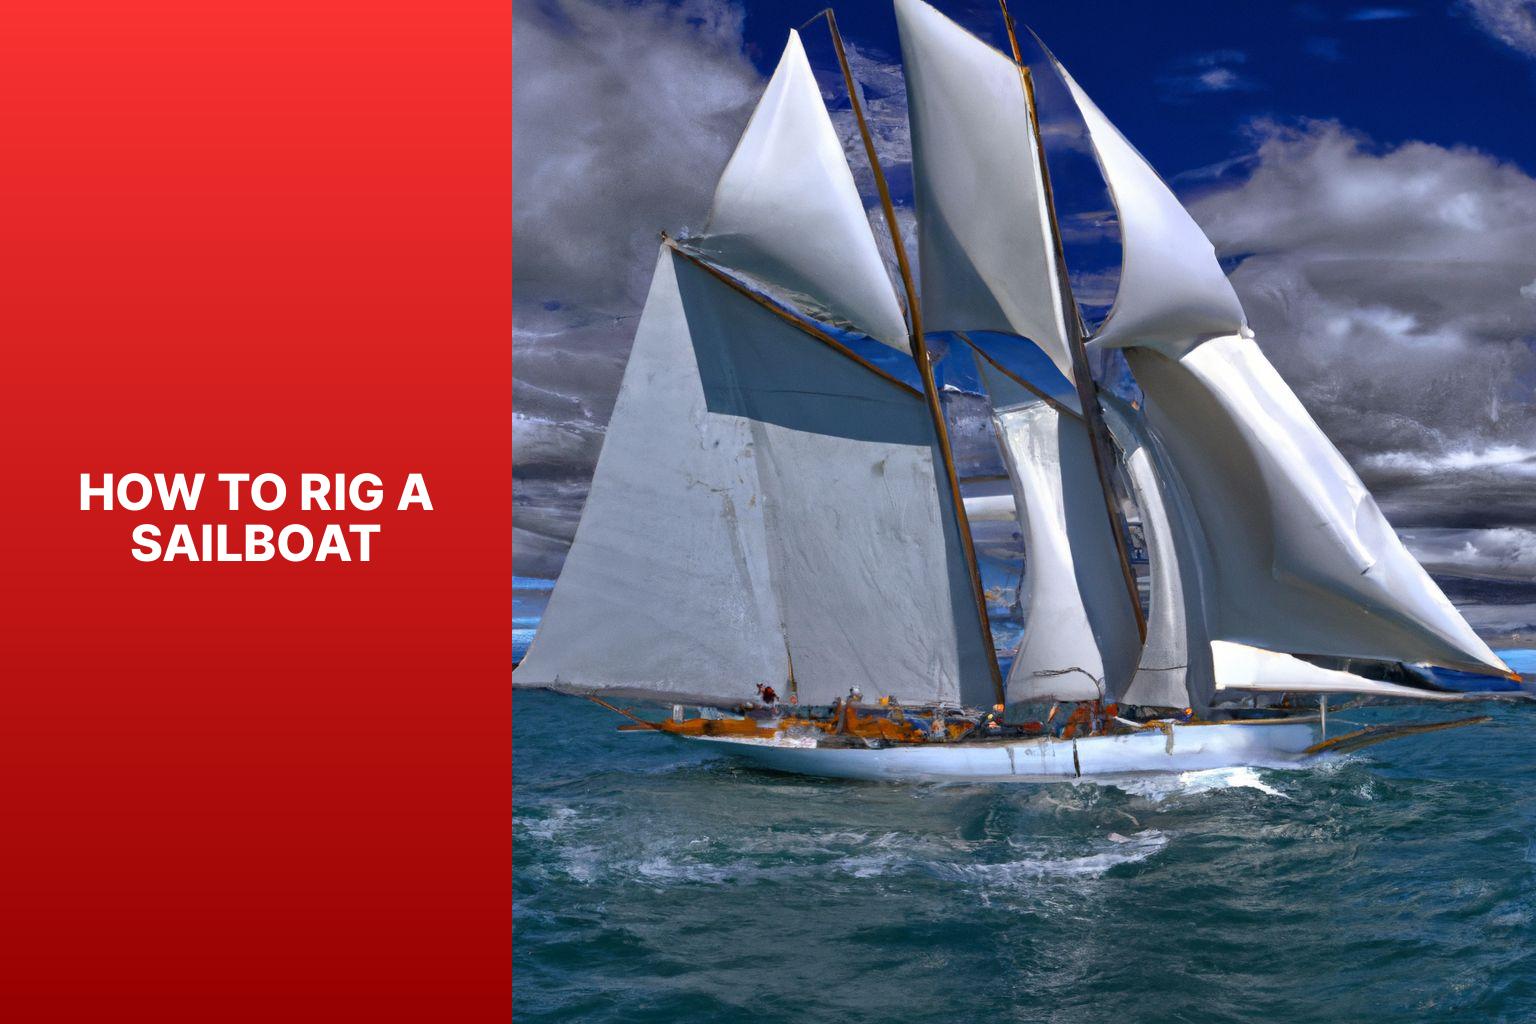
Rigging a sailboat is a crucial process that ensures the proper setup and functioning of a sailboat’s various components. Understanding the process and components involved in rigging is essential for any sailor or boat enthusiast. In this article, we will provide a comprehensive guide on how to rig a sailboat.
Introduction to Rigging a Sailboat
Rigging a sailboat refers to the process of setting up the components that enable the sailboat to navigate through the water using wind power. This includes assembling and positioning various parts such as the mast, boom, standing rigging, running rigging, and sails.
Understanding the Components of a Sailboat Rigging
Before diving into the rigging process, it is important to have a good understanding of the key components involved. These components include:
The mast is the tall vertical spar that provides vertical support to the sails and holds them in place.
The boom is the horizontal spar that runs along the bottom edge of the sail and helps control the shape and position of the sail.
- Standing Rigging:
Standing rigging consists of the wires and cables that support and stabilize the mast, keeping it upright.
- Running Rigging:
Running rigging refers to the lines and ropes used to control the sails, such as halyards, sheets, and control lines.
Preparing to Rig a Sailboat
Before rigging a sailboat, there are a few important steps to take. These include:
- Checking the Weather Conditions:
It is crucial to assess the weather conditions before rigging a sailboat. Unfavorable weather, such as high winds or storms, can make rigging unsafe.
- Gathering the Necessary Tools and Equipment:
Make sure to have all the necessary tools and equipment readily available before starting the rigging process. This may include wrenches, hammers, tape, and other common tools.
- Inspecting the Rigging Components:
In the upcoming sections of this article, we will provide a step-by-step guide on how to rig a sailboat, as well as important safety considerations and tips to keep in mind. By following these guidelines, you will be able to rig your sailboat correctly and safely, allowing for a smooth and enjoyable sailing experience.
Key takeaway:
- Rigging a sailboat maximizes efficiency: Proper rigging allows for optimized sailing performance, ensuring the boat moves smoothly through the water.
- Understanding sailboat rigging components: Familiarity with the various parts of a sailboat rigging, such as the mast, boom, and standing and running riggings, is essential for effective rigging setup.
- Importance of safety in sailboat rigging: Ensuring safety is crucial during the rigging process, including wearing a personal flotation device, securing loose ends and lines, and being mindful of overhead power lines.
Get ready to set sail and dive into the fascinating world of sailboat rigging! We’ll embark on a journey to understand the various components that make up a sailboat’s rigging. From the majestic mast to the nimble boom , and the intricate standing rigging to the dynamic running rigging , we’ll explore the crucial elements that ensure smooth sailing. Not forgetting the magnificent sail, which catches the wind and propels us forward. So grab your sea legs and let’s uncover the secrets of sailboat rigging together.
Understanding the mast is crucial when rigging a sailboat. Here are the key components and steps to consider:
1. The mast supports the sails and rigging of the sailboat. It is made of aluminum or carbon fiber .
2. Before stepping the mast , ensure that the area is clear and the boat is stable. Have all necessary tools and equipment ready.
3. Inspect the mast for damage or wear. Check for corrosion , loose fittings , and cracks . Address any issues before proceeding.
4. To step the mast , carefully lift it into an upright position and insert the base into the mast step on the deck of the sailboat.
5. Secure the mast using the appropriate rigging and fasteners . Attach the standing rigging , such as shrouds and stays , to the mast and the boat’s hull .
Fact: The mast of a sailboat is designed to withstand wind resistance and the tension of the rigging for stability and safe sailing.
The boom is an essential part of sailboat rigging. It is a horizontal spar that stretches from the mast to the aft of the boat. Constructed with durable yet lightweight materials like aluminum or carbon fiber, the boom provides crucial support and has control over the shape and position of the sail. It is connected to the mast through a boom gooseneck , allowing it to pivot. One end of the boom is attached to the mainsail, while the other end is equipped with a boom vang or kicker, which manages the tension and angle of the boom. When the sail is raised, the boom is also lifted and positioned horizontally by using the topping lift or lazy jacks.
An incident serves as a warning that emphasizes the significance of properly securing the boom. In strong winds, an improperly fastened boom swung across the deck, resulting in damage to the boat and creating a safety hazard. This incident highlights the importance of correctly installing and securely fastening all rigging components, including the boom, to prevent accidents and damage.
3. Standing Rigging
When rigging a sailboat, the standing rigging plays a vital role in providing stability and support to the mast . It consists of several key components, including the mast itself, along with the shrouds , forestay , backstay , and intermediate shrouds .
The mast, a vertical pole , acts as the primary support structure for the sails and the standing rigging. Connected to the top of the mast are the shrouds , which are cables or wires that extend to the sides of the boat, providing essential lateral support .
The forestay is another vital piece of the standing rigging. It is a cable or wire that runs from the top of the mast to the bow of the boat, ensuring forward support . Similarly, the backstay , also a cable or wire, runs from the mast’s top to the stern of the boat, providing important backward support .
To further enhance the rig’s stability , intermediate shrouds are installed. These additional cables or wires are positioned between the main shrouds, as well as the forestay or backstay. They offer extra support , strengthening the standing rigging system.
Regular inspections of the standing rigging are essential to detect any signs of wear, such as fraying or corrosion . It is crucial to ensure that all connections within the rig are tight and secure, to uphold its integrity. Should any issues be identified, immediate attention must be given to prevent accidents or damage to the boat. Prioritizing safety is of utmost importance when rigging a sailboat, thereby necessitating proper maintenance of the standing rigging. This ensures a safe and enjoyable sailing experience.
Note: <p> tags have been kept intact.
4. Running Rigging
Running Rigging
When rigging a sailboat, the running rigging is essential for controlling the sails and adjusting their position. It is important to consider several aspects when dealing with the running rigging.
1. Choose the right rope: The running rigging typically consists of ropes with varying properties such as strength, stretch, and durability. Weather conditions and sailboat size should be considered when selecting the appropriate rope.
2. Inspect and maintain the running rigging: Regularly check for signs of wear, fraying, or damage. To ensure safety and efficiency, replace worn-out ropes.
3. Learn essential knot tying techniques: Having knowledge of knots like the bowline, cleat hitch, and reef knot is crucial for securing the running rigging and adjusting sails.
4. Understand different controls: The running rigging includes controls such as halyards, sheets, and control lines. Familiarize yourself with their functions and proper usage to effectively control sail position and tension.
5. Practice proper sail trimming: Adjusting the tension of the running rigging significantly affects sailboat performance. Mastering sail trimming techniques will help optimize sail shape and maximize speed.
By considering these factors and mastering running rigging techniques, you can enhance your sailing experience and ensure the safe operation of your sailboat.
The sail is the central component of sailboat rigging as it effectively harnesses the power of the wind to propel the boat.
When considering the sail, there are several key aspects to keep in mind:
– Material: Sails are typically constructed from durable and lightweight materials such as Dacron or polyester. These materials provide strength and resistance to various weather conditions.
– Shape: The shape of the sail plays a critical role in its overall performance. A well-shaped sail should have a smooth and aerodynamic profile, which allows for maximum efficiency in capturing wind power.
– Size: The size of the sail is determined by its sail area, which is measured in square feet or square meters. Larger sails have the ability to generate more power, but they require greater skill and experience to handle effectively.
– Reefing: Reefing is the process of reducing the sail’s size to adapt to strong winds. Sails equipped with reefing points allow sailors to decrease the sail area, providing better control in challenging weather conditions.
– Types: There are various types of sails, each specifically designed for different purposes. Common sail types include mainsails, jibs, genoas, spinnakers, and storm sails. Each type possesses its own unique characteristics and is utilized under specific wind conditions.
Understanding the sail and its characteristics is vital for sailors, as it directly influences the boat’s speed, maneuverability, and overall safety on the water.
Getting ready to rig a sailboat requires careful preparation and attention to detail. In this section, we’ll dive into the essential steps you need to take before setting sail. From checking the weather conditions to gathering the necessary tools and equipment, and inspecting the rigging components, we’ll ensure that you’re fully equipped to navigate the open waters with confidence. So, let’s get started on our journey to successfully rigging a sailboat!
1. Checking the Weather Conditions
Checking the weather conditions is crucial before rigging a sailboat for a safe and enjoyable sailing experience. Monitoring the wind speed is important in order to assess the ideal sailing conditions . By checking the wind speed forecast , you can determine if the wind is strong or light . Strong winds can make sailboat control difficult, while very light winds can result in slow progress.
Another important factor to consider is the wind direction . Assessing the wind direction is crucial for route planning and sail adjustment. Favorable wind direction helps propel the sailboat efficiently, making your sailing experience more enjoyable.
In addition to wind speed and direction, it is also important to consider weather patterns . Keep an eye out for impending storms or heavy rain. It is best to avoid sailing in severe weather conditions that may pose a safety risk. Safety should always be a top priority when venturing out on a sailboat.
Another aspect to consider is visibility . Ensure good visibility by checking for fog, haze, or any other conditions that may hinder navigation. Clear visibility is important for being aware of other boats and potential obstacles that may come your way.
Be aware of the local conditions . Take into account factors such as sea breezes, coastal influences, or tidal currents. These local factors greatly affect sailboat performance and safety. By considering all of these elements, you can have a successful and enjoyable sailing experience.
Here’s a true story to emphasize the importance of checking the weather conditions. One sunny afternoon, a group of friends decided to go sailing. Before heading out, they took the time to check the weather conditions. They noticed that the wind speed was expected to be around 10 knots, which was perfect for their sailboat. The wind direction was coming from the northwest, allowing for a pleasant upwind journey. With clear visibility and no approaching storms, they set out confidently, enjoying a smooth and exhilarating sail. This positive experience was made possible by their careful attention to checking the weather conditions beforehand.
2. Gathering the Necessary Tools and Equipment
To efficiently gather all of the necessary tools and equipment for rigging a sailboat, follow these simple steps:
- First and foremost, carefully inspect your toolbox to ensure that you have all of the basic tools such as wrenches, screwdrivers, and pliers.
- Make sure to check if you have a tape measure or ruler available as they are essential for precise measurements of ropes or cables.
- Don’t forget to include a sharp knife or rope cutter in your arsenal as they will come in handy for cutting ropes or cables to the desired lengths.
- Gather all the required rigging hardware including shackles, pulleys, cleats, and turnbuckles.
- It is always prudent to check for spare ropes or cables in case replacements are needed during the rigging process.
- If needed, consider having a sailing knife or marlinspike tool for splicing ropes or cables.
- For rigging a larger sailboat, it is crucial to have a mast crane or hoist to assist with stepping the mast.
- Ensure that you have a ladder or some other means of reaching higher parts of the sailboat, such as the top of the mast.
Once, during the preparation of rigging my sailboat, I had a moment of realization when I discovered that I had forgotten to bring a screwdriver . This unfortunate predicament occurred while I was in a remote location with no nearby stores. Being resourceful, I improvised by utilizing a multipurpose tool with a small knife blade, which served as a makeshift screwdriver. Although it was not the ideal solution, it allowed me to accomplish the task. Since that incident, I have learned the importance of double-checking my toolbox before commencing any rigging endeavor. This practice ensures that I have all of the necessary tools and equipment, preventing any unexpected surprises along the way.
3. Inspecting the Rigging Components
Inspecting the rigging components is essential for rigging a sailboat safely. Here is a step-by-step guide on inspecting the rigging components:
1. Visually inspect the mast, boom, and standing rigging for damage, such as corrosion, cracks, or loose fittings.
2. Check the tension of the standing rigging using a tension gauge. It should be within the recommended range from the manufacturer.
3. Examine the turnbuckles, clevis pins, and shackles for wear or deformation. Replace any damaged or worn-out hardware.
4. Inspect the running rigging, including halyards and sheets, for fraying, signs of wear, or weak spots. Replace any worn-out lines.
5. Check the sail for tears, wear, or missing hardware such as grommets or luff tape.
6. Pay attention to the connections between the standing rigging and the mast. Ensure secure connections without any loose or missing cotter pins or rigging screws.
7. Inspect all fittings, such as mast steps, spreader brackets, and tangs, to ensure they are securely fastened and in good condition.
8. Conduct a sea trial to assess the rigging’s performance and make necessary adjustments.
Regularly inspecting the rigging components is crucial for maintaining the sailboat’s rigging system’s integrity, ensuring safe sailing conditions, and preventing accidents or failures at sea.
Once, I went sailing on a friend’s boat without inspecting the rigging components beforehand. While at sea, a sudden gust of wind caused one of the shrouds to snap. Fortunately, no one was hurt, but we had to cut the sail loose and carefully return to the marina. This incident taught me the importance of inspecting the rigging components before sailing to avoid unforeseen dangers.
Step-by-Step Guide on How to Rig a Sailboat
Get ready to set sail with our step-by-step guide on rigging a sailboat ! We’ll take you through the process from start to finish, covering everything from stepping the mast to setting up the running rigging . Learn the essential techniques and tips for each sub-section, including attaching the standing rigging and installing the boom and sails . Whether you’re a seasoned sailor or a beginner, this guide will have you ready to navigate the open waters with confidence .
1. Stepping the Mast
To step the mast of a sailboat, follow these steps:
1. Prepare the mast: Position the mast near the base of the boat.
2. Attach the base plate: Securely fasten the base plate to the designated area on the boat.
3. Insert the mast step: Lower the mast step into the base plate and align it with the holes or slots.
4. Secure the mast step: Use fastening screws or bolts to fix the mast step in place.
5. Raise the mast: Lift the mast upright with the help of one or more crew members.
6. Align the mast: Adjust the mast so that it is straight and aligned with the boat’s centerline.
7. Attach the shrouds: Connect the shrouds to the upper section of the mast, ensuring proper tension.
8. Secure the forestay: Attach the forestay to the bow of the boat, ensuring it is securely fastened.
9. Final adjustments: Check the tension of the shrouds and forestay, making any necessary rigging adjustments.
Following these steps ensures that the mast is properly stepped and securely in place, allowing for a safe and efficient rigging process. Always prioritize safety precautions and follow manufacturer guidelines for your specific sailboat model.
2. Attaching the Standing Rigging
To attach the standing rigging on a sailboat, commence by preparing the essential tools and equipment, including wire cutters, crimping tools, and turnbuckles.
Next, carefully inspect the standing rigging components for any indications of wear or damage.
After inspection, fasten the bottom ends of the shrouds and stays to the chainplates on the deck.
Then, securely affix the top ends of the shrouds and stays to the mast using adjustable turnbuckles .
To ensure proper tension, adjust the turnbuckles accordingly until the mast is upright and centered.
Utilize a tension gauge to measure the tension in the standing rigging, aiming for around 15-20% of the breaking strength of the rigging wire.
Double-check all connections and fittings to verify their security and proper tightness.
It is crucial to regularly inspect the standing rigging for any signs of wear or fatigue and make any necessary adjustments or replacements.
By diligently following these steps, you can effectively attach the standing rigging on your sailboat, ensuring its stability and safety while on the water.
3. Installing the Boom and Sails
To successfully complete the installation of the boom and sails on a sailboat, follow these steps:
1. Begin by securely attaching the boom to the mast. Slide it into the gooseneck fitting and ensure it is firmly fastened using a boom vang or another appropriate mechanism.
2. Next, attach the main sail to the boom. Slide the luff of the sail into the mast track and securely fix it in place using sail slides or cars.
3. Connect the mainsheet to the boom. One end should be attached to the boom while the other end is connected to a block or cleat on the boat.
4. Proceed to attach the jib or genoa. Make sure to securely attach the hanks or furler line to the forestay to ensure stability.
5. Connect the jib sheets. One end of each jib sheet should be attached to the clew of the jib or genoa, while the other end is connected to a block or winch on the boat.
6. Before setting sail, it is essential to thoroughly inspect all lines and connections. Ensure that they are properly tensioned and that all connections are securely fastened.
During my own experience of installing the boom and sails on my sailboat, I unexpectedly encountered a strong gust of wind. As a result, the boom began swinging uncontrollably, requiring me to quickly secure it to prevent any damage. This particular incident served as a vital reminder of the significance of properly attaching and securing the boom, as well as the importance of being prepared for unforeseen weather conditions while rigging a sailboat.
4. Setting Up the Running Rigging
Setting up the running rigging on a sailboat involves several important steps. First, attach the halyard securely to the head of the sail. Then, connect the sheets to the clew of the sail. If necessary, make sure to secure the reefing lines . Attach the outhaul line to the clew of the sail and connect the downhaul line to the tack of the sail. It is crucial to ensure that all lines are properly cleated and organized. Take a moment to double-check the tension and alignment of each line. If you are using a roller furling system, carefully wrap the line around the furling drum and securely fasten it. Perform a thorough visual inspection of the running rigging to check for any signs of wear or damage. Properly setting up the running rigging is essential for safe and efficient sailing. It allows for precise control of the sail’s position and shape, ultimately optimizing the boat’s performance on the water.
Safety Considerations and Tips
When it comes to rigging a sailboat, safety should always be our top priority. In this section, we’ll explore essential safety considerations and share some valuable tips to ensure smooth sailing. From the importance of wearing a personal flotation device to securing loose ends and lines, and being cautious around overhead power lines, we’ll equip you with the knowledge and awareness needed for a safe and enjoyable sailing experience. So, let’s set sail and dive into the world of safety on the water!
1. Always Wear a Personal Flotation Device
When rigging a sailboat, it is crucial to prioritize safety and always wear a personal flotation device ( PFD ). Follow these steps to properly use a PFD:
- Select the appropriate Coast Guard-approved PFD that fits your size and weight.
- Put on the PFD correctly by placing your arms through the armholes and securing all the straps for a snug fit .
- Adjust the PFD for comfort , ensuring it is neither too tight nor too loose, allowing freedom of movement and adequate buoyancy .
- Regularly inspect the PFD for any signs of wear or damage, such as tears or broken straps, and replace any damaged PFDs immediately .
- Always wear your PFD when on or near the water, even if you are a strong swimmer .
By always wearing a personal flotation device and following these steps, you will ensure your safety and reduce the risk of accidents while rigging a sailboat. Remember, prioritize safety when enjoying water activities.
2. Secure Loose Ends and Lines
Inspect lines and ropes for frayed or damaged areas. Secure loose ends and lines with knots or appropriate cleats or clamps. Ensure all lines are properly tensioned to prevent loosening during sailing. Double-check all connections and attachments for security. Use additional safety measures like extra knots or stopper knots to prevent line slippage.
To ensure a safe sailing experience , it is crucial to secure loose ends and lines properly . Neglecting this important step can lead to accidents or damage to the sailboat. By inspecting, securing, and tensioning lines , you can have peace of mind knowing that everything is in place. Replace or repair any compromised lines or ropes promptly. Securing loose ends and lines allows for worry-free sailing trips .
3. Be Mindful of Overhead Power Lines
When rigging a sailboat, it is crucial to be mindful of overhead power lines for safety. It is important to survey the area for power lines before rigging the sailboat. Maintain a safe distance of at least 10 feet from power lines. It is crucial to avoid hoisting tall masts or long antenna systems near power lines to prevent contact. Lower the mast and tall structures when passing under a power line to minimize the risk of contact. It is also essential to be cautious in areas where power lines run over the water and steer clear to prevent accidents.
A true story emphasizes the importance of being mindful of overhead power lines. In this case, a group of sailors disregarded safety precautions and their sailboat’s mast made contact with a low-hanging power line, resulting in a dangerous electrical shock. Fortunately, no serious injuries occurred, but it serves as a stark reminder of the need to be aware of power lines while rigging a sailboat.
Some Facts About How To Rig A Sailboat:
- ✅ Small sailboat rigging projects can improve sailing performance and save money. (Source: stingysailor.com)
- ✅ Rigging guides are available for small sailboats, providing instructions and tips for rigging. (Source: westcoastsailing.net)
- ✅ Running rigging includes lines used to control and trim the sails, such as halyards and sheets. (Source: sailingellidah.com)
- ✅ Hardware used in sailboat rigging includes winches, blocks, and furling systems. (Source: sailingellidah.com)
- ✅ A step-by-step guide can help beginners rig a small sailboat for sailing. (Source: tripsavvy.com)
Frequently Asked Questions
1. how do i rig a small sailboat.
To rig a small sailboat, follow these steps: – Install or check the rudder, ensuring it is firmly attached. – Attach or check the tiller, the long steering arm mounted to the rudder. – Attach the jib halyard by connecting the halyard shackle to the head of the sail and the grommet in the tack to the bottom of the forestay. – Hank on the jib by attaching the hanks of the sail to the forestay one at a time. – Run the jib sheets by tying or shackling them to the clew of the sail and running them back to the cockpit. – Attach the mainsail by spreading it out and attaching the halyard shackle to the head of the sail. – Secure the tack, clew, and foot of the mainsail to the boom using various lines and mechanisms. – Insert the mainsail slugs into the mast groove, gradually raising the mainsail as the slugs are inserted. – Cleat the main halyard and lower the centerboard into the water. – Raise the jib by pulling down on the jib halyard and cleating it on the other side of the mast. – Tighten the mainsheet and one jibsheet to adjust the sails and start moving forward.
2. What are the different types of sailboat rigs?
Sailboat rigs can be classified into three main types: – Sloop rig: This rig has a single mast with a mainsail and a headsail, typically a jib or genoa. – Cutter rig: This rig has two headsails, a smaller jib or staysail closer to the mast, and a larger headsail, usually a genoa, forward of it, alongside a mainsail. – Ketch rig: This rig has two masts, with the main mast taller than the mizzen mast. It usually has a mainsail, headsail, and a mizzen sail. Each rig has distinct characteristics and is suitable for different sailing conditions and preferences.
3. What are the essential parts of a sailboat?
The essential parts of a sailboat include: – Mast: The tall vertical spar that supports the sails. – Boom: The horizontal spar connected to the mast, which extends outward and supports the foot of the mainsail. – Rudder: The underwater appendage that steers the boat. – Centerboard or keel: A retractable or fixed fin-like structure that provides stability and prevents sideways drift. – Sails: The fabric structures that capture the wind’s energy to propel the boat. – Running rigging: The lines or ropes used to control the sails and sailing equipment. – Standing rigging: The wires and cables that support the mast and reinforce the spars. These are the basic components necessary for the functioning of a sailboat.
4. What is a spinnaker halyard?
A spinnaker halyard is a line used to hoist and control a spinnaker sail. The spinnaker is a large, lightweight sail that is used for downwind sailing or reaching in moderate to strong winds. The halyard attaches to the head of the spinnaker and is used to raise it to the top of the mast. Once hoisted, the spinnaker halyard can be adjusted to control the tension and shape of the sail.
5. Why is it important to maintain and replace worn running rigging?
It is important to maintain and replace worn running rigging for several reasons: – Safety: Worn or damaged rigging can compromise the integrity and stability of the boat, posing a safety risk to both crew and vessel. – Performance: Worn rigging can affect the efficiency and performance of the sails, diminishing the boat’s speed and maneuverability. – Reliability: Aging or worn rigging is more prone to failure, which can lead to unexpected problems and breakdowns. Regular inspection and replacement of worn running rigging is essential to ensure the safe and efficient operation of a sailboat.
6. Where can I find sailboat rigging books or guides?
There are several sources where you can find sailboat rigging books or guides: – Online: Websites such as West Coast Sailing and Stingy Sailor offer downloadable rigging guides for different sailboat models. – Bookstores: Many bookstores carry a wide selection of boating and sailing books, including those specifically focused on sailboat rigging. – Sailing schools and clubs: Local sailing schools or yacht clubs often have resources available for learning about sailboat rigging. – Manufacturers: Some sailboat manufacturers, like Hobie Cat and RS Sailing, provide rigging guides for their specific sailboat models. Consulting these resources can provide valuable information and instructions for rigging your sailboat properly.
About the author

Leave a Reply Cancel reply
Your email address will not be published. Required fields are marked *
Save my name, email, and website in this browser for the next time I comment.
Latest posts

The history of sailing – from ancient times to modern adventures
History of Sailing Sailing is a time-honored tradition that has evolved over millennia, from its humble beginnings as a means of transportation to a beloved modern-day recreational activity. The history of sailing is a fascinating journey that spans cultures and centuries, rich in innovation and adventure. In this article, we’ll explore the remarkable evolution of…

Sailing Solo: Adventures and Challenges of Single-Handed Sailing
Solo Sailing Sailing has always been a pursuit of freedom, adventure, and self-discovery. While sailing with a crew is a fantastic experience, there’s a unique allure to sailing solo – just you, the wind, and the open sea. Single-handed sailing, as it’s often called, is a journey of self-reliance, resilience, and the ultimate test of…

Sustainable Sailing: Eco-Friendly Practices on the boat
Eco Friendly Sailing Sailing is an exhilarating and timeless way to explore the beauty of the open water, but it’s important to remember that our oceans and environment need our protection. Sustainable sailing, which involves eco-friendly practices and mindful decision-making, allows sailors to enjoy their adventures while minimizing their impact on the environment. In this…

- Forum Listing
- Marketplace
- Advanced Search
- About The Boat
- Gear & Maintenance
- SailNet is a forum community dedicated to Sailing enthusiasts. Come join the discussion about sailing, modifications, classifieds, troubleshooting, repairs, reviews, maintenance, and more!
Replacement running rigging???
- Add to quote
Hi all, I'm replacing all of my running rigging bit am feeling a bit overwhelmed with the sheer number of brands, tires, and technology out there. 1985 Hunter 34 original spec calls for: 7/16" low stretch for halyards Various sizes "yacht braid bbe" for sheets, vang, travelers etc Doesn't say for roller furling line Any suggestions on type or brand? Any idea what low stretch or yacht braid bbe refer to? We are trying to sail as much as possible these days but it's due for replacement. I'm just getting confused with New England Regatta, novabraid xle, polyester double braid, sta-set, etc etc etc with such a wide range of prices. I don't want crappy lines, but I also don't want to just pay for a name or assume something is better simply because it's more expensive. Thanks!
Effit, There is a lot of terminology and obviously a lot of trade names, material choices, construction methods, and all sorts of nonsense that you can ignore. Starting with a clean sheet of paper, first you need to define what type of sailing you are going to do, and how involved in making the lines you want to be. Raceing vs cruising is a big difference, performance cruising vs don't care cruising is as well. If you are willing to do some light splicing work, and I really suggest that you do, I would make one recommendation, if you just want to walk into a shop and buy it then I would make a different one. For what it's worth, on our Beneteau 381 I am using Halyards- 3/8 endurabraid. There are very low stretch, but pretty expensive. Main sheet - 8mm salsa. Light weight, doesn't absorb water, nice hand Jib sheet - 7/16 sta-set (these are the last lines from before we bought the boat) soon to be replaced with 3/8 endurabraid Control lines - 3-5mm Marlow Excel Control Furling line - 3/16 dyneema end for end spliced to 6mm Tenex. The light weight dyneema wraps well, the tenex is just for the part that is handled. My general rule of thumb is that anything that won't be touched b hand is uncovered dyneema, anything I handle needs to be larger, and I use either a dyneema blend (salsa) or cover it with something else (Tenex or a specialty made cover like Flavored Ice) depending on application. But I like doing splicing work, paying someone to do all this complicated splicing can get very expensive very quick.
Stumble said: .. . Main sheet - 8mm salsa. Light weight, doesn't absorb water, nice hand... Click to expand...
For low stretch, you probably want something with a "high tech" core (dyneema and friends). For everything else, you'd probably be happy with one of the "hybrid" lines (that have a mix of high-tech and polyester in the core). Some people like something like polyester or even nylon double-braid for travelers for shock absorption. Long story short, modern lines are super nice compared to what was available in 1985, so you can just get something basic that's the right size and it'll work. For calibration, something like New England Ropes VPC is probably okay for your sheets, and T-900 for halyards. No particular endorsement for New England Ropes, but you can use that for $$ calibration. As you spend more money, you get lower stretch lines that start lighter and stay lighter when they get wet. Unless you're seriously racing, you probably don't care. Stumble's lines are very nice. Lastly, you should ignore everything I said and just email Hunter and ask them.

VPC is too stiff for sheets but a good value for halyards

I've been using VPC for 4 years on my boat in 3/8 and it's been working great. Also used it on a J120 in 7/16 as main and jib sheets. Have also used it on a 34 footer in a 16:1 vang purchase system. sta-set X is too stiff for sheets, but VPC is a great mid level sheet.

If you are not racing, I think you get a good cost/performance trade-off with VPC halyards, and sta-set or similar for everything else. The only exceptions to this plan for my 34' cruising boat are: topping life, spinnaker sheet, and reef lines. For these I use 1/4 inch Amsteel. Running backstays I use 5/16 Amsteel.
Effit said: 1985 Hunter 34 original spec calls for: 7/16" low stretch for halyards Various sizes "yacht braid bbe" for sheets, vang, travelers etc Doesn't say for roller furling line Thanks! Click to expand...
Just a few comments.... I never buy sta-set, ever. In its day it was good stuff, but when priced today it is one of the most expensive lines you can buy on a $/MBL basis. I haven't run the numbers in a while, but for a long time it was more expensive than heat set dyneema on this basis. Add in that it has a relatively high amount of stretch, and you needed to massively overspecced the MBL to control stretch. This is somewhat true of the next generation of lines like VPC when compared to dyneema. But because deck hardware has a minimum size, you can only go so small before you have to start replacing clutches which changes the math a lot. In this case... Size........line.......MBL....Cost/ft.....MBL/$ 10mm ....VPC .....6,500...1.58...... 4,100 10mm.....endura..11,000..3.38..... 3,200 8mm.......endura..8,100...2.28...... 3,500 6mm.......endura..4,500...1.63...... 2,700 3/16.......amsteel..5,400..1.08...... 5,000 1/4"........amsteel.8,600...1.68..... 5,100 As this chart makes pretty clear, the cheapest line you could use is likely to be the 3/16 amsteel. But to use it with your deck gear would likely require doing a good bit of splicing work adding covers and bulking splices so your deck gear can handle it. Otherwise it's just too small. This splicing work adds to the cost (remember when I asked if you were willing to do that yourself?) and needs to be taken into account. Next up is likely the 10mm VPC. It's probably much stronger than needs be, but if it's the smallest your deck gear can handle then it's likely a good choice. Since it doesn't need any real splicing work on the line, just an eye splice at one end. My choice would be to go down to the smaller, 8mm endura if your deck hardware is compatable. It's more expensive, but is stronger, and thinner and thinner line runs with less friction. Endura has less stretch than VPC, and the extra strength means under similar loads it will stretch even less. But at a price premium. I included the 6mm endura just to dismiss it. In any case where 6mm would work I would just switch to 1/4" dyneema (they are the same size) and save money. This is a really long way to get to... If 10mm is as small as your deck gear can go then I would recommend VPC because it's far stronger than you need. If the gear can take a smaller size I would switch to a smaller endurabraid for the reduced stretch and size, even at a price premium. If you want to get serious about doing your own splices then I would go with uncovered dyneema and add covers yourself.

Effit said: Hi all, I'm replacing all of my running rigging bit am feeling a bit overwhelmed with the sheer number of brands, tires, and technology out there. 1985 Hunter 34 original spec calls for: 7/16" low stretch for halyards Various sizes "yacht braid bbe" for sheets, vang, travelers etc Doesn't say for roller furling line Any suggestions on type or brand? Any idea what low stretch or yacht braid bbe refer to? We are trying to sail as much as possible these days but it's due for replacement. I'm just getting confused with New England Regatta, novabraid xle, polyester double braid, sta-set, etc etc etc with such a wide range of prices. I don't want crappy lines, but I also don't want to just pay for a name or assume something is better simply because it's more expensive. Thanks! Click to expand...
Rod at Vela is a stand up guy. I like him a lot personally, and have always received good service from him. $900 sounds like a pretty good price. But without knowing the number and length of lines specced, and the number and type of shackles used I cants really say. My Olson 30 had about $400 just in shackles for instance.
Effit, I would think that if I were outfitting an Open 60 for a global trot I would pay a lot of attention to brands and strength ratios….. but on a 34 foot day sailing/coastal cruising boat you will probably be just as well of just running double braid. I doubt that you will notice the difference except in the wallet. If you actually got 1 extra inch of stretch (which you probably won't) would you notice the difference and how much difference would it make? I asked the same question last year and got the same advice. I have all double braid now and haven't noticed the slightest bit of difference….. Sails hoist and set well. Boat goes to hull speed and stays there. The $$$$ I saved got me an extra couple of weeks on the water.
Dancin' Bare said: Effit, I would think that if I were outfitting an Open 60 for a global trot I would pay a lot of attention to brands and strength ratios….. but on a 34 foot day sailing/coastal cruising boat you will probably be just as well of just running double braid. I doubt that you will notice the difference except in the wallet. If you actually got 1 extra inch of stretch (which you probably won't) would you notice the difference and how much difference would it make? I asked the same question last year and got the same advice. I have all double braid now and haven't noticed the slightest bit of difference….. Sails hoist and set well. Boat goes to hull speed and stays there. The $$$$ I saved got me an extra couple of weeks on the water. Click to expand...

Effit, Sent you a private message.

Oma, I find most cruising sailors tend to ignore sail trim to an embarrasing level. They could greatly benefit from halyards that don't constantly require a few more turns off the winch to keep the draft in about the right spot.
Oma, I appreciate I can be long winded. Sorry about that. Grinding on more tension will take out that extra stretch, but adds more load to the line. Increasing the amount of stretch requiring even more tension to take out that stretch... It's a vicious cycle. The extra load also does all sorts of other bad things. It increases the load on the sail luff so it accelerates how quickly the sail stretches out. Increases the loads on deck hardware and increases the likelihood of the failure. Increased the compression load on the mast and rigging, cursing them to work harder than they should be... It's a cascade failure, to fix the initial stretch you have to add loads to everything else, causing the boat to work harder and to wear out faster. Which causes other things to work harder, which causes other stuff to break. Obviously there is a practical limit to how much you can do, and the really exotic stuff like heat set dyneema is simply too expensive to consider for all but maxed out racing programs. But the marginal cost of high tech lines is pretty small these days, and the gains are substantial and real.

Stumble said: Oma, I appreciate I can be long winded. Sorry about that. Grinding on more tension will take out that extra stretch, but adds more load to the line. Increasing the amount of stretch requiring even more tension to take out that stretch... It's a vicious cycle. The extra load also does all sorts of other bad things. It increases the load on the sail luff so it accelerates how quickly the sail stretches out. Increases the loads on deck hardware and increases the likelihood of the failure. Increased the compression load on the mast and rigging, cursing them to work harder than they should be... It's a cascade failure, to fix the initial stretch you have to add loads to everything else, causing the boat to work harder and to wear out faster. Which causes other things to work harder, which causes other stuff to break. Obviously there is a practical limit to how much you can do, and the really exotic stuff like heat set dyneema is simply too expensive to consider for all but maxed out racing programs. But the marginal cost of high tech lines is pretty small these days, and the gains are substantial and real. Click to expand...
There are a few different types of friction at play. All are negatively effected by larger size lines. 1) the larger the contact patch of the line on the sheave the more friction there is between them. 2) the larger he line the more friction on the side cheeks of the block 3) internal to the line itself, as the line bends around the sheave the fibers move against each other. The larger the line the more fibers, the more friction. I guess it's possible that a very small line could damage the sheave itself, but I have never seen this from rope, just wire.
For cruising, this is the most over-thought boat issue. I've been guilty too. Just buy what the manufacturer suggests. Low stretch for halyards, basic lines in the sta-set range for the rest. We bought Sampson XLS for jib sheets. It's been wearing better than most, but I've never liked the line, especially when it was brand new. I actually had to run sandpaper over it, when it was new.
Hey all, I ended up using Rod over at Vela Sailing Supply - I highly recommend him. He is very knowledgeable about his products as well as what was available when the boat was built. He is obviously passionate about what he does and isn't just trying to separate a person their cash which I appreciate. Good price, great service, fast and free shipping. I decided to hold off on a few lines but for now we got a new main halyard, new main sheet, and new furling line. We decided on New England's VPC for the halyard, and New England's Sta-Set for the main sheet. We will be replacing the jib sheet later this year after getting the turning block sheaves rebuilt. Thanks again for all the suggestions. It was certainly helpful having some knowledge prior to coming to a final decision.
- ?
- 174.2K members
Top Contributors this Month

- Forums New posts Unanswered threads Register Top Posts Email
- What's new New posts New Posts (legacy) Latest activity New media
- Media New media New comments
- Boat Info Downloads Weekly Quiz Topic FAQ 10000boatnames.com
- Classifieds Sell Your Boat Used Gear for Sale
- Parts General Marine Parts Hunter Beneteau Catalina MacGregor Oday
- Help Terms of Use Monday Mail Subscribe Monday Mail Unsubscribe
When should standing rigging be replaced?
- Thread starter Project_Mayhem
- Start date Nov 9, 2020
- Forums for All Owners
- Ask All Sailors
Project_Mayhem
I've read that standing rigging should be replaced anywhere from 10 all the way up to 20 years and also simply based on condition. My boat has been in fresh water all its life. To the best of my knowledge it hasn't had a trailer until last year so the mast was up through the winter. Most recent receipt was for lower stays 10 years ago. Overall condition is good with some kinks here and there. No signs of corrosion or stray strands anywhere. Would you replace this?

If you have (reasonable) evidence that the PO replaced only the worst sections, it's safe to assume that the rest of the rig is getting ancient and failure prone. 20 years is what we go by for fresh water usage, for a max time.... and matter of fact we are now replacing our 2004 complete rig. Be sure to replace the turn buckles also -- not much more $, and it's great to be sure of the integrity of the entire rig.

Standing rigging replacement. Just got home from my first sail with my 7 year grandson on my 47 year old boat. One of his first observations “Granddad that’s a pretty big pole. Is it going to fall down, cause that would hurt.” When and why do you change standing rigging. Easy answer “before it can fall down.” There is sailors knowledge based on observations and experiences that have formed the rules of thumb. 6-10 years for salt water exposed rigging and 15-25 years for fresh water rigging. Rough guides that depend on location of the boats sailing experience, how the boat has been used, and how the boat will be used. On a new to me boat I want to know the condition by inspection of the rigging and all the connections to the mast and hull. If I’m a day sailor with close proximity to repairs and my mast is easily fixed/taken down that is different than if I am planning an extended cruise isolated from repair resources and skilled help. Racing and heavy weather sailing tests the strength of the rigging. Replacement of the rigging components is more frequent and based on inspection. Kinks in wire is like chafe on a line. It requires more careful consideration of condition, usage, and inspection for signs of failure. Proper size and material components for the rig are further consideration. When I refitted my mast and rigging I had the help of a seasoned rigger. He advised that with the size of my mast, the manufacturer was known to have undersized the rigging. Based on my sailing plans he suggested we increase the wire and components one size. I base my decisions on my planned usage and condition of rig more than on a number of years. The reactive answer to your question is a probable Yes it is time. The resulting knowledge of “The Rigging” was new in 2021, is peace of mind and will serve a little should you decide to sell at a future date. Also there is a sense of confidence when that thunderstorm approachs that the rigging is new and solid. It should be one less worry about will we weather the storm. Now those 20 year old sails might be the next issue. Good luck.
Project_Mayhem said: Overall condition is good with some kinks here and there. Click to expand

Project_Mayhem said: ...I've read that the inner stays rarely snap. Does that mean that replacement time for those is longer? Click to expand

ontherocks83
On our old boat we had the Port Aft lower shroud fail while sailing. The mast stayed up, but it sounded like a gun shot and was scary as hell. On our new boat the PO could not remember when or provide receipts to how old the standing rigging was. When applying for insurance they either wanted proof that the rigging was under 10 years old or to have a rigger inspect it and report its condition. I ended up just replacing all of the standing rigging through rigginonly.com in Fairhaven Ma. They were awesome to deal with and the price was very reasonable. To be honest I feel much more comfortable knowing the age and condition of the rigging especially when the wind picks up. And realistically all of the rigging on a 25' boat should not be expensive at all.
ontherocks83 said: I ended up just replacing all of the standing rigging through rigginonly.com in Fairhaven Ma Click to expand
dlochner said: For Rigging Only . If you don't live nearby, call them and then send them the old rigging, they will duplicate it. Good service, good quality, nice people. Click to expand

I think another factor to consider is how much of the "life time" of the rigging was spent with the boat in the water and the mast up. A boat in the water is in constant motion and the rigging experiences constant micro shock loads even when sitting in the slip. A boat spending most of the last 10 years on a trailer with the mast in a cradle has only corrosion to consider. It will always be a judgment call. You can't eliminate all risk on a sailboat and how to make that call will be different bassed on an individual's risk tollerance.

Don't forget that this site will also replace your rigging. Just a FYI. dj

Step 1 - Hire a professional rigger with a good reputation to do a thorough survey of your standing AND running rigging. Let them know any of your concerns before they get started. Step 2 - Evaluate their recommendations and decide for yourself. I just had a full rigging inspection done and the evaluation split the recommendations into: - "Good" (inspected and no action required) - "Watch" (no immediate action required but inspect regularly and plan to replace in the near future). In one case my VHF antenna's protective cover had UV degraded to the point of compromise and at some point the rigger felt the freezing and thawing of moisture entering the antenna would cause it to fail. I opted to replace now. - "Action now" (potential for failure soon). One example here was my mainsail halyard whose splice had UV degraded to the point the strength was compromised. I opted to replace now. Two other side benefits - if I have a rig failure I have a half leg to stand on with insurance that I did my best to maintain my rigging, having had a recent full inspection by a rigging company and rectified all known problems. Also, piece of mind that I'm not ASSUMING my rig is fine, but I have photographic evidence and expert advice of that (they took 141 photos during the inspection). I bought the 2009 boat in 2018 with no record of any rigging inspection or maintenance, so I figured the time was right at 11 years in salt water for a beefy B&R rig. They also discovered during the inspection that all my bolts on my radar were backing out - some nearly ready to fall to the deck (they fixed on the spot) and found my radar wire seal had popped out of the mast (fixed that on the spot). Worth EVERY BIT of the $150 I spent on it.

I would think at the first notice of a few broken strands in more than two of the wires. When the rig is tuned the wires are stretched. Before re-tuning the rig the mast base, turnbuckles and stay fixtures should be inspect. A boat with sound supports should not require re-tuning in less than 5 years. Any requirement to re-tune the rig more often than that would point to wires been stretched beyond their tensile strength minimums. The most important determinant would be the boat's use; a boat used for racing or offshore cruising would require the wires to be inspected and replace more often. Boats used for coastal cruising, week ending or day sailing may go longer. I personally take stock of a pleasure boat's components and their age and will not load an older boat's rigging as much as I would a newer one. I have broken more than my share of components in newer boats while a lot less in older boats. I agree with a general average of 20 years for replacing the standing rigging.
This is some excellent information! I'm on Lake Michigan. I push the boat hard whenever conditions allow and am always a bit leery of its old rigging. I'll pull the standing rigging and as much hardware as reasonably possible (tangs, bolts, pins, turnbuckles, etc) and drop it off to a local rigger. I found some tests that some SBO folks had done many years ago on the O'Day 25's standing rigging. Their solidworks simulations revealed the rigging was on the lighter side. I'll also inquire about upgrading to one size up.
Benny17441 said: I would think at the first notice of a few broken strands in more than two of the wires. Click to expand

Timm R Oday25
When we brought our Oday 25 home ,I knew judging from the lack of care the previous owner shown the rigging might also be suspect. Every spring I replaced a set of shrouds . It was about $200 each spring. If there is a kink from a shroud or a stay ,it usually happens from stepping the mast .I've learned to not be in a hurry .
I'll agree that most of the kinks were created during stepping or prepping for storage
The reason it is a scheduled item is that a visual inspection prolly won't detect defects. Maybe dying or some other high tech test would. But you can't really detect corrosion down into the swage. I recently sailed on a boat that had rust around the wire/swage on all the shrouds. I think the owner needs to replace those but there's a Covid problem. The good news is that after a spirited sail, which was pretty physical, my hip didn't hurt. Every other muscle did but the hip was fine and I think I'm good to go.

David in Sandusky
It sounds to me that the question is when, not if you will go for new rigging. When I thought about it this way, it seemed easy to give ourselves 20 years of confidence for our Lake Erie boat, rather than take the risk of waiting. We are cruisers who sail around 500 nm per year, and are able to avoid frequent encounters with heavy weather by laying over if storms are in the offing.
David in Sandusky said: It sounds to me that the question is when, not if you will go for new rigging. Click to expand
- This site uses cookies to help personalise content, tailor your experience and to keep you logged in if you register. By continuing to use this site, you are consenting to our use of cookies. Accept Learn more…
IMAGES
VIDEO
COMMENTS
Jun 18, 2013. Jack Frantz, Norwalk, CT asks: I'm planning on replacing all the running rigging on my 1978 Tartan 37 this spring for the first time since I bought the boat over 10 years ago. All my lines are now polyester, and I'm wondering if it makes sense to buy more modern high-modulus line. There are now so many different types of rope ...
For a 30-foot sailboat, the cost to replace a main halyard can be around $500. The estimated cost of replacing your boat's running rigging with sheets is around $1,700-$2,000+. For an average 40-foot boat, you can expect to pay around $4,000 for wire rigging replacement, which may include control lines. The average maintenance cost for boats ...
By Robin Iversen January 12, 2024. The running rigging on a sailboat consists of all the lines used to hoist, lower, and control the sails and sailing equipment. These lines usually have different colors and patterns to easily identify their function and location on the vessel. Looking at the spaghetti of lines with different colors and ...
Replacing Running Rigging on an Older Sailboat If you're thinking of buying a used sailboat it's probable that your final selection will be a boat that is a few years old - and the halyards, mainsheet, backstay, jibsheets and other running rigging will probably look a little old, dirty and frayed. Your first thought may be to replace this old stuff with some of the bright new high tech line ...
Good question. Yes, doing it yourself will theoretically save money. For an average 40-foot boat, Cockerill estimates about $100 per foot to re-rig with wire rigging ($4,000), as well as the round-trip cost to haul and launch the boat and unstep and step the rig (an additional $2,500 or so).
There is no hard and fast rule for "when" to replace your running rigging. If line is properly taken care of, it can last many decades. But a newly cracked sheave or an exposed cotter pin can quickly shred a line that otherwise would have lasted much longer. The only thing we can really do is regularly inspect lines to look for wear.
Short answer running rigging on a sailboat: Running rigging refers to the ropes and lines used for controlling the sails and other movable parts on a sailboat. It includes halyards, sheets, braces, and control lines. Properly rigged running rigging is essential for efficient sail handling and maneuvering of the boat. Understanding Running Rigging on a
Short answer running rigging for sailboats: Running rigging refers to the set of lines or ropes used to control the sails on a sailboat. It includes halyards, sheets, and control lines that regulate sail positioning, trim, and hoisting. These essential components are crucial for maneuverability and sail adjustment during sailing. Introduction to Running Rigging for
Standing rigging keeps the mast in place, but it's the running rigging that handles all the action aboard a boat under sail. The many components in a modern running rigging system—sheets, outhauls, vang control, halyards—work in conjunction with wide range of blocks to keep friction to a minimum. Ralph Naranjo.
Running rigging, on the other hand, comprises the movable components needed to control, adjust, and handle the sails. These elements allow us to raise, lower, and trim the sails according to wind conditions and the boat's course. Understanding the distinction between the two types of rigging is vital in operating a sailboat safely and ...
With the help of the rigging experts at West Marine, Cruising World shows us how to re-rig a sailboat with new running rigging to bring a pal's boat back int...
We have a Hunter 26.5 1989 and have purchased new sails. We need to replace the running rigging. We plan to replace the main halyard and sheets. the jib is a furler job so we would just replace the sheets. This should be easy to do since the mast and boom are off the boat (on a stand in the...
As shown on the sailboat diagram, the price to replace the running rigging with some good-to-beautiful line can be as little as $299 or as much as $1,552—a five-fold difference. Every rope manufacturer listed below offers printed material describing its offerings, and most have excellent websites, some of these have rigging guides showing ...
Our running rigging calculator can instantly spec lines for more than 5,000 sailboats. Just select your boat below and you're a couple clicks away from new, top quality rigging. We've reduced the choices to a minimum to make ordering as simple as possible. (If you prefer more choices, please see our Running Rigging Builder.)
Redoing the running rigging on a cruising sailboat involves measuring, measuring and measuring. Then we head over to Bacon Sails and Marine Supplies for a tu...
Aug 14, 2015. It's one of the most important features on a sailboat, but many owners put standing rigging at the back of their minds when it comes time to do their pre-season safety checks. A prudent sailor should inspect his or her standing rig at least once each season and should know when the time comes to replace most or all of it.
When it comes to running rigging, cruising sailors can learn a lot from racers, and in the process maximize their fun while getting the most out of their sails, hardware and lines. This rendering of a roughly 40-foot cruising boat shows a deck layout optimized for performance sailing, with plenty of lines that are well-led for trimming and ...
PLEASE NOTE: THIS VIDEO HAS BEEN UPDATED WITH ENHANCED GRAPHICS AND IMPROVED SOUND. CHECK IT OUT HERE https://youtu.be/tRgWtPaCQQcA beginners guide to sailbo...
Rope Running Rigging Replacement Cycle. Modern ropes are amazingly long lived. For example, when we sold our McCurdy and Rhodes 56 we had a set of polyester (Dacron) staysail sheets still in use that came with the boat when we bought her 30 years before.. And most all the running rigging was 18 years old and still fine, with one possible exception (see below).
4,638. Hunter 46 Point Richmond, CA. Feb 3, 2020. #3. I looked on this site and on the internet and did not find a running rigging schedule of diameters and lengths as shown in later model owner's manual. You might be a be able to determine the running rigging length for the halyards from the boat's dimensions shown in the attached manual.
5. Secure the mast using the appropriate rigging and fasteners. Attach the standing rigging, such as shrouds and stays, to the mast and the boat's hull. Fact: The mast of a sailboat is designed to withstand wind resistance and the tension of the rigging for stability and safe sailing. 2.
While transiting the vessel north from Seattle, we checked in various ports for a rigger to replace all of the running rigging. While we were installing a new windlass in Anacortes, WA, USA, we found Anacortes Rigging. ... Sailing is about dynamic loads and stretchy lines are never good for performance "FULL TILT II" 2011 BENETEAU FIRST 30
When and why do you change standing rigging. Easy answer "before it can fall down.". There is sailors knowledge based on observations and experiences that have formed the rules of thumb. 6-10 years for salt water exposed rigging and 15-25 years for fresh water rigging. Rough guides that depend on location of the boats sailing experience ...