I TRI’D – A Self-Designed 18-foot DIY Trimaran
by Small Tri Guy | Oct 4, 2013 | Self-built Small Trimarans , Small Tri Info - All , Small Trimaran Videos | 4 comments
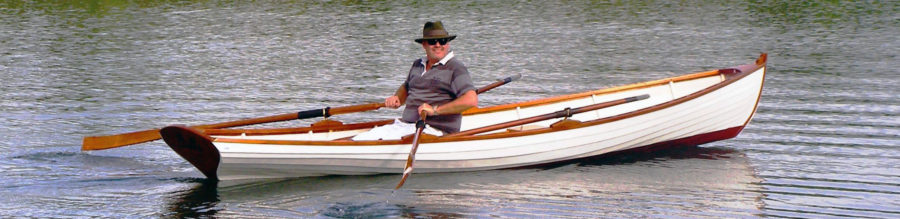
I TRI’D is a self-designed 18-foot DIY trimaran by sailor Mick Milne. He built this sailboat himself after researching lots of small tris and then using using “HULLS” software to produce dimensions for the panels.
The building technique is “stitch and glue” plywood — with the main hull oversheathed with two layers of fiberglass and epoxy. And the outriggers slide in on aluminum beams to allow trailering . It looks pretty good.
Mick learned all this stuff as he went along. But the best part is that he thinks it sails just fine.
Mick said the build took about 16 months in his spare time. This time frame was mainly driven by the weather, however, as the building took place outdoors in the UK, which, according to Mick, had one of wettest winters in years.
The first launch of Mick’s DIY trimaran was last October. What a day that must have been for him.
Great job Mick …. terrific! Thanks so much for sharing the story of your project (and photos) with us here. ( PS – Love the name of your boat too :-)
………………………….
I TRI’D – 18-foot DIY Trimaran by Mick Milne I have sailed for many years, mainly dinghies and small cats, though also a limited amount of coastal sailing in UK and around Denmark. I have never really lived on the coast so sailing as regularly as I would wish has always been a challenge.
Drawing plan for the I TRID Trimaran
A bit more research led me to view that a Tri fitted all the requirements I was looking for:
- Sailing reasonably flat
- Shallow draft
- Reasonable pace
- Trailerable – as long as it folds somehow
The more I looked, the more I got hooked, and I am one of those guys who once something gets under my skin I have to do it.
I spent a lot of time looking at designs and think there are some great Tri’s out there, but I like the problem solving aspect of designing something. I bought and read your book, “ More Small Trimarans, ” and noted the variety of different approaches, ranging from fully qualified and experienced designers to those who “just learnt as they went along”; that was enough inspiration for me to start my own.
First ama hull being built
The only real frustration was the weather. All the build was outside and I spend too much time removing and recovering the boat. If I build another (I suspect I will) it will definitely be under cover.
Main trimaran hull with crossbeam fittings
The small trimaran begins taking shape
First sail fitting with mainsail and jib from a Fireball Dinghy
I definitely expect to do some more modifications in the future. I am not a boat designer and there are things that are not right first time. The seating areas slide in, which I thought would help with the trailing width, but it all increases the setup time. I am going to raise them by about 1 inch , which will allow the outriggers to slide underneath without unlocking various pins etc. Also, I never really designed in an adequate system for mounting an outboard, currently fitted to the sliders it is secure but poorly positioned. I will change this when I amend the seats.
Blue deck paint on this small tri
Launch Day!
Sailing Cardiff Bay
To date, I’ve primarily sailed I TRI’D mainly around Cardiff in Wales. There were also a couple of trips into the Bristol Channel when conditions were favourable. The boat was planned for relatively calm coastal waters, with the expectation that in a few years we will move to the South Coast of England, near Poole, which has a very large natural harbour, with lots only accessible with a shallow draft, and easy access to get further along the coast.
Under sail with her tramps
Smaller trimaran moored with the big boats
Update 10-07-13: Mick sent me the following YouTube video featuring I TRI’D …
___________________________________________________________
Fantastic job Mick!
I’d love to see some more photos, or video of you sailing. I’m also fascinated by the reasons for people’s design choices. Why did you decide to design your own? Why 18 foot? Do you stand on the hull, or is there a floor? What sort of lee-board did you build? Is there a photo? What’s wrong with the outboard position? How long does it take to rig and launch?
Robin, thanks for your interest.
I have a video but am having problems uploading it, not my area of expertise but I will persevere, hopefully I will have that complete in the next couple of days, I will also provide more photos.
Why my own design – I think I covered that partially in the notes but in essence I think I just like to understand how things work and also I like doing things to see if they do work, and I suppose experience has shown me you can do most things if you try.
Why 18ft – I certainly wanted something I sat in rather than sat on, but had also read in many places the advice not to build a boat bigger than you need. Once I started designing 18ft provided enough space to seat two easily, four at a push, and provided enough displacement. I did sketch out some 16ft designs but they just seemed to be too small.
There is a floor, simply 18mm plywood , raised about 4-6 in from the hull base, this seemed to make sense rather than walking on the hull. Surprisingly there are no pictures but I will take some and post them.
The leeboard is simply plywood sheet shaped, but is already showing signs of stress. I am busy reinforcing a hardwood centreboard (with epoxy and fibreglass)which I will use to replace the plywood. I got most of the ideas for the leeboard from Frank Smoot’s excellent website which has featured several times on this blog. His explanations and points, such as that shifting a leeboard to change the CLR, really helped. There are some photos showing the leeboard which I will post.
The issue with the outboard position is the mounting bracket, not the outboard itself. As the slider mountings are round, and close together, I have had to modify the outboard bracket, the bracket obscures access to the slider locking pin and also applies enough pressure to the mounts to restrict free movement of the sliders. This means I am continually slackening or tightening the bracket , or removing it. It is just not a good piece of work. If I was designing the same boat again I would fix a wooden square bar 4-6 inches behind the slider mounts to provide easy location of a standard outboard bracket.
Rigging and launch takes around an hour though part of that is due to the launch site I use. Good launch sites are rare in UK and it is a busy site. I have to rig the mast, the jib , outboard, and seats at a trailer area, and then having reversed onto the ramp extend the outriggers and tighten the tramps, then launch. I then normally rig the main on the water. Part of the work to modify seats, outboard mount and a few other small tweaks is to reduce this time, though I do think rigging the boat is part of the experience so I would not want to have no rigging to undertake.
I hope all that that helps answer your queries and I will put together some more photographs showing some of the detail, and hopefully that video.
Love it, Mick. I’m always excited when any bold venture sets out to, not only build, but design their own trimaran. I’m on maybe my 10th “home brew” tri now, and each one has been not only a blast to build and sail, but a real education as well. My latest (a 19-footer) is probably my best so far. Set-up time was always an issue for me, too, which is why I ended up with a folding design and an unstayed mast with the 128 sf sail furled around it. My designs are shaped by the places I sail (shallow) and by the fact that I always beach launch. 18′ is probably the perfect length for a tri you can launch, rig, and sail alone. Your boat looks great, and I’m delighted that my leeboard info was helpful. Couple of questions, if I may: What does she weigh in at, all up? How much sail are you carrying? Have you had a chance to speed test with a GPS yet? All my boats have hit 14 mph (white knuckling it, for sure!), but I haven’t hit 15 yet. I think I will, though, with my new vertical batten sail. I’d be happy to email you some photos, if you like. Also, I now use solid lumber for my rudder and leeboards, covered in 4 oz glass. They last much better that way (I got tired of having to constantly repair them). Again, excellent job! And I liked the video as well – mainly because you kept the camera moving and we got to see most all of the boat. Cheers, “Trimaran” Frank
Hello Mick,
Congratulations for your boat ! I’m very interested in your 18 ft trimaran because i have the same project. I have some questions : Is there any drift ? where it is ? The seats are fixed under the tubes, that ‘s it ? is it a self draining background in the cockpit or not ? Did you purchase specific sails or you pick up them from an other boat, witch one ? what is the the mainsail area ? what is the weight of your boat ? You designed your boat with what software ?
Thank you for your reply Best regards x.lemaire

Submit a Comment
Your email address will not be published. Required fields are marked *
Notify me of followup comments via e-mail. You can also subscribe without commenting.
Blog Post Categories
- Production/Commercial Small Trimarans (291)
- Self-built Small Trimarans (678)
- Small Trimaran Audios (30)
- Small Trimaran Videos (289)
- Trimaran Design, Rigging, Construction Info/Links (222)
- Contact “Small Tri Guy”
Boat Profile
Seaclipper 16
A folding trimaran for the home builder
From Issue January 2017
I ’ve built more than a few boats for myself in the past 38 years, and in all that time I have never been tempted to build a multihull. Why go to all the work of building two hulls, let alone three, when I’ve never found any of my single-hulled boats lacking in any significant way? I started getting answers to that question as soon as I stepped aboard a Seaclipper 16 designed by John Marples of Searunner Multihulls and one of nine designs in the Seaclipper series of trimarans. The hull is constructed of 7 sheets of 1/4″ six-ply marine plywood, five sheets of 3/8″ nine-ply, and lumber in commonly available sizes. Fiberglass-and-epoxy sheathing is optional. The instructions are geared for novice builders; full-sized templates for the bulkheads are provided in the plans. Stringers connecting the bulkheads define the shapes of the plywood panels for the hulls. The 15′ 11″ vaka (center hull) has a flat bottom that will take to landing on the beach without digging in or causing the kind of wear you’d get with a sharp V hull. The amas (outrigger hulls) have bottom panels set at an angle, deeper outboard than inboard. This configuration adds a fin-like element for increased lateral resistance for sailing in shallow water with the daggerboard pulled up. The angled ama bottoms also present an edge to the water, keeping the amas from slapping the waves when they’re close to the water’s surface; it’s a quieter ride. The amas’ bottoms are positioned higher than the vaka’s bottom, so their edges are not subjected to wear when the boat is hauled up on a beach.

Each of the four swing-arm akas has three bolts: one securing the pivoting part of the aka to the ama, and two (one of those anchoring the shroud bridle) connecting the pivoting part of the aka to the fixed central section on the vaka. Removing the inboard bolt allows the swing arm to pivot, moving the ama aft and inward.
The akas (crossbeams) can be made in three ways: as one piece bolted to the three hulls, hinged to fold the amas on top of the vaka, or as swing-wings, like LIMONADA shown here. With the swing-wing, the amas pivot aft and nest against the vaka, bringing the beam down from 11′ 3″ to 7′ 7″ for trailering and to fit in a standard marina slip. The swing wings can function whether the boat is afloat or on a trailer, so they are handy when launching or landing at a crowded boat ramp. The swing wings don’t require any hardware beyond nuts and bolts, and have an advantage over the hinged akas: there’s no need to lift an ama and set it down gently on the vaka. The Seaclipper 16 can be built as an open-cockpit cruiser, or as a daysailer with a tandem cockpit, with the helmsman sitting in the aft position, legs straddling a centerboard trunk and the crew sitting forward. The 7′-long open cockpit has side decks between the akas that offer more options for seating, moving around while under sail, and sleeping aboard while moored.

John Marples, designer of the Seaclipper 16 and builder of LIMONADA, goes for a sail on the Mystic River.
L IMONADA, as an open-cockpit version of the 16, has a daggerboard deployed through a slot in the cockpit sole. A softwood stick wedged in the slot keeps the board down; it has a loop of line at its top for quick removal and raising of the board. The cockpit sole is high enough above the waterline that any water coming into the cockpit drains right out. The rudder is mounted on a false transom, hinged at the top, that allows the rudder to kick up when meeting an unexpected shoal or to be retracted when coming ashore. The downhaul at the bottom of the false transom leads to the cockpit for easy operation. The rudder blade is balanced and has enough of the blade ahead of the pintles and gudgeons to lighten the load on the skipper when coming about. It also allows the arms of the rudder yoke to be short and unobtrusive. The lines from the yoke lead forward to pedals in the cockpit to for hands-free steering. A tiller above the yoke allows steering while sitting on a side deck and is the means of raising the rudder when coming ashore.

A hinged false transom allows the rudder to be kicked up. The tiller pulls the rudder up and holds it. The line at the bottom of the false transom holds the rudder down while the boat is underway.
The Seaclipper 16 is designed to take a Hobie 14 sailing rig. The pivoting aluminum mast, roller-furling jib, and fully battened mainsail are readily available from a wide network of Hobie dealers and may be found used in online classifieds. The Hobie 14 has a beam of 7′ 8″, so the Seaclipper 16, with a beam of 11′3″ can take better advantage of the 146-sq-ft sail rig without flying a hull to the brink of capsizing. Dyneema shrouds, secured to bridles spanning the side decks, support the mast. The plans include specifications for an unstayed wooden mast. For auxiliary power, a short crossbeam aft of the port aka serves as a mount for a small outboard.

The side decks provide seating when two are aboard, and the steering is then done with the tiller, not the foot pedals.
I had a chance to sail LIMONADA, the Seaclipper 16 built by Marples for Mac MacDevitt, on Mystic River near Mystic Seaport. Stepping aboard, I got my first lesson in the values of a multihull. I didn’t have to lunge for the centerline as I do with my monohulls to keep them on an even keel. The trimaran has plenty of stability no matter where I put my weight and the amas (outer hulls) have enough volume of to support my 220 lbs. Without having my movement aboard the boat restricted by the nagging demands of a monohull, I could wander around the boat. The decks are all flat, so the footing is good everywhere. While I like the sweep of a curved sheer line, the Seaclipper’s flat decks simplify the construction of the boat and provide the geometry required for the swing-wing akas.

The deck surrounding the cockpit is large enough to set up a tent for sleeping at anchor. The windshield was added by the builder to block spray when sailing into a brisk breeze.
I liked being able to walk around the boat while it was under sail with Mac at the helm. I never get to see my own boats moving through the water, so stretching out on an ama to watch the vaka’s bow at work was a treat. The 7′-square deck around the cockpit offers a place to pitch a tent. Mac has a two-person tent with an oval hole in its floor to match the cockpit opening. He can sleep to one side of the cockpit, sit comfortably upright with his feet in the cockpit and have access to the gear stowed there. The amas and vaka offer plenty of room for cruising and camping gear; commercial plastic hatches offer access.
I took LIMONADA out by myself and enjoyed steering with my feet and having my hands free to manage the sheets. Nestled down in the cockpit on a padded seat with a backrest, I was very comfortable and relaxed. The sheets were right in front and could be cleated off, making sail-handling a breeze; there was no need to switch sides or do-si-do with a tiller when coming about. During my outing the weather was warm and the wind was light, perhaps 8 to 10 knots at best with a few gusts, but in a cold wind, being mostly below deck level would be a boon. Mac had made a removable windshield that wraps around the forward end of the cockpit for even greater protection from cold wind and spray.

With Marples and owner Mac MacDevitt aboard, LIMONADA flies the windward ama. The leeward ama still has plenty of freeboard.
The light wind was more than enough to get Mac’s Seaclipper going at a brisk pace and fly the weather ama. There was no spray, so I stayed dry, and even with the boat moving at a good clip I didn’t notice any water coming up through the daggerboard slot.
I was surprised by how well the Seaclipper could come about. With three hulls in the water, I thought there would be a lot of drag in the turns and that the boat would get bogged down, but the rudder blade and the centerboard have enough area to swing the bow around before the boat loses momentum. I never got caught in irons, but I backed the jib for a moment to hasten the bow’s falling off and the filling of the main.

LIMONADA owner Mac MacDevitt reports that his Seaclipper 16 is “super fun in a stiff breeze.” Here, sailing with a reefed main on Lake Champlain, he estimated his speed at about 13 knots. “It was exciting, but I felt safe and secure.”
Christopher Cunningham is the editor of Small Boats Monthly.
Seaclipper 16 Particulars
Length/15′ 11″
Beam/11′ 3″
Beam, amas retracted/7′ 7″
Draft, hull only/11″
Draft, board down/2′ 7″
Sail area/127 sq ft
Displacement, dry/400 lbs
Displacement, full load/800 lbs

Plans for the Seaclipper 16 are available from Searunner Multihulls for $180.
Is there a boat you’d like to know more about? Have you built one that you think other Small Boats Monthly readers would enjoy? Please email us!
Share this article
Join The Conversation
We welcome your comments about this article. If you’d like to include a photo or a video with your comment, please email the file or link.
Comments (2)
Thanks for the multi-hull perspective. Lots of cool ideas.
I’ve been looking. This could be the one!
Comments are closed.
Stay On Course
More From This Issue
From The Editor
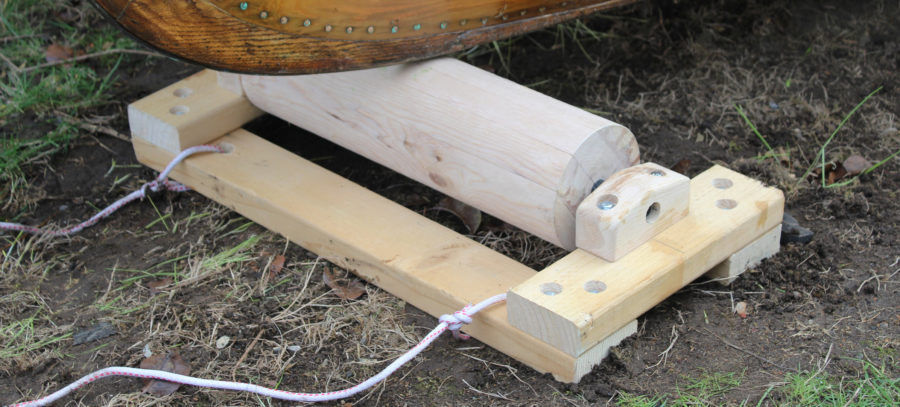
Roller Carts
Like Ben Fuller, I have more boats than trailers to haul them, so when I read his article on the roller cart he built with Joe Liener, I was convinced...

I already had a sailing dinghy and a sail-and-oar skiff in our two-car garage, but I thought there was room for one more boat, a small one, alongside my wife’s…
I’ve built more than a few boats for myself in the past 38 years, and in all that time I have never been tempted to build a multihull. Why go to…

A Lakeland Row
A couple of years ago I spotted a long, lean traditional Finnish rowing boat for sale online. It had been designed and built for bi-stroke racing with a rower on a…
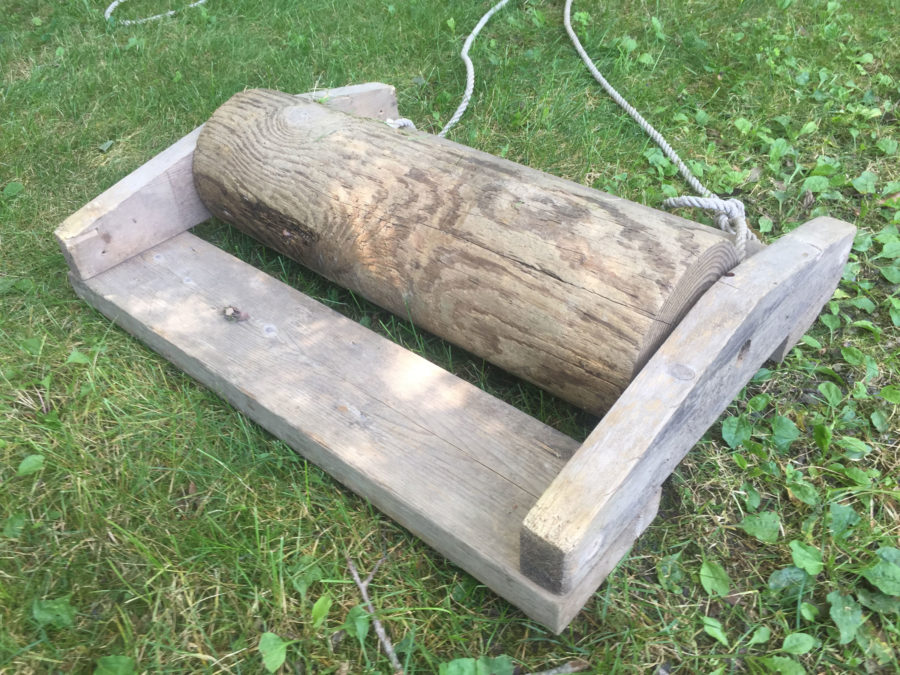
Joe’s Roller Cart
Decades ago, my friend Joe Liener introduced me to duckers and melonseeds at his little boathouse in Wittman, Maryland, on the eastern shore of Chesapeake Bay. Joe had retired some…

If I can keep my head, feet and hands warm while I’m rowing in cold weather, the rest of me stays warm; pogies are my winter hand covering of choice.…

Product Reviews
Thin Rip Table Saw Jig
If I had my druthers, I’d make knees, breasthooks, and stems—all those angle-reinforcing structural parts of boats—out of grown crooks, but they’re hard to come by and take time to…

Reader Built Boats
John Adamson visited the WoodenBoat campus in the fall of 2009 and was taken by two Jericho Bay Lobster Skiffs: the original plank-on-frame version built by Jimmy Steele in the…
More Boat Profile

The Sand Bar by Tidal Roots
I was paddling on a placid Royal River with my four-year-old son Noah kneeling in front of me on a wooden Tidal Roots stand-up-paddle (SUP) board. The water hissed quietly…
In a word, my overall impression of the boat’s performance under way was: “Easy.” With 300 lbs of crew (my daughter and myself) and 200 lbs of foam-wrapped lead ballast…

During a weekend in northern Michigan during the summer of 2009, I got a chance to take a spin in a couple of wooden boats that my daughter’s boyfriend had…
Duck Trap Wherry
Rowing the wherries is a sheer pleasure. The fine ends create very little drag. It is almost like rowing a competition skiff. I never felt like I was hitting the…
Subscribe Today!
Become a subscriber today and you’ll recieve a new issue every month plus unlimited access to our full archive of backlogged issues.
Already a subscriber? Sign In
Subscribe For Full Access
Flipbooks are available to paid subscribers only. Subscribe now or log in for access.
Building, restoration, and repair with epoxy

Developing Multihulls
A folding trimaran for diy boat builders, by michael leneman, multi marine.
Above: A completed L-37 multihull at the dock. Multi-Marine’s new 23′ folding trimaran kit features manufactured hull pans. The builder attaches plywood topsides to the pans.
What is the simplest way for a home builder to build a good, light hull for a catamaran or trimaran? A few years ago, we set about looking for an inexpensive way to construct a small trimaran that we had developed as a prototype. The answer we came up with was unique: to combine a fiberglass molded “pan” with plywood/glass/epoxy topsides.
It is very time-consuming to build and fair the three hulls of a trimaran. So our concept was to make the exacting, complex curved, below waterline shape of the hull—the pan—in a mold. The simpler, above waterline shape can then be formed in easy-to-make plywood/ composite panels. This combination results in lightweight hulls, which are easy to build. The plywood/composite panels bend to a nice, fair curve so that almost no laborious fairing is required. The pre-molded fiberglass/ epoxy pan is, of course, already fair.
From this concept, Multi Marine’s new 23′ folding trimaran, the L-7, emerged (See image at top) . The home builder can purchase pre-manufactured fiberglass/epoxy-molded pans for the main hull and floats from Multi Marine and then join these to plywood/glass/epoxy topsides he or she builds. (The full kit includes the fiberglass/epoxy pans for the main hull and floats, the glass-pultruded I-beams (tapered), pultruded “C” channel for the x-arm boxes and daggerboard, mast kit, rigging, sails, plywood, fiberglass, and foam. WEST SYSTEM® epoxy, rollers, squeegees, and other accessories can be bought from a local dealer or West System, Inc. The full kit costs less than $19,000, including a mainsail and jib. Any item may be purchased separately.
The floats (amas)
For the floats, the builder starts upside down with the deck and then installs trapezoid-shaped, “picture-frame” bulkheads. The okoume marine plywood topsides, which have already been fiberglassed on the inside, are then installed (Figure 2) . Next, the butt blocks are put in and the fiberglass pan is epoxied in place (Figure 3) . Once that is done, the whole outside of the hull is fiberglassed. An amateur builder can make this float in less than 40 hours. We have built 6 floats like this, and there is virtually no fairing, just some microballoon passes where there is a joint.

Figure 2—The pan and topsides of the L7 folding trimaran. The plywood topsides have been glued to the bulkheads. The next step is to install the butt blocks, to which the pan will be attached.

Figure 3—The epoxy/fiberglass composite pan is glued to the topsides. Fairing is required only along the joint before the outside of the float is glassed and coated with epoxy.
The main hull
The main hull (if you’re building a trimaran) is done a bit differently. The full bulkheads for the main hull are built first and placed on a strongback. Then the fiberglass pan is glued to the bulkheads (Figure 4) . The butt blocks are glued to the pan (not the topsides, as in the floats). Lastly, the topsides are put on. After everything is set, the builder turns the hull right side up, levels the sheer, and puts on the decks and cabin. The cockpit floor, decks, anchor locker floor, cabin side seats, and lazarette floor are all flat and are pre-made with foam, glass, and plywood. There is basically an entire mid-height sheer web that runs through the entire main hull.

Figure 4—The main hull is built by first attaching bulkheads to a strongback. Here, the pan is glued to the bulkheads before butt blocks are glued to the pan. The topsides are put on last.
For the main hull decks, cockpit floor, anchor locker floor, and seats, we use a combination of thin plywood, styrene foam, and glass. High-density styrene foam is not usually used in custom boat construction because polyester resin eats the foam, and styrene foam is susceptible to pressure dings. However, WEST SYSTEM Epoxy works great with styrene foam, and bonding a thin layer of plywood to the top face of the composite panels eliminates the pressure ding problem. A composite panel made this way (ply-styrene foam-glass) is very stiff and light. The best part is that the cost is about 1/3 that of a standard urethane foam-cored, glass composite panel.
The X-arms are one of the coolest parts we came up with. They are fiberglass pultruded I-beams. The best part is that you can cut the sheer web of the beams and bend the caps down to make a nice looking, tapered, outside shape to the beam. The beams look good, they are pre-made, they can’t corrode, they are strong, you can paint them any color you want, and they are inexpensive.
Rigging and sails
To fill out the rest of the basic boat, we extruded our own mast and designed our own rigging with the added feature of a roller-furling boom. Full-batten mainsails lend themselves to being furled around the boom, especially since we use an inexpensive round aluminum tube as our boom. With a main, jib, and reacher, the boat is about the same speed around the racecourse as a stock F-31 folding trimaran with a full inventory of sails.
The Eko-Cat 23
So, now you’re sitting around looking at the trimaran floats, and you say to yourself, “gee, those would make nice catamaran hulls if they just had a little more freeboard in the transom.” Well, this can be easily done since the topsides of the floats can be changed in a second. It is only the pan/topside joint that has to remain the same. We have made a few small power catamarans from old beach cats, so making the power Eko-Cat 23 from these hulls turned out to be very easy. The mileage is incredible. An 8-hp motor makes 12 knots and over 20 miles per gallon in flat water. With a 25-hp motor, the boat does 20 knots.

Figure 5—A completed L-7 folding trimaran. When folded, the L-7 is 8’4″ wide and easily trailered.
L-7 Folding Trimaran Specifications
Length: 23′ 6″ Beam: 16′ 6″ Folded beam: 8′ 4″ Mast height: 33′ Sail area (main & jib): 370 sq ft Weight (empty): 1300 lb
For more information on both of these projects, visit Multi Marine .
Lunada Design
Creative Boats for Home Builders
Category archives: plywood trimarans, back bay sit on top kayak, a modular system approach to sot kayak sailing, paddling and mirage drive propulsion.
Sit-On-Top (SOT) kayaks are easy boats on which to learn to paddle. They have none of the “get in the coffin and you are about to drown” psychological identity that one finds in the Sit-Inside boats and they’re amazingly adaptable to a wide range of paddling activities. It also doesn’t hurt that they are pretty straightforward boats to rotomold, which makes them very cheap to produce in large numbers.
I didn’t envision just one boat for this niche in the home-built kayak market. Instead, it came to me that there would need to be at least three models that could address the wide-ranging styles of boating interests in this area of the kayak world. The result was a couple of very clean, SOT models at 14’ and 16’ called the Corona and the Back Bay, respectively. The third model was going to be called the Wahoo, as it was specifically designed for the folks who spend a lot of time fishing with their SOT’s. I’ll get to the Wahoo in the next article.
As a canoe and kayak sailor and a guy who had just been out for a test drive on the Hobie Adventure Island, which is based on their 16’ SOT Adventure model, I wanted to offer my own take on what makes for a truly fun and stylish, sailing SOT kayak. The result was that a fully integrated system of component parts was designed for the basic Back Bay. This modular approach allows the Back Bay to go sailing by simply adding a system of light-weight, easily built elements that quickly convert the SOT to a single aka sailing boat called the Scorpion, OR, to a double aka sailing boat with slightly larger ama volume, called the Doubloon. Of the two configurations, the Doubloon is most like the well-known and highly respected, Hobie Adventure Island.
The Corona and the Back Bay are virtually identical models, save for their respective lengths. For the purposes of this article, I’ll focus on the Back Bay version and all the potential add-on systems I’ve incorporated in the design.
THE BACK BAY SOT KAYAK
Specifications: Length overall – 16′ Beam overall main hull – 28″ Depth of hull max – 12” Weight – 48 lbs. or less Displacement – 335 lbs.
This boat is built in the S&G style of construction in 4mm marine ply with 6 oz. plain weave fiberglass set in epoxy on the inside and outside of the hull for full laminate sandwich strength. The build process uses external cradles as building supports, ensuring that the hull goes together with minimum hassle when handling the rather slender and longish hull panels. The boat is bulkheaded internally at three key points. These bulkheads create not only integrated strength in the design, but they also cleanly separate the hull cavity into four unique volumes for gear storage and watertight flotation.
The Back Bay can be configured with a large, open tankwell set aft of the cockpit, or built with a watertight, aft hatch cover for internal storage in a conventional kayak style.
Specifications: Beam overall – 10′ Weight (est.) – 90 lbs. Sail Area – 56 sq. ft. Displacement – 350 lbs. Draft (board down) – 28″
The Scorpion variant is a Sit-On-Top design for fun sailing, paddling, or Mirage peddling… or all three, as the builder desires. There will be a design for a leeboard mount included in the plans for those who are going to build the boat for sailing. Having the aka gull wing form set well forward permits a full paddle swing arc. The aka beam connectives to the amas is split into a pair of mounting elements. I did this to make for a stronger, single beam mounting struture. With a single beam design, there is a tendency for the am to want to rotate around the beam, making for a very stressed component that could lead to early failure. By splitting the beam and spreading the mounting points, I have given the structure more resistance to this rotational force, making for a more rigid boat in use. This setup will allow the owner to power sail in light air with both the paddle and the sail providing thrust. With the leeboard swung down for sailing, the owner can do some “power sailing” and utilize the Mirage drive, as well as the sail, in light conditions. The Mirage is capable of boosting boat speed enough that it creates apparent wind over the sail, adding power where there really isn’t enough for sailing alone.
The amas are positioned to optimize capsize resistance when sailing off the wind. The amas do not touch the surface of the water at rest in stable trim and provide only minimal wetted surface drag when underway by paddle or peddle. As soon as the sail is loaded by the breeze, though, the ama on the lee side begins to immerse, firming-up the boat and resisting the heeling moments being generated.
The aft deck can be configured as a watertight hatch with full access to the aft sections of the hull, OR a large, diving tank well with self-draining ports. The cockpit is fitted with self-drain ports under the seat as well as forward, in addition to the daggerboard slot. There is a watertight deck plate just forward of the seat, between the knees of the sailor/paddler to provide secure storage for critical items that may be needed on a routine basis. The foredeck has a watertight hatch cover for bow storage needs.
The rig is a fully battened Dacron sail with two reef points and a multi-section, self-supporting mast which steps into a sealed mast socket in the hull. The mast and boom sections can be aluminum or carbon, as budget permits. The sail choice is open for the customer as long as it can be balanced with the fixed positions for the mast and dagger board. The Cunningham is run to the deck of the gull wing aka to keep the rig on the boat in the event of a capsize.
With 56-sq. ft. of sail on a 90-pound boat, this will be a decently speedy boat without being in over its head all the time in a stiff breeze. I suggest two reef points in the sail to allow for sailing in a wide variety of conditions.
This will be a wet boat at speed, yet there are no worries at all for flooding and sinking, save for a truly nasty trip over a reef that shreds the entire underside of the craft. The bow, cockpit and aft hull volumes are all independent, sealed compartments, as are the ama volumes.
Reentry from a swimming session will be easy with a simple, sling, or rope ladder much like those used by rock climbers, called etriers.
The boat is constructed in a multichine, marine plywood style with epoxy glass laminates inside and out in a stitch and glue style. Stainless T-Nuts are embedded in the hull deck surface from below to provide a secure set of mounting points for the aka wing. The amas are held in place on the aka tips by large bungees and a notched lock system. This system provides for quick setups on the beach.
You just fit the aka to the foredeck, insert four, 1/4″ threaded stainless screws with comfortable, knobbed grips and screw down the aka wing. The amas slip onto the ends of the aka and you lift the pair of 3/8″ bungees up and over two raised hooks on the aka ends to secure the ama in place. Simple, easily maintained and near foolproof in operation.
DOUBLOON SAILING SOT
The Doubloon is the second variation on the central SOT theme of this group of boats. In this design, I am looking to provide a more expansive utility application for the base, Back Bay SOT version. The Doubloon is essentially a solo craft and it carries the same, 56 sq. ft. sail, but the overall potential of the boat is expanded through the use of dual akas and full trampolines on both sides of the Back Bay hull. The rendering of the Doubloon shows a daggerboard inserted down through the Mirage Drive trunk, but in use, I would prefer to have the board mounted outside the Back Bay hull as a leeboard. Plans will be supplied with the leeboard solution.
The akas on the Doubloon are spaced to allow for a full paddle stroke with the boat setup as a trimaran. There are two sections of tubing that span the opening fore and aft between the akas from which the tramp is mounted. The trampolines are designed to roll-up on the outer tube section, much like a window shade and they are deployed by an endless loop of light halyard line. With the tramps fully deployed, the inner tube section lifts up and over a holding pin in the aka and the sailor applies as much tension to the tramp as he feels he needs by hauling-in the endless loop line and cleating it off. If a paddling session is desired, he simply pops the jam cleat and pulls the line to roll-up the tramp on the outer tube section. This procedure applies for both port and starboard tramps.
Like the Scorpion, the Doubloon can be built to utilize a Mirage drive in the center well and the need to roll-up the tramps for paddling is essentially negated, (though it is nice to have the option once in awhile as Mirage drives can be difficult to maneuver in tight places)
The aka beams are held to the deck of the Back Bay hull with the same, threaded knob strategy for quick setup and takedown times. Similarly, the amas are held to the aka ends with hefty bungee cords for the simplicity of use. There’s another, rather invisible, benefit to using the bungee cords for ama mounting. Because they are being held in place through a fairly dynamic hold-down system, the amas can move about, ever so slightly, while underway. This allows the amas to have some structural “give” and the result is that the banging and thrashing that is typically experienced by the ama, is somewhat dissipated through the flex of the joining system.
All in all, I think the Back Bay SOT should be a really fun boat to own for warm water/warm weather boating adventures. It has the capacity to carry enough gear for several days out on the water. When rigged with a sailing system of your choice, it can also cover some pretty good distances if the winds are favorable. Plans for this boat and all its variations will be available from this site and Duckworks Magazine.
Chris Ostlind
Lunada Design Chris@Wedgesail.com
Solo 12 and 14, corsica 15r, sports car performance on the water.
Over the past couple of years, I have taken a break from my boat design work. During that time, I’ve been able to reassess my connection to the craft. The last boat I designed was the Europa 20, which is a trimaran meant for vertical strip foam construction with sandwich style, infused epoxy/glass laminates inside and out. The Europa is a boat for very fast day sailing with a very light hull and a very big rig. A boat that is not for everyone, to be sure, as it requires a level of skill that the average guy does not typically cultivate in the course of experiencing their recreational boating interests.
In stepping away from the larger, more powerful beach type multihulls, I came around to the desire to produce a smaller, very quick and sensitive boat that would appeal to recreational sailors and not just those guys who want to blast around with their hair on fire (though I do suspect that in the right hands, this boat will do just that). The new design had to be easy to build with standard, marine plywood/epoxy/glass techniques that did not rely on exotic layups with spendy carbon cloth. (Well, maybe the carbon will sneak in there a bit on the beams for the guys who want to play with a bigger rig)
Looking long and hard at the smaller skiff-like hull designs I had done before, such as the Montage, I decided to draw the new boat in that same general size, but with a very different approach when it comes to how the boat achieves its performance potential. Where the Montage has a relatively spacious cockpit capable of taking on a couple of adults, (or a parent and a couple of smaller kids) the new, Corsica 15R trimaran would be for one adult (or accomplished kid) designed solely for a unique, one-up sailing experience within the small beach multihull genre.
As a result, the boat has minimized clutter when it comes to excessive high-tech trickery. With that approach, the Corsica 15R is also going to be a boat that has much lower maintenance requirements in order to keep it in top sailing condition, as well as a much lower realized cost to get it on the water and ready to sail.
If you are into cars, as I am, then think in terms of a nicely pumped, Mazda Miata, type of boat that would be a cool, weekend canyon racer for one person. A boat that could blast around the local waters in a good breeze and give chase to other small, fast, multihulls being sailed by crews of two.
The result of this conceptualizing process is the Corsica 15R. The C15R is a boat of modest, marine plywood build techniques and is very light weight for its generous sail area. With this boat, the normal sailing position would be the skipper, semi-reclined within the main hull, driving his machine like an F1 Grand Prix car. In this configuration, the boat is designed to utilize foot pedals for steering, leaving the hands free to work the sheets. But, that’s not the only way to sail this boat. Owners who wish to sail in a more conventional multihull style, can sit-up out of the cockpit and onto the main hull cockpit gunnel, or even the trampoline surfaces all the way out to the ama, where they will steer with a tiller extension.
A construction style in multichine, 4 mm marine plywood, allows the boat to be assembled in a well-understood fashion that will go together quickly. With a subtle placement of minimal stringers and sufficient bulkheads, the C15R becomes a strong main hull shell that can absorb the loads from its sizeable rig, turning the power of the sails into forward thrust in the water.
There is no fully enclosed transom on the vaka hull. The cockpit deck is slanted gently down and aft for automatic self-draining, such as is seen in sport dinghies and larger race boats. A collection of bulkheads under the cockpit deck provide structural support and watertight compartments ensuring that the boat will not likely sink even if large sections of the bottom are torn out from an underwater hazard while smoking along in a gin clear lagoon.
The demounted boat can be assembled easily by one person. The gently gull-winged akas are built with a glassed box beam core. The inboard ends of the akas slide into tapered sockets in the main hull and are levered in place with stainless waterstays to make ready for sailing. This, tapered socket technique prevents binding while assembling the boat, while providing a solid, hassle-free and weight minimized demounting system. The leading edges of the akas are smoothly shaped foam blocks that are glassed onto the box beam to provide an aero component, as well as creating reduced drag from waves and spray. The akas are hard fastened to the amas as a complete assembly that is easily removable from the vaka hull. The trampolines stay mounted to the akas and amas for transport and only have to be hooked and tensioned to the main hull during assembly.
The mast is a stick from a Hobie 16. I specify the addition of a set of spreaders from the Hobie 18 mast to stiffen up the H16 mast to handle the additional righting moment generated by the Corsica design. Naturally, I’d prefer to see fresh sails in something like fully battened, Pentex laminate, but builders on a tight budget could also work with a loft service to tweak a reasonably fresh Hobie 16 main and jib and do just fine. The addition of reefing points on the main are strongly suggested, as well as the use of furlers for the jib and spinnaker/screacher. For those who desire fresh sails for this boat, I would recommend the folks at Whirlwind sails in San Diego, California. http://www.whirlwindsails.com/
A removable carbon prodder sets the tone at the front end of the boat. The stick originates as a carbon windsurf mast, so it is easily found on the used market and equally replaceable, should it get poked into an unyielding environment. For trailering, the sprit unpins, slides out of its socket and is stowed in the cockpit for transport and storage.
Corsica 15R Specifcations
LOA 14’ 11” (4.54 m)
BOA 13’ (3.96 m)
Displacement 650 lbs. (294.8 kg.)
Sail Area (upwind) 218 sq. ft. (16.17 sq. m)
Spin 142 sq. ft. (13.19 sq. m)
Mast Length 26’ (7.62 m)
Draft (board up) 1’ (.3 m)
Draft (board down) 42” (1.07 m)
The mast is raised by the traditional beach cat method of physically lifting the mast with the base pinned to the mast step, or by utilizing the long daggerboard in its trunk as a form of a gin pole. A forward hoisting line is led over a pair of sheaves at the top of the daggerboard and down to the hand cranked winch on the trailer. Mechanical leverage quickly raises the mast so that the forestay can be fastened to the bow, stepping the mast securely. You can see a few photos of the process at Brent’s L7 trimaran site:
http://home.comcast.net/~ritakend/site/?/page/Mast_Raising/&PHPSESSID=864f3404e3f46ed29dd99b863018fc1d This is a very simple way to raise a mast should you need to avoid the trad lifting exercise for one reason or another.
I chose to not go with tricked-out, curved lifting foils in the amas due to construction complexity and added cost for the builder. Foils of this type are hard to build correctly by hand, as are the needed curved trunks in which they slide. Instead, the boat is equipped with a daggerboard that is inserted through the deck of the main hull in front of the mast which angles aft to exit the hull below the waterline. A daggerboard and trunk of this type are much simpler forms to build and orient in the hull. It is also just one main foil, where lifting foils need to be made in pairs, one for each ama. Lifting foils also need complex control mechanisms to retract and deploy the foils and they have to work from the cockpit remotely with the foils mounted way out in the amas. The needed controls are an interesting problem when the boat is 13’ in width and the driver is semi-reclined in the main hull.
Note: I’m not against an owner who might want to experiment with foiling for this boat, even if it is just foil assist and not full flying. It would require a lifting t-foil style rudder and twin Bruce style foils in the amas, or, if a person is really accomplished as a composites builder, they could make a pair of matching c-foils for the ama. The owner just needs to know what level of additional work is involved and at what skill level they need to perform in order to get the desired result.
If you are on a budget, the rudder and headstock from a Hobie 16 will work just fine for the Corsica with some mods to the tiller. The more deluxe, Rudder 25 system from Dotan will also work well, should you have the coin. http://www.dotan.com/ If you plan on pushing the boat hard, then a longer blade will be required, or you can get yourself invested in the process of putting a rudder on each ama and have stunning control at your finger tips. On the down side, that change will cost you a bit out of your pocket and at the launch ramp in setup time… though I can see a nifty rig with light alu tubing and the use of snap buttons as a cool solution.
The Corsica 15R will be a light boat built from familiar materials. It should be a fairly simple building experience for the owner and will fit comfortably into any typical garage space, making it easy to find a building location. It will quickly assemble for sailing and be hassle free with minimal maintenance required to keep it in top form. It can be towed behind any compact car on a typical beach cat trailer and when demounted for travel, is road legal anywhere in the world. On the water, this boat should be quite quick and behave with predictable, pin-point sailing manners. With the skipper slung comfortably in his reclined cockpit seat, he will be decently protected from the effects of the weather and sea state while tearing around his local waters.
NAGARE 21′ AND 17′ MIRAGE DRIVE SPEEDSTERS
Making use of mirage drive propulsion with more efficient hulls designs.
Nagare (nah-ga-ray) is a Japanese word meaning Flow.
Both of them are configured as trimarans with fairly small and unobtrusive amas designed to give the boats remarkable stability in a wide range of conditions while allowing the vaka, (main) hull to be decidely slender for more effective drive through the water.
The Nagare sisters also have incredibly narrow waterline beam numbers that, when coupled with their fairly long hulls provide for very easily driven hull forms for high efficiency per unit of energy applied.
I expect both boats to operate at the very high end of commercially available paddled boats of the same length, beam and weight. So, yes, they can go pretty quickly, but that’s not the real purpose.
The real benefit of the design genre is through the ease with which they are propelled at any given speed, compared to other boats of their size. This efficiency translates directly to those using the boats as less tiring for miles covered, or greater speed with the same effort as other, wider designs.
Because the propulsion is derived from the largest muscles in your body, the leg muscles, rather than the arms and shoulders, there will be less fatigue for each mile traveled. Because leg muscles are so much bigger than arms, they will be able to do more work in a given period of time, making for longer possible trips, as well as the mentioned lower fatigue issue. With a less fatiguing effort, more people will be able to enjoy the experience of being out on the water for daylong adventures.
NAGARE 21 DOUBLE SPEED AND STABILITY FOR DOUBLE RECREATIONAL BOATERS
The Nagare 21 uses a set of amas, mounted on a pair of simple, anodized aluminum tubes with quick release snap buttons holding the sections together for easy disassembly for car-topping. If a trailer is used to transport the boat, the beam of the Nagare 21 falls well below trailer maximums, so nothing special needs to be done to take the boat to and from the water. Two Nagare 21’s can be trailered, or car-topped, by removing one of the amas and placing the main hulls close to one another on the racks, or trailer. The removed amas easily fit inside the hulls and they are ready to go. The whole affair on the rooftop is very much like a pair of sea kayak doubles. Because of the length, I would not mount a boat this big on any compact cars. You would be very likely to rip the rack right off the roof in strong side winds.
Steering is by means of a simple, flip-up style kayak rudder with control lines run through the hull to a convenient steering lever in the cockpit. I suggest the SeaLine SmartTrak rudder system (do a search for supplier), the P-41 Multi-purpose rudder from Onno Paddles http://www.onnopaddles.com/onnocomponents.html and the Feathercraft rudder system for hardshell boats. http://www.feathercraft.com/accessories/rudders-hardshell.php These are really great rudder units and will give excellent steering control with minimum drag.
NAGARE 21 SOT OPTION
This boat can be built with a full cockpit tub so that it functions as a Sit-On-Top kayak with full drainage through the Mirage drive openings. Auxiliary drain ports are located in the tub for rapid removal of any water that comes in over the side of the hull. I suggest the SOT option for warm water users, with the more traditional kayak style, Sit-Inside hull form for those who will be using the boat in colder water, or more frequent inclement weather.
The SOT version has internal bulkheads for support of the SOT tub, along with the capability of adding a small circular deck plate for an additional watertight compartment in the cockpit that is perfect for small items, such as cameras, wallets, car keys, etc.
The SOT variation is an optional element to the base plans. If you wish to built it as an SOT, drop me an email at my regular email address and I’ll get back to you.
ROUGH WATER USE
This is not really a boat that is meant to go out in rougher conditions, such as those where a full-blown sea kayak might be right at home. It’s meant for quieter waters, such as lakes, bays, harbors and bigger rivers. It can take a session in 1 or 2 foot breaking surf, but I would not expose the boat to bigger waves, especially in a shore break scenario. You may find yourself out from the shore a bit when the wind comes up, producing steep, choppy waves. The basic Nagare 21 will handle this easily because only the cockpit will be exposed to swamping. The amas will keep the boat stable while you pedal to shore, or a quieter place on the water, where you can bail-out the boat and continue.
It is a perfect boat for sightseeing, bird watching, fishing, photography, and just simple, energy efficient cruising with near bomb-proof stability (you can stand up in the boat while out on the water without your partner coming completely unglued, for instance).
The Nagare 21 is a fast, comfortable and unique boat for a couple who like to get out on the water, but do not want to hassle with the business of capsize that is present in other types of boats, such as kayaks and even canoes.
NAGARE 17 SINGLE A NEW STYLE OF SOLO BOAT FOR TROLLING FISHERMEN
The solo version of the Nagare series has some very different twists, compared to its bigger sister. It has the same, highly efficient and easily driven, slender hull technology, the same set of trimaran style amas well aft for big time stability, the same generous cockpit opening and the same convenient utility for car-topping or lightweight trailering.
The design elements that set this particular boat apart from its sister craft is that the Nagare 17 has a very special capability when it comes to fishing.
AFT FACING TROLLING
Anybody who builds the Nagare 17 and intends to use it for fishing will probably be knocked-out by the potential for facing aft while trolling. Imagine using your legs to quietly drive the boat forward while you casually set trolling rigs, eat a sandwich and keep an eye on the fish finder… all while keeping an eye on the rigs you have set, with them easily at hand?
This is the signature utility development with the Nagare 17, designed specifically, for fishermen. It works like this…
The fisherman loads his boat, drops into the forward facing seat, hits the iPod for his favorite tunes and jams out across the lake at a remarkable speed for a human powered boat. He zips across the lake in virtual silence because he’s driving a very skinny and efficient hull with no engine sounds. Once he arrives, he’s going to make a few sneaky trolling passes with his Mirage drive pushing him along over that monster crew of Pike that are hanging around on their favorite piece of structure. Wham! Fish On! and the day starts with smile on his face.
If you’ve ever fished from a typical Sit-On-Top, you know that you have to face forward while trying to look over your shoulder while trolling. Hook-up and then you have to swivel around, grab the rod and go after the fish. All the time you are doing this, you have to balance the boat carefully, because the whole tamale could go over and end your day right then and there.
Well, that’s how you used to do it, anyway.
With the Nagare 17, you can take it to a whole new level of fishing pleasure. The Nagare 17 is equipped with twin Mirage drive trunks. When driving the boat forward and facing forward, the Mirage drive is dropped into the forward trunk and a tractor-style seat is dropped into the aft trunk with the seat bottom resting on the top of the trunk.
To convert the boat to aft facing trolling and fishing, you simply stand up in the boat and swap the Mirage drive for the aft mounted seat plug and the seat then goes to the front trunk… facing aft. With the Mirage drive still set to drive the boat forward, you simply sit down and start pedaling, slowly, up to your desired trolling speed.
Now, you can watch your fish finder, GPS and your trolling rigs while you continue to tool along at your favorite speed for nabbing the fish. Get one on and simply work that rod while continuing to face aft. No twisting around in your seat, no ”just about dumped it” scenarios, just simple, fun fishing in a very stable boat. What could be cooler than that?
With the fore/aft balance point of the boat set right between the two drive trunks, there is but a very minimal change to boat pitch when you change the direction you face.
The Nagare 17 is further designed to accept an insulated and watertight tank between the two aka tubes where they run through the aft deck. You can use this for all kinds of stuff like: your catch, fresh bait storage, cold beverages if you catch and release… whatever suits your needs. There is plenty of room between the two drive trunks for a pretty good sized tackle box and lots of room up forward of the trunks for any of that “other stuff” that fishermen seem to sneak aboard their boats.
A moveable electronics unit can be fastened at the forward end of the cockpit, or unhooked and moved around aft if you’d rather have it facing that way.
Maybe you want to cast lures or flies instead of troll. The boat is so stable with the two, wide set amas, that you can stand up and cast all day without ever feeling like you are getting the least bit tippy. All in all, the Nagare 17 is quite a boat for fishing, as well as just plain fun, recreational pursuits.
The Nagare sisters represent a unique design family for human powered vessels. They are quick, stable and with their unique styling, represent a distinct departure from the looks of traditional boats one typically sees on any given shore or launch ramp. Both boats are designed to be built in marine ply Stitch and Glue methods for the hull sections, with cedar stripped decks to take advantage of the really beautiful, smooth curves capable from that style of building. You can paint the lower sections of the hull and leave the cedar decks natural with a deep varnished finshed, for a real knock-out boat that will really gather a crowd.If you really want to have a plywood deck build instead of the cedar strip build, write and twist my arm gently. I can design that change for those who really like to build that way
Plans are not yet complete, so if you would like to build one of these two boats, please send me an email and I’ll put your name on the mailing list for information, or watch the plans section of Duckworks for the notice.
CHRIS OSTLIND LUNADA DESIGN CHRIS@WEDGESAIL.COM
Another Trimaran/Skiff … Bigger, With More Power
Well, you had to know this would happen…
When the Montage Skiff/Trimaran was introduced, the Lunada Design website was absolutely flooded with an ocean of page hits every day right after the article was posted. I received several dozen personal query letters regarding the boat and sizeable slice of them were directed at the potential of a bigger version of the Montage.
The concept of being able to build your own boat and rig it with a used mast and possibly even used sails, (if they are in good enough condition) had struck a chord with the homebuilding community. The creation of a larger version of the Montage would take the specified rig choices up into the much more commonly found beach cat rig sizes and make the business of finding a used rig in great shape, a whole lot easier. After pencilling a collection of thoughts and running some rough numbers on the potential, the idea came into focus as the 18′ Collage.
The ama shapes, especially on the smooth hulled variation, borrow other design cues from the modern performance dedicated French designs of VPLP, as well as the very cool work of Nigel Irens. The transoms are nudged in the direction of a triangular shape, while retaining some of the typical beach cat, flat-topped U-form feeling. The volume concentration is well-forward, with the foredecks being much more rounded to provide rapid shedding of water. These shapes will help to reduce the tendency of multihulls to pitchpole when sailed hard.
Breaking away to some degree, from the single, build style of the Montage offering, the Collage is presented as a fully strip built, smooth hulled version, as well as a multichine plywood version. These choices will give builders the ability to work with the material choices and aesthetics they prefer. I am also looking at the potential for a foam cored sandwich laminate boat using the vertical strip technique, though that iteration will probably come around a little later in the process.
Collage Specs
LOA 18′ ( 5.48 m ) BOA 14′ ( 4.26 m ) BOA main hull 41″ ( 1.04 m )
Sail Area Main 163 sq. ft. (15.14 sq, m.) Jib 55 sq. ft. ( 5.12 sq. m. ) Spinnaker 161.5 sq. ft. ( 15 sq. m. )
Displacement 1000 lbs. ( 454.5 kg. ) Weight 380 lbs. ( 172.7 kg. )
The Collage meets all the same design criteria as does the Montage, except it’s longer and wider, has more sail area, carries more crew weight and yes, it’s going to be faster in the right hands. Faster… sometimes this term can be kinda self-defeating when speed claims are made compared to another boat. When it comes to recreational boats, I’m of the opinion that speed is a relative thing based on the overall design brief of the boat in question. In the case of the Montage and Collage designs, speed is one of the attractive elements as long as it is kept in perspective with just what the use application will be from day to day. From where I sit, this will be primarily recreational purposes.
The Sail Area to Displacement ratio ( SA/D ) for each of the boats is as follows: The Montage is 31.56 and the Collage is 34.88 With both of these boats being sailed at near max displacement, I give the nod to the Collage, based on waterline length, as well as the ability to punch through wave conditions that will toss the Montage around to some degree.
I would like to see this pair of boats ( Montage and Collage ) blasting around in the hands of skilled sailors. There’s nothing quite like the feel of a performance boat and the way it can deliver the exhilaration of a spirited ride. But… I’d also like to see this boat out on the water being used by families while they have a really fun day on the water with, maybe, a somewhat toned-down speed blast tossed into the mix every now and then to get the kids chirping.
I’m looking at the potential for the Collage to create a new beach and/or lake sailing culture in which energetic hot shoe dudes, as well as young sporting families, can all mingle on the beach, out on the water and share a communal BBQ after the day of sailing. I grew to maturity on the beaches of SoCal watching the brand new Hobie Fleets do this very thing and it was a lifestyle that perfectly fit my beach kid way of thinking. It would be great to see that happen once again. Could this take place in 2009? Hey, I don’t know the answer to that one, but it is fun to think of the boat and its owners in those terms.
There’s a lot going for the Montage/Collage design approach to support such a social event concept. Both boats are affordable to build, they are easily trailered by even sub-compact cars, they make use of “experienced” parts that can be had on the open market for pennies on the dollar when compared to new parts and they are boats that are easily sailed on the first day. This last part is important, as the boat will attract more enthusiasts when they see that they can be sailed with what pretty much passes for beginner’s skills. Just because it can go fast, does not mean it has to be sailed that way. As the owner’s skills grow, the boat’s potential will be there waiting for him.
As a way of introducing the Montage and the Collage designs to the homebuilder market, I’d like to offer free plans to one person. This builder should be able to show me that they have a very strong interest in either design and are willing to build the boat as I supply the plans in accordance with their progress from the previous plan set delivery.
If interested in this offer, you can write me at: Chris@Wedgesail.com or at lunadadesign@gmail.com and make your pitch. The one chosen to receive the free plans will be willing to provide construction photos of their progress and a brief written description as to how things are going. The personal accounts will be published on this website, Lunadadesign.net so that the readers of the site can follow the projects.
Chris Ostlind Lunada Design
This boat created immediate appeal to beginning and intermediate sailors. It offers much of the speed experience of a high performance skiff in a stable and predictable platform that is really tough to capsize. The Weta is one of the first boats to encourage family participation and reintroduces the waterborne fun of the beach sailing culture, established way back in the late 60’s with the intro of the Hobie catamaran.
A brand new, factory built Weta goes out the door for USD $11K. Realistically speaking, this isn’t an in surmountable amount of money for a factory produced, brand new carbon trimaran. It is, however, quite a lot of money for most casual recreational enthusiasts and the folks who like to build their own boats… especially when you consider the rugged economic conditions we all face these days.
The estimated $5600 figure represents a boat with a whole host of brand new parts. For the clever builders out there, the Montage could be even less expensive if they can find a used 470 rig, perhaps a used small craft, or beach cat trailer that could be modified to fit the hull design and even a collection of hardware in good condition. The Montage is a very light boat at right around 235 lbs., so you do not need to buy a heavy duty trailer.
I went back to the drawing table and reconfigured everything so that the longest hull panel was going to just fit on a couple of sheets of marine ply laid end to end. The main hull also got just a bit wider in the process of lengthening the boat. Where the factory boat uses carbon fiber on foam cores for its structure, the Montage will be a 4mm marine plywood design with full fiberglass/epoxy sandwich laminates inside and out. The foredeck and the cockpit seating transitions are strip-built in Red Cedar to give the overall appearance of the boat a smoother, more organic feel than straight plywood panels.
The amas for Montage came from a 16′ trimaran design that I had already done and required minimal re-design to work with this boat. The amas are also designed as multichine ply forms with pretty high volume shapes well forward and a water shedding deck form that will helps to keep them riding high even when driven hard. Ama displacement is 100% of the all-up boat weight when sailing.
Montage Specifications
LOA 15′ 6″ BOA 12′ BOA main hull 41″
Main 110 sq. ft. Jib 38 sq. ft. Screacher 102 sq. ft.
Displacement 650 lbs. Weight 235 lbs.
The aka beams are anodized aluminum instead of carbon tubing. The inboard ends fit into fairly burly sockets in the hull and are held in place with quick release pins. Flat deck flanges on the ama ends are welded in place and bolted to the amas. The amas are removable from the aka tubes for repair or maintenance, but otherwise stay mounted, along with the trampolines, as complete units.
The mast is also anodized aluminum. The boat uses the same mast section as the 470 dinghy, which is a Proctor Cumulus section. This mast is available on the used market with a little bit of hunting around. If you want it all and have the money, then there’s a very cool, filament wound Forte carbon spar available with very close specs to the Proctor that will rock your world. http://fortecarbon.com/
Making these two changes from the benchmark, all-carbon Weta to an aluminum spar and tubing keep the costs down, with but a slight weight penalty over all-carbon parts. If you find a used mast, the savings will be even more substantial.
I have found that the more expensive sailcloth laminates are capable of driving the boat just a bit faster, but for the average recreational sailor, they will hardly ever make a difference compared to more forgiving sails in Dacron. Dacron is much easier to maintain, lasts longer, is a lot more tolerant of UV exposure and can be repaired by any sail loft wherever you go. If the builder of the Montage really wanted to, they could buy a set of sails in something like Pentex laminate instead and they’d have that hot, performance boat look that some desire along with just a bit more zip under sail.
The aluminum aka tubes will be sold pre-bent and ready to install on the amas. If the builder has access to a good mandrel bending facility that can handle the OD/ID specifications of the tubing, they can fabricate their own tubes to supplied specs.
The Montage is designed to be a really fun day sailing machine that can generate near performance skiff sailing speeds while offering a hugely stable platform for recreational sailing. Construction of the boat is very straightforward in marine plywood with glass/epoxy laminates and can be easily built by any sailing enthusiast who has household handyman skills with tools. The Montage has been created to offer homebuilders an opportunity to enjoy this style of family sport boat at a completed cost that is far less expensive than the manufactured version.
CHRIS OSTLIND
Fresh take on the solo16 s, a safe, speedy solo cruising craft for adventurous souls.
After a lot of input from readers of this site, I have completed the modifications to the Solo16 S design that reflect many of their expressed interests.
The Solo16 S now has a bit more displacement as a direct response to suggestions for the use of a small 2 hp outboard and some spare fuel. At the same time, the vaka hull was given additional beam above the waterline and the shear was raised some to allow for mods to the amas.
The amas, themselves, were made slimmer and taller, while retaining the same volume. They now have a slight vee section which gives the boat a progressive resistance increase as the amas are pressed heavily in a gust.
To complete the changes, a sporty all-weather soft cabin has been designed to allow the owner a chance to sail in a wide spectrum of conditions. The new cabin is modular in its approach with the ability to address a multitude of sailing situations.
All panels except the Bimini have generous window areas which are backed by micro mesh screen that is small enough to keep out the No-See-Ums. The PVC windows are zip-out removable and the screens can be rolled-up for maximum airflow through the cockpit. The complete enclosure system allows the owner to mix and match the panels as needed for the best protection from the elements.
When setting up the boat for sailing while on the trailer, the owner simply lifts the ama assembly, rotates and places the ends of the aka tubes into the matching vaka openings and slides the ama into place. The akas are fully seated when their internal, spring loaded snap-buttons click into place. The entire ama assembly is easily handled by one adult with modest physical strength.
In the trailering mode, the complete boat does not exceed 68″ (1.7 m) in width, falling well under every trailer width limit in the world.

The challenge of building a trimaran from beachcat hulls
Hi Mike! Let me first say I appreciate the depth of information on your web site :)
I've been ‘oogling’ it for years. But now I have a question regarding the potential of building a trimaran out of some old 18' cat hulls. How would you suggest I proceed and what might I expect from the result ?
….. Josh from Kalispell, MT.
ANSWER : Tks Josh … always pleased to hear my work is proving of value to others.
I first need to say that using cat hulls is not a perfect fit for either the vaka (center hull) or even the amas (floats) but sometimes we can make something work as a fun project. The vaka will be the biggest challenge. I could briefly answer your question with just a list of do’s & don’ts , but I think a more detailed reply will give you some specifics and cover a broader range of related questions, so here we go.
First step is to make a weight estimate starting with what a ship designer would call the “Lightship weight” (boat ready to sail, but no supplies, crew or their personal equipment). You then need to decide what weight you wish to tack-on to form the Design Displacement . This we call the ‘Deadweight’. The very minimum would be for solo day sailing .. say 200 lbs added to the Lightship weight, but for an 18footer, this will likely be more like 350lbs as an absolute minimum.
So let’s assume the boat and its rig and gear weigh 550 lbs. Now with 350lbs added, the required Design displacement will now be 900lbs. The volume to support that will be 900/64 = 14 cu.ft. (1 cuft displaces 64 lbs of seawater, or use 62.4 for fresh water)
The difficulty with a trimaran over a beachcat, is that there is initially only ONE hull to provide this buoyancy volume, compared to two for a catamaran, so right away, one can see why a single catamaran hull is WAY too small for a vaka. Let’s say these are your 3 hulls.
Place the widest one with most volume in the center.

Obviously, if you kept the hull in this level position, your trimaran would be dragging 3 hulls through the water with far more drag than for a catamaran.
So you need to lower the central hull, so that it will support your 900 lbs .. requiring 14 cu.ft volume under the waterline. It will clearly not have the volume needed so what can be done ? There are 3 basic ways to go. You can lengthen it, widen it, or sink it deeper. Using all three would be best if designing a new vaka but I suggest that sinking it deeper will be the easiest, as you can then just raise the sides. But you will probably need some frames to support the deeper hull section as the hull will now have to accept more hydrostatic pressure.
It will now look more like this:

You can either raise the sides (C) or a better solution would be to combine this with side extensions (D) to give yourself some form of central cockpit as well as more width to later attach your cross beams (akas). Exactly how deep this central hull will need to go, will decide how practical this whole ‘conversion’ will be, and it’s quite possible you will need to do some major surgery to this central hull (or build a new one) to get the buoyancy volume you need. If you are not already familiar with how to calculate this, I suggest you study this page from the design section.
https://www.smalltridesign.com/Trimaran-Articles/design/simpsons-rule.html
A very rough idea of the sectional area (marked as ‘buoyancy’ in the above sketch) can be obtained by assuming a Block Coefficient* of 0.5. For this, double your required volume and divide by your waterline length .
- Block Coefficient is the ratio of actual hull volume to an encompassing ‘block’, that has dimensions equal to: your waterline length: your waterline beam: and underwater water depth (design draft)..
So in this case, this will be 2 x 14 / 17.5 or 1.60 sqft, which will roughly require a beam and draft of (1.60 0.5 ) or 1.265 ft for both waterline beam and for draft .
If your hull is much smaller, you either have to go deeper than 1.3ft draft OR find ways to widen that hull to get the cross-sectional area you need. (Typically, a central trimaran hull has a waterline width of about double that of the ama beam).
Moving forward .. let’s assume you now have chosen your best workable solution for the vaka.
As far as the overall beam is concerned, the issues involved and a way to select a suitable beam is already explained in this Q&A from earlier this month.
We now need to connect the amas with the main hull using beams. As I understand you are planning to use a similar folding system to my W17 and using my design of fiberglass hinge and latch , I will explain what you will need.
Beam and latch strength will be defined by the maximum righting moment that the ama can apply, plus a safety factor.
As a safety factor, it is common to apply the full buoyancy of the ama (when fully underwater) to the main beam ... and multiply by the Beam Lever (shown here), which might be ~4ft in this case. IF the full ama volume is say 800 lbs, then the bending moment on the beam would be 3200 lbs.ft

Once you have fixed the hinge location, you can calculate the bending moment at the hinge, using the same 800 lbs (just assumed for this example) but with a smaller lever. Let’s assume it is 2.5ft in this case, so the Bending Moment will now be 2.5 x 800 or 2000 ft lbs. This would mean that IF your vertical distance between the upper hinge and the lower latch is 5” deep (0.42ft), that the latch will need to take 2000/0.42 or 4762 lbs in tension, for the hinge to be as strong as the beam. This shows the important value of 'beam depth' with a hinge system.

There will also be a download on the upper hinge, due to whatever crew weight you place on the flying windward ama (plus the weight of the ama and outer beam itself). With a large volume ama, this download is typically about 70-80% of the upload, so the hinge is a little less stressed in tension than the lower latch, but with a small ama, it could be the reverse, so you need to do the maths..
In Fig 3. note that I show the amas inclined out at 10-12 degrees. If this is not done, they are more side-loaded when heeled and this adds an unnecessary load to their beam attachment as well as making the ama more resistant to push through the water, so personally, I consider some outward angle is essential.
In addition to their location in the above sectional view, the outer hulls that will work as amas, also need to be positioned in profile view , relative to the central hull.
In the sketch below, they are shown with slight lift of the bow that some designers in the past have incorporated with the assumption of less resistance and 'to ride over the waves'. In the 1970’s many amas were then banana shape d and even back then, Hobie 16 hulls were sometimes used as trimaran floats. Having sailed on one a few times, I found such boats (like Newick’s Tremolino for one) were very jittery in any seaway, were very wet, and also pitched excessively. Even using the straighter and therefore more suitable H18 hulls, their stability role for a trimaran is still compromised if installed as shown here in Fig 6.

Just compare these two sketches in Fig 7 that both show an identical assumed heeled water line (in red) and you can see that IF the bow of the ama is raised that the ama will not give any bow lift UNTIL the whole bow drops, severely increasing the risk of pitch-poling, so unless the bow is very full with a wide vee, its more effective and safer to actually LOWER the buoyancy of the ama bow so that it quickly immerses, to provide more effective lift when heeled.

So what can be done to make the beachcat hull more like this ama? The bow is deep and narrow, not vee’d. Think of the Hazelett mooring buoy that is a vertical tube. While it still offers buoyancy, it moves very little in waves. When a bow is like that, its not easily launchied in the air to only fall again, over and over again. It just stays quiet and cuts horizontally through waves and it certainly increases the waterline length. Early rockered amas, had short waterline lengths and were also vee’d … two things I advise against. After all, we are ’sailing’ on this ama and need it to act like an efficient boat hull. But as it would be complicated to deepen the forefoot of an existing beachcat hull, its easier to lower the bow as shown above and then raise the deck forward of the forward beam.
As a picture is a 1000 words …, check out what I would do. 3 days of 4 hours could see both done if you plan your work.

You might find a collision bulkhead inside that will need cutting across, but it should not be hard to raise that with rigid foam, so that the raised deck can be bonded to it and keep it watertight. The ¾” holes in the sides will stop the end of the cut from splitting and cracking, and will be filled and covered over by the fill piece.
This should give one enough to make the important decisions and calculations, but as can be seen, catamaran hulls are not ideally interchangeable with Trimaran hulls, so their use like this will always be a compromise.
You also have to decide which hull will hold a centerboard or daggerboard. It’s much easier to reach one in the center hull, but this is your choice and dilemma. Either can be made to work but do not use ama boards unless you are operating in deep water, or you may end up IN the water while trying to adjust them from an ama, especially in rough water.
As far as the end result , it depends on so many things that it’s hard to predict. But it could be made to perform quite well in relatively flat water and give you some fun at least … but it will not be a dry boat like the W17, nor as comfortable or have as low leeway, as the round hulls are just not as ideal for slicing waves with minimum disturbance as the W17 hulls are. While rounded hulls are very effective in lowering surface friction, they seldom slice waves as well and certainly do not provide the leeway resistance of the W17 hulls.
It's also frequently forgotten (or just not understood) that often, the greatest resistance from a small boat is wave resistance or wave making … being the most critical in the 4 to12kt range. Optimizing for this range with non-round hulls can more than make up for their added skin drag. See this article for more on this, where there is a chart showing what proportion of residuary (wave) resistance applies at what speed.
Hope this helps to get you going in the right direction, and good luck with your project.
Also note that there was an earlier question of using the reverse ... Trimaran hulls for a Catamaran and as my graph showing the proportion of residuary resistance versus the total is also there, it may be of some interest too.
Mike ... March 2022
"New articles, comments and references will be added periodically as new questions are answered and other info comes in relative to this subject, so you're invited to revisit and participate." —webmaster
"See the Copyright Information & Legal Disclaimer page for copyright info and use of ANY part of this text or article"
Fram's Building and Sailing Pages
Introduction.
Hello and thank you for showing interest in the building story of Fram, my F-39 trimaran.
Using the “Next” button at the bottom of this page will guide you trough the whole construction process. But be warned, there is a lot of information and thousands of pictures, so it can take some time for the interested reader.

Initially, the choice for my new to build boat fell on the high-tech F-36 trimaran, a design by the famous New Zealander Ian Farrier ( † RIP Dec.8, 2017).
In those days the F-39 did not exist yet. Although the F-36 missed my preferred folding option, the design nevertheless meets most of my wishes. According to Farrier, there was simply not enough demand for a folding option for such a large trimaran. And is it not true that a boat is always a compromise ?
Actually, the determining factor to go on with this Farrier (F-boat) design was the superbly detailed building plans and the building method. The more I studied the plans, the more I realized that this boat is an engineering marvel and accompanied by an building method that I could manage. So all necessary attributes for an high quality yacht!
However, somewhere in my head I still felt the obligation to find out whether it was not better to outsource the construction to a suitable yard. Though, I had already realized that this would be far above my budget, which was indeed proven by offers from various yacht builders at home and abroad.
“The desire to build a boat ... begins as a little cloud on a serene horizon. It ends by covering the whole sky so that you can think of nothing else.“ quote Arthur Ransome
I can not deny that this state of mind led to the purchase of the building plans. A stack of paper from which a boat has to be built. This is the beginning of an almost incalculable adventure.
I bought the original F-36 plans in the spring of 2000 and planned the start of the construction process by the end of that year. But it worked out differently.
And I want some new furnishings too ................
And the kids want a bigger rabbit hutch..............
By finishing this and carry out your promises I will be ready for the project.
Of course she was right !
Update to the F-39

Autumn 2001 everything was done. In the meantime I have been searching for materials and suppliers, and have negotiated for prices and specifications. As still being a greenhorn in composites, I tried to get familiar with all these composite materials and worked on another F-36 (thanks Gary Mulder) to go through the laminating process of the main hull.
And just before I ordered the materials for the first float there was a very welcome note from Ian Farrier that he decided to upgrade the F-36 to an F-39. The new design is not only larger but also includes a number of improvements, the latest design insights, rotating mast and last but not least the folding option.
So this delay wasn't too bad at all and now I could update without any trouble and not having done the wrong things. Spring 2002 I ordered the updated plans. Not all drawings were ready yet but there was enough to make a start.
In the spring of 2003 the form frames for the first float are upright.
Vacuum Resin Infusion.
In the year 2000 when I started to study the possibilities for a DIY boat building project, I was a total composite greenhorn, but I already had learned that a vacuum treatment was desirable to get the lightweight multihull quality I was looking for. However, it was hard to find any information about how to get a vacuum densified laminate within my range of possibilities.
I learned to understand the vacuum bagging technique but the implementation looks to be very challenging. At least to me. The fact that this technique should start with old-fashioned hand lay-up and then to be completed within the time constraints of the resin clock currently looks very discouraging to me. And for laminating and subsequent vacuum bagging the hulls are many helpers needed for which I do not have enough space in my humble workshop.

An article in our local ″ Zeilen ″ magazine put me on the trail of the vacuum infusion technique. This has given me a whole new perspective on the matter. Although, there was almost no information available, except that it was some kind of black magic, operated behind closed doors by some very professional boat building plants.
A breakthrough was made possible through the purchase of knowledge at Polyworx in the person of Mr. Arjen Korevaar.
With almost no previous composite experience, I suddenly saw the possibilities to make my boat building project possible and still be assured of the best possible quality. After all, vacuum infusion is a defined process that not depends of my initially lack on knowledge and experience and skills for laminating big boat hulls. It gave a boost to the preparations.
Earlier in the eighties I have built an epoxy/wooden boat, somewhere in a remote barn. From that I learned that I will never build a boat again in a different location than at home.
In the past I did a rebuilding of the garage of our modest house with the intention to enlarge the living room with the aft part of the (former) garage. But I had also a hidden motive to built a new boat, so the actual joining with the living room had still to wait some time ....
Building at home is essential for me. Despite the small room for this project, it is much more efficient than a workshop somewhere else. It's save, I can leave the things behind me and every single moment of the day, or when I feel like to do something, the project is just a few steps away. But the most important advantage is the fact I can stay at home and near my family, a great benefit to family- and social live.
With extension the working area is about 13 x 3,7 m², but the height is not enough to join the two main hull halves together. So I have to do this somewhere else.

Since there is only just enough room for the main hull (or halves), I made an attic floor for workbench and vacuum table. In fact, the whole floor is a 3,5 x 3,7 m² bench and a standing room is 0,9m. lower in front of this (removable). With the main hull in place, I don't need this lower floor anymore as working at the bench is possible while standing on the F-39 cabin roof.
However, I still need to learn to have the discipline to be very organized and clear, to be able to manage this job in this limited space. Anyway, I don't have a choice. I would never attempt such a project in another location than at home.
As I am going to build with epoxy, there is no inconvenience with bad smell because epoxy is almost odorless. Which is not the case with the two part painting products. These have an awful smell and for this reason I installed a big ventilation unit capable to maintain a low pressure in the workshop. With this the painting fumes flow outside instead of causing troubles with the family.
Workshop extension
There was still one difficulty to overcome: the garage is 2m. too short so I had to enlarge the garage a bit. This turned out to be a big problem in our highly civilized and urbanized small country! July 2001 the plans for a temporary extension were sent to the officials of the my hometown.
By the end of August they decided to turn my request down...............
As I've said before, home building is essential. No permit is no project, but this is something the Jacks-in-office didn't want to know and certainly would never understand. (and here they are right, it's nuts probably ;-)
Wow, I never expected this. The extension is simply, small and temporal while I knew (almost) for sure the Dutch building laws must allow this! So next step was to raise an objection to this decision and for this we have a special committee of independent wise men. They decided that the refusal was taken on wrong arguments and advised the officials to think about other arguments for a refusal (no sailors neither)!
Now it became a bad joke. Better arguments were hard to find, but they found them, legal ones against a temporary extension, but, as I found out, nothing against a permanent extension...........
All parties were agreed that this enlargement is not an embellishment for the house, so the legal permanent option is the worst solution. This strange situation came to an climax by a special permission by the Lord Mayor himself, which allowed me to build the temporary (and inexpensive) option. I received this long awaited document in the summer of 2002.
After one year of struggle, the actual building of the workshop extension was finished in just 3 weekends. Even the neighbors like the result and are getting curious about my activities (which are quite abstract for non-yachties).
I started the building of the F-39 in the Spring of 2003 at home. By the end of 2009 I have build and finished both floats as well as the starboard half of the main hull together with some interior parts as settee and galley. Roughly a little less than half of the entire construction job, although it has taken much too long.
But then that once-in-a-lifetime opportunity came along ....
2010 Changes, another workshop
While sitting in the sunny garden in summer 2009 and looking at the successful work we did with once more an alteration of the house (expanding the attic into a fully-fledged living floor), we thought we had made a good descision to cross out the idea of once moving to our ″Dreamhouse″ and instead making our house more comfortable. That dream was living near the water with the boat along the garden jetty. This kind of villa's are always far above our budget.
However, it is a buyers market nowadays and while having peace with the decision to give up this apparently not realistic dream, a once in a lifetime opportunity came along. A radical turnover lead to buying a house with a private harbor on the South side of the IJsselmeer, without any bridges or locks to pass and with plenty of room (33'x40') for the unfolded F-39, very rare in our little country.
When I had known this just a few months earlier, we would not have start the extension of the roof. Now it is not finished yet and we are moving to another house. Challenging times so to speak !
So, the Fram project had to move to a new workshop, which I found quite nearby and not coincidentally being our company workshop.

Much more room, but also not at home, which was a major condition to undertake this huge building project. Much less privacy too. This of course is a temporal solution with the necessity of getting in a hurry. This means from now on I will focus on finishing the F-39 on the outside and get her in the water to tie her up along the jetty of our new home. Further work on interior, hardware and rigging will be delayed till she is at home again.
What is my schedule ? This seems to be the most important question, not anymore for me but apparently for others who have asked me that already 1000 times. My answer has always been simple, next year! And that is the most accurate answer I can give as that planning turns out to be correct every year.
It is a part-time project, besides a day-job that requires a lot of time and attention, and I work in spurts and bursts, not steadily. And always on my own without any outsourcing. One needs an optimistic mindset because everything takes three times longer than previously thought. I now know why many of these kinds of projects are stranded halfway.
I once met a German catamaran builder and asked him how many years it has taken him to finish his beautifull catamaran .... 14 Years ! was his answer. I complimented him with the great result and shake hands, meanwhile thinking ″that man must be bloody crazy, not my piece of cake ...″
There are only a few F-39's sailing in the world nowadays. Almost all have been built commercially. A sign on the wall? I know of some half build project, resting in parts in a remote barn somewhere, waiting for that enthusiastic builder who will take up the challenge again. But I also know of some almost completed projects that are not far from launching.
It's time for more F-39's in the water.
My schedule:

Please be warned! If anything on this web site appears to be a recommendation on how to build a boat it is an error of writing or editing. This site is my builder's documentation to chronicle the adventure I had in building Fram.
The Internet is such a lovely open source. Remember this when you see something in this website what you think is yours. If I didn’t ask you before then there was no copyright and I borrowed it. If you think I made a mistake in this, I will give it back to you. If you think I forgot to mention my sources, please let me know. However, everything on this site is mine and no part of this may be reproduced in any form without permission in writing by me. As you may have noticed, this site is a labor of love with lots of free information that has been assembled for your entertainment. Please respect the spirit of this site and don't engage in behavior that I consider hostile.
All information is composed with care and consideration using my background and personal experiences. You may disagree with my opinions or, better, let them support you in your own dreams. You are free to do the same things or to use the procedures, practices or methods as described in this site, but you should always use your own common sense when applying this information to your personal projects and you do this on your own risk for which I am not responsible. I do not warrant or make any representations regarding the use or the results of the materials, practices or methods on this site or linked sites in terms of their correctness, accuracy, reliability, or otherwise. The only thing I can promise you is that I have or will have enough confidence in the info supplied that I already have or will use it in my own project.
While you and I might consider some of the images on this site quite pretty, please respect copyright and do not enhance your site by hotlinking to images on mine. Hotlinking does not only violate my copyright, it also makes me pay for the delivery.
If anything I do or say happens to offend you, that is unfortunate, you are free to go elsewhere.
I explicitly disclaim any responsibility for the accuracy, content, or availability of information found on this site and sites that link to or from this site or that this site or sites that link to or from this site are free of viruses or other harmful components.
I am not affiliated with the manufacturers or resellers of products featured on this site in any other way than perhaps being a customer. Furthermore, since I'm not charging you anything for the use of this site, you're going to be the one assuming the risk of anything and everything you do as a result of reading content here.
Believe it or not, I do get a lot of mail. It may take a few days or longer to answer, as time allows. However, I do attempt to answer all e-mails.
Wayne Barrett has been building boats for 50 years, many of them world renowned. His latest venture is a DIY trimaran kit that embodies his half-century of expertise and celebrates “the joy of building and sailing your own creation”.
21 April 2020
Advertisement
Famed in multihull circles and the creator of high profile vessels such as Trilogy and Indian Chief designed by Tony Grainger, and Traveller, the 50-foot tri designed by Dick Newick, Wayne Barrett describes himself as “a little guy designing boats on the kitchen table in an apartment on the Gold Coast, with a nice view over the lake.”
He has built some “100 or so boats” over the years and his passion and prowess have inspired him to create the M80 trimaran, an 8-metre vessel designed with the home builder in mind; those with limited time or space, and some basic experience with hand tools.
The versatile M80 can be specified for cruising or racing and the larger 9-metre design will have a range enough to sail across the Atlantic.
“In 2021, I’m planning to sail the 8-metre boat up to The Whitsundays as a promotional exercise to showcase the vessel. It’s very manageable for single-handed sailing.”

The concept arose from Barrett’s belief that sailing should be within everybody’s reach.
“I’ve built quite a few complicated, high-performance multihulls over the years and I’m aware they consume time that’s way beyond what an amateur could devote to a build.
I used the flat panel concept, adapted to tri design and put it out there for amateur or professional builders.
“A friend of mine I’ve been sailing with for 40 years needed a new modern Buccaneer 24, a plywood 24-foot Crowther around in 1966. I’ve built a few of them, and a B33, B40 and a Spindrift 37. I thought about it for a year or so, then did something about it.
The spiritual successor to the Crowther Buccaneer 24, Mojo, was originally designed with a central cockpit, a double bunk down aft and a galley and head forward, which I thought was a great concept. But I scrapped that idea and went with a conventional aft cockpit.”
The first boat, in Brazil, set sail just over three years ago and since then, Barrett has sold plans around the world.
“A mate of mine from Geelong, Andrew Johnson, is building one at Lightwave Yachts at Coomera on the Gold Coast with the guidance of Roger Overell. It’s well into the final stages and will be used for cruising. It’s made totally from carbon, so it’s light and strong.
“There’s another one being built in France, a 6-metre design being built in Melbourne and a 9-metre design close to completion in The Netherlands. I’ve sold 9-metre plans to Germany and one in Sydney, revised to be all flat panel, foam and round bilge, with aesthetics to suit that owner.”
The main attributes of the design that have such broad appeal are its simplicity and economical package.

“Initially the concept was built around plywood, which has been a common material for 100 years and most people are familiar with it,” explained Barrett. “The benefit of ply is that a guy can build it in his own shed, over time. But other than the 9-metre in The Netherlands, people are all keen on the foam and epoxy.
“Foam and epoxy is a bit more costly, but comparing the total price is attractive for an amateur builder. It can be built from CNC cut panels in a fraction of the time compared to some other options, alternatively you can build it from our easy to follow plan set for DuraKore, DuFlex or foam core kits.”
Barrett has worked with ATL Composites for the past 25 years on numerous projects, including the 9.2-metre Trilogy, which held the Aust Championship title for around 10 years, Traveller and the 13-metre Gary Lidgard-designed cat Saloon Bar .
“I also built a 7.5-metre caravan which appeared on the ABC program, ‘New Inventors’ five or so years ago,” continued Barrett. “I used ATL Composites ’ products, including foam and resins.
“ATL spent a lot of time scanning the surface of the moulds so we could get an accurate pattern for the shapes of the foam core. I built five of them, all custom designed and built, all traveling the country. It was a fantastic looking thing!
“ATL has always been fantastic to me, in their general support, timely supply of goods, always bending over backwards to help.”
Getting started is straightforward, according to Barrett.
“People buy the M80 plans, complete with DXF files and they can have all the flat components cut out with CNC or jigsaw by hand”.
“If you have plenty of time, it’s cheap. An average handyman or woman, with basic experience with hand tools could put it together in their garage or workshop. In The Netherlands it’s being assembled under a tent to keep rain and snow out. Where there’s a will, there’s a way to boat the world over.”
trimarankit.com
atlcomposites.com
Your next adventure
Caribbean nostalgia
Don't miss out!
Subscribe to our newsletter for yachting news, reviews and events.

Making Trimaran Outriggers

Introduction: Making Trimaran Outriggers

Trimarans has three hulls: the main hull and the two outrigger hulls.
For a putt-putt steam engine driven model a narrow main hull can’t carry the engine when the hub is high, so you need outriggers.
Fort he outriggers you can choose an optimal hull. You can take as basis the simpler definition of „optimal”. The main attributes are: the stem is the same as the stern. For convenience the geomerty between the midship and the ends on waterline, and of the keel is a bow. In practice it could be something other, e.g. three straight lines with bow transitions, a straight line at midship with bows to stem and stern, or a parabola…
On the other side at low speed the friction of hull is significant, so you can choose the hull form with minimum surface, a semicircle. At least for getting the greatest speed you can take the mass for a minimum, for having less displacement, so you have to move a minimum body of water. The wave resistance at waterline is virtually unimportant.
The scales of practical hullforms suits the requirements, e.g. racingkayaks, that means a length/beam ratio of L/B=11 (at a draft with semicircle D=B/2).
Step 1: Pieces and Tools

Some pieces can be made from usual modelling material, as pinewood, beech veneer, quick epoxide adhesive, and we can make tools for fixing like gages, or flexible sticks.
Step 2: Carry Out the Frame

To carry out a semicircle hullform makes some difficulties, with traditional wooden planks you have to turn off from the semicircle. You can make the approach, that you take two vertical sideplanks, and two underplanks with 120 degree bevel at keel. In that case the intersection of vertical and 120 degree plank is at half draft, and the intersection of two 120 degree planks under the keel is under the semicircle at about 0,043D. The fillet is R=0,31D between the planks.
Forr assembling the outriggers you can use the baseline method. The deck is here a horizontal plane, we put this on a horizontal plate, and build the frame: at first the transverse ribs, then the longitudinal frames, and the planks.
The length is divided in 4 pieces, we put one rip in the middle, 2 smaller rips ont he ¼ length, and at least 2 horizontal triangle-formed rips. The height of rips is the height of semicircle, plus the difference 0,043D, and the freeboard. The thickness of the triangle rips is only the height of the freebord.
Because the sections have 3 fillets, it is subservient to make 3 longitudinal frames, wich have enough width and thickness for making the fillets (width about 0,6D, thickness 0,18D). The longitudinal frames abuts at the ends in a distance from stem and stern of 0,19L. From this point we can cut them straight to the ends.
Step 3: The Gage

For easier assembling you can make a gage.
You draw on a board the outline of waterline. In the middle, at ¼ length and some centimeters from the ends you can put in the centerline a nail (only the slaps). Around them symmetric on both sides you can put obliquely screws (with 45 degree). We place the center-bored rips on the nails. Than we put on them the longitudinal frames, and tie them to the screws on both sides with rubberbands. We stick the frame with quick one component epoxyde adhesive. It stiffens in about 2 hours (even the 5 minute adhesive), becouse in some places there is more adhesive, with light pressing you can see if it is even liquid. When it is stiffed, you can polish to the true form, mainly at the ends, and longways at the 120 degree cut longitudinal frames, because thay have to give longways a continual cylindrical surface for lapping the planks.
When it is stiffed you can tie the Lx0,11D tailor-made thin (0,6 mm ) vertical veneer planks at the two sides (e.g. with twinged pins), than you can draw near the longitudinal frames the outlines, and cut to size (max. width about 0,78D at the sides). Then we slush the planks with a slower adhesive, and fix it. The same way we tailor and stick the two 120 degree planks (max. width about 0,11D), for fixing the screw tied rubberbands are suitable. The joints can be made with successive polishing and cutting. The sticking lasts with a one component 15 minutes adhesive about 3 hours (the adhesive is not film-sized thin, but on some places thick).
We form the stiffed sticked hull to the true form with polishing, and polish up the joint edges to fillets.
Step 4: The Deck

Then we turn the hull down with the deck, and draw the outline of the deck on a veneer, cut it to size, and stick with quick epoxyde adhesive, and polish.
Step 5: Assembled Outriggers

The trimaran outriggers has lateral beams, wich can be sized to the known level of main hull and waterline, and sticked to the outriggers. You can make a gage for this, but the main hull can also fit for adjusting the true levels and perpendiculaires.
Before painting you can smooth out the outrigger surfaces, polish, and ground with 2 streaks slurry achromatic varnish, and then with colours appropriate to the main hull.
At last we can control the empty and loaded weight (displacement).
In case of the carried out model the waterline length L=365 mm, empty weight 70g, loaded weight (displacement =2V) 160g.
Recommendations

Fix It Contest

Books and Bookshelves Contest

Green Future Student Design Challenge


Barrett M80
DIY tri capturing imaginations
Wayne Barrett has been building boats for 50 years, many of them world renowned. His latest venture is a DIY trimaran kit that embodies his half-century of expertise and celebrates “the joy of building and sailing your own creation”.
Famed in multihull circles and the creator of high profile vessels such as ‘Trilogy’ and ‘Indian Chief’ designed by Tony Grainger, and ‘Traveller’, the 50-foot tri designed by Dick Newick, Barrett describes himself as “a little guy designing boats on the kitchen table in an apartment on the Gold Coast, with a nice view over the lake”.
He has built some “100 or so boats” over the years and his passion and prowess have inspired him to create the M80 trimaran, an 8-metre vessel designed with the home builder in mind; those with limited time or space, and some basic experience with hand tools.
The versatile M80 can be specified for cruising or racing and the larger 9-metre design will have a range enough to sail across the Atlantic.
“In 2021, I’m planning to sail the 8-metre boat up to The Whitsundays as a promotional exercise to showcase the vessel. It’s very manageable for single-handed sailing.”
The concept arose from Barrett’s belief that sailing should be within everybody’s reach.
“I’ve built quite a few complicated, high-performance multihulls over the years and I’m aware they consume time that’s way beyond what an amateur could devote to a build. I used the flat panel concept, adapted to tri design and put it out there for amateur or professional builders.
“A friend of mine I’ve been sailing with for 40 years needed a new modern Buccaneer 24, a plywood 24-foot Crowther around in 1966. I’ve built a few of them, and a B33, B40 and a Spindrift 37. I thought about it for a year or so, then did something about it.
The spiritual successor to the Crowther Buccaneer 24, the 24-ft ‘Mojo’, was originally designed with a central cockpit, a double bunk down aft and a galley and head forward, which I thought was a great concept. But I scrapped that idea and went with a conventional aft cockpit.”
The first boat, in Brazil, set sail just over three years ago and since then, Barrett has sold plans around the world.
“A mate of mine from Geelong, Andrew Johnson, is building one at Lightwave Yachts at Coomera on the Gold Coast with the guidance of Roger Overell. It’s well into the final stages and will be used for cruising. It’s made totally from carbon, so it’s light and strong.
“There’s another one being built in France, a 6-metre design being built in Melbourne and a 9-metre design close to completion in The Netherlands. I’ve sold 9-metre plans to Germany and one in Sydney, revised to be all flat panel, foam and round bilge, with aesthetics to suit that owner.”
The main attributes of the design that have such broad appeal are its simplicity and economical package.
“Initially the concept was built around plywood, which has been a common material for 100 years and most people are familiar with it,” explained Barrett. “The benefit of ply is that a guy can build it in his own shed, over time. But other than the 9-metre in The Netherlands, people are all keen on the foam and epoxy.
“Foam and epoxy is a bit more costly, but comparing the total price is attractive for an amateur builder. It can be built from CNC cut panels in a fraction of the time compared to some other options, alternatively you can build it from our easy to follow plan set for DuraKore, DuFlex or foam core kits.”
Barrett has worked with ATL Composites for the past 25 years on numerous projects, including the 9.2-metre ‘Trilogy’, which held the Aust Championship title for around 10 years, ‘Traveller’ and the 13-metre Gary Lidgard-designed cat ‘Saloon Bar’.
“I also built a 7.5-metre caravan which appeared on the ABC program, ‘New Inventors’ five or so years ago,” continued Barrett. “I used ATL Composites’ products, including foam and resins.
“ATL spent a lot of time scanning the surface of the moulds so we could get an accurate pattern for the shapes of the foam core. I built five of them, all custom designed and built, all traveling the country. It was a fantastic looking thing!
“ATL has always been fantastic to me, in their general support, timely supply of goods, always bending over backwards to help.”
For the M80 in build at Lightwave Yachts, the main shell structure, fore and side decks, and cabin sides were built with DuFLEX/foam panels cored with Divinycell H80 structural foam in a variety of thicknesses and reinforced with double bias E-Fibreglass skins.
The cabin top and floats were strip planked with DuFLEX H80 strips with a 450grm uni-directional on either side to achieve the compound shapes and then reinforced with additional laminates to complete the structure.
The project incorporated carbon fibre and E-fibreglass reinforcement, supplied by ATL, to provide stiffness and to achieve the weight specification for the project.
High performance KINETIX R246TX, a thixotropic epoxy, was used to laminate these reinforcements and WEST SYSTEM R105 and H206 was used for all bonding and coving, combined with WEST SYSTEM 413 Microfibre Blend and 411 Microsphere Blend powder modifiers to alter the consistency for the specific applications.
The M80 was faired with ATL’s unique Technifill XP which is a pre-filled epoxy fairing compound that is ultra-lightweight and very easy to sand.
Getting started is straightforward, according to Barrett. “People buy the plans, complete with DXF files and they can have all the flat components cut out with CNC or jigsaw by hand.
“If you have plenty of time, it’s cheap. An average handyman or woman, with basic experience with hand tools could put it together in their garage or workshop. In The Netherlands it’s being assembled under a tent to keep rain and snow out. Where there’s a will, there’s a way to boat the world over.”
ALSO ON MYSAILING

Pickles & Clockwork

GSC – Four skippers still battling to finish

SailGP’s Trans-Tasman rivalry heats up ahead of race weekend in Christchurch

Slow start Pittwater to Coffs as skipper recalls honeymoon race!

2024 Pittwater Sailing Yacht Show!

2024 NSW O’pen Skiff Championships

Best of the best to contest national yachting title in Newcastle

OGR – Winners and Losers on Leg 4

GSC – Andrea Mura reclaims joy on podium

Final Club Championship results at Manly 16ft Skiff Sailing Club

Race is on to win 2024 Pittwater to Coffs Harbour Yacht Race

Outteridge takes the wheel as Schneiter steps back for remainder of Season 4
Join Our Newsletter
- Name First Last
- Email This field is for validation purposes and should be left unchanged.

Read all of the latest sailing news

Dinghy and Yacht Racing News

News from the offshore world

Cruising Stories from around the world

Boats & Gear
The latest boats and yachting gear

Watch everything sailing and boating
Latest Sailing News, Racing, Cruising, Boats, Gear and more
- Plans & Kits

- Qty in Cart

West Mersea Duck Punt PDF Free Plans

Making Hand Screw Clamps Free Instructions

Tape & Glue Process Free Instructions
Lisa b good - free plans.

Folding Mast & Boom Free Plans PDF

Slipper PDF

Drifter 12L Free Plans
Wanigan (free plans).

1 Sheet Wedge Plans PDF

Drifter 12 Free Plans

Mouse Free Plans
Little bretton free plans.
- Total: items /
- Add all to cart
Adding your products to cart
Yachting Monthly
- Digital edition

How to sail a trimaran: Expert advice for sailing with three hulls
- Theo Stocker
- February 13, 2024
For their size, trimarans can punch well above their weight in speed, cruising potential and fun. Monohull sailor Theo Stocker gets to grips with how to handle one
Humans tend to gravitate into tribes of like-minded enthusiasts, enjoying the encouragement, support and sense of identity, while often looking askance at others; sailors at motorboaters, cruising sailors at racers, monohull sailors at raft, I mean, multihull sailors, and everyone looks askance at jet-skiers.
Large cruising catamarans (40ft now counts as a small one) are a world apart from monohull sailing, but there’s a sub-tribe of sailors dedicated to life on three hulls and builders such as Dragonfly, Corsair, Farrier, and Astus give them plenty of choice.
I’ve been sailing a 22ft (7m) Astus 22.5 this season, with just enough space for a family of four and a minimum of creature comforts. Thanks to her VPLP-designed hulls and 650kg all-up weight, we can sail upwind at 7-plus knots and downwind at over 10 knots with ease, all on a roughly even keel, while the kids play Duplo down below. It can also be beached and is towable behind a car.
Having, it seems, caught the trimaran bug, I wanted to get better at sailing and handling the boat, but my monohull sailing experience and habits were proving something of a hindrance, so we sought advice from some existing trimaran owners, and well as the UK’s top multihull sailors.
Much of the advice will apply to all multihulls , whether two or three-hulled, while other parts are just for small trimarans. I also found that brushing-up some of my rusty dinghy sailing skills helped get my head around what we were trying to do.
To try out our expert tips we went out sailing to see what difference they made. On the day, we got a solid Force 4-5 southwesterly, averaging 16 knots, but fluctuating between 12 and 20 knots true.
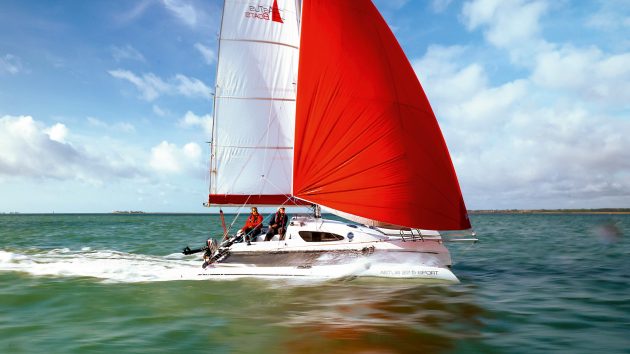
Blasting about on a sporty trimaran is a whole world of fun, but is much calmer than it looks
Trimaran sail trim
One of the biggest differences between a cruising monohull and a multihull is how the mainsail is trimmed. Leech tension on a yacht is often largely controlled by the kicker and the backstay, while the mainsheet sheets the mainsail in and out, predominantly controlling the angle of the boom to the centreline, and there may be a short traveller.
On a mulithull, however, there’s more than enough space for a good, wide traveller. Those who sail on performance monohulls will also be used to this. The sail shape is mainly controlled by the mainsheet, and the traveller then moves the boom towards or away from the centreline.
This is exaggerated on a multihull which has wide shrouds, swept well aft with no backstay, making space for a powerful square-top mainsail with full-length battens. There’s no backstay to bend the mast and flatten what is anyway a pretty rigid mainsail.
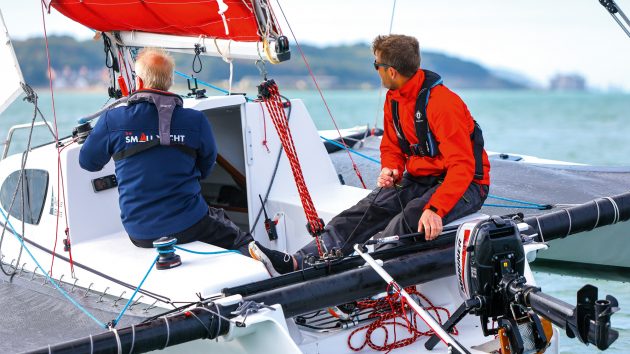
The mainsheet purchase creates enough power to control the leech of the square-top mainsail
Depowering a trimaran
Sailing on a monohull, heel and weatherhelm and eventually a broach give loads of warning that you’re pushing too hard. With straight hulls and little heel, those warning signs don’t really apply to multihulls.
In reality, however, there are a host of warning signals that it’s time to back-off; they’re just a bit different. Even then, there’s still a large safety margin before you get close to danger.
By way of reassurance, with the boat powered up on a beat, Hein, from Boats on Wheels, the boat’s owner, stood on the leeward hull and lent on the shrouds. Even as his feet got wet and the wind gusted at the top of Force 4, the boat didn’t bat an eyelid, thanks to the huge buoyancy of the floats.
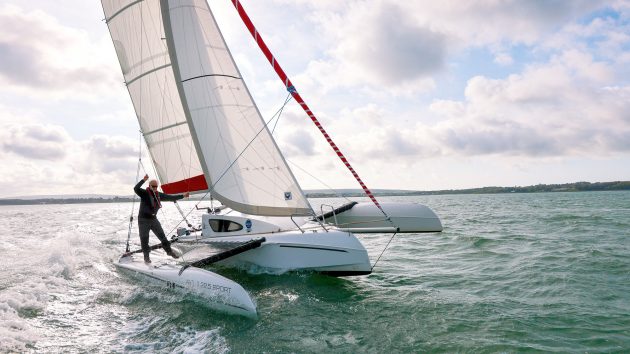
Even with a person on the leeward float the boat was extremely stable
On the water – sail trim
My first inclination was to point the boat as high upwind as possible, pin the sails in and go for height. Doing that resulted in a not-terrible boat speed of 5-6 knots and a good pointing angle.
Free off by a handful of degrees however, and ease the sails just a smidge, and the speed leapt up to 8-9 knots – over 50% more; a huge increase. So, don’t pinch. If you had a decent chartplotter on board, you could find your optimum speed to angle using velocity made good (VMG).
I was also tempted to pinch in the gusts, but it’s better to hold your course and let the speed increase until the main needs easing.
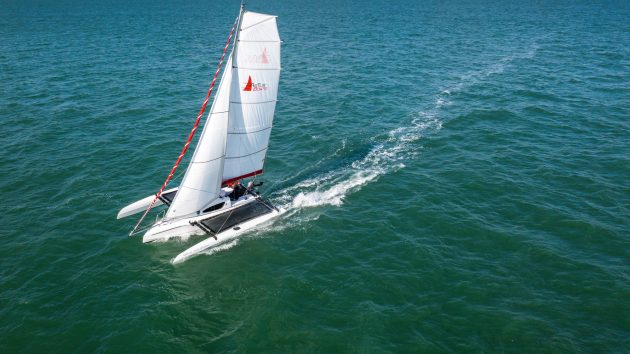
On the wind, it’s time to get the boat fully powered up
If that’s the case, drop the main down the traveller an inch or two or ease some twist into the mainsail and it makes all the difference in the world, but not so far that the top battens fall away and invert – that really isn’t fast. Push too hard and the boat will slow down, largely from the drag of submerging the leeward float and crossbeams. If you’re still overpowered and the main is luffing, it’s time to reef. Downwind is different, but we’ll get onto that later.
After we put a reef in the main, our boat speeds upwind remained largely the same, and the boat was much happier. I came away feeling reassured that even a little trimaran like this would be pretty difficult to capsize, and there were always plenty of warning signs telling me to take my foot off the pedal a little.
Article continues below…
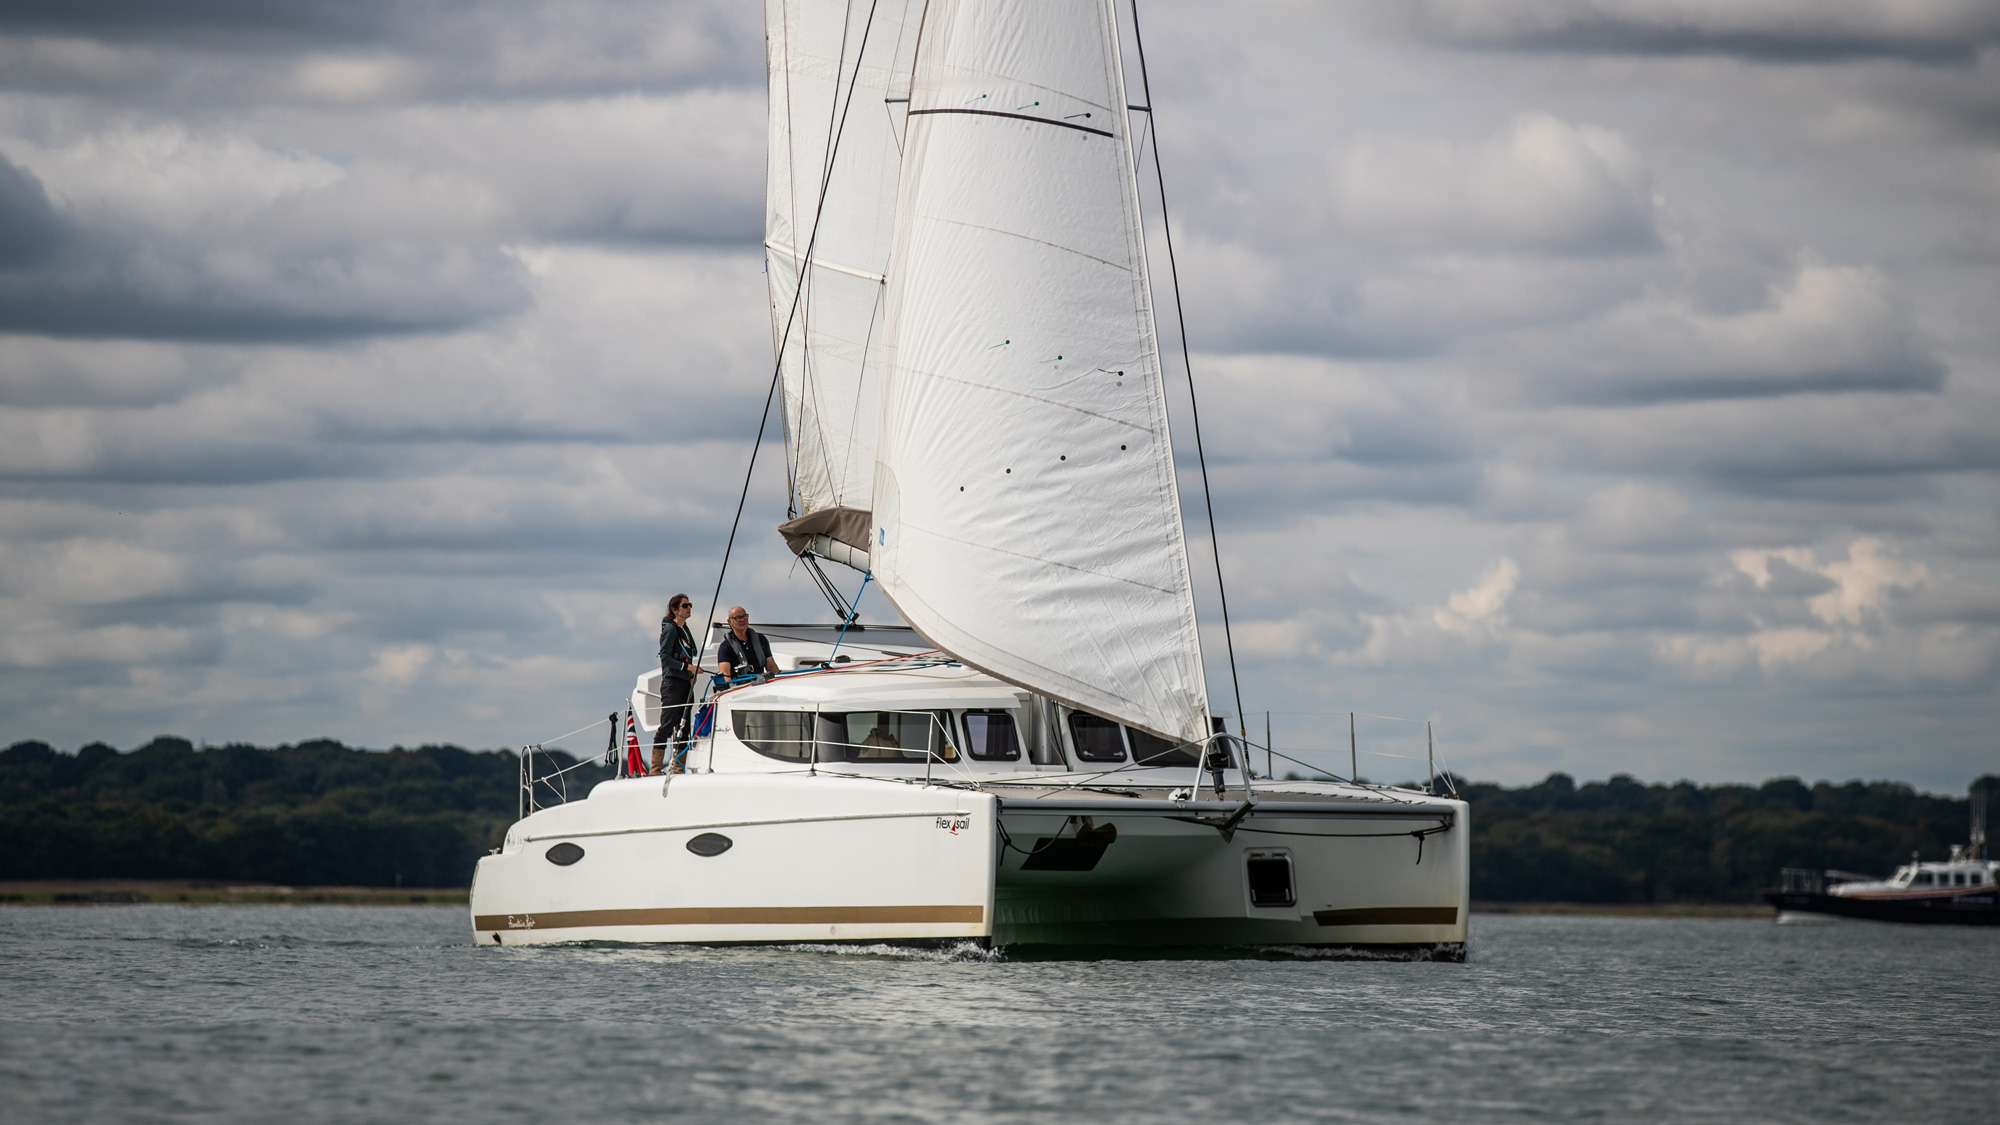
Catamaran sailing skills: Mooring and anchoring a multihull
How do you make an average passage speed of 7 knots, fit in three double cabins and a huge saloon…

Monohull or multihull: which is best for blue water?
As former editor of Yachting World, David Glenn has plenty of experience of both monohull and multihull cruising. Here he…
Tacking and gybing a trimaran
Everyone knows that multihulls don’t tack as well as monohulls. Straight hulls and wide beam don’t lend themselves to turning, especially when coupled with the displacement and fixed keels of big cats. Trimarans are a little easier, with a single central daggerboard to act as a pivot, and one or other of the floats will generally be clear of the water. On the downside, light displacement means that there isn’t much momentum to keep you going through the turn and plenty of windage to stop you.

On a trimaran the central daggerboard helps the boat to turn by providing a central pivot point that catamarans lack
Speed is your friend. Build speed up before the tack to give you as much momentum as possible. The helm needs to steer positively into and through the turn, and if necessary, keep the jib backed on the new windward side to help the bow through the wind. Don’t worry about scrubbing speed off, but you don’t want to get stuck in irons.
When it comes to gybing, speed is again key. The turning bit isn’t going to be an issue as you’ll be scooting along, but the faster you’re going, the less load there will be on the sails. The more you slow down, the more the true wind will pile up.
Trimaran sailing skills
Tacks took a bit of practice. It felt plain wrong to jab the tiller across the boat, slamming a big break on in the water but I ended up putting us through the tacks far too slowly, losing a lot of speed. A more aggressive approach worked better. On the Astus, the traveller was between me and the tiller, so the tiller extension needed to be swung around the stern behind the mainsheet onto the new side.
Similarly, old habits of controlling a gybe needed to be modified. With the asymmetric set, we were planing at well over 10 knots, and the ideal is to stay on the plane. Heading dead downwind and centring the main lead to a more violent manoeuvre than flying into the gybe as fast as possible and, as the boom was never that far out thanks to the apparent wind angle, it didn’t need much extra controlling.
Coming up onto the wind after the gybe helped the asymmetric around the front of the jib and to fill on the new side. Stay too deep and it’ll get blanketed by the main. Once we had built up some apparent wind, we could bear away again.
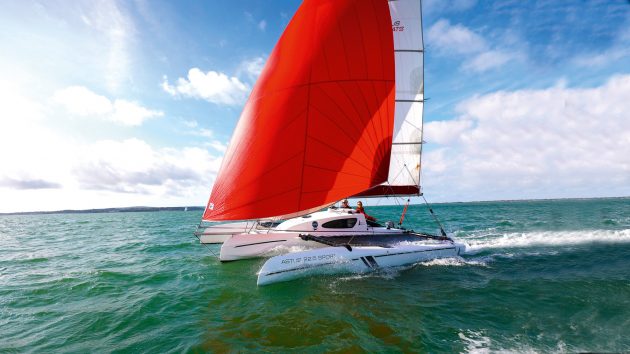
You’ll be on a course deep downwind before you know it, hitting speeds in the double digits
Downwind in a trimaran
Upwind cruising may be fun in a multihull, but bearing away and going with the wind is what it’s all about. Easily-driven hulls, a generous sailplan and light weight mean you can be up and planing, leaving displacement boats wallowing in your wake.
The big difference comes from apparent wind. If you’re in a boat that can do 15 knots downwind in 20 knots of true wind, the resulting wind angles can really mess with your head.
To get going then, says Brian Thompson, ‘Use those leech tell-tales again when sailing downwind and reaching to set the correct twist through the mainsheet, and use the traveller to set the correct angle of the whole sail to the wind.’
As the wind and your speed builds, bear away and trim the main accordingly.
In theory, you shouldn’t need to ease the traveller at all, but you may need to if you want to sail deep downwind. As the gust fades, you’ll find the boat slows down, so you can come back up towards the wind a little to pick up some more breeze, and then bear away as you accelerate again.
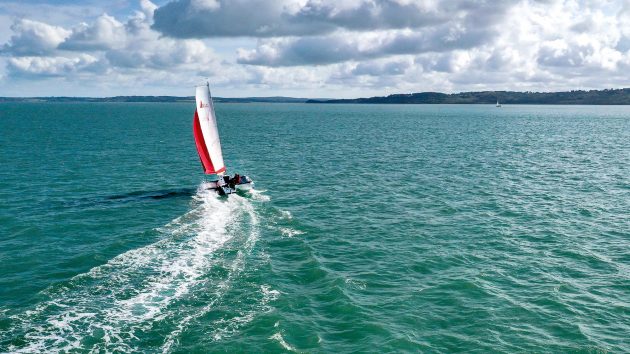
Bear away as the boat accelerates. Your course will be something of a slalom as you look to keep a consistent wind angle
This results in something of a ‘slalom’ course, and will also be accentuated if you’re sailing down waves, but that’s all quite normal for apparent wind sailing. Ultimately, you’re looking for a consistent apparent wind angle, even if the resulting wake isn’t straight.
It’s worth remembering that apparent wind reduces the felt effect of the wind, so you need a sailplan to suit the true, not apparent wind speed.
I found that the boat was more sensitive to having a balanced sailplan and trim downwind than upwind, largely because you’ve got almost double the canvas up, with the bowsprit as an extra lever. When weather helm built, I needed to ease the mainsheet to increase twist to depower so that I could bear away. I must admit, getting the boat balanced, sailing fast and light on the helm at 15 knots was something I came away feeling I needed more practice at.
Reviewing the images, I suspect the asymmetric was sheeted in too hard, with too much twist in the main.
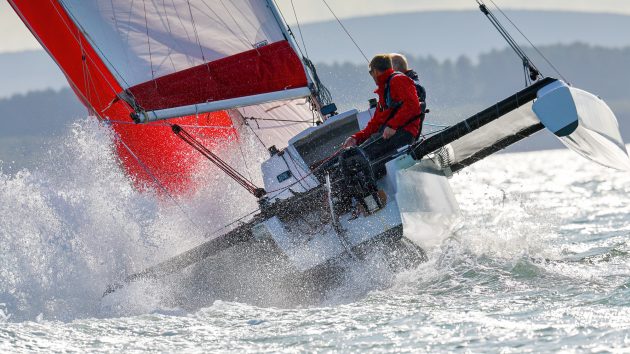
Getting a float fully submerged is when it’s time to back off
On the water
Unfurling the gennaker worked best on a beam reach, giving plenty of airflow over the sail to help it fully unfurl. This was also roughly the fastest point of sail, ideal for getting up some speed for apparent wind sailing. We mostly had the sails set for a close reach, even when we were beyond 120º off the true wind on a broad reach.
It was possible to soak deeper downwind, but lose the apparent wind benefit downwind and our speed dropped off dramatically, prompting us to point a bit higher to find some more speed.
As the boat powered up, it paid to hold a slightly higher angle than I would have done in a monohull for the boat to properly take off and get up into double digit speeds – topping out at 15 knots. Lymington to Cowes would have taken us just half an hour at that speed. It’s easy to give yourself a heck of a beat back!
We were sailing on a pretty flat day, so didn’t have to contend with any waves to speak of. On the recent RTI this is what caused the capsizes of at least two multis, a sobering reminder that you need to sail much more conservatively in lumpier conditions.
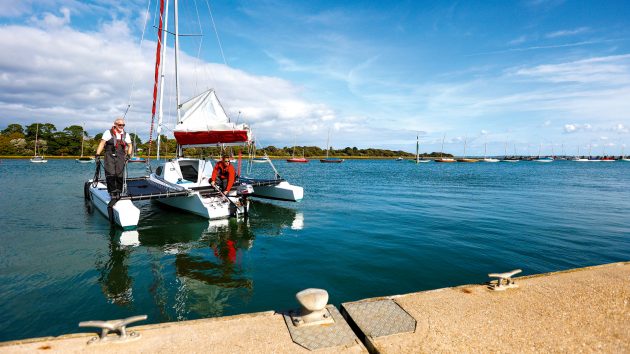
The bows want to point downwind, so a stern-first approach works with rather than against the boat
Coming alongside
A 650kg boat with no draught and plenty of windage feels dreadfully skittish when manoeuvring in confined spaces. Straight hulls with no forgiving curves and fragile-looking sharp bows make berthing tricky. You’ve got a couple of advantages on your side, however. In the Astus, the floats are at pontoon height making stepping off easy.
Whether you have an engine in each hull of a cat, or one in the central hull of a tri, there’s also a lot more leverage to play with to turn the boat and drive her on or off the pontoon. A steerable outboard gives you even more options.
If the boat has a lifting keel or daggerboards, put them down if there’s enough depth to give you a pivot and to resist drifting. Think about getting corners onto the pontoon, rather than putting the boat alongside. On tris, you won’t be able to get to the bow to fend off as it’s too narrow. You can rig a fender up forwards on a line, and two fenders are enough on the flat sides.
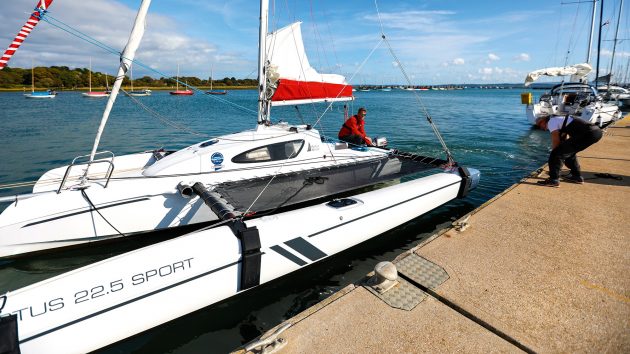
Steering with the outboard towards the pontoon will drive the stern in more; steer away to drive the bow in more
Offshore wind
Coming onto the pontoon with wind blowing off, it worked well coming in stern first. If there’s a tide running, you’ll want to be heading into the tide, so find a spot down wind and down tide to start your approach so you come in at an angle.
On our first attempt we had a bit of tide under us to start with so we came in at a much steeper angle, almost 90º, although this worked out OK in the end.
The crew could then step ashore, taking a line from the stern quarter round a cleat.
Drive forwards against the line and the bow will obediently drive up towards the pontoon, bringing you flat alongside. Getting off was simple, releasing the bowline, and allowing the bow to swing out the before slipping the stern line.
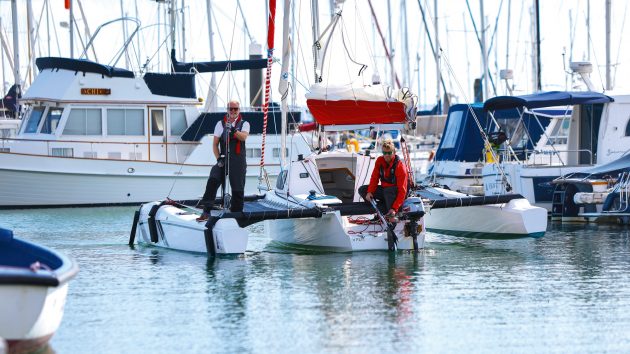
Coming in astern and stopping upwind of the berth meant the bows blew towards the pontoon far to quickly
Onshore wind
Getting onto and off a pontoon with onshore wind proved rather trickier. On our first attempt we came in stern first. The issue was that once we were just upwind of our desired berth and stopped, we lost steerage and the bow immediately blew off with alarming speed towards the pontoon.
Going ahead would only increase the force of the impact, while going astern only increased the bow’s sideways drift. I managed to back out without smashing the bow, but only just, and ended up awkwardly stern to the wind with the bows pointing at the pontoon.
On our second attempt we came in bows first but having aimed at the berth, I had to motor the stern to leeward to stop the bow hitting, making for a rather forceful coming alongside.
On take three, I came in forwards and began ferry gliding towards the berth early, keeping the bows to windward of the stern. Being able to steer with the outboard meant I could go ahead to keep the bow up, and go astern with the engine pulling the stern down toward the pontoon. In this way, it was possible to come in pretty well controlled and parallel to the berth.
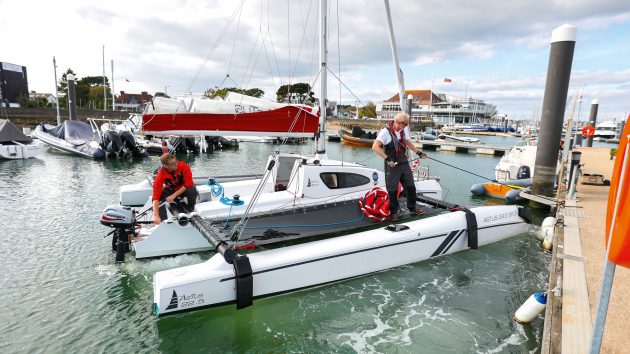
To get out, motoring astern against a bow line pulled the entire boat clear before slipping the line
Leaving was a different proposition all together, as I didn’t want to drag the bow along the pontoon, or to drive hard onto it to spring off. Instead, we rigged a slip-line from the forward cross beam. Going astern against this, and then turning the engine towards the wind, I could pull the stern, and the rest of the boat, out and away from the pontoon.
Keeping power on astern, once we’d reached a decent angle, we slipped the line and went astern, finding steerage way almost at once, with the bow following obediently in our wake with more control than I had anticipated.
Whether the wind is blowing onto, or off the pontoon, you want the engine to be driving or pulling the boat off the pontoon with a line on the corner you are going away from. That way you avoid point-loading fine ends where it’s hard to fender.
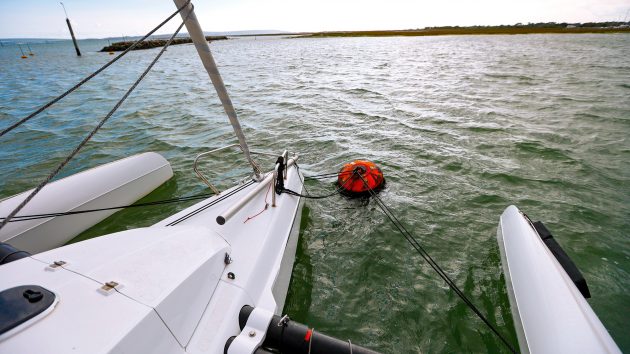
You’ll want a bridle to reduce swinging, but keep the pick up lines on the bow as backup
Anchoring and mooring a trimaran
While mooring a catamaran is complicated by the lack of a central bow, things should be simpler on a trimaran, and they are, mostly. Picking up a mooring buoy from the main hull bow with a low freeboard and dropping the pick-up line onto a cleat is easier even than a monohull.
The bow may be narrow, but for any lines that pass through a ring on the buoy, you still need to take it back to the same cleat to avoid chafe. That should be it, but windage from the two extra bows and the lack of keel mean the boat can dance merrily around the mooring buoy in a breeze.
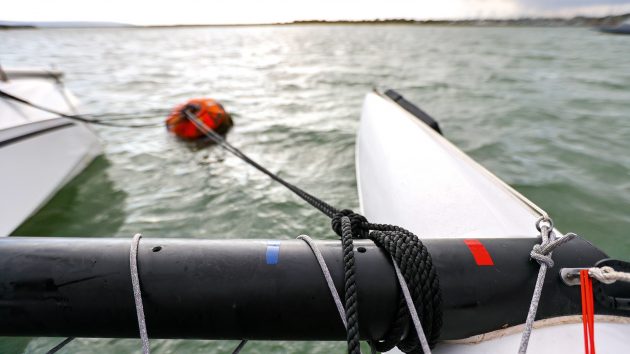
Rig the bridle so the buoy sits to one side to stabilise the boat
In practice, we found that a trimaran benefits from a mooring bridle in the same way that a catamaran does. It can’t be rigged from the floats’ bows, as there are no mooring cleats, so a line passed around the outboard ends of the forward beams gave a pretty good angle, again with long lines passed through the mooring and back to the same side. The main pick-up lines stay as a safety backup.
The other trick is to rig the bridle asymmetrically so that the buoy sits to one side or the other, just enough to not be dead head to wind, making it much more stable in the wind.
On the plus side, the lack of draught or keel means that you’ll nearly always be lying head to wind, so the cockpit remains nice and sheltered whatever the tide’s doing.
We ran out of time on the day to try anchoring, but rigging a bridle, effectively a long snubber to a point on the anchor chain in a similar way wouldn’t be tricky.
If you needed not to swing, or to behave more like deeper boats nearby, hanging a bucket over the stern can help, or there’s always anchoring with a kedge, either out ahead in a V, or in line astern.
Enjoyed reading this?
A subscription to Yachting Monthly magazine costs around 40% less than the cover price .
Print and digital editions are available through Magazines Direct – where you can also find the latest deals .
YM is packed with information to help you get the most from your time on the water.
- Take your seamanship to the next level with tips, advice and skills from our experts
- Impartial in-depth reviews of the latest yachts and equipment
- Cruising guides to help you reach those dream destinations
Follow us on Facebook , Twitter and Instagram.
IMAGES
VIDEO
COMMENTS
24 Foot Sailing Trimaran: Indonesian style, built out of recycled stuff.Here we are busting out through the surf in 30mph winds at Stinson Beach California on the maiden voyage. The boat works great! There are no swimmers or surfers out because of the rough conditions. The k…
I TRI'D is a self-designed 18-foot DIY trimaran by sailor Mick Milne. He built this sailboat himself after researching lots of small tris and then using using "HULLS" software to produce dimensions for the panels. The building technique is "stitch and glue" plywood — with the main hull oversheathed with two layers of fiberglass and ...
The DESIGNER'S book TRIMARAN and CATAMARAN CONSTRUCTION is part of the plans (over 21') and covers all phases of construction. Plans are leased to build ONE boat, NO time limit. Tri-Star designs are proven designs, sailing the seven seas since 1964. Free consultation is provided to the original non-professional builder till he or she is sailing ...
When John Ordovas contacted me with some drawings of a 64' Trimaran I was intrigued. When he told me that he had assembled a small group of workers, found a ...
After all the cat's my first trimaran. I built the boat in 136 hours.After many requests a plan is made for the boat.Construction time lapse: https://www.you...
However with all things considered, building a multi can be an amazing journey. Fast Twin Catermaran. $ 30.00 - $ 45.00 (USD) Lively 28 Cruising Trimaran. $ 170.00 - $ 185.00 (USD) Lively 35 Cruising Trimaran. $ 355.00 - $ 370.00 (USD) Catamaran & Trimaran Boat Plans from Hartley Boats make it a reality to build your own multihull at home.
Small Trimarans Report. Back in 2010, sailor/naval architect Mike Waters published a 22-page report covering 20 small trimarans. It includes charts, graphs, photos, and critical objective reporting on many of them. Read more…. Review of nine Small Trimarans. Mike Waters' review of nine small folding trimarans 14-20 feet including six ...
The Seaclipper 16 is designed to take a Hobie 14 sailing rig. The pivoting aluminum mast, roller-furling jib, and fully battened mainsail are readily available from a wide network of Hobie dealers and may be found used in online classifieds. The Hobie 14 has a beam of 7′ 8″, so the Seaclipper 16, with a beam of 11′3″ can take better ...
A folding trimaran for DIY boat builders by Michael Leneman, Multi Marine Above: A completed L-37 multihull at the dock. Multi-Marine's new 23' folding trimaran kit features manufactured hull pans. The builder attaches plywood topsides to the pans. What is the simplest way for a home builder to build a good, light hull for a
This is our video series showing the full build of our Tryst 10 trimaran sailboat. The Tryst 10 main hull is a Duo 10, so the first 12 or so episodes will be...
The Back Bay can be configured with a large, open tankwell set aft of the cockpit, or built with a watertight, aft hatch cover for internal storage in a conventional kayak style. Specifications: Beam overall - 10′. Weight (est.) - 90 lbs. Sail Area - 56 sq. ft. Displacement - 350 lbs. Draft (board down) - 28″.
Place the widest one with most volume in the center. Obviously, if you kept the hull in this level position, your trimaran would be dragging 3 hulls through the water with far more drag than for a catamaran. So you need to lower the central hull, so that it will support your 900 lbs .. requiring 14 cu.ft volume under the waterline.
Jul 19, 2012. It all started with losing my job. Like many people in recent years, I found myself unemployed, and the lack of activity made for restless hands. I figured since I couldn't find work, I might as well build a boat. I had fond memories of sailing a simple dugout trimaran off the north coast of Bali and decided a small tri would ...
Initially, the choice for my new to build boat fell on the high-tech F-36 trimaran, a design by the famous New Zealander Ian Farrier ( † RIP Dec.8, 2017). In those days the F-39 did not exist yet. Although the F-36 missed my preferred folding option, the design nevertheless meets most of my wishes. According to Farrier, there was simply not ...
DIY tri Wayne Barrett has been building boats for 50 years, many of them world renowned. His latest venture is a DIY trimaran kit that embodies his half-century of expertise and celebrates "the joy of building and sailing your own creation".
Step 3: The Gage. For easier assembling you can make a gage. You draw on a board the outline of waterline. In the middle, at ¼ length and some centimeters from the ends you can put in the centerline a nail (only the slaps). Around them symmetric on both sides you can put obliquely screws (with 45 degree).
How To: Building a Trimaran as a first timer. We loved this fantastic blog by an amateur boat builder from New Zealand, giving you a detailed and helpful step by step guide of how he went about his very first project - a stunning Trimaran built from scratch all by himself in his spare time. We were very impressed!
DIY tri capturing imaginations. 02/04/2020. Wayne Barrett has been building boats for 50 years, many of them world renowned. His latest venture is a DIY trimaran kit that embodies his half-century of expertise and celebrates "the joy of building and sailing your own creation". Famed in multihull circles and the creator of high profile ...
Catamaran Stock Plans. Ed Horstman designed TRIMARAN and CATAMARAN plans are drawn for the first time builder. Plans are concise and clearly drawn so the builder can easily follow each building step. Designs are continuously updated with your input and new ideas. Plans include full size patterns to 63'.
Section E has a flat bottom, so there are 'just' a total of 4 knuckles to fit and fair. The flat-of-bottom can help to get the volume of buoyancy into the hull design and also be low down, and this shape will allow a boat to turn more easily than that of Section F that has a sharper keel on the centerline. The shape also still sits nicely on a ...
To download these plans, click HERE The Drifter 12 is a small trimaran that can be paddled or sailed, and is perfect for exploring rivers, bays, and lakes. The rig is simple, using a windsurfing mast.
Trimaran sail trim. One of the biggest differences between a cruising monohull and a multihull is how the mainsail is trimmed. Leech tension on a yacht is often largely controlled by the kicker and the backstay, while the mainsheet sheets the mainsail in and out, predominantly controlling the angle of the boom to the centreline, and there may be a short traveller.
More Trimaran Folding Systems — Part 3 Hinge and Latch system (Gull-Wing) This system works well on small trimarans and is employed on the Cross 18, Discovery 20/21 and the W17.. On the older Cross 18, this hinge system is created with vertical metal plates bolted to the sides of relatively small beams, and mating plates are sandwiched together with a pivot bolt.